second chance games

Search This Website of delight

Showing posts with label Germany. Show all posts

Heart of Leviathan by imageStudios  These are the ultimate heavy metal for us aficionados: Battleships in World W...

Heart of Leviathan by imageStudios Heart of Leviathan by imageStudios

For your Wargamer, Toy soldier collector, MiniFig collector, military history nut. Reviews, interviews, Model Making, AARs and books!

Germany


Heart of Leviathan

by

imageStudios


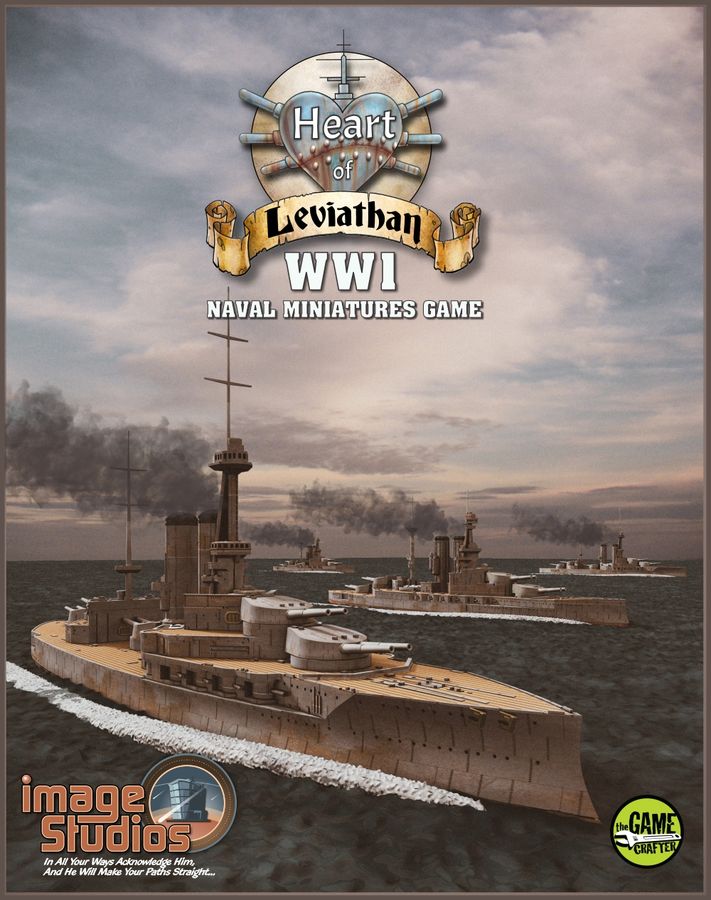
 These are the ultimate heavy metal for us aficionados: Battleships in World War I. The setting was mostly the frigid North Sea, although action took place across the globe. This is one of my favorite wargame/simulation topics. Who wouldn't be in love with their majestic beauty? These ships were the ultimate weapon of war on the high seas until submarines and then finally aircraft came along. In the age depicted, they are like the dinosaurs with no other enemies except other leviathans to worry about. Massively armed and armored, they strode across the seas from 1905 until the beginning of world War II as each nation flexed their biceps. With the building of the British Dreadnought all other warships became obsolete overnight. Oddly enough, Dreadnought was so radically better than any other warship it actually somewhat levelled the playing field between Germany and Britain. So we know what the game is about; how is it to play?


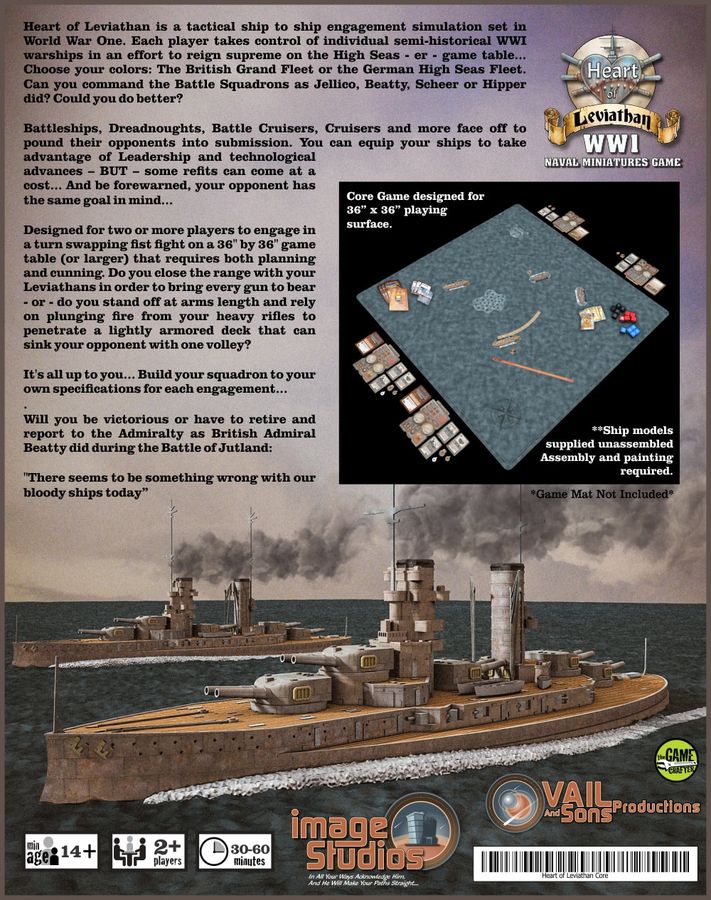
 First things first, I have to tell you what HOL is not. It is not a naval simulation where you need the floor of your den or dining room to play. You also do not need a calculator or have to keep maximizing and reprinting the game's spreadsheets in order to read them. This game is a thing of beauty. It is a mixture of miniatures and wargame/simulation that is wonderful to look at and to play. The game's components are top shelf all the way. The piece de resistance is the miniature ships that come with the game. Even the rulebook is a small piece of art. This is what you get with the game:


4 Battleships - 2 König Class, 2 Iron Duke Class (this game set)
4 Hardstock Ship Counters
4 Ship Command Placards
5 Movement Templates
15 Dice - 5 Red, 5 Blue, 5 Black
Critical Damage Card Deck
Equipment Refit/Upgrade Card Deck
Shallow Water Obstacle
Numerous Minefield Obstacles
Smoke Markers
Ship Captain Card Deck
Numerous Markers


 I just cannot say enough about the level of the components. The only games that are comparable are very high level space simulators. The rulebook is only ten pages long including the Advanced Rules. The actual rules probably only take up five pages because of the excellent, and large, illustrations of setup and play. This is not a tome that cannot be memorized and you do not need a medieval monk, complete with scrolls, sitting next to the players as a reference. This is an exceedingly playable game that actually gives the player historic outcomes. It is one of those things where everyone is scratching their heads, going why didn't I think of this? Another great part of the game is that you can use the miniatures unpainted, but why would you, or you can use them after they are spruced up in all their glory. Not only that, you do not need them at all. If you are too wary of damaging your small masterpieces, the game comes with thick stock overhead portraits of the ships. The miniatures actually have a small rectangular keel that fits right into the cardboard. So it is up to you, admiral, on how you want to play. This also means that when leaving home to play somewhere else you do not have to worry about damage to your miniscule beauties. They actually are not that miniscule. The ships are almost 4 1/2" long (at least these Battleships are). You can play the game in as little space as 36" x 36" or larger if you prefer. The key to the game is the 'Ship Command Placard'. Everything about the ship from speed, hull strength, and the dice to use at what range, along with other things are on the placard. Everything about the rules has been streamlined and pretty much thought of. It has turned naval gunnery warfare from an hour for the player to find out if he has hit to what he actually hit on his opponent, to a simple system. I am not saying the other types of games are not enjoyable at times. It is just before this game we never had the choice of what type to play. That is one thing I have to state strongly. This game was never intended to be a simulation of incredible depth. You cannot target a specific part of the enemy's ship. It is a simple die roll that shows whether or not you have drawn blood. If you roll a 'Critical Hit', then the captain of the hit ship pulls a card from the Critical Damage Deck and implements those effects. Some of these are:

Damaged Rudder - Can only move straight
Power Generator Damage - You can only fire at range 1 or 2
Shattered Primary Gun Barrel - Remove one red and one blue die
Command Station Destroyed - Discard all Admiral and Captain   upgrade cards
Powder Magazine Explosion - Something wrong with your bloody ship today


 Both Captain Cards and Equipment Refit/Upgrade Cards are bought at the start of the game. They suggest a 200 point engagement value for each player. You, of course, are free to decide among the players the amount. Some of the Equipment Refit/Upgrade Cards are specific to the type of ship (Battleship. Battlecruiser), and some are specific to either Germany or England.
These are some of the cards:

Elbow Grease - Can freely rotate turrets to the other side
Mast range Clock  - Another Friendly ship within range 1-3 may change one blank result to a hit
Repair Damage - Recover up to two Hull Value of your ship

 Each Ship Captain Card has its own set of allowable Upgrade/Refit Cards it can use.


 The sequence of play is:

1. Plot Phase - Planning phase for the turn. Players secretly set their ship's Movement Value on the Ship Command Placard. Players may also select an Order that is available to them to be used during the turn.
2. Movement/Orders Phase - During the Movement/Orders Phase, players follow through with the movement and orders previously designated for their ships during the Plot Phase. The Player in possession of the First Player Token moves and/or executes orders for any one of his/her ships first followed by player 2 (repeat alternately until all ships have been activated)
3. Combat (Guns) Phase - Ships fire at opposing targets while targeted ships attempt to avoid or minimize damage. Players alternate firing back and forth (just as in movement). Battle damage is resolved immediately/consecutively - not simultaneously - Ships can be sunk before they have a chance to return fire.


 The advanced rules add the ability for a captain to make smoke. The advanced rules also include Close Quarter Melee rules. These ships were still armed for this even at this late age. The age of the ram armed Battleship was not that many years before. Image Studios has also released a set with cruisers that has torpedoes in the game. These are the English and German ships released and planned so far:

English

Iron Duke Class - Battleship
Iron Duke -  This was in my set
Benbow - This was in my set
Emperor of India
Marlborough

Queen Elizabeth Class - Battleship
Queen Elizabeth
Warspite
Barham
Malaya
Valiant


Weymouth sub-class of the Town class - Light Cruiser
Weymouth
Yarmouth
Falmouth
Dartmouth

M Class Destroyer

German

König Class - Battleship
König - This was in my set
Markgraf - This was in my set
KronPrinz
Grosser Kurfürst

Helgoland Class - Battleship
Helgoland
Thüringen
Ostfriesland
Oldenburg

Dresden Class - Light Cruiser
Dresden
Emden

U-boats
U-19
U-51


  This game is for anyone who has any interest in World War I naval battles. I think this is a great crossover game for someone who wants to try miniature gaming, or a miniature gamer who wants to head toward board games. This game is the perfect segue for either. Thank you imageStudios for letting me review this game. I cannot for the life of me understand why this game has so little written about it on the web. Its BGG page is almost entirely empty. For a game that is this good it is a shame. 

i
mageStudios Hearts of Leviathan:
https://www.imagestudios.us/heart-of-leviathan.html

Robert
 

TIGER LEADER BY DAN VERSSEN GAMES What I'm going to say may have started to become a touch familiar, nay repetitive, if you ...

Tiger Leader Tiger Leader

For your Wargamer, Toy soldier collector, MiniFig collector, military history nut. Reviews, interviews, Model Making, AARs and books!

Germany

TIGER LEADER

BY DAN VERSSEN GAMES


What I'm going to say may have started to become a touch familiar, nay repetitive, if you have read my previous reviews of DVG games, especially as they have all been from the Leader stable of games.  Is it my fault that their production quality is some of the finest and most reliable in the hobby ?  There's no getting away from the fact that they put out consistently top-notch physical components - unboxing is a sheer delight  - and this from a company much smaller than all the really big names.

My one and only slightly adverse criticism of the new edition of U-Boat Leader and its American counterpart Gato Leader was the small size of mounted main gaming board and the fact that DVG then published as an "expansion" a decent sized board for them along with some fairly irrelevant plastic ships.  Well, Tiger Leader, which came out a year before them in 2015, hasn't even got that minor blip!

I'd go so far as to say that it is one of my favourite game boards in their series.  It's a four-panel, mounted board and fractionally over the standard 22" x 17" folio size that many companies put out as paper maps.  In the central play area is a magnificent sepia map of the Ardennes where that last desperate throw of the Third Reich, namely the Battle of The Bulge, took place.  Even more amazing is that this map is ultimately purely eye-candy, as once the main "Battle" Phase of the game gets under way, it is overlaid by six generic terrain pieces [in the same fashion as the earlier Thunderbolt/Apache Leader game].  Equally odd is that out of the nine excellent campaigns the game offers, the Bulge isn't included.
How can you leave out the Bulge? [sob]


However, as a war gamer who cut his teeth on hexes, these large, four-hex tile overlays are very impressive.  They are made of substantially thick, durable, glossy card-stock: double-sided so that you can fight in three different terrain localities - Europe, Desert and Winter.  They get a big, loud "Len's 10" from me [apologies that that metaphor's probably only understandable in the UK, not sure how many countries we've sold it to - so other nationalities can google "Strictly Come Dancing"].  So too do the two counter sheets that include the substantial numbers of Polish, French, Russian and American troops to fight against.


Along with the units are a wide range of Damage markers, one side for Armour damage, the other for Infantry damage, the inevitable red Stress markers, enemy Battalion counters and, of course, your own German units.


Ultimately, you will be selecting some of those evocative Tiger tanks, but if you're like me that will be some time in the future, as there are nine Campaigns to choose from starting with Poland 1939, France 1940, Russia, North Africa and Europe 1944.  There's nothing to stop you dashing on to those legendary monsters and don't let me stop you.  Perhaps it's just my OCD tendency, but I like to work my way gradually through the historical time-line!

And, naturellement, in a DVG product, lots of lovely cards to drool over [didn't I tell you I always sleeve mine - now you know why!] : German unit cards, German Commander cards, Battalion cards [in three types - Assault, Supply and Command] Event cards, Special Condition cards and Objective cards.  Some of them will be placed on the main mounted board called the Tactical Display Sheet, that I've already waxed lyrical about, some on the large card-stock display called the Head Quarters [sic - yes, it really is divided into two words]Sheet.  Not sure where you quarter your arms, legs, etc!

Apart from the map section I've already detailed, the two separate Displays provide you with Holding boxes for all those lovely cards, a detailed Sequence of play and enough information to just about cover all aspects of the game without reference to the rule book.  This tends to be a good feature of this series, but is for me one of the strongest and most workable examples in those games I possess.

As always the Rule Book is very substantial in quality and detail, following what I've come to recognise as their signature design.  First comes the Campaign Set-Up taking you step by step through each process while enumerating all the relevant details about the counters and the cards with carefully labelled and itemised pictures, exactly when needed. Though, in one way, there is more detail here, each step is so easy and straightforward that I've found the process simpler than expected. 

Select one of the nine Campaigns and a specific Objective.  Each Campaign will tell you the difficulty level, any additional Special Ops points [SOs], the terrain type and the Commander Skill levels and any special features.  The Objective card next provides how many SOs you have available to spend on buying units and other resources, the number of weeks the Campaign lasts, Battalion points for randomly selecting the necessary enemy Battalion cards, specific rules  modifications to the Campaign and the Evaluation table to determine your level of success at the end. 


If you are totally new to the Leader series of games, this may already be making you wonder if this game is for you, all I can say is that it is a very smooth process and reads far more dauntingly than the actual execution of what I'm describing.  Though my developed familiarity with the overall systems may have influenced my next statement, I genuinely believe - and I am being as objective as possible - that this game is easier to learn, flows more smoothly overall and plays more quickly.  What I have also found is that it is just as easy to lose!

The next step is one that appeals to me.  In the previous DVG games I've reviewed your unit and its commander were one and the same.  Buy a submarine and you choose one of the cards that represent the vessel and named commander at different levels of ability usually from Recruit to Ace, the same with your planes that were governed by the level of the pilot's skill.  In Tiger Leader, the SOs you've been allocated are for buying purely the units that you will use to fight the Campaign - a few more SOs may come your way during the following weeks of fighting - but by and large most of what you buy now will be what you're stuck with as they suffer and get shot up or eliminated. 


[Here's a typical combination of a machine-gun team and some transport.  They don't have to go together, but the combo allows your vehicle to move your men forward and then both the transport and the infantry can fire.  If the infantry are by themselves they can either move or fire, not do both.]

Then you choose, for free, one Commanding officer for each unit.  Once again, each of these Commanders do come in six levels of ability.  What prevents you just grabbing an Ace for each unit is the Campaign card that designates how many of each level of ability you may choose for up to seven units.  For example, the Polish campaign allows you 3 Recruit, 2 Green*, 1 Average and 1 Skilled Commander.  You'll notice that one level of Skill is starred.  Any units that you buy above seven have to be allocated another of the starred levels.   So, if I bought nine units I'd end up with 4 Green Commanders in total.  


[Tank Commander Dietrich hopefully on his way to Ace status, with all the necessary stats.  Notice that, like the images used for units, these aren't photo shots but sketches.]


Another very good wrinkle is that the assignment of Commander to unit can be changed at the beginning of each week.  You have three categories of units: Infantry, Armour and Unarmoured - obviously each type of unit must have the relevant type of Commander.  No giving an Armour Commander to an Infantry unit.

The next step is to draw a Special Condition card that will affect all the Battles in a given week.


One of the beneficial Special Condition cards - overall these cards have a balance of positive and negative effects and many of the negative ones can be cancelled by paying SO points.


Then it is decision time.  How many Battalions am I going to choose to fight at the start of the week and which of my units am I going to allocate to take on each Battalion?   Just choose one and send in all your men and you'll probably gain an easy victory, probably reaping about 3 VPs.  Do that for any of the Campaigns that last three weeks and you'll end up with about enough VPs to earn yourself an Evaluation ranging from Dismal to the lowest level of Adequate.


[ Just one of your likely adversaries, a fairly meaty Infantry Support Battalion. ]


One advantage of this game is that you don't lose any VPs for your own units and Commanders that are eliminated.

So, it's off to our first Battle of the week and the draw of an Event card which normally will affect only this particular battle.


As with Special Condition cards, about half have good, half bad outcomes.  Notice here a very familiar image - one of its earliest manifestations being a stylised version on the 1st edition of the famous Squad Leader game. 


Six random tiles are drawn to form the battlefield; you place your units on the bottom row of map hexes and the enemy units' positions are randomly selected by dice rolls in the top two hex rows of the map.  Most Battles last five turns.  As with previous Leader games, your units that have a Fast Commander will activate first to move and/or shoot, then all the enemy ones  and finally all your units with Slow Commanders.  A very satisfying, simple chart and a single die roll provides the A.I. for enemy movement.


Here is the set-up of my forces in an early Campaign with a tank, machine-gun unit and transport in the light cover on the left flank and two more tanks on the right flank.


Combat too is very easy with a few, typical modifiers, such as terrain.  For you, hit the enemy and it is eliminated - couldn't be simpler.  For the hits scored by enemy units, it's draw one of the double-sided Damage markers and apply the appropriate side of the marker: either Infantry or Armour.  As a result your units tend to survive longer than the enemy ones, as they may take several different types without being eliminated, though two of the same type usually will kill.  There is the rare chance of an Explosion and bye-bye unit and Commander.  It is rare, but in the second week of my first campaign, I had three tanks and each turn the Explosion damage was drawn when a unit shot at a tank.  Don't say I didn't warn you!

At first sight this asymmetrical procedure for Combat may seem to hand it to the Germans on a plate.  Experience of playing the game disproves that notion.  The range of damage, the limited ability to remove some of it between each week of Battle, the choice of a Commander who might help in the process, all add greatly to the narrative produced by the game and this draws you in to the atmosphere of the game.

To defeat a Battalion you have to destroy a set number of unit points, but there is also a point at which the Battalion is reduced to half strength [gaining you half the VPs].  So, you may decide, if possible, to avoid further combat by manoeuvre - not always an easy thing to do - until the end of this Battle and return the next week to finish the Battalion off with a fresh force.

Standard to all the Leader series is the Post Combat phase at the end of each week, when Experience is logged and possibly spent to upgrade the ability of a Commander, if he has earned enough points, attempt repairs and replacements depending on whether you've gained SOs and acquire new Commanders if any have been killed in the previous week's fighting.

Personally, I've had a thoroughly good time with this game.  The different elements introduced have greatly appealed . Among these  are the Operational Display on which your enemy Battalions are placed according to information on their Unit card and the rule that means they may advance or retreat week by week, the Tactical Movement chart already mentioned, the difference of having a map and terrain to fight and manoeuvre over, the combination of unit and Commander discussed in more depth earlier, the flavour given by the Damage chits and learning the best combination of units to meet a particular type of Battalion.

Despite my strongly favourable reaction to Tiger Leader, I was aware before I started that there had been quite some criticism of this particular addition to the Leader stable of games.  Especially, intimations of it being "broken", poor rules and lack of difference between units had made me wonder what to expect.  From extensive reading, my view is that most of the adverse comments boil down to the old realism/historicity argument.   First and foremost, the rules as written I found clear, consistent and easy to follow.  To repeat an earlier point,  they were easier to assimilate than any of the three previous Leader games I've reviewed.   They provided a good flow to all my games; even when I made monumental mistakes, they weren't mistakes in the rules!

Admittedly there are only small differences between the stats for the tanks, but at the level being focused on I wouldn't expect anything else.  Certainly, there is at least and I would say more difference here than between the submarines in U-Boat and Gator Leader.  But added to that there is the difference between individual Commanders and between their different Skill levels.  So. I would feel safe in saying that the differentiation is not one that is in any way out of line with the other Leader games.

Mutters about the sameness of all the battles, I would strongly refute.  I soon learnt that fielding the wrong combination of units against specific Battalions was a quick way to a losing situation.  Only one oddity that struck me was that there were limitations on the ability of some of my units to fire/move, but not on similar enemy units - if that bothers you then it's dead easy to give your enemy the same restrictions.  However, I felt that the game intended to handle that distinction through the movement limitations produced by the Tactical Displays A.I/. system.

The campaigns are tough, even the Poland 1939 one.  As at least one commentator has pointed out, you certainly don't romp through 
the Polish units.  If that's what you want to do, just give yourself some more SO points to field more units.  Perhaps, they are tougher than they ought to be, but then I don't find much fun in a situation where I really can't lose. 

Here are some of those Polish units


I'd rather have what I've got in this game than spend my time killing loads of enemy units with no trouble at all and then find that I've lost because the victory conditions say I should have killed even more.  Many other games I've played on the Polish campaign tend to do exactly that to achieve what they call balance!

So, bottom line for me - a fun experience, giving a very different feel from both air and submarine warfare [and so it should], broad brush approach that works, good clear rules, ace quality physical package in all departments [cards, counters, boards, rule book].  Nuff said, I hope.


United Bricks: Three Soldats Reviewed On parade today we have three WWII Germans from United Bricks. Last time we reviewed United Brick...

United Bricks: Three MinFigs get the review treatment! United Bricks: Three MinFigs get the review treatment!

For your Wargamer, Toy soldier collector, MiniFig collector, military history nut. Reviews, interviews, Model Making, AARs and books!

Germany

United Bricks: Three Soldats Reviewed


On parade today we have three WWII Germans from United Bricks. Last time we reviewed United Bricks MinFigs they passed with flying colours. Will it be the same story this time, or have they been reprimanded and put on kitchen duty peeling spuds (potatoes for those not from the UK). Read on to find out!


First up we have German Soldier Corporal. In the last review, we also had a German corporal, but that time he was wearing a light grey uniform and didn't have the MP 40 ammo pouches on his webbing. This time he is wearing the standard feldgrau (field grey) uniform. He has his corporal's rank on his left shoulder. On his head is a metallic looking German M40 helmet. Unlike the grey uniformed corporal, this time he comes with a weapon, an MP40, hence the ammo pouches. One of my criticisms of the Cobi MiniFigs was their happy smiling faces; this is more like it, wearing his close combat face! He comes in either a yellow skin version as seen here or a more realistic light flesh version. You can also buy a winter version.


Print work is excellent and I have no complaints. He retails at £8.50.


Next up is a German Officer. He is wearing your standard early\mid war feldgrau uniform (The pockets give the date away, late war have no pleats on the pockets) and his hat is a Lego Kepi. On his belt is his Luger's holster. He is also wearing white gloves, so I presume he is on parade rather than in action. Obviously a brave soldier, he has the close combat badge and a Knights' Cross around his neck. Skin tone is flesh rather than the normal LEGO yellow, which is more realistic and my preference to be honest. Printing is excellent - they use a high quality UV method which produces excellent results.

This great little MiniFig retails at £8.50


I've saved my favourite for last. Here we have a German General. He is wearing a feldgrau German General's uniform. German Generals have red piping down the side of each leg. It also has red piping down the front of the jacket. He has a General's insignia on his lapels. He also has a collection of medals, including the Knights' Cross, Close Combat Badge and a War Merit Cross. On his head is a German officer's peaked cap, which I love - really well made. He wears white gloves and his skin tone is Flesh. I really do love this MiniFig. One other aspect to mention is his face, he looks extremely overworked and stressed out, with his red rimmed eyes and sunken cheeks, a great little detail. The print work is top quality.

The General retails at £8.50 and is well worth the price.

One final thing to mention is that the MiniFigs now come in a neat little black box with foam lining and gold printing on the lid. So much better than a zip lock bag:) This gets a huge thumbs up from me!

Well that's it for now. As you can see it looks like the spuds still need peeling! Keep checking back for more Mini Fig reviews and I'm sure we will be reviewing more excellent new releases from United Bricks!

 Dear All, Welcome to our 7th Anniversary newsletter comprising some unique WW2 offerings to complement our Romans which made an ap...

Thomas Gunn Newsletter Thomas Gunn Newsletter

For your Wargamer, Toy soldier collector, MiniFig collector, military history nut. Reviews, interviews, Model Making, AARs and books!

Germany


Dear All,

Welcome to our 7th Anniversary newsletter comprising some unique WW2 offerings to complement our Romans which made an appearance last week. Kicking off with a new version of FJ020 but this time with 2 gunners with their MG34 set up in the HMG mode on a Lafette stand. There will also be an 'E' winter version but unfortunately it was not ready in time for this month's releases. FJ020D Anniversary set will be priced at $89/£70 and is strictly limited to 100 pieces worldwide.


The last of our FJ pieces for at least a year and a special promotion on this price for all orders received in the month of July. FJ028 set comprises 2 gunners with an MG42 in the prone position taking aim at the enemy. The A version is a winter variant with our 2 FJ's dressed in white smocks/trousers and the B version more suitable for Normandy with our gunners wearing late war style splinter pattern smocks and grey trousers. The normal price will be $89/£69 for the pair, but to commemorate our 7th anniversary this set will be available for the bargain price of $45/£35 for July thru ourselves and all of our dealers. After the discount period ends the price will revert to the standard price of $89/£69. Limited to 100 pieces of the winter and 80 pieces of the Normandy variant. Please note that a wooden DFS 230 glider will follow as well as JU 52 to accompany all of our Fallschirmjager pieces later in the year. Our new range of FJ's will make a reappearance next year in a format not previously released by ourselves and one we are very excited about.


RS042A/B Mortar: Two Aussies prepare to lay down a barrage on the enemy with their 8cm mortar. The A version Aussies are dressed in typical combat fatigues reminiscent for 1940's jungle warfare whilst the B version (to follow in the next month or so and not pictured) will be dressed in the early war style Battledress suitable for the Desert or Greek campaign. The A version is limited to 100 pieces and the B version will be limited to 80 pieces. Both versions will be priced at $95/£75.


RS043 Command Set comprises a super little set of an officer trying desperately to hear what is being said down the line whilst the noise of battle rages around. His number 2 patiently prepares to write down orders as and when they get through. This set also comes with spare weapons in the form of M1 carbine and Owen Machine gun for the 2 figures or to enhance your diorama elsewhere as standalone pieces. Limited to 100 pieces worldwide and priced at $85/£65 whilst stocks last. Our Japanese tank RS035 should be making an appearance soon with this being one of the final pieces for the RS series for the time being.

Roman Series: Don't forget ROM010, 012 and 013 released last week have already been heavily pre-ordered and have been as popular as ever, if you have not ordered yet I would strongly recommend that you do so. Next month will see the release of 4 new figures with some Auxiliary troops to follow later in the year in the form of archers and a few other surprises.

Wings of War WW2 Release This month we decided to combine our Mahogany WW2 aircraft with our figures and as such they are a splendid Axis forces selection, please read below for details:


WOW067 The Blohm & Voss BV 141 was originally developed from a 1937 requirement for a new reconnaissance aircraft with optimal visual characteristics. Arado were the preferred competitor but after the aircraft prototype failed to impress, the field was left wide open. Focke Wulf stepped in with the FW189 although this aircraft had two engines despite the RLM's requirements for a single engine aircraft design type. Blohm & Voss submitted a design with a highly unusual asymmetric design feature, which surpassed all requirements and was powered by a single engine. Unfortunately for Blohm and Voss the design was considered too radical and Focke Wulf were awarded the lucrative contract. Only 20 B&V aircraft were produced with some seeing action on the Eastern Front and several other examples captured by the Allies including the British, as they advanced through Germany. Our version NC+RI was the last from the initial production batch of 10 aircraft and is portrayed in standard Luftwaffe colour scheme for this period. Despite being a single engine aircraft the BV 141 was very large for its time with a wingspan of over 57ft and a fuselage of approximately 46ft in length. The BV 141 had a crew of three personnel and all in all this makes it larger than the Messerschmitt 110 we recently released! We have a limited number of 10 models available sometime in August, this very unique machine is priced at $799 and comes free with FJ029 Military police figure.


WOW086: The Messerschmitt BF 110 was a twin engine heavy fighter and served with success in the early stages of the war during the Polish and France campaigns but was hopelessly outclassed by the RAF's fighters during the Battle of Britain, where is served as a bomber escort. Redeployed as a nightfighter in the West the BF 110 was well suited to this role, especially when flown by aces like Major Schnaufer who claimed 121 victories solely in this type of aircraft. In other theatres such as the Balkans and the Russian front, the 110 soldiered on as a ground attack/fighter bomber and performed admirably. A 37mm cannon could also be fitted under the belly of the BF 110 which made this a formidably armed aircraft when used in the ground attack or bomber interceptor role. The 110 was also adopted by Italy, Romania and Hungary amongst others with over 6000 aircraft being produced during its operational career.


The BF 110 aircraft had a 53ft wingspan and was over 40 ft in length making it another large aircraft even in 1/30 scale. Our new version the C-6 was one of 12 converted with an experimental 30mm cannon fitted under the belly and was utilised by the Luftwaffe against RAF radar stations during the Battle of Britain. Comes free with Luftwaffe pilot and FJ figure as pictured in the promotion photos attached. Limited to 10 in number and available in August at a price of $799.


WOW087: The Kawasaki KI-100 was a superb fighter aircraft fielded by the empire of Japan in the last days of WW2. It was capable of intercepting the B-29 Superfortress that were plaguing Japan at the time, but was hampered performance wise by the lack of a suitable supercharger. No Allied name was given to the KI-100 as it arrived too late in the war to be to be christened, however its arrival came as something of a shock to the Allies nevertheless. An overall assessment of the effectiveness of the Ki-100 rated it highly in agility, and a well-handled Ki-100 was able to outmanoeuvre any American fighter, including the formidable P-51D Mustangs and the P-47 Thunderbolts which were escorting the B-29 raids over Japan by that time, it was also comparable in speed, especially at medium altitudes. In the hands of an experienced pilot, the Ki-100 was a deadly opponent and along with the Ki-100, the Army's Ki-84 and the Navy's Kawanishi N1K-J were the only Japanese fighters able to defeat the latest Allied types. Armed with 2 x machine guns and 2 x 20mm cannons the KI-100 could deliver a knock-out blow whenever it came into close contact with Allied aircraft. Our offering comes in a very colourful scheme of the 111th Sentai as it would have appeared in late 1945. The sentry and 2 officer Command set pictured with the aircraft are included free with the total package being priced at $550 plus P&P, with a limited availability of 10 models being produced worldwide.


WOW088: The afore mentioned N1K-J also makes an appearance in our catalogue and rightly so as it was one of the most effective Japanese Naval aircraft of WW2. Christened 'George' by the Allies this outstanding aircraft possessed heavy armament as well as surprisingly good manoeuvrability. This was due to a mercury switch that automatically extended the flaps during turns, these "combat" flaps created more lift, thereby allowing tighter turns. Unlike the A6M Zero, the George could compete against the best late-war fighters, such as the Hellcat and the Corsair. Despite its obvious capabilities, it was produced too late and in insufficient numbers to affect the outcome of the war. Our model is one based with the 301st hikoitai "Shinsen-Gumi", 343rd kokutai, Shikoku, during the Spring 1945. The sentry and 2 officer Command set pictured with the aircraft are included free with the total package being priced at $550 plus P&P, with a limited availability of 10 models being produced worldwide.

That's all for this month folks and I hope you enjoyed what was on offer. I am not expecting any WW1 aircraft in this month which I know will come as something of a disappointment to some, but hopefully August will see some all new biplanes. For those of you wishing to make a purchase directly thru ourselves please visit our website www.tomgunn.co.uk where all our figures will shortly be on display. For those of you wishing to purchase an aircraft please email me direct as these items tend to be slower getting loaded onto the site. Please note you can still make stage payments on all our wooden aircraft models, ask for details if this is of interest.

Best wishes The Gunn Team

Against the Tommies: History of the 26 Reserve Division 1914-1918 by David Bilton   For my first book review I've picked, by acc...

Book Review: Against the Tommies by David Bilton Book Review: Against the Tommies by David Bilton

For your Wargamer, Toy soldier collector, MiniFig collector, military history nut. Reviews, interviews, Model Making, AARs and books!

Germany

Against the Tommies: History of the 26 Reserve Division 1914-1918 by David Bilton


For my first book review I've picked, by accident, a book that is rather tricky to review as it's really a photographic journal of the German 26th Reserve Division - photos that  were initially compiled by the divisions Staff Officers in 1920 as a commemorative record of service for veterans of the 26th Reserve Division. So you can imagine text is thin on the ground and heavy on photographs which leaves little for me to analyse or discuss in any real detail. Saying that I've really enjoyed reading it and I'm actually quite pleased I chose it to review as I would never have read it as I normally steer clear of photographic war books.

The 26th Reserve Division is a Division I'm rather familiar with. They played a major part on the first day of the Battle of the Somme 1916, defending a portion of the front line trenches and continued to fight through out the Somme offensive. With the 52nd Inf Division on their right flank, their trench line started just north of Beaumont Hamel tracing a line south past Beaucourt, St Pierre Divion on to the infamous Schwaben Redoubt, then on through Thiepval and finally ending just south of Ovillers, where the 28th Reserve Division took over. If you've read any books on the Somme then your bound to have read of their exploits in that particular battle. The German Army on the Somme by Jack Sheldon, and another favourite series of mine The Other side of the Wire Volume 1 and Volume 2 by Ralph Whitehead, cover the Division in great detail, making this book the perfect companion to these highly recommended books.


Against the Tommies follows the 26th Reserve Division throughout the War, it starts with them attacking the French in the Vosges, then they were invovled in what became known as the "Race to the Sea" as both sides tried to turn the flank. The sides eventually reached the sea and niether had been successful, the only course was to dig in. The Germans pulled back to the closest high ground and dug in, the Entente got as close as possible and also dug in. The War on the Western Front became a 450 mile siege with the continous line of trenches we are all familar with. In the winter of '14 the Division settled in the Somme district until the end of the Somme campaign and winter '16\'17. They then retreated to the newly built Hindenberg line and were involved in fighting around Arras. In the summer of '17 they fought at Passchendaele, otherwise known as Third battle of Ypres. In spring '18 they fought in Germany's last throw of the dice, the great March offensive, where Germany came close to victory, the British and Commonwealth troops were driven out of miles of their front line and the Portuguese force disintergrated in mass panic. The result being the Commonwealth and British forces had to retreat until they had their "backs to the wall". However, after several months of bitter fighting the offensive came to a halt. The Germans had fought themselves to a standstill from which they'd never recover for the duration of the War. Finally, there are a couple of photographs taken during Germany's general retreat and the last photograph entitled "home coming" is a picture of a town center with it's deserted streets, which I think says it all.

As the Division was in the Somme district for a prolonged period of time it really adds interest to the photographs as we can see the towns, villages, churches and chatuexs slowly blasted to rubble brick by brick. You can see how destructive modern warfare was to the landscape at the time. One early war photograph will show a typical picturesque countryside scene and then further along the book  there is a photograph of the same view taken later in the War; that picturesque scene is now like a barren lunar landscape as the weapons and detritus of War take their toll and seem to corrupt nature itself. In fact there are a few cases in the book where several photographs have been taken over a period of time - of  a particular church or chatuex -  as if to record the slow and devatstating effect of artillery as it turns a beautiful building to rubble.


The collection of 405 photographs is extremely wide ranging in subject matter and most have never been published before. Many are of the trenches and the typical you'd expect: group photos, explosions, casualties, captured weapons, POWs and arty emplacements etc. However, it also includes many interesting ones of work behind the lines. Photographs of charcoal collectors, butchers, bakery, setting up weather balloons, troops using a threshing machine, bottling soda water and other normally unseen logistical work. One photograph really stands out from any other photo from WWI I've seen. It's a picture of a young German soldier 14th Kompanie RIR 99 who has an open, innocent face with a massive smile that seems to go from ear to ear! His Company Commander is standing just to one side behind him showing, what seems to be a fatherly look that could say "daft sod". He looks so young, innocent and happy, which makes it so poignant as I know he is only weeks away from the horror that was the Somme offensive and I wonder if he survived the attack and even the War, I hope so.

There are also some photographs of downed planes, and it would be interesting to do some research  to see if you can indentify the squadron and if possible the pilots name. In one photograph the RFC pilot is standing next to his crashed plane and another photograph has a German pilot standing next to the wreckage of one of his kills.

The book is divided into three chapters. The first chapter covers the start of the War to Dec '16. The chapter starts with a brief summary of  each of the actions the division fought in during that period. The next chapter carries on from the last until the end of the War. Again, at the start of the chapter are brief summaries of the actions the division was in for that period of time. Next are three large scale maps of the areas the division was in. The final chapter is a list of dates and names of all the battles the Division was in and finally the figure of killed, wounded and missing Officers. You are also given another total for NCO's and other ranks that the division suffered during the War. The book is 174 pages and 405 photographs. I'd have paid more if the paper used had been photograph paper and been colourised as I think that would have added another level to the book. Still, I recommend it if your looking for an interesting and extensive photograph collection following a particular unit. It's a great companion book to Jack Sheldon's German Army on the Somme or Ralph Whitehead's Otherside of the Wire.

You can purchase Against the Tommies directly from Pen & Sword or from Amazon and any other large book store. Hardback edition retails at £19.99.


Blocks in the East AAR    Follow Chris Buhl as he battles across Russia in Vento Nuovos well received  BLOCKS IN THE EAST BLOC...

Blocks in the East AAR by Chris Buhl Blocks in the East AAR by Chris Buhl

For your Wargamer, Toy soldier collector, MiniFig collector, military history nut. Reviews, interviews, Model Making, AARs and books!

Germany

Blocks in the East AAR


Follow Chris Buhl as he battles across Russia in Vento Nuovos well received BLOCKS IN THE EAST

BLOCKS IN THE EAST is a game of World War II conflict simulation at the strategic level.
 
It recalls the most decisive battles fought on the Eastern Front from the beginning of the invasion in summer '41 until the dramatic end in Berlin in spring 1945.
 
Although based on historical events, players can modify the evolution of World War II on the Eastern Front.

The AAR consists of 17 parts. I shall publish them in three goes. Enjoy the read!
 
 
hpssims.com