second chance games

Search This Website of delight

Showing posts with label Revolution Games. Show all posts

  Stalingrad: Advance to the Volga Solitaire Area Movement Series: Volume 1 by Revolution Games & Take Aim Designs  Stalingrad has almos...

Stalingrad: Advance to the Volga, 1942 by Revolution Games Stalingrad: Advance to the Volga, 1942 by Revolution Games

For your Wargamer, Toy soldier collector, MiniFig collector, military history nut. Reviews, interviews, Model Making, AARs and books!

Revolution Games


 Stalingrad: Advance to the Volga


Solitaire Area Movement Series: Volume 1


by


Revolution Games & Take Aim Designs


 Stalingrad has almost as many games about it as Gettysburg or Waterloo. However, the actually tooth and nail fight for the city itself is not as represented in wargames as the campaign is. It has been compared with the Battle of Verdun in the First World War. The city itself was almost completed destroyed during the back and forth fighting during the end of 1942 and the beginning of 1943. The battle is often called the turning point of World War II. It certainly was a turning point on the fighting on the Eastern Front. 


 This game has two scenarios, one between September 13th and September 30, 1942 for nine turns. There is also a smaller five turn scenario from October 14th until October 31st. It is a solitaire game where the player takes on the role of the Germans. It is an area movement game for those of us who love hexes. You as the German have only a few turns to win the battle. If during that time the Germans control every area on the map you win an Automatic Victory. If, however, the German Morale Track reaches '0' at any time the Soviets get an Automatic Victory. If the game runs all the way to the end of turn nine without either of the above, then these are the Victory Conditions:


"If Automatic Victory has not been achieved by the start of the End

Phase of Turn 9, the game’s final turn, the German player wins an

Operational Victory if they control at least one Heavy Urban Area

and the “German Controlled” markers on the Record Track are 40

or greater. Design Note: this is the roughly historical result. If

they fail to do so, the Soviet side is the victor and the player has

lost the game."


 This is what the designers have to say about the game:


"STALINGRAD: ADVANCE TO THE VOLGA, 1942 is a solitaire game simulating the campaign by the German Sixth Army to capture the Soviet city of Stalingrad between September 13 and September 30, 1942. The player commands the attacking German forces and the game rules handle the defending Soviet forces. In reading these rules, if any capitalized term or abbreviation confuses you, refer to the index and glossary at the end of this rulebook. The numerical references found therein and throughout these rules should be ignored during first reading and used only later to refer to related sections for greater clarity."


 As you can see, the rules come with both an index and a glossary. It also has a History and Suggested Reading section.

 This is what comes with the game:

17 x 22 inch MOUNTED Map

One sheet of 5/8" die-cut counters

One player aid card

16 page rulebook

Eight six-sided dice (4 red and 4 black)

Game Box


 This is the Sequence of Play:

1. Dawn Phase

  Reinforcement

  Withdrawal

2. Random Event Phase

  Roll 3d6 and consult the Random Event Chart.

3. Supply Phase

  Roll 4d6 for German Supply

  Consult Supply Cost Table

4. Combat Phase

  Bloody Streets

  German Movement/Attacks

5. End Phase

  Automatic Victory Check

  Flip all spent units to their fresh side.

  Reduce German Morale by -1


 As with all of the Revolution Games that I have played this game's motto is 'you get more with less'. This does not mean that they cut corners on their components. As a matter of fact, it is quite the opposite.


 The game map is smaller than a lot of games. However, it still manages to have all of the needed features and adds a lot of immersion to the game. I am assuming that it was made from an original German map of the time. Either that or the artist added them all on top of his own map. As I mentioned, it is very immersive with the German language parts on it. All of the historical parts of Stalingrad that we have read about are on it and shown in English. Such as the Grain Elevator and all the rest. The counters are very well done. They have either a NATO symbol or a profile for the tank and panzer grenadier units. At 5/8" the counters are nice and large for a game this size. They are also not cluttered, and the information needed for play is nice and large. The Rulebook is only sixteen pages long. It is in full color and is easy to read and understand. It also has a few pictures and examples of play to boot. The actual rules only take up eight pages. Then comes a page of optional rules. Then there is the setup for the smaller scenario followed by an article on the history and one on game strategy. The back page is a checklist of all the areas on the map for both scenarios. There is one Player Aid that is made of card stock that has all the information you will need to play, and it has the Sequence of Play on it. It also has the setup for the first scenario on it.


 There are more and more games that are being released that either can be played solitaire, or like this one built from the ground up for it. This is a very good idea for our hobby. More and more people are finding it hard to get friends, or enemies, to play wargames. So smaller games that can be played by yourself and do not take up much space are really needed in the 21st century. That doesn't mean that monsters are dead; far from it. It is just harder to coordinate getting a group together. 


 Stalingrad is a game that gives the player so many choices. Besides that, there are so many changes and twists and turns from one game to the next that it never goes stale. The German supply is your currency for all you can do. This alone makes the game a nail-biter. You can make the most grandiose plans and then find out you cannot do half of what you intended. This is even before the random events kick in. I want, and will get, a monster game about the street fighting in Stalingrad. However, even after that purchase, this game will still find a place on my table at times. It is just that good.


 Thank you, Revolution Games for allowing me to review this game. The designer of this game is Michael Rinella. I will now have to be on the lookout for more games from him.


Robert

Revolution Games:

Revolution Games | Main Page


  A Greater Victory South Mountain September 14, 1862 by  Revolution Games  The time is 1862 in the month of September. Robert E. Lee has ta...

A Greater Victory: South Mountain September 14,1862 by Revolution Games A Greater Victory: South Mountain September 14,1862 by Revolution Games

For your Wargamer, Toy soldier collector, MiniFig collector, military history nut. Reviews, interviews, Model Making, AARs and books!

Revolution Games


 A Greater Victory


South Mountain September 14, 1862


by 


Revolution Games


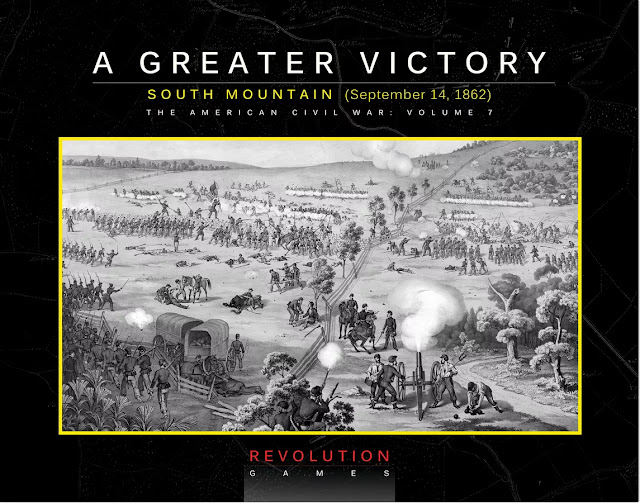
 The time is 1862 in the month of September. Robert E. Lee has taken his Army of Northern Virginia across the Potomac to invade the North. His army leaves behind a good number of men who feel that saving their states from invasion is okay, but are not too happy to invade the Union. From Lee's point of view the campaign is going well. His troops have surrounded Harpers Ferry and are about to bag the entire Union detachment there. The Army of the Potomac is once again being led by Little Mac and Lee believes he knows how slow and deliberate his foe will be. What Lee doesn't know is that one of his orders for the invasion showing where every one of his units will be has been found by Union soldiers wrapped neatly with three cigars. Little Mac sees this as the Godsend it is and declares that he will destroy Lee with this information. The gleam in Little Mac's eyes last only about a day. He is energetic enough to send soldiers to cut Lee's army in half at the gaps around South Mountain going into the Shenandoah Valley. Meanwhile the Confederates have learned that the gaps are not being held by any of their troops. So, now we have a footrace between the two enemies to see who gets there first. That is the battle that Revolution Games has given us to refight. 


 This is a game from the Hermann Luttmann Blind Sword Rules System. This is just one of the systems that Mr. Luttmann has created to replicate warfare in the mid-eighteenth century. He seems to have as many systems in use right now as some men have ex-wives. 


 This is what comes with the game:


352 5/8" Counters

22 x 34 inch Map

Exclusive Rulebook

Series Rulebook

2 Event Description Cards

2 Combat Results Table Cards

1 General Records Track

2 Player Reference Cards

2 Brigade Activations Cards


 This is what the designer has to say:


"A Greater Victory (South Mountain,1862) features two small, quick playing scenarios (Fox’s Gap and then the actions around Frosttown), along with a long scenario covering the full day’s engagement. Each scenario has its own Fog-of-War table to more accurately reflect that particular phase of the battle.

The Order-of Battle has not relied upon customary “paper strength”, but a more accurate number of effectives for each regiment and brigade, so expect some surprises here.

Taking advantage of the proven Blind Swords system, AGV has been injected with abundant history while still offering players a plethora of choices as to where and how to deploy their troop formations. Being heavily outnumbered, the Confederates must conduct a skillful defense while the Union will have to effectively coordinate their powerful brigades over brutal terrain. With the climactic battle of Antietam just three days distant, casualties at South Mountain are also an important consideration.

I want to point out that I’ve also focused the design to be an excellent solitaire study, made possible by the historically desperate position that DH Hill found himself - from forgotten rear guard to frontline army savior.

The single map (by Edmund Hudson) and counters (by Charlie Kibler) are truly excellent, and I also wanted to publicly thank Roger Miller from Revolution for his outstanding support of this project since its inception. It’s been a lot of fun to work on, and there’s much more to come!"

Steve Carey - Designer


Beautiful Map


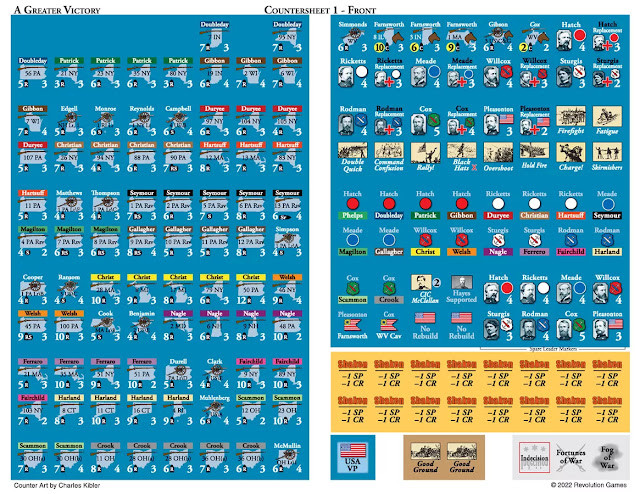
  At 5/8" the counters are nice and big. Infantry/Cavalry units are color coded with a stripe on top to show what brigade they belong to. Artillery units have the commanders' names at the top. They also have their state pictured in the middle of the counter. So, they are nice and big, easy to read, and you will have no trouble picking them up to move. The map is very nicely done. It has good sized hexes to fit the counters. Elevation is done better than most maps and also has a trick up its sleeve. The heights are listed with a small roundel with a number inside going from one to eleven (one being the lowest ground), and the different levels are color coded. These are an excellent way to describe elevation in wargaming maps. The Exclusive Rulebook is sixteen pages in length. It is also in full color. Half of it is taken up by the rules and examples of play. The other half gives the setup for the three scenarios. The end of the Exclusive Rulebook is the various victory conditions and some player notes. Then there is an index, and on the back cover are the Fog of War Tables. The series Rulebook is also sixteen pages in length. However, it is in black and white and has no examples of play. The type on both Rulebooks is large enough to easily read without squinting. All of the Player Aids are made of hard stock and are in full color. The Event Cards are double-sided with the Union and Confederate events on one side and the Unique events on the other. There are two identical ones that are single-sided and have some of the tables and Sequence of Play on them. The next two are also identical and have the CRT, Cohesion Test, and Terrain key on them. Lastly there is another single-sided one that has the Turn Record Track, Victory Point Track, and Broken Track (for broken units) on it. There are also two smaller Brigade Activation Display for both Union and Confederate. Between the beauty of the map and the well-done Rulebooks and Players Aids there is a lot of great things in this small package.


 This is from Revolution Games:

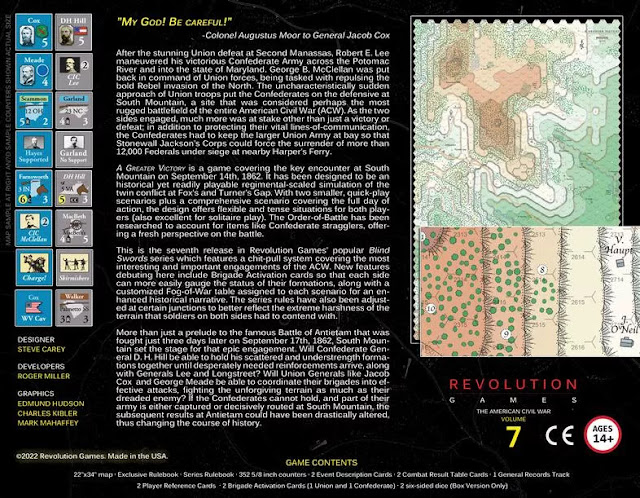
"A Greater Victory is a game covering the key encounter at South Mountain on September 14th, 1862. It has been designed to be an historical yet readily playable regimental-scaled simulation of the twin conflict at Fox’s and Turner’s Gap. With two smaller, quick-play scenarios plus a comprehensive scenario covering the full day of action, the design offers flexible and tense situations for both players (also excellent for solitaire play). The Order-of-Battle has been researched to account for items like Confederate stragglers, offering a fresh perspective on the battle.

This is the seventh release in Revolution Games’ popular Blinds Swords series which features a chit-pull system covering the most interesting and important engagements of the ACW. New features debuting here include Brigade Activation cards so that each side can more easily gauge the status of their formations, along with a customized Fog-of-War table assigned to each scenario for an enhanced historical narrative. The series rules have also been adjusted at certain junctions to better reflect the extreme harshness of the terrain that soldiers on both sides had to contend with."

 Revolution Games describes the Blind Swords System thusly: " It emphasizes the three FOW's of military conflict: Fog-of-War, Friction-of-War, and Fortunes-of-War."

 If you have had the pleasure of playing one of the Blind Swords games, you know that this description is right on the money. These game rules have created an almost perfect balance of fun gameplay and adherence to history. It gives you the what ifs without adding dragons or anything else from D&D. Almost anything that is plausible could happen on any given turn. This in turn keeps the player always on his toes. Remember that grandiose plan you made last turn to win the game? Well, forget about it now. Playing the Confederates, you are always looking over your shoulder for those damned reinforcements. As the Union player you will be hampered by the usual 'slows' that affected the Army of the Potomac at that time. Both sides will have to deal with the very rough terrain on the battlefield. One of the biggest changes in the Exclusive Rules is the cost of terrain in movement points. To reflect the nature of the terrain a unit attacking up or down in a steep slope gets penalized when doing Close Combat (this is not in the Series Rules).

 This is the Sequence of Play:

1. COMMAND DECISION PHASE
  a. Both players choose event chits and setup draw 
  cup
2. ARTILLERY PHASE
  a. Union Artillery Step (move or fire)
  b. Confederate Artillery Step (move or fire)
  c. Both sides alternate “a” and “b” above until done
  d. Artillery Rally/Rebuild Step
3. CHIT DRAW PHASE
  a. Held Event Chit Step (play any held events)
  b. Draw Chit Step
  • If Event chit, owning player keeps it or plays it, 
  draw new chit
  • If Wild chit, resolve immediately, draw new chit
  • If CIC chit, owning player selects brigade and 
  proceeds to Phase 4 or holds the chit
  • If Division Activation chit, proceed to Phase 4
  • If Brigade Activation chit proceed to Phase 4
4. BRIGADE ACTIVATION PHASE
  a. Orders Step
  b. Fire Combat Step
  c. Movement Step
  d. Close Combat Step
  e. Rally Step
  f. If any chits remain in the cup, return to Phase 3. 
  g. If no chits remain in the cup, go to Phase 5
5. END TURN PHASE
  a. Final Held Event Chit Step
  b. Victory Point Awards Step
  c. Flip over all “Activated” brigade markers to their
  “Available” side.
  d. Broken Track Adjustment step
  e. Each player gathers all their Event chits together, 
  none are saved for following turns, and then 
  advance the Game Turn marker


 The Blind Swords System is meant to give the player the full enjoyment of playing a well-done tactical 19th century wargame. This is without giving the players a really deep micromanagement type of game. The system (as well as this game) hits the sweet spot between fun and realism for the player. The games that Revolution Games have published for the system are all excellent for dipping your toes into the system.  

 The center of the Blind Swords system is the chit pull mechanic. This alone will make sure the Fog of War enters into both sides play. As mentioned, there is also a chance to pick one of these chits: Event chit, Wild chit, Fortunes of War chit, Fog of War chit, and the CIC (commander in chief) chit. The designer, Steve Carey, had to make some adjustments of the rules because of the actual terrain of the battlefield. Because of this, the Union was not able to bring its superior numbers to bear and crush the Confederates. The battlefield is essentially split into two parts, North and South. The Union player has to remember that his 'Rally' chit is no longer used after 12:30pm.

 The game comes with three scenarios. These are:

1. Carnival of Death

2. Every Man was a Hero

3. The Battle for South Mountain

 The Victory Conditions for all three are mostly based on hex control. Each side also gets victory points for enemy units' destruction. There is also a chance for the Union player to win an automatic victory in the third scenario. I must say that the hex victory conditions in the third (whole battle) scenario are a little more complicated than just which side was the last to occupy the hex in question. 


  As the Rules state, this was D.H. Hill's finest hour. He mostly gets short shrift in many histories. His work here and at Antietam were first class soldiering. Unfortunately, he was known as an irascible man. He was put to the side because of his personality trait of always saying when the emperor had no clothes on. Considering that Lee kept Jubal Early (his "bad old man") D.H. Hill must have really known how to ruffle feathers.


  I am an unashamed fanboy of Hermann Luttmann's games and his gaming systems. So, when I found out that I would be able to review another Blind Swords System games I was very happy. When I got to play the game, I was even happier. Thank you, Revolution Games for letting me review this well-done game. A Greater Victory is on sale right now at Revolution Games. The sale price is $65 for the boxed version and $55 for the Ziploc version. That is $20 and $15 off the regular price.

Robert

Revolution Games:

  Warsaw 1920 by Revolution Games  This was supposed to be the start of the world Communist revolution. All the Red Army had to do was to ma...

Warsaw 1920 by Revolution Games Warsaw 1920 by Revolution Games

For your Wargamer, Toy soldier collector, MiniFig collector, military history nut. Reviews, interviews, Model Making, AARs and books!

Revolution Games


 Warsaw 1920


by


Revolution Games


 This was supposed to be the start of the world Communist revolution. All the Red Army had to do was to march into Poland,  the oppressed workers would join them, and then it would march through the rest of the world. What really happened was that the Poles rose up in force to defeat the Red Army. This was just another time that Poland was left to defeat a rapacious neighbor. The picture on the cover is of Field Marshal PiÅ‚sudski, the main Polish hero of the Polish-Soviet War in 1920. During the first part of the war, the Red Army went from victory to victory and almost succeeded in taking Warsaw. The Poles then held them off and counterattacked to push the Red Army back over the border. On the Soviet side Marshal Tukhachevsky and Stalin and some of his cronies: Budyonny etc. were in charge of some of the troops.


 This is what Revolution games has to say about the game:


"Warsaw 1920” is a two-player wargame that recreates the Battle of Warsaw in 1920, 101 years ago. One player controls the Polish (including Ukrainian and Lithuanian) and the other controls the Russians.

The war between Poland, which has regained its independence, and Russia, which wants to export the revolution to Europe, also called the "Soviet-Polish War," has been waged since September 1919 without a formal declaration of war. Full-scale combat began in April 1920, when the Polish army launched an offensive in the south and occupied Kiev while the Russian army was extracting troops from the front to clear the remnants of the White army.

However, the Polish didn't achieve the results they expected, and were repulsed by a counterattack of Semyon Budyonny’s 1st Cavalry Army. In July, the West Front Army, led by Mikhail Tukhachevsky, launched an offensive, and the Polish left wing collapsed. The Western Front reached the gates of Warsaw after defeating two Polish army groups and advanced 500 km in five weeks. In August, when Poland was thought to be engulfed by the red tsunami, reorganized troops and Polish units from the south launched an unexpected counterattack from the south against the Russian flank. Relentless and aggressive, the Polish continued to move forward, inflicting heavy losses on exhausted Russian troops and destroying many of them.

This game shows the battle from July 1920, when the Western Front began its offensive, to the end of August, when Tukhachevsky’s army was almost eliminated by Polish counterattack.

Designed by Yasushi Nakaguro"


 This is what comes with the game:

-22 x 34 inch map

-1 counter sheet of 5/8" counters

-Rule Book

-Player Aid

-Ziplock Bag


 This is the Sequence of Play:

1. Polish Player Turn 
1. Reinforcement and Reorganization Phase 
2. 1st Operation Phase (Game Turn 2 or later) 
3. 2nd Operation Phase (Game Turn 3 or later) 
4. 3rd Operation Phase (Game Turn 5 / 6 or later) 
5. Refit Phase 
2. Russian Player Turn 
1. Reinforcement and Reorganization Phase 
2. 1st Operation Phase 
3. 2nd Operation Phase 
4. 3rd Operation Phase 
5.Refit Phase 

After the Russian Refit phase is finished, advance the turn marker to the next turn, and start a new game turn. At the end of turn 8, the game is over, and the winner is determined


 The map is not sartorial, but more of a modest type. The hexes are nice and large, and the terrain is easy to discern. The Pripet Marshes divide the eastern side of the map into two separate areas. The counters, as you can see, are also large and east to read. You will not have any counter clutter with this game. The Polish Player is allowed to have two units in a hex. The Russian Player can have up to three units in a hex. The only caveat to those rules is that units from the Russian Western and Southwest Fronts may not stack together. Polish units are not allowed to stack with Lithuanians either. The Rulebook is twelve pages long with ten of them being the actual rules. Pages eleven and twelve are the counter manifests. Like every other Revolution Game Rulebook, these rules are short and sweet and to the point. There is no ambiguity here. It is in full color and has some examples of play in it. The Player Aid is one sided and has the CRT and Terrain Effects Chart.

 Looking at the counters you will see that the Soviets are hampered by a slow movement rate. Their infantry units have a movement ability of four and the Polish infantry have one of five. The cavalry units for both sides are a different matter. The Polish cavalry have a movement rate of nine compared to the Russian six. The Russian Western Front does have two artillery units. The war was probably the last where cavalry formations were one of the largest parts of each army. In fact, most of the war was determined by swirling masses of cavalry. 

 The Victory Point system is a bit long so let us take a look at how Revolution Games explains it:

"The game begins in July 1920, when Tukhachevsky’s West Front 
launches the offensive, and ends in August, when the Polish 
army almost eliminated it (exception: see 4.2 Russian Sudden 
Death Victory). Victory is determined by the number of controlled cities / major cities, eliminated elite units, and surrendered units.
4.1 Win by Victory Points
At the end of the Game Turn 8, both players calculate each victory point: The side with the higher number wins. Draw if tie
4.1.1 VPs for Controlling Cities / Major Cities
At the end of the game, a player receives one VP for each controlled city hex: 2 VPs for each controlled major city hex. The 
Polish player receives four VPs if they control Warsaw (Exception: 
4.2, the Russian receives only two VPs for Warsaw). However, 
neither player can score from a city / major city unless it can 
trace a continuous railroad from its hex to a controlled friendly 
supply source (see below).
4.1.2 Supply Source
Polish supply sources are Warsaw and the railroad hex at the 
western map edge (printed national emblem). Russian supply 
sources are Smolensk and Kiev (printed red star). At the end of 
the game, if you can trace the unblocked railroad from a controlling city / major city to any friendly supply source, you can 
receive VP from that hex. Enemy units and EZOC that are not 
cancelled by friendly unit blocks railroad trace.
Note: The Polish player always receives 4 VPs from a Polish controlled Warsaw because Warsaw is a supply source. 
4.1.3 VPs for Eliminating Elite Units
The Polish player receives one VP for each eliminated Russian 
Cavalry Division and/or Artillery Brigade. The Russian player 
receives one VP for each eliminated the Polish unit belonging to 
the Polish Legion. Those units have a red star (Russian) or eagle 
(Polish) on the upper right.
4.1.4 VPs for Surrendered Units
Both players receive one VP for each two surrendered enemy 
units (see 12.3) round up.
4.1.5 Russian Re-supply
If the Russian player did re-supply (see 8.3), the Polish player 
immediately gets one VP for each two supply points (round up, 
calculate each front) the Russian player received.
Example: On Game Turn 4, the Southwest Front received 5 supply 
points by re-supply. The Polish player immediately receives 3 
VPs. On Game Turn 5, the West Front received 7 supply points by 
re-supply. The Polish player immediately receives 4 VPs.
4.1.6 PiÅ‚sudski’s Early Counterattack
At the beginning of Game Turn 3, the Polish player must decide 
to counterattack on Game Turn 5 or 6 (see 5.3). If the Polish 
player chooses Game Turn 5, the Polish side will lose 4 VPs at the 
end of the game. No VPs are lost if the counterattack begins on 
Game Turn 6. 
4.1.7 Recording VPs
Both players have VP markers. To record VPs place it on the 
VP Record Track. Almost all VPs are recorded at the end of the 
game. During the game, the Polish player may need to record 
VPs for the Russian re-supply if the Russians choose to receive 
them. Use the back side of the VP marker if your VPs exceeds 10 
VPs.
4.2 Russian Sudden Death Victory
If the Russian player controls Warsaw before re-supplying (see 
8.0) the game ends with a decisive victory for the Russians at 
that moment. No need to trace the supply source railroad connection (4.1.2) for this condition. After Russian Re-supply, Warsaw is treated as a major city for the Russian for all purposes"

 Warsaw 1920 is a fast-paced game that is built around the historic war. Both sides have a chance to win - just like in reality. This is another game from Revolution Games that has both a small footprint and deep gameplay. For a game with only ten pages of rules it also has plenty of immersion. Thank you, Revolution Games, for letting me review this fine product. I can recommend the game for both its history and gameplay.


Robert

Revolution Games:

Warsaw 1920 Rules:


  Death of an Army Ypres 1914 by Revolution Games  "The Ypres Salient in Belgian Flanders was the most notorious and dreaded place in a...

Death of an Army Ypres 1914 by Revolution Games Death of an Army Ypres 1914 by Revolution Games

For your Wargamer, Toy soldier collector, MiniFig collector, military history nut. Reviews, interviews, Model Making, AARs and books!

Revolution Games


 Death of an Army Ypres 1914


by


Revolution Games


 "The Ypres Salient in Belgian Flanders was the most notorious and dreaded place in all of the First World War, probably of any war in history. Typical was this British infantryman's reaction on being told that his battalion was to go there: "I mentioned Ypres and he cursed the place. Rumors of what waited ahead of us had disturbed everyone." This was said between men who had just gone through the ordeal of the Battle of the Somme, where more than 50,000 British soldiers became casualties on the first day.

 From the autumn of 1914 to the autumn of 1918 Flanders was, in effect, a gigantic corpse factory. Hundreds of thousands died there for ground where gains were measured in mere yards. It was where, in 1914, the British professional army was virtually annihilated, though it had stopped the German drive to capture control of the English Channel." (Winston Groom in 'A storm in Flanders')

 The Battle of Ypres in 1914 has many times been described as the 'Death of the British prewar Army. The actual name of this game should be 'Death of Armies'. This is because the German Army was also bled white here. The Germans have their own mythology about the First Battle of Ypres. This is called the 'Kindermord', roughly the 'Massacre of the Innocents'. On November 10, 1914, the Germans attacked the town of Langemarck (hex 0813 on the map). The story that was told was that eighteen-year-old German soldiers clasped arms and sang the German National Anthem while they marched to their death. While the actual history has found this to not be correct, the battles for Ypres did turn the area into an abattoir for the German reservist troops. As an aside, the British troops called it 'Wipers'. This is a game I have been waiting to have in my hot little hands for a long time.


 This is what comes with the game:

22" x 34" Map

Exclusive Rulebook

Series Rulebook

2.5 5/8" Countersheets

3 Player Aids

1 Scenario Setup Sheet

Box or Ziploc Bag

1 Six-Sided Die (Boxed Version)


 This is a blurb from Revolution Games about the game:

"The Battle of the Marne signaled the failure of the Schlieffen Plan and of German hopes to win a quick, decisive victory. In turn, this triggered the Race for the Sea as opposing armies attempted to outflank each other. Then, in a final bid to gain the upper hand, both Allied and German Armies clashed in the First Battle of Ypres. On these fields, the British Expeditionary Force, the professional army of Britain, and the strongest on the Continent, was bled dry.


Death of an Army, Ypres 1914 is a brigade/regiment level simulation of the First Battle of Ypres. Players assume the roles of the commanders of the German and Allied troops as they desperately fight for this valuable position in the line."


 The map shows us exactly why this small patch of territory was fought over for four years. These small ridges, 200' or so in height, are the only high ground to be found in Flanders. With their control of them, the Germans were able to see everything going on in the Ypres salient. Not only that, but their guns were able to target the area, thus turning the salient into a deathtrap for the French and British troops that were stationed there.


German Counters


 The Map is nicely done even though it is mostly made up of clear spaces. There are some important features, such as the canal and the ridge that is almost in the center of the map. The area was also sparse as far as woodlands. The towns and woods that are there are mostly named and will be remembered by people who are familiar with the later battles such as Polygon wood. The map also has the turn record track on it. It is made of the normal glossy paper that we have come to know over the last few decades. The scale of the Map is 1,350 yards per hex. The counters are large and are easy to read. They use the NATO symbols. The counters might look a little busy to some. However, I didn't mind them at all at 5/8" size. Two of the Players Aids are exactly the same. These have The Combat Results Tables on one side and the Terrain Effects on the other. The third Player Aid is one-sided and has a Markers Reference sheet on it. The Scenario Setup sheet is double-sided and has the information for the game's three scenarios on them. The Great War Battles Series Rulebook is twelve pages long and is in black and white with large type. Last but not least, the Exclusive Rulebook is only four pages long. The components some might complain, are Plain Jane, but they are infinitely better than what we used to play with. They also help to keep the game's cost down. You may not get all the bells and whistles with them, but all of Revolution Games productions I have played do come with a lot of gaming, which is really what we are after anyway.


Allied Counters


 As mentioned, there are three scenarios. These are:

Battle of Langemarck  - October 20th until October 24th

Fabeck's Attack - October 29th until November 4th

First Battle of Ypres (Campaign Game) - October 20th until November 12th

 The game plays out in daily turns so the Campaign Game is 24 turns long.

 This is the Sequence of Play:

First Player Turn

The first player is the phasing player and conducts the following events in sequence.

Coordinated Combat Phase: the first player may conduct 
coordinated combat with his units against opposing units (see 6.0).

Movement Phase: the first player may move his units (see 7.0).

Hasty Combat Phase: the first player may conduct hasty combat with his units against opposing units (see 11.0).

Surrender Phase: the first player checks whether any of his 
isolated units surrender (see 12.4).

Second Player Turn

The second player becomes the phasing player and conducts 
the same sequence of events as described for the first player.


Markers and a few more German counters


 So, what is the verdict? Just like any other Revolution Games effort I have played, this game is a winner. Not only if you are interested in the game for its history, but also if you are looking for a great gaming experience. This is early in World War I so air power and even air reconnaissance is in its infancy. You do not have to worry about tanks or poison gas either. This is a straight of battle of king of the hill. One thing a player has to keep in mind is that casualties will mount up and usually mount up quickly. This is the maneuver battle that all of the generals were hoping for after the trench system was built. Artillery is king of the battlefield, as it remains for the rest of the war. You can attack without artillery, or not enough of it, but be prepared to pay the cost. All of the Victory Conditions in all of the scenarios are based on the capture or defense of the high ground. It is a simple concept, and they are right there for you to see. Your problem is getting control of them. It is a rough and tumble affair that simulates the horrific blood loss of the year 1914. One thing really good games have is an ebb and flow to each side. The reinforcements that come in for each side at different times help greatly with the 'what happened, I was winning last turn', feeling that you get in this game.

 This is a blurb from the Designer Notes:

"For Ypres 1914, I wanted to create a simple, fluid game that moves quickly -- sort of a Napoleon at Waterloo for the First World War. Well, it didn’t quite turn out that way - simple, perhaps, fluid, not quite. There aren’t many innovative rules per se but one significant departure from most games is the reversal of the movement and combat phases. The decision to begin with a combat phase was intended to capture the general flow of the battle of the Great War. Most attacks were planned overnight and started at dawn of the next day. Generally, troops were positioned accordingly, often in plain sight of the enemy. After the initial attack, communications would falter, and the original plans would disintegrate. It then fell on the initiative on individual commanders leading smaller units to carry it on, with limited artillery support. The former reflects the co-ordinated combat and the latter the hasty combat procedure."

 I cannot wait for more games in the series.


 Thank you, Revolution Games, for allowing me to take this game for a spin. I will admit I was expecting a lot from the game. The books about the Ypres battles are some of my favorite reads. I was immensely happy that the game played out historically, and all of the outcomes were entirely plausible. While you are at their site, please take a gander at the rest of their games it is definitely worth it.

Robert

Revolution Games:


  The Deadly Woods by Revolution Games Designed by Ted S. Raicer    So, we have another Battle of the Bulge game to enter the fray. Three ba...

The Deadly Woods by Revolution Games The Deadly Woods by Revolution Games

For your Wargamer, Toy soldier collector, MiniFig collector, military history nut. Reviews, interviews, Model Making, AARs and books!

Revolution Games


 The Deadly Woods


by


Revolution Games


Designed by


Ted S. Raicer


 So, we have another Battle of the Bulge game to enter the fray. Three battles pretty much flood the board wargaming industry: Waterloo, Bulge, and Gettysburg. Some would argue that enough is enough. Those same people might also like to eat turkey, ham, or whatever. You do not hear them being upset that someone has cooked their favorite meal again. To me, The Battle of the Bulge in wargaming is an acquired taste. It is one of those battles that one side has the scales all tipped in their favor. The German generals were pretty much in agreement that the plan was slipshod at best. Even Sepp Dietrich, rabid Nazi that he was, thought the plan was beyond the resources assigned to it. That, and the atrocious weather needed to keep the Allied planes grounded, also affected the ground troops of both sides. As it was, the German Schwerpunkt (main point of attack), the SS Panzer Sixth Army in the north, did not punch through the American lines. The American troops bled and died there on the Elsenborn Ridge to stop them. The deepest penetration during the battle was actually further south by von Manteuffel's Fifth Panzer Army.


 This is what comes with the game:


Components

22x34" game map

11x22" setup map

1 1/2 x 5/8" countersheets

Rulebook

Player aids

Game box or ziploc


This is a blurb from Revolution Games about The Deadly Woods:

"In December 1944 Hitler launched a massive offensive against the weakly held Ardennes forest section of the Allied front in Belgium. Achieving complete surprise, the Germans nevertheless faced tough resistance from the battle's opening days, and the offensive was virtually over 10 days after it began. Their followed a bloody Allied counterattack which gradually erased the bulge the Germans had created in the Allied line.

But you probably know all that. Yet another Battle of the Bulge game? Why yes. But one with a different approach. Specifically, award-winning designer Ted S. Raicer has taken a modified version of the chit pull system pioneered in GMT's The Dark Valley: The East Front 1941-45 and brought it west for an exciting new take on this classic wargame subject.

So another Bulge game, but one with the historical action and decisions of games with a much bigger footprint and playing time. And with a unique take on the chaos and friction of the battle that makes it a great choice for solo play. Even if you are bulged out, you'll want The Deadly Woods in your collection!"


 Exactly why do we want another Battle of the Bulge game? The key point to the information above is the name Ted S. Raicer. That name should get you to perk up your ears like a dog. ​

  
 As you can see above, the map is smaller than most Bulge maps at three miles per hex. However, this also means that a lot of the necessary items for play, Turn Record Track etc., have a place on the map. This gives the game a smaller footprint. The size of the map fits right in with the design for a smaller, easier to play, Bulge game. Not simple, just easier setup and shorter play time. The map itself is well done and is fully functional instead of heading in the artsy direction. It is after all a map. The game also comes with a small 'Setup Map' that makes it easier to see where the starting units are placed. The oversized hexes of the map allow the counters to be larger in turn. All of the unit counters are 1 1/2" in size. Their size allows all of the historical and pertinent game information to be read easily. The units that start on the board have their 'Setup Number' on them for ease in setting up the game. The other counters, out of supply etc., are still large at 5/8". We old grumblers always appreciate that in a game. The Rulebook is in black and white and is twenty-three pages long. The rules do not come with a historical background simply because this is a game about the Bulge. However, the Designer Notes are an interesting read. There are three Players Aids that are in full color and are hard backed and not just sheets. They are akin to the rest of the components in having large print. One thing I have to mention is the artwork on the box. For us grognards it might seem a bit strange. There is no Peiper or at least a Tiger or a Sherman adorning the cover. In fact, it is bereft of any soldiers or weapon of war. It is simply a picture of trees, mostly conifers, in a winter setting along with snow. After looking at it for a bit though, I get a bit of the foreboding that was put into it. What is in those trees? So, the cover as a piece of art is to me a really well done, suspenseful looking and feeling picture.


 The game is slated as playing well both for single player and two player games. I can attest that it plays well as a solitaire game. Most of the units have stepped counters, so there are not large amounts of counters to deal with each turn. A minimalist Bulge game is what we are looking at. This seems completely contrary to the norm in Bulge games. Usually, they try to go down to the level of individual tanks etc. I am jesting, but you know what I mean. Most come with four to five maps and hundreds if not thousands of counters. This game, although much smaller, has been able to add in all of the glitz of the Bulge as in:

Supply
Bridges: intact and blown
Divisional Integrity
Artillery
Airborne Units
Engineers
SS Withdrawl
Operation Greif

 The design is based on Mr. Raicer's 'Dark' series of games. Due to legality etc., the campaigns he is designing for Revolution Games will be called 'Deadly'. Beyond the name change, there is not supposed to be much difference in the play. So, anyone playing the Dark series should have no trouble understanding the Deadly series and getting down to playing them rather easily. The game is easy to learn and the rules are setup well. As the Germans, just as historically, you have to get the 6th SS Panzer Army moving. The 'easiest' way across the Meuse is at Liege. Of course, the Allies know this too, unless your opponent's map reading skills are subpar. As the Allies you have to hope that your troops can pull off another miracle at the Elsenborn Ridge. The game comes with two scenarios. The first is the 'German Attack' and it lasts six turns. The other is the "Campaign' which lasts twelve turns. There are nineteen Victory Point hexes with nine of them being across the Meuse. Do not, repeat, do not as the Germans expect to get there. There is a 'Sudden Death' victory for the Germans if they are able, at the end of any turn, to have five Victory Point hexes with a line of supply or have nine or more Motorized steps across the Meuse in the British Area in the north of the map. If you are playing the Attack scenario, the Germans win if they have four Victory Point hexes with a line of supply. If you are playing the Campaign scenario, the German player needs either two, if he withdraws the SS, or three Victory Point hexes with a line of supply if he does not withdraw the SS.

 The bottom line is that this is a refreshing take on the Battle of the Bulge. A relatively simple design, certainly not beer and pretzel, and it is a quick playing 'fun' game. Its small footprint allows for the player(s) to try many different strategies without having to worry about the space the game takes up. I can easily recommend this game to both grognards and people starting out in the hobby. Thank you, Revolution Games, for letting me review this game. Please check out their other fine games when you go to their website. 


Robert


Revolution Games:

Revolution Games | Main Page

The Deadly Woods rules in PDF:

1 (revolutiongames.us)

This is my review of 'Longstreet Attacks' another fine game from Revolution Games:

Longstreet Attacks by Revolution Games - A Wargamers Needful Things


Kernstown 1st Kernstown (March 23,1862) 2nd Kernstown (July 24,1864) by Revolution Games  These two batt...

Kernstown: 1st Kernstown (March 23,1862) 2nd Kernstown (July 24,1864) by Revolurion Games Kernstown: 1st Kernstown (March 23,1862) 2nd Kernstown (July 24,1864) by Revolurion Games

For your Wargamer, Toy soldier collector, MiniFig collector, military history nut. Reviews, interviews, Model Making, AARs and books!

Revolution Games


Kernstown

1st Kernstown (March 23,1862) 2nd Kernstown (July 24,1864)

by

Revolution Games


 These two battles were fought more than two years apart, but they have a lot in common. Both were fought because Confederate troops were trying to tie up the Union forces in the Shenandoah Valley. The Confederates were also trying to put enough fear into Washington to bring back Union troops outside of Richmond. In 1862 McClellan was trying to take Richmond, and in 1864 it was Grant's turn. In the 1st battle of Kernstown it was Thomas 'Stonewall' Jackson in charge of the small Confederate Army. At the 2nd Battle of Kernstown it was Jubal Early's (Per Lee: "His bad old man") turn to take command. The first battle is one of the few blots on Jackson's record. It was a tactical defeat for Jackson who unknowingly attacked a force about twice the size of his. The second battle saw Jubal Early triumphant on his way north through the valley to put a good scare into Federal authorities. Oddly enough, Union General George Crook played the part of Jackson at the second battle. He also believed he was facing a smaller force. As a side note: Richard Garnett, one of the commanders under Jackson at 1st Kernstown, was accused by him of 'neglect of duty' essentially cowardice in Garnett's eyes. Whether through physical constraint or to clear his name, or both, Garnett was the only officer that was on horseback during Pickett's charge at Gettysburg. Miraculously, he was within twenty yards of the Union lines before he was shot down. So, you can see that we get a two-fer here as far as battles. This is what comes in the box:

- 22x34" map
- 2 x 5/8" counter-sheets (352 counters)
- Rulebooklet
- 5 charts/playeraids
- Box or ziploc bag
- 2 dice (Boxed version only)


The game info per Revolution Games:

Complexity: 6 out of 10
Solitaire Suitability: 6 out of 10
Time Scale: 20 minute turns
Map Scale: 150 yards per hex
Unit Scale: regimental
Players: one to two, best with two
Playing Time: three to ten hours depending on scenario


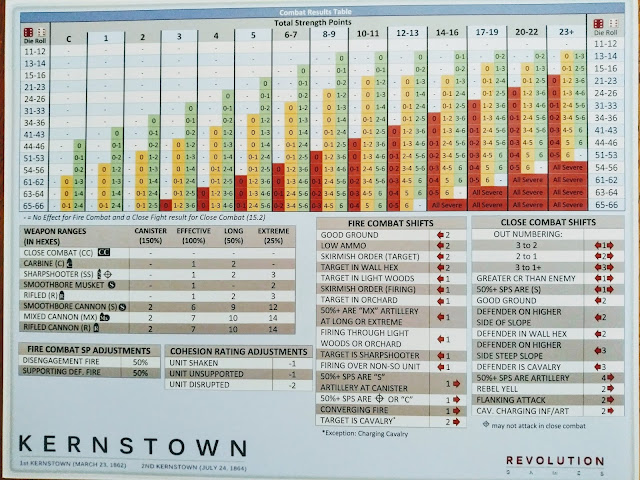
 The map is beautiful and is done by Rick Barber, whose style has graced more than a few Civil War battle games. The hexes on the map represent roughly 140 yards across. Terrain level is divided into thirteen levels, each one of twenty-five feet. The lowest levels of the map are in the darkest color of green. The highest levels are in yellow. All you have to do is look online to see how many people really like this style of map. The counters are 5/8" so they are nice and large. They are very well done with pictures of the leaders on their counters. The combat units show the outline of their recruitment state. There are five Players' Aids; three are in full color and two are black and white. The Union and Confederate Player  each have their own Players' Aid card, and there is one for the Turn Record Chart and eliminated Units etc. The other two full color  Players' Aid cards are for the CRT and terrain, among other charts and tables. I have reviewed both 'Longstreet Attacks' and 'Konigsberg' from Revolution Games, so I am used to their attention to detail and their very well done artwork.


 This is the game's Sequence of Play:


1. COMMAND DECISION PHASE 
 a. Both players choose event chits and set up draw cup
2. ARTILLERY PHASE
 a. Union Artillery Step (move or fire)
 b. Confederate Artillery Step (move or fire)
 c. Both sides alternate “a” and “b” above until done
 d. Artillery Rally/Rebuild Step
3. CHIT DRAW PHASE
 a. Held Event Chit Step (play any held events)
 b. Draw Chit Step 
   If Event chit, owning player keeps it or plays it, draw new chit  If Wild chit, resolve immediately, draw new chit 
   If CIC chit, owning player selects brigade and proceeds to Phase 4 or holds the chit 
   If Division Activation chit, proceed to Phase 4
4. BRIGADE ACTIVATION PHASE
 a. Orders Step
 b. Fire Combat Step
 c. Movement Step
 d. Close Combat Step
 e. Rally Step
 f. If any chits remain in the cup, return to Phase 3.
 g. If no chits remain in the cup, go to Phase 5
5. END TURN PHASE
 a. Final Held Event Chit Step
 b. Victory Point Awards Step
 c. Flip over all “Activated” brigade markers to their “Available”   side
 d. Broken Track Adjustment step
 e. Each player gathers all his Event chits together and then   advances the Game Turn marker


 The game uses the 'Blind Swords' chit-pull system for play. The system emphasizes the three 'FOWs': fog-of-war, friction-of-war, and fortunes-of-war. Once again, I really like the system in any of the games that I have played that uses it. 

 The game comes with six scenarios, with two being 'what-ifs' of each battle. The scenarios are:

The Stone Wall - 1st Kernstown
The Historical Battle - 1st Kernstown
Jackson is aware - 1st Kernstown
Breckenridge Attacks - 2nd Kernstown
Historic 2nd Kernstown
'What If' - 2nd Kernstown


 The simplest way to do this review would be just to say 'Hey, its the Blind Sword System, with a Rick Barber map'! That should be enough for people to get out their credit cards, but we will continue with the regularly scheduled review for those of you still on the fence. The 'Blind Sword System' is based on a chit-pull mechanic, but then it goes much farther. The chits that can be pulled are these:


Event Chit
Wild Chit
CIC Chit
Division Activation Chit

 There are two other interesting mechanics in the game. The first is that after you have activated a Brigade you the have to give it 'Orders' for the turn. You have a choice of four types of 'Orders' to give your Brigade. These are:

Attack
Defend
Maneuver
Regroup


 The other somewhat strange mechanic is that Fire Combat takes place before movement.
 Some of the other rules that enhance the game are:


Canister fire for Artillery
Artillery can fire over friendly troops
Close Combat
Cavalry charging
Mounting and dismounting Cavalry
Cohesion Tests
Skedaddle Test


  I am surprised that we do not have a 'Buck and Ball' rule. The Victory Points for all of the scenarios are either control of victory Point hexes, or a combination of casualties and Victory Point hexes.


 As mentioned, the game comes with six scenarios, with two of them being what-ifs if you are so inclined. These are smaller battles, but the game mechanics are involved (which is a good thing). So, game time is rated at 130-480 minutes. Even though the game does not drown you in components, and the map is not large, you will get a large bang for your buck. I really like this game, even though I am so-so on the campaigns themselves. If you are a frequent reader you will know that I love the 'Blind Swords System', so there isn't much to say about that. The two Battles of Kernstown allow a player to deal with all sorts of military challenges. In both battles you can be the underdog or the force with a clear advantage. This game and the different scenarios are great if you have two opponents of differing skills. The system also works very well for solo play. You never know what is coming out of that chit cup. I am a big fan of Revolution Games, and I will have some links to other reviews I have done for them. Thank you Revolution Games for letting me review another of your splendid games.

Revolution Games:
www.revolutiongames.us/

Konigsberg:
https://www.awargamersneedfulthings.co.uk/2018/06/konigsberg-by-revolution-games.html

Longstreet Attacks:
https://www.awargamersneedfulthings.co.uk/2018/08/longstreet-attacks-by-revolution-games.html

Robert


hpssims.com