

Immortal Fire a DLc for Field of Glory II
by
Slitherine

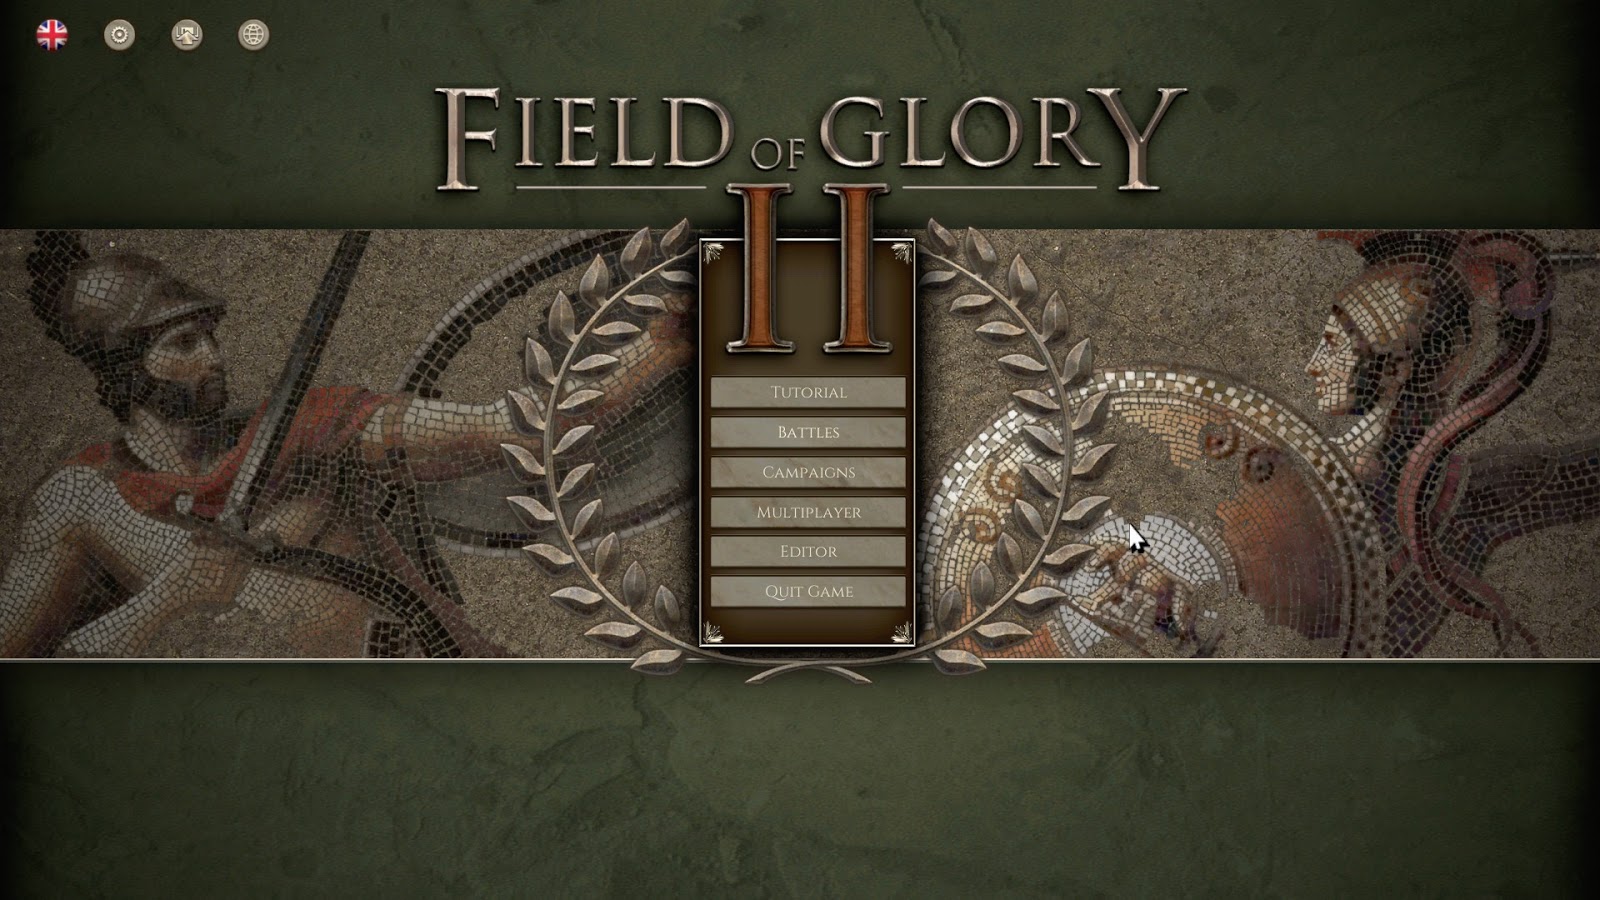
This is the first, hopefully in a long line, of DLCs released for Field of Glory II. For those of you living in a cave, Field of Glory II is the newest ancient battle game released by Slitherine. I am a ancient history nut, and to me and many others, Field of Glory II has really hit the sweet spot. Please see my review of the base game here:
This DLC goes back in time to the first battles between the Grecian city states and the Persian Empire. Then the DLC continues to Alexander's battles and the ones of his successors (the Diadochi). The earliest epic (historical) battle is Thymbra in 547 B.C., and the latest is Raphia in 217 B.C. Here is a list of what comes with the DLC:
- 8 new factions: Achaemenid Persians, Etruscans, Antigonos, Lysimachos, Spartans, Latins, Lydians, Kyrenean Greeks, Thessalian Greeks.
- 10 new units: Persian Immortals, Persian sparabara foot, Persian armoured cavalry with bow, Persian improvised camelry, armoured citizen hoplites, armoured veteran hoplites (with Spartan variant), shallowly formed armoured citizen hoplites, Lydian cavalry, Carthaginian chariots, Macedonian prodromoi.
-
30 new army lists (expanding the total number of army list to 105):
- Achaemenid Persian 550-546 BC
- Achaemenid Persian 545-481 BC
- Achaemenid Persian 480-461 BC
- Achaemenid Persian 460-420 BC
- Achaemenid Persian 419-329 BC
- Antigonid 320-301 BC
- Carthaginian 490-411 BC
- Carthaginian 410-341 BC
- Carthaginian 340-281 BC
- Etruscan 490-331 BC
- Etruscan 330-280 BC
- Gallic 390-301 BC
- Greek 550-461 BC
- Greek 460-281 BC
- Kyrenean Greek 550-461 BC
- Kyrenean Greek 460-322 BC
- Latin 490-338 BC
- Lydian 550-546 BC
- Lysimachid 320-281 BC
- Macedonian 355-329 BC (Philip and Alexander)
- Macedonian 328-321 BC (Alexander and first phase of the wars of the Diadochi)
- Roman 490-341 BC
- Roman 340-281 BC
- Seleucid 320-303 BC
- Seleucid 302-301 BC
- Skythian or Saka 550-301 BC
- Spartan 550-461 BC
- Spartan 460-281 BC
- Syracusan 421-281 BC
- Thessalian 404-353BC
- 10 new Epic Battles: Thymbra 547 BC, Marathon 490 BC, Plataea 479 BC, Cunaxa 401 BC, Chaironeia 338 BC, Granikos 334 BC, Issos 333 BC, Gaugamela 331 BC, Hydaspes 326 BC, Raphia 217 BC (all playable from either side). Five of these track the career of Alexander the Great.
- 24 new Quick Battles (each playable from either side).
- Expanded Immortal Fire Custom Battles module includes all 105 army lists from Rise of Rome and Immortal Fire.
- Expanded Immortal Fire Sandbox Campaigns module includes all 105 army lists from Rise of Rome and Immortal Fire.
- 4 new historically-based campaigns: Xenophon, Philip of Macedon, Seleukos I Nikator, Seven Hills of Rome. (Alexander the Great's battles are covered in the Epic Battles).
- 1 what-if campaign: Alexander the Great (what he might have done next if he had not died in 323 BC). (His historical battles are covered in the Epic Battles).

With the armies that come with the DLC, your ancient wargaming is now endless. You also get a what-if campaign of Alexander. This postulates that he did not die in 323 B.C. He was already contemplating conquering at least some of Arabia.
The Persian Immortals are here, as are the Macedonian Silver Shields. You can recreate battles between Carthage and Syracuse or Pyrrhus. The armies of Greece in the Peloponnesian War are also here for your gaming pleasure.
The base game Field of Glory II is so versatile that all of the DLCs that came with its older brother Field of Glory I can, and probably will, be added to its portfolio. As you can see, the ancient army list is now up to a whopping 105. For various reasons, I did not play Field of Glory I much at all. This is not the case with Field of Glory II, and now with the DLCs starting to come, it will be hard for me to tear myself away from the game.
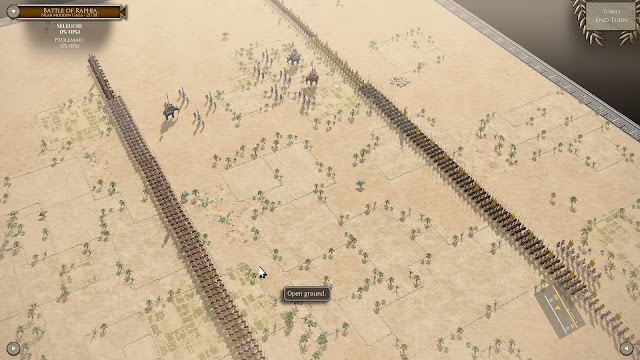
The AI in the game is as good as the one in one of their other titles 'Pike and Shot'. The graphics in Field of Glory II are amazing. Field of Glory II is driven by a long standing table top miniatures set of rules. So it not only looks like you are playing miniatures, you really are. I just lost a game of the battle of Raphia to the AI.

Playing as the Seleucids, who are on the right hand side of these pictures, I thought that I could crush the Ptolemy left flank before my left would be in too much trouble. What I should have done was to refuse my left and let the Ptolemaic right hook catch nothing but air. I did somewhat destroy their left flank, but not before they had inflicted more casualties on my left. I would like to show you pics, but I had a senior moment and was using the print screen button instead of F12. Sorry, I didn't have time to re-fight the battle. So I just took some shots of the setup of the forces once I realized my mistake.

With the release of The operational Art of War IV and Field of Glory II, among others, Slitherine/Matrix certainly have given us wargamers a plethora of gaming. Now, their sister company Ageod has to get going and release 'The Wars of Succession' so I can get my early 18th century itch scratched.


This just went up on the Slitherine website. It is an announcement about the new field of Glory II 'TT' mod. The 'TT' stands for table top. This adds an immense amount of units etc. to the game. It is not necessary to own 'Immortal Fire' for the mod, but it can only make this great game better.
FIELD OF GLORY II “TT MOD” - DESIGNER NOTES FROM PAUL ADAWAY
This mod greatly expands the units in Field of Glory 2. I am calling it the TT Mod. “TT” because I have got most of my inspiration from the original Field of Glory Table Top army lists. I have added back into the lists a lot of the units from the tabletop version that were left out of the PC version of the game. The mod will come in two forms, a sandbox campaign and a skirmish module (with SP and MP versions).
Nearly all nations have their own specific Pike Phalanx. I have created lots of extra Heavy and Light Cavalry units to replace the ubiquitous vanilla versions. Unfortunately I have no 3D modelling skills, but a lot can be done with new textures, new alpha layers and modding the animation/effects unit.txt files.
I have not modded game play in any way. All unit stats are consistent with the vanilla game. I was tempted to put in my Elephant mod, that I have used in some of my scenarios (i.e. Apollonia), but at the moment it is not included. If I get positive feedback about it, I may add it in later.
This is what is new in the mod:
New army lists:
"Indian (Royal) 500 BC – 180 BC",
"Indian (Royal)179 BC – 319 AD",
"Indian (Republican) 500 BC – 180 BC",
"Indian (Republican) 179 BC – 319 AD",
The vanilla Indian list has been split into 4, the Republican armies having no elephants, and the early lists having no light horse archers.
“Georgian 331 BC – 252 AD”,
The vanilla Iberian list has been renamed as Georgian to stop confusion with the “Spanish” Iberians, who now have their own list.
“Iberian 300-10 BC”,
“Celtiberian 300-10 BC”,
“Lusitanian 300-10 BC”,
The Spanish list has been split into the three main tribal groups.
"Pyrrhic (in Italy) 280-272 BC",
"Pyrrhic (in Greece) 280-272 BC",
The Pyrrhic list has been split into two.
“Achaian League 280-209 BC”,
“Achaian League 208-147 BC”,
“Achaian League 146-146 BC”,
“Aetolian 280-146 BC”,
“Boiotian League 280-271 BC”,
“Boiotian League 270-246 BC”,
“Boiotian League 245-146 BC”,
“Athenian 280-146 BC”,
“Eleian 280-146 BC”,
“Spartan 280-228 BC”,
“Spartan 227-222 BC”,
“Spartan 221-146 BC”,
The Hellenistic Greek lists have been split into several state specific lists.
“Gallic Lowland Tribes 300-201 BC”,
“Gallic Lowland Tribes 200-101 BC”,
“Gallic Hill Tribes 300-201 BC”,
“Gallic Hill Tribes 200-101 BC”,
“Gallic Lowland Tribes 100-50 BC”,
“Gallic Hill Tribes 100-50 BC”,
“Gallic Lowland Tribes 390-301 BC”,
“Gallic Hill Tribes 390-301 BC”,
The Gallic lists have been split into separate ones for lowland and hill tribes.
“Galatian 280-279 BC”,
“Galatian 278-228 BC”,
“Galatian 227-63 BC”,
The Early Galatian list has been split into three era specific lists.
“Graeco-Bactrian 250-211 BC”,
“Graeco-Bactrian 210-130 BC”,
The Graeco-Bactrian list has been split into two era specific lists.
“Carthaginian 235-201 BC”,
“Carthaginian 200-146 BC”,
The late Carthaginian list has been split into a Second Punic War and Post Second Punic War list.
“Kushan 130 BC – 24 AD”,
“Kushan 25 AD – 476 AD”,
The Kushan list has been split into two era specific lists.
“Indo-Skythian 95 BC – 24 AD”,
“Indo-Skythian 25 BC – 50 AD”,
The Indo-Skythian list has been split into two era specific lists.
"Parthian (Saka campaign) 129 BC – 129 BC",
The Parthian Saka campaign gets it's own list.
“Athenian 550 BC – 461 BC”,
“Corinthian 550 BC – 461 BC”,
“Boiotian League 550 BC – 461 BC”,
“Aetolian 550 BC – 461 BC”,
“Akarnanian 550 BC – 461 BC”,
“Phokian 550 BC – 461 BC”,
“Syracusan 550 BC – 461 BC”,
"Greek (Western) 550 BC – 461 BC",
"Greek (Asiatic) 550 BC – 461 BC",
“Athenian 460 BC – 381 BC”,
“Corinthian 460 BC – 381 BC”,
“Boiotian League 460 BC – 381 BC”,
“Aetolian 460 BC – 381 BC”,
“Akarnanian 460 BC – 381 BC”,
“Phokian 460 BC – 381 BC”,
“Syracusan 460 BC – 413 BC”,
"Greek (Western) 460 BC – 381 BC",
"Greek (Asiatic) 460 BC – 381 BC",
“Athenian 380 BC – 281 BC”,
“Corinthian 380 BC – 281 BC”,
“Boiotian League 380 BC – 281 BC”,
“Aetolian 380 BC – 281 BC”,
“Akarnanian 380 BC – 281 BC”,
“Phokian 380 BC – 281 BC”,
"Greek (Western) 380 BC – 281 BC",
"Greek (Asiatic) 380 BC – 281 BC",
The Classical Greek lists have been split into several state specific lists.
“Carthaginian 550-411 BC”,
Extended Early Carthaginian list back to 550 BC.
“Spartan 461-381 BC”,
“Spartan 380-281 BC”,
I have split the late Spartan list into two.
“Seleucid 300-280 BC”,
“Seleucid 279-206 BC”,
“Ptolemaic 320-280 BC”,
“Ptolemaic 279-167 BC”,
“Macedonian 320-280 BC”,
“Macedonian 279-261 BC”,
The early Seleucid, Ptolemaic and Macedonian lists have been split into pre and post 280 BC lists. To reflect a number of changes that happened around that date: availability of Celtic mercenaries, shielded heavy cavalry, Thureophoroi replacing Iphikratean Hoplites.
"Spartan (2nd Invasion Peloponnese) 369-368 BC",
The Spartan army at the time of the 2nd invasion of the Peloponnese gets its own list with Spanish and Celtic troops provided by Syracuse.
"Achaemenid Persian (Gaugamela) 331-331 BC",
"Achaemenid Persian (Bessos) 329-329 BC",
Two new campaign specific lists for the Achaemenid Persians.
"Syracusan (Agathokles in Africa) 310-307 BC",
A new campaign specific list for Syracuse.
“Eumenes 321-316 BC”,
A new army list for Eumenes.
"Greek (Xenophon) 401-399 BC",
A new army list for Xenophon's March of the Ten Thousand.
Some changes to vanilla side names, and 15 new ones added. In some cases giving unique side names to some vanilla armies that share with other nations in the vanilla game:
IDS_SIDENAME_36,“Skythian”,
IDS_SIDENAME_38,“Iberian”,
IDS_SIDENAME_600,“Celtiberian”,
IDS_SIDENAME_601,“Lusitanian”,
IDS_SIDENAME_602,“Rhoxolani”,
IDS_SIDENAME_603,“Achaian League”,
IDS_SIDENAME_604,“Aetolian”,
IDS_SIDENAME_605,“Boiotian”,
IDS_SIDENAME_606,“Athenian”,
IDS_SIDENAME_607,“Eleian”,
IDS_SIDENAME_608,“Saka”,
IDS_SIDENAME_609,“Sertorian”,
IDS_SIDENAME_610,“Corinthian”,
IDS_SIDENAME_611,“Akarnanian”,
IDS_SIDENAME_612,“Phokian”,
IDS_SIDENAME_613,“Eumenes”,
IDS_SIDENAME_614,“Xenophon”,
Some existing units have been renamed, of these the two Greek cavalry units have new textures:
IDS_UNITNAME18, “Numidian Light Javelin Horse”,
IDS_UNITNAME21, “Gallic Armoured Cavalry”,
IDS_UNITNAME34, “Iberian Scutarii”,
IDS_UNITNAME38, “Veteran Greek Armoured Cavalry”,
IDS_UNITNAME104, “Greek Armoured Cavalry”,
New units, the vast majority with new textures:
IDS_UNITNAME401, “Italian Armoured Cavalry”,
IDS_UNITNAME402, “Italian Citizen Hoplites”,
IDS_UNITNAME403, “Eastern Irregular Foot”,
IDS_UNITNAME404, “Eastern Light Javelinmen”,
IDS_UNITNAME405, “Eastern Massed Archers”,
IDS_UNITNAME406, “Eastern Light Archers”,
IDS_UNITNAME407, “Eastern Light Javelin Horse”,
IDS_UNITNAME408, “Ligurian Spearmen”,
IDS_UNITNAME409, “Apulian Cavalry”,
IDS_UNITNAME410, “Italian Veteran Armoured Cavalry”,
IDS_UNITNAME411, “Tarantine Light Javelin Horse”,
IDS_UNITNAME412, “Illyrian Spearmen”,
IDS_UNITNAME413, “Thracian Armored Cavalry”,
IDS_UNITNAME414, “Macedon Chalkaspides Phalanx”,
IDS_UNITNAME415, “Macedon Peltastai Phalanx”,
IDS_UNITNAME416, “Macedon Agema Phalanx”,
IDS_UNITNAME417, “Macedon Guard Xystophoroi”,
IDS_UNITNAME418, “Seleucid Chalkaspides Phalanx”,
IDS_UNITNAME419, “Seleucid Argyraspides Phalanx”,
IDS_UNITNAME420, “Seleucid Xystophoroi”,
IDS_UNITNAME421, “Agema Cavalry”,
IDS_UNITNAME422, “Companions”,
IDS_UNITNAME423, “Ptolemaic Regular Pike Phalanx”,
IDS_UNITNAME424, “Ptolemaic Agema Phalanx”,
IDS_UNITNAME425, “Ptolemaic Xystophoroi”,
IDS_UNITNAME426, “Mercenary Galatian Warband”,
IDS_UNITNAME427, “Ptolemaic Guard Cavalry”,
IDS_UNITNAME428, “Egyptian Levy Pike Phalanx”,
IDS_UNITNAME429, “Hispanic Heavy Cavalry”,
IDS_UNITNAME430, “Hispanic Light Cavalry”,
IDS_UNITNAME431, “Celtiberian Warband”,
IDS_UNITNAME432, “Caetrati light javelinmen”,
IDS_UNITNAME433, “Heavy Caetrati”,
IDS_UNITNAME434, “Pontic Levy Pike Phalanx”,
IDS_UNITNAME435, “Tarantine Pike Phalanx”,
IDS_UNITNAME436, “Pyrrhic Agema Cavalry”,
IDS_UNITNAME437, “Pyrrhic Pike Phalanx”,
IDS_UNITNAME438, “African Light Javelinmen”,
IDS_UNITNAME439, “Libyphoenician Armoured Cavalry”,
IDS_UNITNAME440, “Euzonoi light javelinmen”,
IDS_UNITNAME441, “Greek Pike Phalanx”,
IDS_UNITNAME442, “Early Cataphracts”,
IDS_UNITNAME443, “Armenian Levy Pike Phalanx”,
IDS_UNITNAME444, "Raw Hastati/Principes",
IDS_UNITNAME445, “Pedites Extraordinarii”,
IDS_UNITNAME446, “Roman Armoured Cavalry”,
IDS_UNITNAME447, “Soldurii”,
IDS_UNITNAME448, “Gaesatae”,
IDS_UNITNAME449, “Bactrian Light Horse”,
IDS_UNITNAME450, “Graeco Bactrian Pike Phalanx”,
IDS_UNITNAME451, “Iranian Lancers”,
IDS_UNITNAME452, “Graeco Bactrian Xystophoroi”,
IDS_UNITNAME453, “Graeco Bactrian Cataphracts”,
IDS_UNITNAME454, “Spartan Pike Phalanx”,
IDS_UNITNAME455, “Freed Slave Pike Phalanx”,
IDS_UNITNAME456, “Numidian Foot”,
IDS_UNITNAME457, “Libyan Foot”,
IDS_UNITNAME458, “Civic Militia Light Javelin Horse”,
IDS_UNITNAME459, “Seleucid Cataphracts”,
IDS_UNITNAME460, “Indo Greek Armoured Cavalry”,
IDS_UNITNAME461, “Indo Greek Pike Phalanx”,
IDS_UNITNAME462, “Cretan Levy Foot”,
IDS_UNITNAME463, “Nubian Mercenary Cavalry”,
IDS_UNITNAME464, “Graeco Bactrian Pike Phalanx”,
IDS_UNITNAME465, “Chalybes Spearmen”,
IDS_UNITNAME466, “Pontic Chalkaspides Phalanx”,
IDS_UNITNAME467, "Germanic Warband (Loose Order)",
IDS_UNITNAME468, "Germanic Warband (Close Order)",
IDS_UNITNAME469, “Galatian Warband”,
IDS_UNITNAME470, “Pontic Imitation Legionaries”,
IDS_UNITNAME471, “Macedonian Armoured Cavalry”,
IDS_UNITNAME472, “Macedonian Guard Cavalry”,
IDS_UNITNAME473, “Macedon Leukaspides Phalanx”,
IDS_UNITNAME474, “Ex Seleucid Pike Phalanx”,
IDS_UNITNAME475, “Freed Helot Pike Phalanx”,
IDS_UNITNAME476, “Arab Light Javelin Horse”,
IDS_UNITNAME477, “Perioikoi Hoplites”,
IDS_UNITNAME478, “Spartiatai Hoplites”,
IDS_UNITNAME479, “Gladiators”,
IDS_UNITNAME480, “Persian Heavy Chariots”,
IDS_UNITNAME481, “Phrygian Foot”,
IDS_UNITNAME482, “Phrygian light javelinmen”,
IDS_UNITNAME483, “Raw Hoplites”,
IDS_UNITNAME484, “Lydian Raw Hoplites”,
IDS_UNITNAME485, “Lydian Light Cavalry”,
IDS_UNITNAME486, “Lydian Light Chariots”,
IDS_UNITNAME487, “Thracian Swordsmen”,
IDS_UNITNAME488, “Citizen Hoplites”,
IDS_UNITNAME489, “Greek Cavalry”,
IDS_UNITNAME490, “Armoured Spartiatai Hoplites”,
IDS_UNITNAME491, “Spartiatai Hoplites”,
IDS_UNITNAME492, “Saka Foot”,
IDS_UNITNAME493, “Phoenician Marines”,
IDS_UNITNAME494, “Armoured Theban Hoplites”,
IDS_UNITNAME495, “Theban Sacred Band Hoplites”,
IDS_UNITNAME496, “Theban Hoplites”,
IDS_UNITNAME497, “Theban Pike Phalanx”,
IDS_UNITNAME498, “Carthaginian Sacred Band”,
IDS_UNITNAME499, “Poeni Cavalry”,
IDS_UNITNAME500, “Italian Mercenary Hoplites”,
IDS_UNITNAME501, “1st Class Roman Spearmen”,
IDS_UNITNAME502, "2nd & 3rd Class Roman Spearmen",
IDS_UNITNAME503, “Mixed Class Roman Spearmen”,
IDS_UNITNAME504, “4th Class Roman Foot”,
IDS_UNITNAME505, “Roman Cavalry”,
IDS_UNITNAME506, “1st Class Latin Spearmen”,
IDS_UNITNAME507, "2nd & 3rd Class Latin Spearmen",
IDS_UNITNAME508, “Mixed Class Latin Spearmen”,
IDS_UNITNAME509, “4th Class Latin Foot”,
IDS_UNITNAME510, “Italian Cavalry”,
IDS_UNITNAME511, “1st Class Etruscan Spearmen”,
IDS_UNITNAME512, "2nd & 3rd Class Etruscan Spearmen",
IDS_UNITNAME513, “Mixed Class Etruscan Spearmen”,
IDS_UNITNAME514, “Etruscan Cavalry”,
IDS_UNITNAME515, “Devoted Foot Spearmen”,
IDS_UNITNAME516, “Etruscan Light Chariots”,
IDS_UNITNAME517, “Etruscan Axemen”,
IDS_UNITNAME518, “Crescent Shield Spearmen”,
IDS_UNITNAME519, “Greek Light Javelin Horse”,
IDS_UNITNAME520, “Iphikratean Hoplites”,
IDS_UNITNAME521, “Theban Sacred Band Hoplites”,
IDS_UNITNAME522, “Italian Veteran Armoured Cavalry”,
IDS_UNITNAME523, “Italian Citizen Hoplites”,
IDS_UNITNAME524, “Guard Apple Bearers”,
IDS_UNITNAME525, “Persian Guard Lancers”,
IDS_UNITNAME526, “Illyrian light javelinmen”,
IDS_UNITNAME527, “Spartan Armoured Cavalry”,
IDS_UNITNAME528, “Rowers disguised as Hoplites ”,
IDS_UNITNAME529, “Foot Companions Phalanx”,
IDS_UNITNAME530, “Hypaspists Phalanx”,
IDS_UNITNAME531, “Companion Cavalry”,
IDS_UNITNAME532, “Agema Cavalry”,
IDS_UNITNAME533, “Thessalian Armoured Cavalry”,
IDS_UNITNAME534, “Agrianian Light Javelinmen”,
IDS_UNITNAME535, “Accensi”,
IDS_UNITNAME536, “2nd Class Etruscan Pilum Foot”,
IDS_UNITNAME537, “3rd Class Etruscan Pilum Foot”,
IDS_UNITNAME538, “Antigonid Pantodapoi Phalanx”,
IDS_UNITNAME539, “Lysimachid Pantodapoi Phalanx”,
IDS_UNITNAME540, “Antigonid Veteran Phalanx”,
IDS_UNITNAME541, “Lysimachid Veteran Phalanx”,
IDS_UNITNAME542, “Eumenes Pantodapoi Phalanx”,
IDS_UNITNAME543, “Eumenes Veteran Phalanx”,
IDS_UNITNAME544, “Eumenes Argyraspides Phalanx”,
IDS_UNITNAME545, “Hypaspists Phalanx”,
This is absolutely amazing.
Robert


Follow Us