second chance games

Search This Website of delight

Showing posts with label Eastern Front. Show all posts

From The Realm of a Dying Sun Volume 1 by Douglas E. Nash Sr.  This is an amazing book from cover to ...

From The Realm of a Dying Sun Volume 1 by Douglas E. Nash Sr. From The Realm of a Dying Sun Volume 1 by Douglas E. Nash Sr.

For your Wargamer, Toy soldier collector, MiniFig collector, military history nut. Reviews, interviews, Model Making, AARs and books!

Eastern Front


From The Realm of a Dying Sun Volume 1

by

Douglas E. Nash Sr.


 This is an amazing book from cover to cover. The author not only shows you the IV SS-Panzerkorps from inception on August 5th 1943, to the end of the Battle of Modlin on November 25th 1944, he does it in spectacular fashion. You get to see the actual creation of the Panzerkorps from the ground up. From the paperwork that created the Panzerkorps, to the assigning of medical and all other staff, it is in this book. The first ninety pages are taken up by the organization and the actual officers who were to command the separate parts of the Panzerkorps. The rest of the book's 500 pages are taken up by the intensive fighting the Panzerkorps took part in on the Eastern Front. 

 The two Panzer Divisions that made up the Panzerkorps were the 3rd SS-Panzer Division Totenkopf, and the 5th SS-Panzer Division Wiking. Both of these divisions were already known for being in the thick of the battles on the Eastern Front. Their history after being coupled in the Panzerkorps only cemented their reputations. I think we should stop here to explain something. It is possible to read about the SS-Panzerkorps and be amazed at their level of battle-worthiness while fighting at extreme odds against the Soviets; however, you can still feel a revulsion at what the SS actually stood for. At this time of the war the reinforcements sent to the SS divisions were very rarely recruits, but ordinary Germans who had been drafted into the Armed Forces of Germany. This fact makes the actual exploits of the IV SS-Panzerkorps even more amazing. To be continually refilled with recruits and then able to give them the esprit de corps that the veterans had was pretty incredible.

 One of the more interesting claims by the author is that the Warsaw Rising did not really impact the German forces fighting off the Soviets that much. As a matter of fact, Field Marshal Model was actually using the IV SS-Panzerkorps at that moment to counterattack the Soviet forces attempting to capture Warsaw. 

 The book is an excellent overview of what it takes to start up an armored corps from scratch. If it showed only that, the book would be worth buying. Then the author goes on to show it fighting for its life in amazing detail. From the decisions taken at the highest levels to the actual stories of the men in the tanks and on the ground, it is an unparalleled work of military history. The book comes with a good amount of pictures of the officers and troops, along with some well done maps. It also comes with a glossary of German military terms. Thank you Casemate Publishers for letting me review this book, and I am anxiously awaiting Volume II. The fighting on the Eastern Front in 1944 is usually given the short shrift in books compared to the volumes written about the Western Front at the time.

Robert

First Look at the Upcoming 'Fire and Rubble' the First Module for  Combat Mission Red Thunder  Th...

First Look at the Upcoming 'Fire and Rubble' the First Module for Combat Mission Red Thunder First Look at the Upcoming 'Fire and Rubble' the First Module for Combat Mission Red Thunder

For your Wargamer, Toy soldier collector, MiniFig collector, military history nut. Reviews, interviews, Model Making, AARs and books!

Eastern Front


First Look at the Upcoming 'Fire and Rubble' the First Module for 

Combat Mission Red Thunder


 This is just a quick sneak peek at some screenshots of what Battlefront has been hard at work on. It is called 'Fire and Rubble', the first module for their Red Thunder game. Red Thunder is one of my favorite of the Combat Mission stable of games, and I am very happy to see that it is finally getting some love. So without further ado, here are the screens, and at the bottom will be some links for Battlefront games. 


 It is looking good, and please Battlefront keep your excellent games and modules coming!

Battlefront:
Combat Mission Red Thunder:

My review of the 'Rome To Victory' module for Fortress Italy:

My review of 'Shock Force 2':

Robert

Kiev '41 by VentoNuovo Games  The Germans have come a cropper against the Soviet Union in the southern part...

Kiev '41 by VentoNuovo games Kiev '41 by VentoNuovo games

For your Wargamer, Toy soldier collector, MiniFig collector, military history nut. Reviews, interviews, Model Making, AARs and books!

Eastern Front


Kiev '41

by

VentoNuovo Games


 The Germans have come a cropper against the Soviet Union in the southern part of their Barbarossa attack (the invasion of the Soviet Union) in 1941. The strongest elements of the Red Army are deployed here below the Pripyat Marshes. Even a few books have been written that put forth the idea that Stalin was getting ready to attack into Poland, Romania etc. If so, that would explain the huge amount of soldiers, planes, guns, and tanks to be found in the Southern area. The German intelligence before Barbarossa was either non-existent or denied, again depending upon what book you read. The commander of the German Army Group South, von Rundstedt, was in for a rude awakening as far as Soviet might. Contrary to most histories, the largest tank battle on the Eastern front was not at Kursk in 1943, but around Dubno in 1941. The Germans were faced with what seemed like the zombie apocalypse. No matter how many Soviet tanks or soldiers they destroyed, more seemed to rise from the ground itself in front of them. The German Luftwaffe was the only part of the German war machine that successfully completed most of its task. The Soviet Air Force was almost completely destroyed, mostly on the ground, during the first month of fighting. This allowed the Luftwaffe almost free reign to assist the German ground forces in the South for a few months. Enough of the background; you are given the task to defend Mother Russia, or as the German commander to kick the rotten door in. The only thing is the door has been reinforced by iron bars behind the rotten facade. On to the Game!


 This is the third part of VentoNuovo Games trilogy of Operation Barbarossa in 1941. The other games are Leningrad '41 and Moscow '41(they also released a game on the Stalingrad Battle - Stalingrad Inferno). Kiev '41essentially uses the same rules and precepts of the other games. The rules have been continually updated, but if you have played either of the other two games you will be up and playing in no time. The timeline of the game is from June to December 1941. It comes with five scenarios. These are:

1. Les Preludes - July 1941
2. The River - August to the end of September 1941
3. The Pocket - September to the end of October 1941
4. The Snow - November to the end of December 1941
5. The Southern Struggle Campaign Game - July to the end of
     December 1941


 The map is a large card stock one of the Southern area of operations in 1941. The map goes from Tarnopol in the Northwest, to Maykop in the Southeast, and from Constanta in the Southwest, to Novi Oskol in the Northeast. The map (86cm x 62cm) is colorful and is like a cross between a glossy and flat finish. You do have a choice of buying either a Mounted Map or a larger (103cm x 77cm) Gortex Map. The normal map is just as good looking as the other maps that VentoNuovo produces, and I have almost all of their games. It is an area map, and for the most part you will have enough room in each area for both side's units to be in. There are some choke points that you will have to squeeze the units in if you have large scale battles in them. The blocks are small at 15mm x 15mm, which is almost too bad. The reason being is that the stickers are very well done and a pleasure to look at, especially if you invest in the Icon Stickers. I realize that the size of the blocks is so you do not need a map that takes up an entire table. You have to make some adjustment somewhere. All of the components are up to the usual great standard of VentoNuovo Games. The player's aid cards are all card stock and done up the same way as the map. When you open the box you will be happy if not delighted with what you find. This is what comes with the game:


 1. 1 Mapboard (heavy stock, laminated 86x62 cm)
 2. 1 Rules manual
 3. 2 rules Summary and Player's Aids
 4. 151 PVC Stickers
 5. 2 Orders of Battle/Scenario Setup Aids
 6. 56 Wooden Markers: 1 Weather Forecast Marker (yellow
      cylinder); 1 Initiative Disc (large green disc); 2 Weather 
     Markers (white discs); 4 Soviet Supply and Control Discs 
     (1 yellow, 1 orange, 1 light blue, 1 blue); 13 Artillery Fire
     Markers(squares, 2 blue, 4 black, and 7 red); 20 Area
     Control Markers (cubes, 10 red, 10 black); 5 River
     Crossing Markers (blue cubes); 10 Out of Supply Markers
      (white cubes);

 7. 112 wooden Block Counter Units (black, blue, brown, green, 
      tan, and red blocks)
 8. 8 Luftwaffe Bombers (8 black discs)
 9. 2 Soviet Fleets (red plates)
 10. 4 Dice 


 This is the scale of the game:

Map: 1:1,000,000 (1cm = 10Km)
Unit Size: Axis Corps/Divisions; Soviet Armies/Corps/Divisions
Time: 1 turn = 1 Month
Players: 2 Players, with excellent solitaire suitability


  Sequence of Play

1. Logistics Phase (2,3,4,5, and 6 turn)
2. Impulse Phase (player with the initiative first)
    Bad weather Check (2nd impulse of October)
    Supply Check (always)
    HQ Activation Segment (TI only)
    Command Segment (always)
    Combat Segment (TI and SI only)
    Blitz Segment (TI only)
    HQ Deactivation Segment (TI only)
    Isolation Check (always)
    Exploitation (playing the Initiative Disc after a TI)
3. Final Phase

 I will use their own words to describe a turn:

"A Turn is made up of a variable number of Impulses, from a minimum of two, up to unlimited. When a new Turn starts, the player with the Initiative plays the 1st impulse, followed by the other player, and so on.
  A player may:
a. play a Strategic Impulse (SI) or
b. play a Tactical Impulse (TI) or
c. Pass
After two consecutive Passes (by the two players. one per player), the Turn ends and a new one begins."


 The game mechanics of the series is a lot different from what you have been used to in Eastern Front games. In other games there is a sheet where you place all of your reinforcements and they come automatically at the appointed time. In these games the reinforcements are randomly drawn from the Reinforcement Pool in a number equal to the player's Logistics Value. A lot of people might call this heresy. However, the one mechanic that this does enforce is complete randomness to every single game. It also makes it easier to play it solitaire. You will have no idea of what you are going to pull, or more importantly, not pull from the Reinforcement Pool. You check for reinforcements during the logistics phase, or you can use the Initiative Disc. There are Logistic Phases on turns 2,3,4,5, and 6. You have to choose to activate your Supreme Leader (Hitler or Stalin) to be able to draw reinforcements or replace steps on the HQ or unit blocks. Your Logistics Value is calculated by the Supreme Leaders points and your non-exhausted HQs along with enemy losses etc. Each block unit is also color coded as far as their strength. They can be either black, white, or red. Depending upon the unit's color, the cost for Replacement Points is different (1 for black, 2 for White, 3 for Red). One part of the rule is that, say you have 6 as your Logistic Value after calculating it. You then have a total of 6 for HQ regeneration, AND 6 for replacement points, AND 6 for reinforcements, not just 6 for all three. The weather will also affect your Logistic Value. For example, a snow turn will halve the Axis Logistic Value once you have added it up.  The Initiative Disc is pretty much a Nuclear Option for the player controlling it. Using it allows the player to 'play a Strategic Impulse', and 'play an Exploitation Movement after a Tactical Impulse'. This can easily be a game changer. The only problem being is that once used, the enemy player now gets control of the Initiative Disc to use at his discretion. This is also a big change from most games where initiative is determined at the beginning of each turn. So, the big question is, do I just hoard the Initiative Disc and not use it for fear of what my opponent can do with it, or risk using it?


 And the verdict is (drum roll please), another winner from VentoNuovo Games. This game, while using the mechanics of its older siblings, is in most ways a lot tougher nut to crack, at least in the beginning. The player will get to see exactly what Amy Group South was up against during Barbarossa. The components are second to none (especially if you avail yourself of the more expensive options). The gameplay is as usual a winner (when you have a winning combination, why change it). The addition of all of the randomness in the games, as mentioned, lead to each game being different. It also lends itself to solitaire play. This is a great selling point in this day and age. Thank you VentoNuovo for allowing me to review this game. Owners of the first two in the Barbarossa trilogy will be pleased to know that work is being done to make all three playable together. What a monster that will be!


 A whole slew of YouTube videos about the game:

VentoNuovo Games Kiev '41:

Robert


1914 Glory's End/When Eagles Fight by GMT Games  This game box actually contains two separa...

1914 Glory's End/When Eagles Fight by GMT Games 1914 Glory's End/When Eagles Fight by GMT Games

For your Wargamer, Toy soldier collector, MiniFig collector, military history nut. Reviews, interviews, Model Making, AARs and books!

Eastern Front


1914 Glory's End/When Eagles Fight


by


GMT Games


 This game box actually contains two separate games. Ted Raicer originally designed both for (sob) Command magazine. I don't have many of the Command magazines, but the few I have I keep pristine and they are some of my prized possessions. Mr. Raicer was like a prophet in the wilderness when he started designing WWI games. No one was interested in WWI; it was all static trench warfare without any room to maneuver or use any finesse. Oh, how wrong we were. World War I is actually one of my favorite eras to wargame, especially the Eastern Front. There you have sweeping and swirling campaigns. The first game, '1914 Glory's End', is about the first campaign on the Western Front of WWI. So it is about the German army's swing through Belgium to outflank the French and take Paris. This culminates with the 'Race to the Sea' and the 'Kindermord Bei Ypern' (The Massacre of the Innocents at Ypres). While history has taught us that the German reservists were actually closer to middle age, they were still massacred in droves. The second game, 'When Eagles Fight', represents the entire war on the Eastern Front. The chaotic nature of the first and second years of the war come through loud and clear.

 This is what is in the box for Glory's End:

One 34"x22" Map
Two countersheets
Two Player Aid Cards
One Pad of Roster Sheets
One Rules Booklet
One Mini-map 

 This is what you get for When Eagles Fight :

One 34"x22" Map
Two Countersheets
Two Player Aid Cards
One Rules Booklet
Two dice 

 GMT has done a complete overhaul of the original games. Not that the original versions were bad, but usually everything can be improved upon.

 Per GMT the difference from the Command version of 1914 Glory's End:

"The game scale is 9.5 miles per hex and three days per turn. The campaign game runs a full 30 turns, but the new edition will include not only a previously published mini-scenario on the Battle of the Marne, but a short ten turn campaign scenario covering the decisive opening weeks of the war. In addition the campaign games can be played in historical or free set-up versions."

 This is from GMT about the differences in When Eagles Fight:

 "But the new edition of When Eagles Fight is more than just a reprint of the original version. The Random Events Table has been exchanged for a system of random events chits allowing for more events. The effects if the Germans do not launch a Verdun offensive in France-which sometimes threw off the balance of the original design- have been revised. Changes in the stacking rules after 1914 more accurately reflect the effect of trenches on the course of the campaigns. And the map now contains the rail lines removed by Command from the first edition. The game also includes a short alternative-history scenario in which the bulk of the German army goes east rather than west in August 1914."


 This is the Turn Sequence for 1914 Glory's End:

I. Allied Player Turn A. Reinforcement & Replacement Phase (Not on Turn 1)
 B.  Entrenching Phase (Turns 10-30 Only)
 C.  Command Control Phase (Not on Turn 1)
 D. Strategic Movement Phase (Not on Turn 1)
 E.  Operational Movement & March Combat Phase
 F.  Prepared Combat Phase
 G. Attrition Phase (7.12)
 H. Allied Victory Check Phase (Not on Turn 30*) *  On Game Turn 30 make one mutual victory check at the end of the turn, adding in all conditional VPs at that time.
II. German Player Turn
 A. Reinforcement, Replacement & Withdrawal Phase (Not on Turn 1)
 B.  Entrenching Phase (Turns 10-30 Only)
 C.  Command Control Phase (Not On Turn 1)
 D. Strategic Movement Phase
 E. Operational Movement & March Combat Phase
 F. Prepared Combat Phase
 G. Attrition Phase (7.12)
 H. German Victory Check Phase (Mutual Check on Turn 30*)

 This is the Turn Sequence for When Eagles Fight:

The Russian Player Turn is the first each Game Turn. Exception: When play begins, the Russian Player Turn of Game Turn 1 is considered to have already taken place, so play begins with the “Central Powers Regular Movement Phase.”
 I. Random Events Phase (From Game Turns 5 to 24)
 II. New Units & Withdrawals Phase A. Russian  • Reinforcements  • Replacements  • Withdrawals B. Central Powers • Reinforcements  • Conversions  • Replacements  • Withdrawals III. Strategic Movement Phase
 A. Russian
 B. Central Powers
 IV. The Russian Player Turn
 A. Russian Regular Movement Phase
 B. Russian Combat Phase
 C. Russian Attrition Phase
 V. The Central Powers Player Turn
 A. Central Powers Regular Movement Phase
 B. Central Powers Combat Phase
 C. German OberOst Combat Phase
 D. Central Powers Attrition Phase
 VI. Victory Check (Game Turns 2, 6, 11, 15, 20, 24) 


 Both games are listed as a '4' on GMT's complexity 'Meter'. So, they are both easy to get into for the player, and a good step up for new gamers from introductory games. Yet, both still have all the bells and whistles that Grognards love, such as Forts, Cavalry, Strategic Movement, Sea Movement, etc. 

 In 1914 Glory's End the German Player, just as in real life, has to smash through Belgium and its forts as quickly as possible. The German player has a timetable that has to be met if he is to take Paris. The German Player is given the historical choice of invading Belgium or not. If the German Player does not invade Belgium, Britain is kept out of the war for now. If the German Player reaches 20 Victory Points, then Britain does declare war. So you have to juggle the pros and cons of invading Belguim. I think most of us budding generals will choose to follow Schlieffen's thoughts on the matter. The Alied Player must delay the German Player as much as possible. The game shows how the original distribution of the French forces leaves the German Player a small window of opportunity in Northen France. The Allied Player has to play for time until his forces can be moved into Northern France to stave off defeat. The start of trench warfare on the Western Front is very effectively shown by the game's rules.

 When Eagles Fight gives the armchair general the chance to fight the entire war on the Eastern Front in World War I. This game is a strategic one instead of operational like it's brother. In 1914 the roles are reversed in Northeast Germany. The German Player must play for time and avoid being crushed by the 'Russian Steamroller'. In the South the 'Central Powers' Player must decide what to do with the Austro-Hungarian army (although I doubt anyone could do as badly as Franz Conrad von Hötzendorf it's commander for most of the war). Luckily for the Central Powers Player he does not have to worry about Serbia, other than not being able to move the 2nd Austro-Hungarian Army on turn one. The Central Powers Player does have to worry about the Italian Front after turn seven. The game's Random Events are full of opportunities or disasters that both players must work around. The Russian Player is hamstrung by ammunition shortages, just like in reality. The Russian Player has to decide if and when he will go on the defensive and what to do on the German and Austro-Hungarian part of the Eastern Front. Luckily for the Russian Player, the game's rules show the lack of cooperation between the Central Power's armies. The Russian Player is hamstrung by ammunition shortages, just like in reality. The Russian Player also has to worry about the threat of revolution depending upon how the war is going for them. 


 The games do unfortunately come with the maps printed on each side of one sheet. This means that unless you copy one of the maps you can only setup one game at a time. The maps are, however, done in typical GMT Games fashion, meaning that they are very well done with all the tables etc. at your fingertips without making the map look too 'busy'. The counters are your typical 5-6-4 type using NATO symbols. They are 5/8" and are very easy to read, even for old eyes. The Player Aid Cards are also very well done. The components are all up to GMT Games standards.

 These games were one of the few that we could play about World War I when they were released. We now have a multitude of games we can play on the war. Some are much more complex than these two games but I think both games have withstood the test of time, and are still two of the best in depicting their different fronts and scales. The Random Events for When Eagles Fight are only that, and do not dive into the realm of fiction or non-plausible as some games do. Do yourself a favor and pick up this great bargain of two great games for really the price of one. Thank you GMT Games for allowing me to review both of these games.


Robert

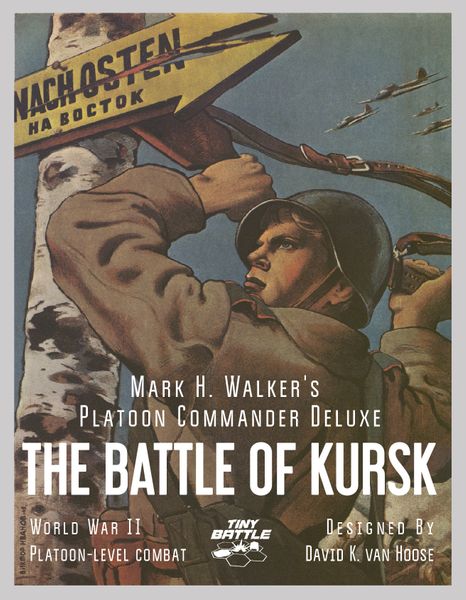
Mark H. Walkers Platoon Commander Deluxe The Battle of Kursk Tracks in the Mud The Battle of Kursk Strategy Guide by Fl...

Mark H. Walker's Platoon Commander Deluxe the Battle of Kursk With the Kickstarter Extras by Flying Pigs Games Mark H. Walker's Platoon Commander Deluxe the Battle of Kursk With the Kickstarter Extras by Flying Pigs Games

For your Wargamer, Toy soldier collector, MiniFig collector, military history nut. Reviews, interviews, Model Making, AARs and books!

Eastern Front


by


 It's big, bad, and beautiful. It is also very easy to start playing. Flying Pigs hits another one out of the park with this one. I was sent the entire Kickstarter kit and caboodle by Flying Pigs to inspect, thank you very much, you self-propelled porcines. I will go through the three pieces separately in this review. What I received was:

Platoon Commander Deluxe: The Battle Of Kursk
Tracks In The Mud
Platoon Commander Deluxe: The Battle Of Kursk Strategy Guide


 The first thing I noticed when  opening the box is how extremely well done all the components are. The next thing I did was to pick up what I thought would be a heavy sturdy many paged rulebook. Imagine my surprise when it turned out to be only nineteen pages long. Included in those pages are the twelve scenarios and the credits. The rules are only nine and a half pages long!!! How can a tactical game have only that many pages. Most tactical games have that many pages of errata. There are however many nuances in the rules that you have to carefully read. Take, for instance, one rule about stacking and movement. Rule 1.3 Stacking:
 "Up to two units may stack in a hex. Stacking limitations apply at all times". 
 This means that unlike many other games, stacking is not checked at the end of the turn. Only two units may be in any hex at one time during the full turn. So you cannot park two units in that hex, and then continue to move other units through that hex. So as the Strategy Guide says, "be careful about causing traffic jams". 


 You can see the sequence of play on the following sheet.


 This is what comes in the box:

252 colorful, one inch square die-cut counters
Two mounted 17" x 22" geomorphic game maps
18 playing cards
3 x player's aid cards
Full-color rules and scenario booklet


 The game plays like you would expect. The rules are easy to pick up, and you will be deciding the fate of your troops in Operation Citadel in  no time. Now, don't think that the brevity of the rules leaves you with a simple game. The rules and game give you the full panoply of a tactical World War II game. The cards can be used for barrages and for aerial strikes among other options. Here is a list of the card options.


 The game allows you to play with Tigers, Ferdinands, and Panthers along with the "animal killer" Su-152. So now we go onto the expansion Tracks in the Mud. Ah, the smell of cardboard representing heavy metal! This comes with this list of bad boys to play with:

Jagdtiger
King Tiger
Jagdpanther
T34/85
IS-3
IS-2
Pershing
Easy-Eight Sherman's
Two what if American versus Russian scenarios
Six scenarios in all


 This is just the icing on the cake. The addition of the ability to play with these monsters is a tactical dream come true. 


  With this already great pack you also get the The Battle of Kursk Strategy Guide. This guide is even longer than the rules and scenario booklet. Stacking, close assault, and fire combat etc. are gone through so that the player is spoon fed what he needs to know. Although to be honest, anyone who has played a tactical game or two should get the hang of the game in no time flat.


 The game play is abstracted so that it gives you a great tactical feel without getting all bogged down in the rules. The close combat rules seem to make a lot of sense. First, the attackers are not in the same hex like most games, so you can use units from multiple hexes to attack. The rules also give you a flanking bonus due to the multiple venues of attack. This would seem in line with real world tactical doctrine. The AFV combat also has some nuances that not only make gameplay faster, but just seem right.  What would you rather do on game night? Stare at the rules and fight over the rulebook or get to it? Those who love tactical minutiae should stay clear of this game. However, those of you looking for a good game that is tense, quick, and challenging, come on down. Simple, but deep tactics, and loads of new shiny AFVs to play with, what more do you want? You are free to argue to your heart's content about the various factors on the AFVs assigned by the designer. That is, once you have played it at least once. 

This is a link to game and expansion:

https://flyingpiggames.com/t/platoon-commander-deluxe

 Robert


 This is a blurb from the designer:


So, What's Different?
I hear that a lot. With all the tactical games on the market, what makes Platoon Commander Deluxe: Kursk different?
Clutterless counters. PCD:K uses color to determine a weapon's range. For example, an Armor Piercing factor printed on gold indicates that the weapon can fire normally at a target up to four hexes away.
Unique phasing. Players alternate attacking in the Fire Phase, but move all their units at once during the Movement Phase.
Flanking Friendly Close Assault Phase. Units do not enter the hex of the Close Assault target, but rather attack from adjacent hexes. This allows the attacker to not only amass the overwhelming odds needed to take that key position, but also attack from multiple directions, which provide a flanking bonus. Additionally, alternating attacks in the Close Assault phase allow defenders to conduct true spoiling attacks.
Ranged combat results are based not only an the target's armor factor and terrain, which determine the column on which the attack is executed, but also the target unit's morale which determines how many hits affected the target.
Artillery is card driven. Neither player knows the other's artillery capability by glancing at a scenario card. Artillery barrages are determined by Action Cards.
Action Cards. PCD:K is not card driven, but rather card assisted. The Action Cards provide artillery, rally units, provide combat bonuses, and even unexpected Opportunity Fire shots.
Focus and Aid Markers. These markers allow players to influence the battle much as their real life counterparts would. Players may choose to focus on a specific area, providing combat bonuses, or provide additional aid to those disrupted by fire.


Heroes of the Motherland With the add-ons Dark July 43 - X-Maps for Dark July 43 by Lock 'N Load Publishing ...

Heroes of the Motherland with add-ons Dark July 43 - X-Maps for Dark July 43 by Lock 'N Load Publishing Heroes of the Motherland with add-ons Dark July 43  - X-Maps for Dark July 43 by Lock 'N Load Publishing

For your Wargamer, Toy soldier collector, MiniFig collector, military history nut. Reviews, interviews, Model Making, AARs and books!

Eastern Front


 An Argosy of wargaming goodness arrived on my porch a while ago. There is just so much that comes with Heroes of the Motherland that I have a real problem figuring where to start, and what to write about. I received not only HOTM, but also two add-ons for it. They are  Dark July 43: The Battles for Prokhorovka Third Edition, and also the X-Maps for Dark July. 


HOTM Counters


 The Eastern Front in World War II is probably the one campaign that has more games, tactical, operational, and strategic than any other. The types of weapons and troops you can use in this game span the depth and breadth of the war. Tanks that were built before the war to King Tigers and JS-2s are present for your gaming pleasure.
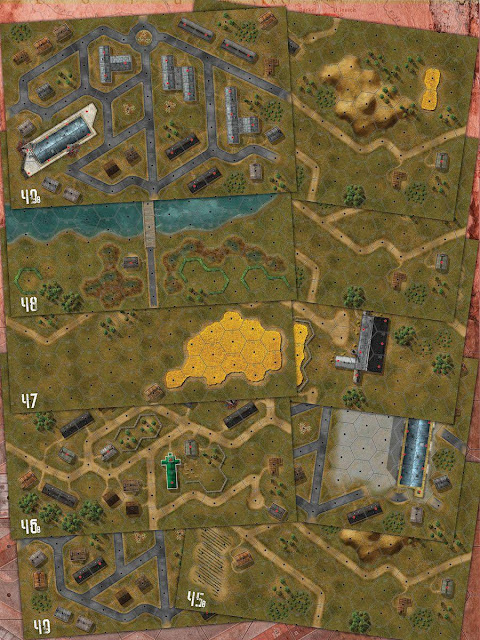


HOTM Maps


 LNL's premise for their tactical World War II era games is simple but breathtaking in scope. They have developed a core set of rules that span the years 1930-1959. This core set allows gamers to learn it, and then adds a few extra rules for each game. That means that gamers can game all of the conflicts and campaigns during those years with a single rules set. This has been tried in the past, but to my knowledge only for Ancient and Medieval gaming. The game scale is fifty meters wide to the hex. You play with squads, half-squads, and vehicle crews etc. 


Scenario

 The Core Manual is sixty-six pages long. However, do not be discouraged. It is written in large script and has many pictures and examples throughout. The Module Rules and Scenario Booklet really has only four pages of rules to learn. This is how encompassing the Core Rules are. They are also constantly being updated. The rules are up to version 5.0 now.

 The game comes with:

14 x Color Geomorphic  8.25 x 12.75 Maps.
5 x CounterSheets with over 550+ counters. 
1 x Color Core system manual featuring the latest v4.1 rules.
1 x Color Game Module rules,  Examples of play with 12 scenarios and One Campaign.
3 x 11 x 17 Player Aid Cards.
2 8 x 11 Player Aid Cards.
1 x Heavy Duty box.


HOTM Campaign


 The sequence of play is:

Rally Phase
Operations Phase
Fire Combat
Movement
Laying Smoke
Melee Combat
Administrative Phase


 I really like this system for tactical gaming. That does not mean that I do not own and like others. You can ask my wife. I think it is a losing proposition to compare games against each other. Much like a parent, you can find good and bad traits in your children, or a game's rules and mechanics. We are Wargamers, so we buy Wargames, many, many Wargames. Back to HOTM, the rules have been worked on to be streamlined and as easy to understand as possible. The setup of the rules and scenarios are done in a sequence to make it easier on the gamer to learn.

 The components that come with any Lock 'N Load game are some of the best on the market. The counters are extremely well done, and for those who cannot play without it, they come already clipped. Almost all of them fall out of the sprues with nothing extra stuck to them, or the need for cleaning them up. The maps are once again well done. They are on thick paper stock. Some people prefer mounted maps, but I can play on either surface without giving it a second thought. 


 The Dark July module adds in the seminal fight between the SS divisions and the Russian forces rushing forward to make sure that operation Zitadelle is a German defeat. The module is a bit misnamed because there is also a scenario about the Battle for Ponryi on the northern flank of Zitadelle. So this means you can see how effective Ferdinands really were. There are only two pages of rules that come with Dark July, and some are optional. This is what Dark July comes with:

1 x 34 x 22 Color Map.
2 x Color Geomorphic 12.75 x 8.25 Maps.
1 x Counter Sheet with over 80+ counters.
1 x Color Module rules, Examples of play with 6 Scenarios.
1 x 8 x 11 Player Aid Cards.


                                  Dark July Counters


 The X-Maps add-ons that Lock 'N Load sells are worth every penny. The maps are the same as the ones that come with the module, for example Dark July. The difference is that the hexes are much larger. The standard maps in Dark July are 8.25" X 12.75". The X-Maps come in at 11" X 17".
So you get the same maps, but are able to play with less clutter, which is always a good thing. So if you do buy any of the main game's modules I suggest that you do invest in the X-Maps for it. The X-Maps for Dark July contain:

One Color Two Part 51 x 33 Map.Two Color 11 x 17 Maps.

One 11 x 17 Player Aid Card.


 Great system, great components (besides the lack of mounted maps, which again I could care less about), if you have any interest in the theater I think it is time and money well spent investing in HOTM. Thank you Lock 'N Load for letting me review all of this gaming goodness.

X-Maps Size

Robert
hpssims.com