second chance games

Search This Website of delight

Here's a link to Part 1 in case you missed it. The Kingdom of Graykeep has already plunged head first into a new age of progr...

Shadow Empire Preview: The Graykeep AAR Part 2 Shadow Empire Preview: The Graykeep AAR Part 2

For your Wargamer, Toy soldier collector, MiniFig collector, military history nut. Reviews, interviews, Model Making, AARs and books!


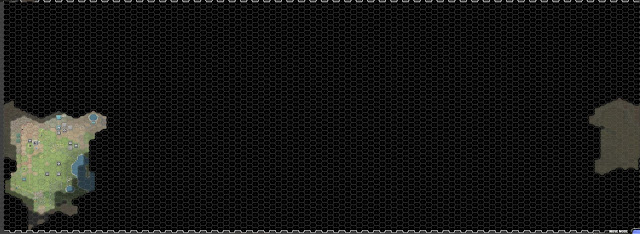
The Kingdom of Graykeep has already plunged head first into a new age of progress, rapidly expanding its borders out from admittedly modest beginnings. As king, I have many decisions to make that will shape our future, but I am assisted by numerous advisors and staff. I plan to continue recruiting additional bureaucrats and using them to head new councils like one focused on foreign affairs, and another in charge of military research. The more funding we can provide to these councils, the more able they will be to provide me with stratagems, cards which I can play, at the cost of political points, to do things like improve diplomatic ties with a hostile neighbor, or change the tactics of individual military HQ's. Below you can see the world as we know it right now. There is much that is unknown to us, but we know that there is opportunity out in that darkness that exceeds the dangers.


Militarily, our situation is stable but still requiring my full attention. We face two points of contact with non-aligned rebel forces, and are being pressed by a minor power that has no respect for our expansion. Previously, I was able to secure basic diplomatic contact with my neighbors to the north, west, and south, and we all agreed to fix the borders in their current state. While future conflict is almost certainly still on the table, I feel comfortable enough to concentrate my forces to the east, where we have numerous active enemies, and several small towns up for grabs.


Amania (dark blue) makes a fatal error. Going beyond occupying the nominally unclaimed territory between us, they send their soldiers behind my lines, cutting off the bulk of my forces from supply just as we finish off the last of the rebels in the area. This will not stand! I have no choice but declare my first war. I had hoped to avoid this inevitability for as long as possible, at least until we had established a more robust economy, capable of replacing the losses we were sure to take. Fortunately, most of my forces still consist of militia, units which are able to replenish themselves without input from my government. On the downside, these forces are weak in terms of firepower. Our enemy appears to have two units of mechanized walkers to our single walker, but overall we have much greater numbers. 

First things first, I have my troopers breakthrough and take back control of the road leading back to Hawking, our capital. This will ensure my forces aren't soon starved for supplies. Then we begin working on turning the tables against the Amanians by cutting off a couple of their units and eliminating pockets one by one. Alas, the major power to the north, Zelaria, chooses this as an opportune time to shake us down for money. Their leader threatens war if we do not pay tribute. With their forces stationed on the border, immediately ready to attack my army from the rear if they so choose, I decide to pay the tribute that is demanded, and avoid a two front war. I've read that those never go well. 


Although it stings to lose a large portion of our hard earned cash, it will hopefully buy us time to deal with one enemy before facing another. My forces pounce on Amania forces and press them back. Unfortunately, their walkers are just as formidable as our lone steel beast, able to turn back entire companies of militia riflemen on their own. Our greater numbers soon tell, however, and we are able to isolate and defeat them piecemeal. The next turn, I notice that our borders in that area show only non-aligned rebel forces. Whether we have defeated them entirely, or if their rear was overrun by rebels, is unclear. The only thing that matters is that our front is secure and our forces can continue to advance and liberate more towns in the area. I order the expansion of our road network so that our supplies can flow to the front. With the foreign affairs situation relatively stable for the moment, more attention can be paid to internal matters. 

One matter , for example, is whether or not we should interact with an ancient AI computer found in some deep ruins back in Hawking. The machine predates all of our known histories and could give us some interesting revelations. It could cause us problems as well. In the spirit of boldness, I direct our scientists to turn it on and see what happens. The AI gives us a lengthy lecture on ethics, and then supplies the knowledge needed for us to produce more effective firearms. The ethics we take into consideration, the firearms we prepare for production.


Production, however, requires resources, and my advisors point out to me that we won't be able to build any of the nice new things they have been researching until we secure our own supplies of them. Namely, metal. Our militia army is fine for now, but if we want to build anything better, we need metal. Our dirt roads are fine for now, but if we want to build railroads, we need metal. If we want to expand our industrial base, again, metal. To that end I stop by the economic council meeting and direct them devote the vast majority of their funding to prospecting for resource deposits. The more passive approach I've taken so far has not yielded any results. I have the military continue to explore and bring more territory into our kingdom, hopefully increases the chances we will strike metal.

In the meantime I've begun buying metal on the limited open market. We have an excess of funds at the moment, since we aren't building much of anything (need metal!) and so buying it outright will get things moving for now.  I quickly learn that buying too much of one resource causes the price to sky rocket for a time, and vice versa, selling a large amount of food, something we have quite a lot of, causes its price to plummet. As a result, the amount of metal we can acquire at any one time is limited, but useful for finishing some construction projects we started long ago but never had the resources to complete.

There is one nice economic development, the first private construction pops up near the agricultural domes we built early on. A town to support the workers pops up on its own accord, and begins paying taxes. An excellent development indeed! 


Another internal matter comes across my desk. This one is a bit of a touchy subject. The Church of Syndic, by far the most popular cult within my kingdom, requests a hefty donation from the state to fund their ultimate project. They want to create some sort of super computer to solve all of our problems. Such cults are fairly common on our world, though each has its own objectives. Quite a few of my own staff are Syndic sympathizers, and they would be quite upset with me if I refuse, not to mention the church itself being cross with me. They point out that they have donated multiple priests to augment my forces by strengthening their resolve, at no cost at all to the state. In the back of my mind, I am wary of using such priests in our forces, I can't help but think that seeding too many of them among the companies might lead to some sort of insurrection. That said, they do greatly benefit the troops they accompany. 

I decide it is in the best interest of keeping everyone happy to make the hefty donation. That's money we could have used to buy more metal and other resources, but a kingdom is more than just buildings and roads, it must have a happy populace as well. Zelaria, our most powerful neighbor, is at it again with the demands for tribute. I can see their forces build up along our border at times, making everyone nervous. I tell them to shove off this time and the next. Not only because our forces now stand ready to repel any invasion, but also because I don't have that kind of money to spare at the moment.


Our investment in prospecting efforts finally pays off! A metal deposit is found in the southern region of the kingdom. Now I just need to order the construction of a metal mine and we will be in business! No more shortages, no more buying at exorbitant prices on the open market! We can really make some progress with a steady flow of materials. Oh, what's this? My construction chief is telling me that the site is too far away and outside of our logistics network. Apparently building such a facility in the middle of nowhere with no way to transport workers and construction equipment to the site is a problem. Ah, well, that makes sense. I consult the writings of my father (the game manual) and realize that I have indeed been neglecting the logistical side of things. Simply building dirt roads is not enough it seems. I order the construction of some transportation centers to get trucks on the road and supplies moving. Once again I'm forced to buy metal on the market to speed up the process. 

In the meantime, I look out across my kingdom. We have expanded further than I ever expected by this point. So far out in fact that our units can't be supplied and we begin losing contact with a few of them completely. Logistics really are important it seems! Being a king in this world is far more involved than simply ordering armies around. It requires management of trade, diplomacy, logistics, personal relationships, and more, in far greater detail than one might ever suspect. It looks like I've still got a lot to learn, but things are going quite well in the Kingdom of Graykeep. For now...


Shadow Empire is coming out soon from Slitherine Games. Stay tuned for more coverage of this fascinating title!

- Joe Beard

HOW THE WEST WAS SAVED: THE RUSSO-POLISH WAR FROM STRATEGEMATA Another fairly obscure war for many of us in the Western hemisphe...

HOW THE WEST WAS SAVED HOW THE WEST WAS SAVED

For your Wargamer, Toy soldier collector, MiniFig collector, military history nut. Reviews, interviews, Model Making, AARs and books!

HOW THE WEST WAS SAVED:
THE RUSSO-POLISH WAR
FROM
STRATEGEMATA

Another fairly obscure war for many of us in the Western hemisphere of Europe.  However, it is a topic I already had familiarity with through two prior gaming treatments. The first was the original GDW game Red Star/White Eagle [note the just released remake by Compass Games] and later The Eagle and The Star from the small Polish company Leonardo Games , which also underwent a superlative physical revamp some years ago by Academy Games under the title, Strike of the Eagle.  

As I have both the latest from Compass Games and Academy Games' very different system, I was delighted to be sent a review copy from the Polish company, Strategemata, of their game on the topic with its exceedingly long title, How the West was Saved: the Russo-Polish War!  

I admit that I had strong expectations that I would enjoy the game.  since the designer was Stephen Pole and the system used here is a modification of the one used in his three games covering WWII.  The latter are all in my collection and provide a highly playable and enjoyable system.  Also, they were all produced by White Dog Games and so I was equally interested in how the change to the Polish company Strategemata would affect the look of the components.

I'm pleased to say that the evolving and improving quality noted in my recent review of The Last Vikings continues.  First to be noted is a very clear and simple mounted map.  

On the left edge there is an equally clear and eminently readable terrain chart and on the right edge is the Turn display with the crucial number of Resource Points for each player, the list of victory point cities, the turn sequence and a large bold graphic explaining a unit's various factors. Though not usually over-keen on terrain displays on the playing board, perhaps because so many are not user friendly, this is so easy to read and commit to memory that I was more than satisfied.

The counters, though of fairly standard quality, are crisp and clean and hark back to the style of earlier days with three simple numbers for unit strength and movement.  Rather strangely, there is a single larger number at the top of the counter which is a unit's strength when acted from its top, facing edge, while the smaller number in the lower left hand corner number is for attacks across the over five sides of the hex.  This seems a strange differentiation both for the period in history and for the operational/strategic scale of the game.  The third number on the bottom right is the familiar standard movement allowance.


The red counters are the Russian forces and the white ones the Polish, while a small number in yellow with a blue band at the top are the Ukrainians, while the two red units with a green stripe are Russian-supporting Lithuanians.


One of the key points looking at the small number of units involved, especially compared with the numbers in Steve Pole's other three games using this system, is the much greater fluidity of play.  This is even more strongly seen from the set-up and reinforcement chart and the picture given, when the game is set up!
This really is low counter density and a very open situation at the beginning of the game.
The game turn sequence is very simple and straightforward.  Each turn begins with both players playing an Event card and these really are a lovely production from the picture on the front of each card to the wide range of historical images and illustrations from posters on the reverse.
Card Front
Reproduction of propaganda poster
Historical photograph
Here is the full sequence:

Random Events
Determine Resource Points
Depot Actions
Check Supply Status
Combat Unit Movement
Combat
Restoration of Units
Reinforcements

Much of this is quick and easy both to learn and to play.  So, Random Events as we've seen is simply each player playing and revealing a single card which will be executed at the appropriate stage that it applies to.

The number of each player's Resource Points is printed on the Turn Track and supplemented by the roll of two dice: one white D6 - a positive die and one red D6 - a negative die.  So each player may gain or lose from -5 to +5.  On the whole, there aren't major swings, but the possibility is always there.  A nice simple effective rule.

It is these Resource Points that are the heart of this system engine. First of all they are the "currency" to pay for virtually everything that happens in the game, starting with the next Phase: Depot Actions.  Here each player places alternately one new Supply Depot and, like nearly every single action in the game, the moment you decline to take the appropriate action for a Phase then you cannot take any more of that type of action.  Once both players have finished laying new depots you've got to pay for all that are now on the board out of your Resource Points. This chain of Supply Depots is absolutely vital, for in the next Phase [Check Supply Status] every full strength unit that is now out of supply is flipped to its weaker side and if already flipped is now eliminated!  Easy, effective and DEADLY!

Next comes Combat Unit Movement which again is done alternately.  Each stack of units that is moved costs one Resource Point and all the units chosen in a single stack must end in the same hex.  With resource points in short supply, there won't be too many movements made, which is another factor that makes this game run smoothly and swiftly.  Next comes Combat, again executed by each player alternately choosing to carry out one combat at a time and once again if a player declines to carry out a combat then they cannot carry any more later in the Phase. This cat and mouse, back and forth interaction is one of the elements that I relish strongly.
A close up of a small part of the battlefield
Finally, after Combat there is the opportunity to restore weakened units i.e. those that have been reduced to their weaker side can be flipped back to full strength.  Just one problem of course, to do so needs some of those precious Resource Points and, if by now you have some of these left, then you're probably managing better than I usually do!

The only things you don't pay for are your reinforcements and the limited number of four redeployments per player.  Finally, the rules conclude with a rare few Special Rules.  Overall, though the rules have relatively few illustrations and everything is in simple black and white, the clarity of the rules means that these are all that's needed.

Combat, though straightforward, is the section that needs most attention, because there are some interesting and fairly novel elements.  Attacks must be made through the top facing edge of the unit which shows a unit's stronger value and an attack is a single stack against a single stack.  Both players add up the total strength of their units in the single stack and add 1 strength point per additional stack adjacent to the defender. Only the attacker may attempt to bring in the full strength of one additional adjacent stack, but this is at the risk of a D6 die roll.  Roll 5/6 and the additional stack is added in; 3/4 the stack isn't added: BUT  roll 1/2 and the whole attack is cancelled!   To the final total strengths of each side is added the roll of a single D6.

Losses are dependent on the differences between scores.  For the loser it's half that number rounded down, for the attacker it 's half the number of the defender's losses,  This is with the added restriction that neither player can suffer more hits than the number of units inflicting the damage.  To give a simple example: if the difference were 6, then the loser of the combat would provisionally suffer 3 hits, but if the winner had only two units in his stack, then the most the loser would suffer would be 2 hits.

The other rule that needs care, and I say this as someone who has considerable familiarity with this system and the rules, is the use of depots and supply.  However, the care is not in understanding the rules [they are very clear], but in carrying them out.  Too often in the past, when playing Steve Pole's games set in WWII have I discovered that I've miscalculated the distance. As the distance restrictions are even more stringent in How The West Was Saved to reflect the earlier historical period,  you need to be even more careful.

For me, this is an excellent addition to those games already using this system.  It has the lowest counter density of them all; as a result it plays even faster.  The situation is more fluid and open and provides a good balance of attacking and defending for both players.  What's more in these unusual and constrained times where solo play is the enforced norm [unless you're playing online], it plays very well solitaire with only the play of Event cards being slightly problematic.

So many thanks once more to Strategemata for supplying my review copy.

Approx.  $65

Available in the UK : £59.95 from Second Chance Games


These are interesting times we’re living in. As a gamer you may think that our options to play games are limited but in my experience no...

Caylus 1303 Caylus 1303

For your Wargamer, Toy soldier collector, MiniFig collector, military history nut. Reviews, interviews, Model Making, AARs and books!

These are interesting times we’re living in. As a gamer you may think that our options to play games are limited but in my experience nothing has been further from the truth. Not only are there fantastic online resources to help us connect virtually to one another, there is also a growing demand from non-gamers to connect, for contact, conversation and to alleviate the monotony of whatever situation they find themselves locked down in.  We’re perfectly placed as a community to help many people in our own small way.

Prior to the lockdown in the UK I was sent a copy of Caylus 1303 to review. I am writing this as part review and part-a list of resources (at the end of the review) I’ve used to play games online.

Caylus 1303 is a revamp of the eponymous and genre-defining worker placement classic Caylus.  If you’re not familiar with the original, it has spawned a sub-culture within the gaming community of bland-euro art, mean-looking dudes on boxes and arguably the most infamous character in gaming – the Provost! I’ve only played the original a handful of times but it still sparks memories of being screwed over, or inflicting the same screwage onto my friends… I’m pleased to say all this is still present in the new streamlined version of the game.

Gameplay


Caylus 1303 is played over 9 rounds, in which players are trying to get the most prestige points (i.e. victory points) by contributing to building the town of Caylus and constructing the castle.  Thematically this makes perfect sense as the town of the same name in France is famous for its castle.  However, in the game, this theme feels loosely tacked on as a mechanism to place workers and screw with your opponents.
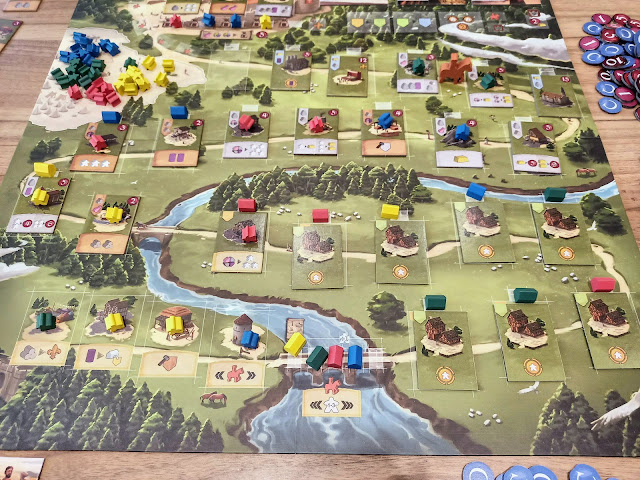
Initial setup for 4 player game.
The game has a randomised setup and a variable turn order, two features that are a must for me when it comes to theme-light euros.  The setup is relatively quick and aided by excellent graphic design throughout the game.  After your first game, you’ll be able to setup the board in a matter of minutes.

One huge benefit of virtual gaming is that the chore of setting up any game is largely removed from the players. I am very experienced in using both Vassal and Table Top simulator both of which have free modules for nearly every board game you can imagine (at least ones you’d want to play!). TTS is much newer than vassal and has a much larger user-base and I’m constantly amazed at how quickly game modules are available in the workshop. Vassal caters more to the typical GMT-crowd
Table Top Simulator - opening splash
Caylus 1303 (a relatively new game has an unofficial port on TTS but only with lower resolution scans. I still managed to convince a few gaming buddies to give it a try and I found it perfectly playable through the TTS module. The easiest (and best) solution I have found to talk to my opponents is through Discord. This enables multi-player comms and text chat if you’re so inclined.  If you’re just playing 2 player games then Zoom is free to use and has a useful screen-sharing option.

During the lockdown I have played online with gaming opponents, Caylus 1303, Mage Knight, War of the Ring, Pendragon, Undaunted Normandy, Combat Commander Europe.  However, what has surprised me most is how up for games ‘non-gamers’ are during these times. I have had countless family and social group quizzes, I have had success playing Scattegories, played a Fake Artist Goes to New York, hosting a murder mystery evening, pub quizzes and even a scavenger hunt for kids.  I have used Zoom for a lot of these but also Kahoot and Quizziz to run the quiz nights.
Some of the Characters
Each player in Caylus 1303 will also have a character with bonus abilities on certain actions. This, however, is not guaranteed to stay with you long.  There is no text anywhere on the board or components so I couldn’t tell what the characters are (without referring to the rule book) but once again the icons are brilliantly designed and intuitive.  I know it’s cheaper to translate a game with no text (just the rulebook) but I would have liked a characters name on their cards at least…

Each round of the game consists of 4 phases.  Planning, Activation, Delivery and Stewardship.
Each player places out their workers on free spaces containing a building during the Planning Phase. Trying to plan out your actions based on resources you get later in the round shouldn’t be difficult…but I have not played any game where I didn’t mess this up at least once. The number of workers you have each round will also change allowing you to do more actions or saving them to move the Provost even more...
First Round Planning Completed
Activation resolves each worker’s action space (building) from the beginning of the road to the space just before the Provost.  The first four buildings are fixed in each game and provide their specific effect.  An additional 10 buildings are placed on the road at the beginning of the game.  These comprise 8 starter buildings, 1 wood building and 1 stone building. The road will have 13 empty spaces in which players can build. All buildings provide also provide prestige points as well as their effect.

The best thing about Activation, and really what makes this game Caylus is moving the Provost.  Any workers on buildings after the Provost will not get their effect.  Each player will get the opportunity to move the Provost in player order up to 3 spaces, forward or back. There is also a building that can move the Provost and also one of the Character’s abilities moves the Provost as well. Buildings later on the road, will generally have more powerful effects but their use is not guaranteed. Placing your workers on them is a risky but rewarding business.
A small selection of the Starting, Wood and Stone Buildings and Monuments
Moving the Provost in front of your opponents is a delicious feeling, unfortunately it’s going to happen to you too. But this is where the fun is, if you don’t like confrontation in your games then this is not for you.

The Delivery Phase allows players to sacrifice their resources to build the castle gaining 5 prestige points and a favour.  In order to go here, each worker will generally need three different resources so it won’t be used too much in the early game, but it is a powerful way to gain lots of prestige points later on.

During the Stewardship Phase owned buildings can be changed to residences, thereby removing the effect, and residences can be changed into Monuments (lots of Prestige points).  However, one side-effect of this is that there are fewer spaces on the road for workers to go.  This combines with generally more workers being available to players later in the game.  This surplus is tailor-made to spend on moving the Provost.  However, in order to gain the most points you will need to pivot away from Residences (gaining more workers) and into Monuments (gaining more points).
4 Players in the 8th (penultimate) round
The winner of the game is the player with the most Prestige points at the end of the ninth round.

Components


Once again I have nothing but praise for the physical components.  The card is lovely and thick and punched out cleaner than almost any other punchboard I can remember.  The wooden components are nice and chunky and their shape represents the resources.  The art and graphic design is clean, consistent and nice to look, but the stand out feature for me is the iconography. They are largely intuitive and once a player is familiar with the rules, sufficiently describe the actions.
Fantastic insert
The insert is a rare example of a publisher actually providing something that I’m not going to chuck out straight away.  It even handles vertical storage without plastic bags which I’m particularly grateful for.

Criticisms


I don’t think I can recommend the two-player game.  At two players, the take-that decision and screwage gets a bit samey.  The designer has compensated the more empty board by starting with more workers but this doesn’t really compensate and it feels quite a different game.  At three players the board isn’t quite as busy but still quite fun.  At five it runs a little long but is still fun – I wouldn’t recommend a 5 player game for your first time out.
A clean and short rulebook

Conclusion


This is a beautiful game and one I’m glad to play and introduce to anybody. I would even recommend this as a gateway game to a non-gamer if they’re not going to be too precious about being attacked (albeit indirectly by the Provost) at every opportunity.  After the first round, the rules are easily remembered and the only repeated questions were around the construction site and favours, neither of which I’ve detailed here but they’re not hard to grasp.

Waiting to play IRL
I like the randomised setup and variable turn order in this game.  These elements are only possible with finely tuned mechanics, else the game will break more often than it’s fun.  That is definitely not the case here, with over 30 years of playtesting (the original Caylus) this revamp has streamlined the original and maintained the essence of what made Caylus, Caylus.  The mechanics and gameplay are rock solid and it will be a welcome addition to my next game night.  Fingers crossed it comes soon.

Stay safe and see you on the other side

I’d like to thank Asmodee for sending this review copy.  Many local game stores will still have this in stock although they may not be open currently, their online shopping portals may still be open. You can use this link http://www.findyourgamestore.co.uk/ to find and support them during this difficult time.


Designer: William Attia
Play time: 60-90 minutes.
Players: 2 – 5 players

Online gaming resources

BGGs distance gaming guide https://boardgamegeek.com/wiki/page/Distance_Gaming_Guide (a comprehensive how- to)
Vassal Engine http://www.vassalengine.org/ (program to run board game modules)
Vassal Mods http://www.vassalengine.org/wiki/Category:Modules (repository of many board games)
Table Top Simulator https://store.steampowered.com/app/286160/Tabletop_Simulator/ (cross platform application that has many users) and it’s workshop where all the games are: https://steamcommunity.com/app/286160/workshop/
Tabletopia https://tabletopia.com/ (browser based alternative to TTS)

Chat and Comms

Discord https://discordapp.com/ (gaming focused communication platform)
Viber https://www.viber.com/en/ (Open source secure comms and video calling)
Zoom (Easy to use software with unlimited calls for 1 to 1 video-conferencing i.e. wargaming)

Victoria Cross II Deluxe Edition by Worthington Publishing  Many of us grognards are of an age where 'Zulu&#...

Victoria Cross II Deluxe Edition by Worthington Publishing Victoria Cross II Deluxe Edition by Worthington Publishing

For your Wargamer, Toy soldier collector, MiniFig collector, military history nut. Reviews, interviews, Model Making, AARs and books!


Victoria Cross II Deluxe Edition

by

Worthington Publishing


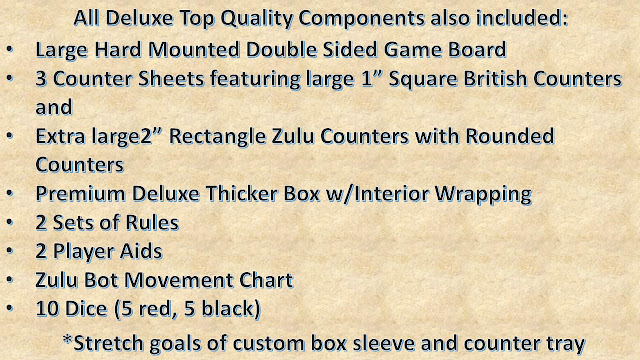
 Many of us grognards are of an age where 'Zulu' was one of the first war movies we saw, if not the first. It portrays the desperate fight at Rorke's Drift in 1879. A Zulu (in reality AmaZulu, the people of heaven) Impi, or division did not arrive in time to take part in the Battle of Isandlwana. Ignoring their king Cetshwayo's orders, they crossed the Blood River looking for a fight. The Impi decided to attack the British garrison at Rorke's Drift. The Zulu people under their king Shaka had conquered a large swathe of territory in Southern Africa in the early 19th century. The line of kings continued with Shaka's half-brothers Dingane and the Mpande. Cetshwayo was the son of Mpande who had won the throne in a Civil War of the Zulus. The Zulu Nation and its Army had been honed to a fine degree by Shaka in his rise to fame. The army was divided into Impis, or divisions. The favorite tactic of the Zulus was the "Horns of the Buffalo". The head of the buffalo, or the main body, would hold the enemy in place, while the horns enveloped them on each flank. Simple, but extremely effective facing enemies without guns. The Zulus under Shaka had developed in close fighting tactics using their short stabbing spear, the "Iklwa", and large cowhide shields. The Zulu Nation, under Cetshwayo, had been attacked by the British and invaded by them under trumped up reasons, in reality a land grab. The British in their hubris believed that their soldiers' rifles and bayonets were more than a match for the Zulu Impis. A part of the British invasion force (roughly 1300 men) had been left at Isandlwana to keep contact with British Natal. A Zulu Army of roughly 20,000 men was surprised by British scouts. The Zulus were not going to attack that day, but the British scouts forced them into action. The British force was destroyed by the Zulus, but not until it had caused the Zulus thousands of casualties. The Zulus themselves were impressed by the British, and describe the British prowess by saying "like lions they fought". So, there is the history of the game's events; onto the game itself. Here is what you get in the oversized box:


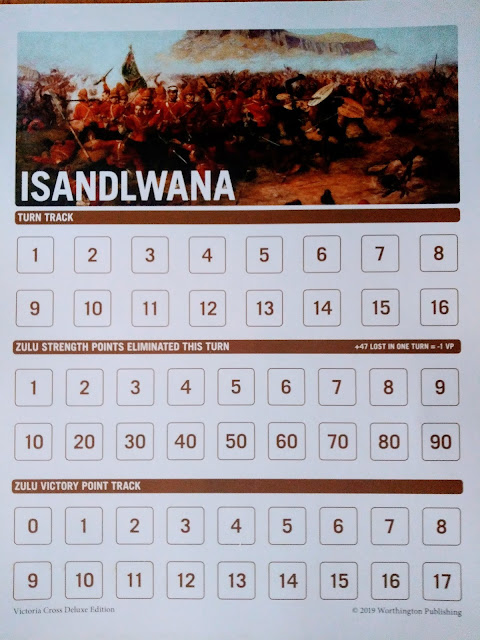
 This box contains two games in one package. You get to refight Isandlwana and also Rorke's Drift. Worthington Publishing describes the quality of the game's components as "Top Quality", and I couldn't agree more. The counters are extremely large and seem to be produced with the eyesight of us older grognards taken into account. In addition, the counters are almost like little paintings of the soldiers. One thing about the counters, be careful and do not try to move the cardboard sprues too much. The counters pop free so easily that you will end up with them strewn across the floor. The maps for both games are done up in period style, and are pretty much devoid of anything but parchment color. This is not a bad thing at all, and I think it actually gives the player more immersion into the game. The different areas of the maps are well defined and the description of the areas are in large print. It is almost like Worthington Publishing had designed the game to be played in a grognard's old folks home. I really love the style of the maps. They are divided into areas and not hexes, for both movement and combat. As we have seen, there are two Player Aids done in color and like the other components large in print and easy to read. There is also a Turn Record and Victory Point Sheet that has one battle on each side. The Rulebook is sixteen pages long and among those are four pages of play examples. The actual rules for both games take up only eleven pages. The rules are concise and easy to understand. This is another kudo for Worthington Publishing. The fact that they were able to develop rules for both highly dissimilar games (one a large scale battle and the other almost down to single soldiers) in one short rulebook is pretty amazing. In the rules an item in a red box is just for Rorke's Drift, and one in a brown box is only for Isandlwana. This saves a lot of wasted space and ink by having the rules written together instead of duplicating most of them.


 All of the Worthington Publishing Games seem to work on the KISS (keep it simple stupid) formula. They usually have very few rules and are easy to learn and start playing. However, they are not beer and pretzel games. All of their games that I have played, including this one, are deep and leave the player plenty of choices to make. I have used the analogy before, but it is still good, chess has very few rules, but do not tell me it is a simple game. This goes for the Worthington Publishing games also. The game rules include a few optional starting rules for Isandlwana. In a great move for players, both games can easily be played solitaire by playing both sides, but they have also included a full 'bot' allowing the game to control the Zulus in both battles. I have played a few computer games on Isandlwana, but never a boardgame about it. I am what I would call a historical boardgamer, meaning that either the game gives plausible historical outcomes, or back on the shelf it goes. Having a deep interest in Zulu history and both battles, I can unequivocally state that both games pass my litmus test for games. The one caveat I would add is that it is hard for the British player to win in the Isandlwana game if he starts with the historical unit setup. The British had no idea until the last moment that a large force of Zulus was anywhere near. It takes a good cardboard general to pull out a victory. If the players use the 'free form' British setup of the units it does make it an entirely different game. With the free form setup it takes into account that British regulations were to laager (circular defense learned from the Boers) their camps. This makes the British nut much harder to crack for the Zulus. Even though Rorke's drift is 4,000 against 125, I find that the game is a toss up.  


You can see where I put one of the counters in upside down


 As mentioned, the game is played out in area movement. The line of sight rules are pretty easy to follow. To ensure there is no confusion, the line of sight to each zone on the board is written in the zone. Not only that, but it also shows you the range to each zone that has line of sight. Leader rules for both sides give added immersion to the game, especially in the Rorke's Drift game. One of the interesting rules covers 'Zulu Random Fire'. Some of the Zulus were equipped with firearms. This is the sequence of play:

"Each game is 16 turns. Isandlwana are all day turns. Rorke’s
Drift is divided equally between 8 day turns and 8 night turns.
Within each turn the players use the following sequence of play:
A. RORKE’S DRIFT - BRITISH REPLACEMENTS - The British
player adds replacements.
B. British Move - The British player may move any and all
units following the movement rules.
C. ZULU MOVE - The Zulu player receives replacements and
then may move any and all units following the movement
rules.
D. BRITISH FIRE COMBAT - The British player conducts fire
combat following all fire combat rules. All losses caused
by fire combat are taken immediately.
E. ZULU RANDOM FIRE - The Zulu player conducts his
random fire combat. All losses caused by fire combat are
taken immediately.

F. MELEE COMBAT PHASE - Both players conduct simul-
taneous melee following the rules for melee combat.

Losses caused by melee combat are not taken until after
both players have completed their melee attacks.
G. BRITISH BAYONET CHARGE - The British player declares
and completes bayonet charge with British leaders plus 4
SP following the rules for bayonet charge.
H. RORKE’S DRIFT - HOSPITAL PHASE - The Zulu player

checks to see if a fire starts or spreads in the hospital ac-
cording to the fire spread rules.

I. CHECK VICTORY – Check if victory conditions met.
J. END TURN - If victory conditions not met, end turn and

move game turn marker 1 space, go back to step A."


 One of the odd things about both battles are that both have had excellent movies made about them: the aforementioned 'Zulu' about Rorke's Drift, and Zulu Dawn about Isandlwana. You don't get too many games that have movies about them, let alone two in one box! Thank you Worthington Publishing for letting me review another winner from you. There were some comments made about the grammar usage in the rulebook. I understand some people may have a problem with it. My editor (read spouse) is a stickler for it, and refuses to allow certain papers into our household because of it. Do not worry, I did not allow her to read it. On the other hand, I may or may not notice, but it doesn't disturb me in the least. I had no trouble at all reading the rulebook. 


Worthington Publishers website:

Victoria Cross II Deluxe Edition website:

Day breaks over the kingdom of Graykeep. Well, calling it a kingdom would be a generous statement. Once...long ago, before the Dissoluti...

Shadow Empire Preview: The Graykeep AAR Part 1 Shadow Empire Preview: The Graykeep AAR Part 1

For your Wargamer, Toy soldier collector, MiniFig collector, military history nut. Reviews, interviews, Model Making, AARs and books!


Day breaks over the kingdom of Graykeep. Well, calling it a kingdom would be a generous statement. Once...long ago, before the Dissolution War, it truly was a magnificent place known around the system. Or so the records and traditions passed down to me by my father say. Truth be told, no one can say for sure what the kingdom was like, or even how long it has been since those glory days. The darkness of endless war and devastation ruined our world, and all of the others known to man during the Dissolution War. A complete loss in communication and trade with other worlds, a regression of technology, and a total breakdown in society has left little standing in the ashes. My family line and a few thousand loyal followers have clung to each other in the city of Hawking and its surrounding villages for centuries, holding out against famine and raiders alike. Now, on the day of my coronation, as I take my deceased father's place, we are poised on the edge of a new era.


Our resource situation, after years of progress and setbacks, has finally become stable enough to support a small standing army of militia, including vehicles for some units. These forces are divided up into several smaller battalions and one, relatively, powerful offensive brigade. We know little about the world around us, only that there are green prairies to our east, a desert to the west, and mountains in between. Ancient roads, now reduced to dirt paths and traveled only by the occasional merchant, still exist and will serve as our means to resupply the troops we send afield. We do not know how far these roads extend, and will likely need to invest in building new ones as we go. 

When it comes to neighbors, we do know the names of several similar city states like ourselves, but no one is certain where their capitals lay or what their exact dispositions are towards us. The little news we have received indicates that other places are in a similar situation as us, able to field small forces to defend their territory and perhaps expand. In the gaps are roving bands of militia, holding onto whatever they can, but without any proper government. Something is in the air, a feeling of tension as if a spring were coiled, we are not the only ones ready for action. 

Our goal is to take back what was once ours, and return civilization to this planet. We will do so by force if needed, by diplomacy when possible. This objective will require us to find new resources and invest them in new infrastructure. To that end I direct my secretary to form an economic council and appoint a promising young staffer to lead it. This council will focus on finding resources and developing new technologies to exploit them. There are many other councils that will need to be formed as we go, using some of our political resources, but each one added gives us many new avenues for improvements.


Our initial ventures afield go as expected. Troops are sent down the known roads and link up our capital with several nearby villages, adding to the kingdom right away. We also stumble across the wreckage of an advanced vessel from the Galactic Republic days. Somehow, despite the centuries of time that have passed, this wreck remained hidden in a ravine and was never picked over by scavengers. Studying it will greatly help our research efforts as we work to recreate the more advanced technology of old.

As we also expected, before too long our troops begin to push up against the forces of our neighbors, who also seem to be on the move. There are no official borders established between us, as they are as much in the dark as we are. Not looking to immediately get in a fight, I pull my forces back to hold onto the towns we have found, and secure the precious advanced wreckage. In the south, our troopers do not encounter any opposing forces and continue on, locating additional villages to bring into the fold. While adding all of this additional population is the goal of our mission, it also means that we have many more mouths to feed. I decide to invest in a domed farm right outside Hawking, where water is plentiful. I also direct our work crews to start their first infrastructure project by building a short new road out to a village that we have discovered. Hopefully this will be the first step towards a globe spanning network centered around our kingdom of Graykeep.


Over the next few months, we bide our time, investing in new government councils while getting a better view of the big picture. We now have a rough idea of the forces facing us from the west, as they continue to encroach on our territory but do not yet attack. Our scouts, initially skittish, reporting the potential foes to be overwhelming in numbers, but cooler heads have prevailed and now we see that their forces in similar to our own, and we have reinforcements we can bring to bear if needed. The troops we sent south find some working automated machine gun bunkers from the Republic days and bring them online. Unfortunately, these units cannot be moved easily, and we do not yet have to means to redeploy them.

As most of our forces are currently occupied with staring down the neighboring army, I decide to invest in an independent company of buggies that can serve as fast scouts to continue exploring the unknown territory around our kingdom.


Over recent months we have tried to sneak a spy into the lands of Limehead, which have learned is the name of the nation to our west. Their forces have not retreated from the border, and I would like to know what lies beyond their lines.The first two attempts to send over a spy fail, but on the third try they are successful, we expect reports to filter back soon. Our scout company of fast buggies is almost complete, and will move out shortly.

We did get some more good news from our soldiers to the south, after some more poking around in the ruins, they recovered a fully functioning mechanized walker from the Galactic Republic era. Our rudimentary militia, equipped with only basic weapons like rifles, machine guns, and RPG's, will be happy to have this war machine bringing its additional firepower to bear. Knowing that we have so many neighbors around, and hoping for better options to interact with them, I decide to form a foreign affairs council. This will generate more stratagems for us to use in diplomacy.


The Emperor of Limehead, apparently tiring of the ongoing situation between our forces, requests that we formally recognize the current lines as the legitimate border between our nations. With the information reported by our spy, I can now see that there is mostly only mountains and desert out there, and so I decide that peace would be prudent at this time. The lands to our east seem far more promising and hospitable. Recognizing the border improves relations between us and Limehead, so I feel safe to remove the bulk of my forces from that area and send them up the road to the northeast. Our first foray into that area encountered numerous groups of unaligned militia and it is likely we will need to fight to take the resources in that area.


Tragedy strikes the scout company we sent into the wilderness to our east where no roads existed. They find a couple of villages, but upon entering one they were ambushed by the local militia forces and nearly wiped out! Of course, this will not stand. I divert some of my troops to secure those villages and the nearby sea. We will need to begin a large road project here if we want to truly control this area. Sending my forces so far into the countryside with no road for logistics is a bad combination. Running low on supplies renders even the best troops vulnerable and useless.


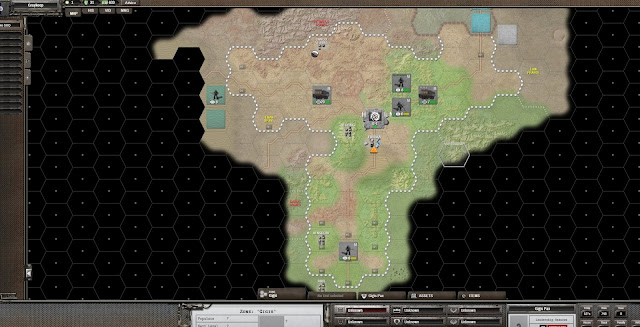
To the northeast, things get hot but go our way as our better equipped army is able to crush several units of unaligned militia. I've begun to consider these forces rebels more than anything else. They should know by now that these lands belong to Graykeep and standing against us is futile. There is another minor kingdom here as well, and we are able to gets eyes on their capital. Like with Limehead, we choose to respect their borders for now so that they will not molest our advances east. After breaking through the rebel lines and driving away most of their forces, we send the battle walker forward to quickly capture a couple more villages. Nothing quite like seeing such powerful ancient technology bearing our banners to bring people into the fold. 


Some of the rebel forces refuse to retreat, and are pounded by our artillery, infantry, and the battle walker. With so much firepower on our side, coming from multiple angles, we are able to inflict heavy casualties while sustaining almost none ourselves. Our forces grow confident with each victory, and kingdom of Graykeep continues to expand under my watch. At home, some new technologies and ideas are discovered, giving us new options and improving the efficiency of my government. I decide to form multiple councils focused on research and development so that we may maintain an advantage over our rivals. I suspect that the going is about to get a lot tougher.


This article is the first in an AAR series I'm doing as a way to preview the upcoming Shadow Empire. This game has really grabbed my attention with its fascinating premise and deep gameplay. It is from creator of Advanced Tactics Gold and the Decisive Campaigns series. At a glance, Shadow Empire bears some resemblance to those games, and does use a similar combat system. But. This game has so much going on that really sets it apart. The manual includes a dozen pages of back story giving context to the setting and the goes on for another 160 pages detailing all of the various systems and mechanics driving this game. It's a lot to take in, and I'm learning as I go. That's why I choose to do this AAR, to chronicle a game so you can get an idea of what it is like, and to give me time to really sink my teeth into the gameplay and the fun setting. I think this game certainly bears a close look from all wargamers and strategy fans. More to come soon!


- Joe Beard


hpssims.com