second chance games

Search This Website of delight

The Great Crisis of Frederick The Great by Vuca Simulations  Friedrich der Große was an anomaly for an 18th c...

The Great Crisis of Frederick The Great by Vuca Simulations (formerly Furor Teutonicus) The Great Crisis of Frederick The Great by Vuca Simulations (formerly Furor Teutonicus)

For your Wargamer, Toy soldier collector, MiniFig collector, military history nut. Reviews, interviews, Model Making, AARs and books!


The Great Crisis of Frederick The Great

by

Vuca Simulations


 Friedrich der Große was an anomaly for an 18th century general. He was more than happy to engage in battle. Most of his comtemporaries would fight wars of maneuver. This didn't mean they did not fight battles, it was just the cost of training troops was always on their minds. Frederick reminds me of Robert E. Lee. He had plenty of victories, and some defeats, but the cost in manpower of even his victories was too much for Prussia in the end. The last two years of the Seven Years War he was forced to fight a war of maneuver, because he could not afford to fight battles. The death of the Russian Empress Elizabeth, who hated him, and the coronation of Peter III, who worshipped him, really saved Frederick. Elizabeth's death was called the 'Second Miracle of the House of Brandenburg'. Strangely, Hitler was hoping for such a change of heart in one of the Allies in 1944-45. He referred to Frederick's luck at the end of the Seven Years War constantly. In a complete reversal of alliances France and Austria, enemies for hundreds of years, were now aligned with Russia against Prussia and England. So the stage is set for the Seven Years War. Let us see what is in the box from Vuca (their name was Furor Teutonicus, however because of its far right wing conotations, they changed it.)
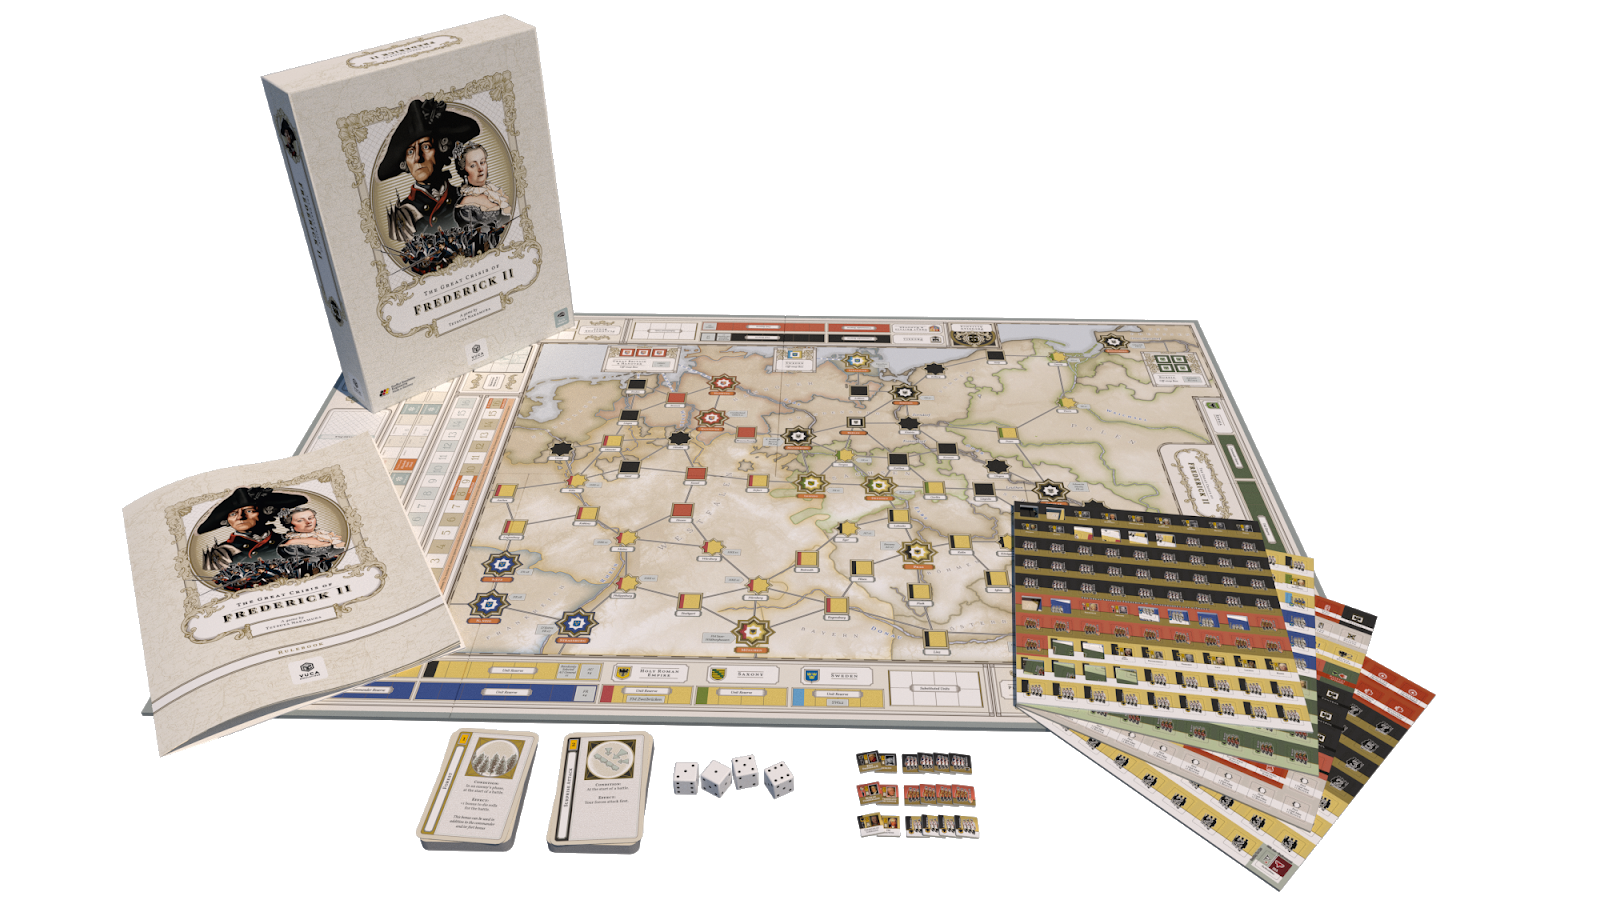

One rulebook
One mounted map
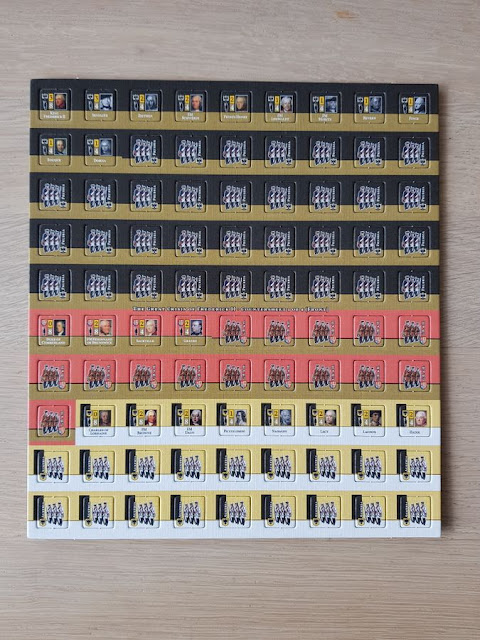
198 large unit counters / 360 counters total
32 tactics cards
Four six-sided dice


 This list does not do the contents of the box any justice. I previously had reviewed Vuca Simulations 'Crossing The Line: Aachen 1944', and the components were wonderfully done. I can say that most of the ones for this new game are equally well manufactured. The map is mounted and it is simply gorgeous for a wargame map. The style is point-to-point movement. All of the information you need to play is right on the map. The fortresses and cities of central Europe are all there in pristine glory. There is also a deck of thirty-two 'Tactics Cards' split evenly between the Prussian and Austrian Player. The cards are just as well done as the map. The counters and different chits needed are, just like the first game, very well done and come with pre-rounded corners. The only difference I had with this game was that the counters were connected to the cardboard sprue almost too well. This time I had to be careful when removing the counters because I thought I might rip some of them. I was kind of surprised, because in the last game the counters popped free very easily. This is not that much of a ding on the game, just make sure you are careful taking them apart. The Rulebook is only sixteen pages long and the actual rules only take up eleven of them. The rest are examples to play, and a full two page spread of the map to show the player where to set up the counters. The Rulebook is in complete color, and is set up for the player to easily understand the game mechanics. The actual print is a little on the small size, but even I could read it without squinting, so it must not be that small. 

 So, it is beautiful, but can it be played? The easy answer is a resounding Yes! For any player who has used a point-to-point map before the mechanics are simple to pick up. Even if you are more used to hexes, the game mechanics are easy to follow. This is the sequence of play:

Procedure of a phase: During their phase, each activated army follows this procedure:
1. All Alliances check their LoC network and mark isolation. (see 4.2).
2. Determines their Action Points  (AP; see 6.).
3. Recovers and moves their forces  (see 6.1 and 6.2).
4. Fights battles  (see 6.3).
5. Removes recovery markers  from units.
6. Marks control of spaces by placing  or removing control markers (see 4.1).
7. Checks if he may draw tactics cards (see 7.4).

8. Checks Victory for his Alliance.
 Each single strength point on a counter represents 4000-6000 troops. 


 Vuca Simulations, and the designer, have kept the game as historically accurate as possible. This means that the Prussian Player has the ability to roam about and put out fires. On the other hand, the Austrian Player has to learn how to herd cats. The Austrian Army under some generals (Browne, Daun) is capable of putting up a very good fight. The French Army is quite a different subject. It represents a threat in being to the Prussian Player, but is as hard to start as a Model T. The Russian Army gave the Prussian Army fits historically, but again it was hard to get into 1st gear. For those of you familiar with the Battle of Antietam, the analogy fits pretty well. McClellan, the Austrian Player, was capable of crushing Lee, the Prussian Player, but because of fear and an unwieldly Union army, Lee was able to fend off all of the disparate attacks by the Union forces. The Prussian Player in this game must play like Lee at Antietam. He must rush around the board and fight off every new invasion of his territories. The Prussian Player must remember that he does not have an endless supply of soldiers. He cannot afford to take as many losses and chances that Frederick did. The Austrian Player has overwhelming strength, but he must be able to bring it to bear. He is like a sumo wrestler fighting an MMA fighter. The Austrian Player must take advantage of any mistakes that the Prussian Player makes.


 The game play is based mainly on Lines of Communications and Resource Points. Keeping your Lines of Communication open to your different forces is vital. If a force becomes isolated, they are penalized by the fact that only four units can move, compared to the usual eight. Their dice rolls for attack and defense are also halved. Resource Points can be either a city or a Resource Fort. Victory is determined a few different ways. If Prussia survives until the end of the game, that is a Prussian Victory. Prussia can also win  after the death of Elizabeth of Russia. Each turn after her death a die is rolled. If a one is rolled then there is a peace settlement. If the Prussian Alliance controls sixteen or more resource Points, that is also a Prussian win. The Austrian Alliance wins if they are able to remove Frederick from the game, or Prussia has only eight resource Points or, nine if the Austrian alliance controls Berlin. 


 Battles and sieges take place off board with each side's troops lines up. The actual mechanics are very like a game with a separate 'Battle Board'. The low amount of units in most battles, and the absence of reserves etc. means that an actual battle board is not needed.


 The game rules are not long at all, but the game is very deep nonetheless. The rules are also easy to remember, and well written. You do not need to put on your judge's wig to determine what the designer meant in each rule. These are clear and concise and you will be up and playing in no time. For the game's sheer beauty some people might want this in their collection. For the person who plays games it is also an excellent addition to his hoard. There is a new version of the Rulebook with errata add in that is about a month old. I will have a link to it below. Thank you Vuca Simulations for allowing me to review this excellent and beautiful game. I think I will have to put an old Avalon Hill game into moth balls, if you catch my drift. 

Vuca Simulations:
https://vucasims.com/

The Great Crisis of Frederick The Great:
https://vucasims.com/collections/available-games/products/the-great-crisis-of-frederick-ii

Rulebook Errata:
https://cdn.shopify.com/s/files/1/0295/6650/0908/files/08_04_2020_Frederick_Errata_V4_A4.pdf?v=1586361960

My review of 'Crossing the Line':
https://www.awargamersneedfulthings.co.uk/2020/01/crossing-line-aachen-1944-by-furor.html

Robert


Roguelike. Wargame. Two genres that you usually don't imagine mashing together. Perhaps it's time for that to change, if Armou...

Armoured Commander II Armoured Commander II

For your Wargamer, Toy soldier collector, MiniFig collector, military history nut. Reviews, interviews, Model Making, AARs and books!


Roguelike. Wargame. Two genres that you usually don't imagine mashing together. Perhaps it's time for that to change, if Armoured Commander II is any indication of the possibilities. Now, of course, that fact that this game is a sequel indicates that the idea has been around for a bit, but I've only recently become aware of the series. I'm glad I found it, because as an avid fan of all stripes of roguelikes, I was excited to try something completely different. 

Armoured Commander II (AC2), made by solo developer Gregory Adam Scott, does indeed bring some fresh ideas to the table, and does some cool things with a very simple interface. As you'll notice, AC2 is not a visually impressive game, though the blocky tank designs are charming in their own way. What is impressive is the UI design and the fact that anyone could pick up this game and be playing in a matter of minutes, with no need to even look at the manual. The action follows a distinct series of phases, and all available actions in each phase are either explained on screen or self-explanatory. 


The game begins by letting you choose between a variety of campaigns. You can start at the beginning with the invasion of Poland, or jump to the late war rush across Europe by the Allies, and many stretches in between. Even more campaigns are planned for the future, including North Africa, the Eastern Front, and perhaps even the Pacific one day. Once you pick a campaign, you are given a choice of several tank models. All the mainstays are here, along with some rare models. I enjoyed the historical tidbits included about each model. 


Each campaign consists of multiple missions, broken down into individual days. The gameplay is then split between something of a strategic view, and more zoomed in tactical battles. Each day you have some sort of objective, such as breaking through the enemy lines, and proceed around the hex-based map in an effort to accomplish it. You aren't alone in this effort, as allied forces will take some spaces as the day goes on, occasionally giving you some extra breathing room. Artillery and air support is also on call when available, though you can't fully rely on it. Every action you take on this map consumes part of the day, time which you would ideally be using to rack up victory points. You can choose whether to spend time conducting reconnaissance into neighboring hexes, or just roll right in. Sometimes you will arrive in a hex to find fierce resistance, and sometimes nothing at all. As the day goes on you will begin running short on shells, and perhaps take some damage, making the decision of whether to press on or turn back all the more tense. Leaving the field early will cut your victory points for the day in half, but discretion is the better part of valor after all.


Before long, you will find yourself in a tactical battle against one or more enemies. This is where the meat of the game begins. Now the hex map zooms in, putting your tank in the center and foes all around. At the beginning of each round of combat you will decide what each member of your crew is doing. Naturally, each member has different options available, though all can "spot" for enemy contacts. The driver can prepare to drive, the gunner can prepare to gun, but the commander can only lend his direction to one of them at a time. Depending on what tank you are in, there will be other assistant crewman who can help out by reloading the main cannon, or manning a machine gun, or doing other activities. In the event on of your boys takes a hit (never a pretty sight inside a tank, best not to think about it), you can have one of these crewmen slide over into their place and carry on. All of the selections you make here at the beginning of the turn will dictate what your options are for the rest of the turn, and how likely you are to succeed in those actions.


Combat is deceptively simple in AC2. When you fire a cannon or machine gun, you'll get a percentage chance to hit. This chance depends on a number of factors, such as the size and type of target, whether they are in cover, whether your tank just moved, and whether the commander is directing the fire, among other things. At the end of the firing phase, there is another roll of the dice to see if the target is damaged or destroyed. Each round the enemy is doing roughly the same thing back at you. This sounds simple enough, but there are a lot of neat little twists built in. You can direct your driver to seek a hull down position. He might succeed or not, maybe you should have had the commander help him out? Alternatively, you can have the driver attempt to overrun the position of an enemy AT gun or rifle squad. Do you roll into battle un-buttoned, able to survey the entire battlefield, or button up to keep safe but leave yourself almost blind? The game has many little trade offs like this that keep each turn interesting. 

If you survive and go on to the next battle, your crew will begin to level up and gain new skills. Letting you customize your experience in each campaign and add some RPG flavor to the game. The men each have their own stats like morale and grit that change over time. Each crewman also has a name and even a bit of history, and it will sting to lose one or see him badly wounded after many fights together. I didn't get deep enough into any one campaign to see a lot of this system just yet, but I love that it's a part of the game.


I wasn't sure whether or not I would like AC2 when I first fired it up, but after my first session I could see the appeal, and after my second session I was hooked. Like other roguelikes, AC2 makes you want to see what's around the next corner, and then the next. Maybe you'll find a juicy target, or maybe a nasty surprise. Your first time out might be a dismal failure, but each subsequent run will be made with the experience you've gained. Different campaigns come with different varieties of terrain, enemy forces, and tanks to command. There is a lot of variety here already, and the one-man developer promises to keep adding on over time. The game has technically just begun early access, but you can buy it right now, and expect a full experience already, and a steady stream of updates to come. In the past week since release there have been near daily patches to fix bugs and make small improvements.

At a very modest $8, this game is certainly worth a look for anyone who fancies a new roguelike, a fresh take on WW2 combat, or all of the above. Even if you aren't a fan of the Dwarf Fortress level graphics, the solid UI and compelling gameplay will suck you in before you know it. Like some kind of grognard Neo, you won't be seeing punctuation marks and abstract shapes, you'll be seeing a battlefield alive with dug-in AT guns and deadly panzers.


Since this is just the initial early access release, I plan to follow the game for a while and post a full review once it is deemed complete by the developer.

Armoured Commander II can be purchased on Steam.

Official Blog


- Joe Beard

Kernstown 1st Kernstown (March 23,1862) 2nd Kernstown (July 24,1864) by Revolution Games  These two batt...

Kernstown: 1st Kernstown (March 23,1862) 2nd Kernstown (July 24,1864) by Revolurion Games Kernstown: 1st Kernstown (March 23,1862) 2nd Kernstown (July 24,1864) by Revolurion Games

For your Wargamer, Toy soldier collector, MiniFig collector, military history nut. Reviews, interviews, Model Making, AARs and books!


Kernstown

1st Kernstown (March 23,1862) 2nd Kernstown (July 24,1864)

by

Revolution Games


 These two battles were fought more than two years apart, but they have a lot in common. Both were fought because Confederate troops were trying to tie up the Union forces in the Shenandoah Valley. The Confederates were also trying to put enough fear into Washington to bring back Union troops outside of Richmond. In 1862 McClellan was trying to take Richmond, and in 1864 it was Grant's turn. In the 1st battle of Kernstown it was Thomas 'Stonewall' Jackson in charge of the small Confederate Army. At the 2nd Battle of Kernstown it was Jubal Early's (Per Lee: "His bad old man") turn to take command. The first battle is one of the few blots on Jackson's record. It was a tactical defeat for Jackson who unknowingly attacked a force about twice the size of his. The second battle saw Jubal Early triumphant on his way north through the valley to put a good scare into Federal authorities. Oddly enough, Union General George Crook played the part of Jackson at the second battle. He also believed he was facing a smaller force. As a side note: Richard Garnett, one of the commanders under Jackson at 1st Kernstown, was accused by him of 'neglect of duty' essentially cowardice in Garnett's eyes. Whether through physical constraint or to clear his name, or both, Garnett was the only officer that was on horseback during Pickett's charge at Gettysburg. Miraculously, he was within twenty yards of the Union lines before he was shot down. So, you can see that we get a two-fer here as far as battles. This is what comes in the box:

- 22x34" map
- 2 x 5/8" counter-sheets (352 counters)
- Rulebooklet
- 5 charts/playeraids
- Box or ziploc bag
- 2 dice (Boxed version only)


The game info per Revolution Games:

Complexity: 6 out of 10
Solitaire Suitability: 6 out of 10
Time Scale: 20 minute turns
Map Scale: 150 yards per hex
Unit Scale: regimental
Players: one to two, best with two
Playing Time: three to ten hours depending on scenario


 The map is beautiful and is done by Rick Barber, whose style has graced more than a few Civil War battle games. The hexes on the map represent roughly 140 yards across. Terrain level is divided into thirteen levels, each one of twenty-five feet. The lowest levels of the map are in the darkest color of green. The highest levels are in yellow. All you have to do is look online to see how many people really like this style of map. The counters are 5/8" so they are nice and large. They are very well done with pictures of the leaders on their counters. The combat units show the outline of their recruitment state. There are five Players' Aids; three are in full color and two are black and white. The Union and Confederate Player  each have their own Players' Aid card, and there is one for the Turn Record Chart and eliminated Units etc. The other two full color  Players' Aid cards are for the CRT and terrain, among other charts and tables. I have reviewed both 'Longstreet Attacks' and 'Konigsberg' from Revolution Games, so I am used to their attention to detail and their very well done artwork.


 This is the game's Sequence of Play:


1. COMMAND DECISION PHASE 
 a. Both players choose event chits and set up draw cup
2. ARTILLERY PHASE
 a. Union Artillery Step (move or fire)
 b. Confederate Artillery Step (move or fire)
 c. Both sides alternate “a” and “b” above until done
 d. Artillery Rally/Rebuild Step
3. CHIT DRAW PHASE
 a. Held Event Chit Step (play any held events)
 b. Draw Chit Step 
   If Event chit, owning player keeps it or plays it, draw new chit  If Wild chit, resolve immediately, draw new chit 
   If CIC chit, owning player selects brigade and proceeds to Phase 4 or holds the chit 
   If Division Activation chit, proceed to Phase 4
4. BRIGADE ACTIVATION PHASE
 a. Orders Step
 b. Fire Combat Step
 c. Movement Step
 d. Close Combat Step
 e. Rally Step
 f. If any chits remain in the cup, return to Phase 3.
 g. If no chits remain in the cup, go to Phase 5
5. END TURN PHASE
 a. Final Held Event Chit Step
 b. Victory Point Awards Step
 c. Flip over all “Activated” brigade markers to their “Available”   side
 d. Broken Track Adjustment step
 e. Each player gathers all his Event chits together and then   advances the Game Turn marker


 The game uses the 'Blind Swords' chit-pull system for play. The system emphasizes the three 'FOWs': fog-of-war, friction-of-war, and fortunes-of-war. Once again, I really like the system in any of the games that I have played that uses it. 

 The game comes with six scenarios, with two being 'what-ifs' of each battle. The scenarios are:

The Stone Wall - 1st Kernstown
The Historical Battle - 1st Kernstown
Jackson is aware - 1st Kernstown
Breckenridge Attacks - 2nd Kernstown
Historic 2nd Kernstown
'What If' - 2nd Kernstown


 The simplest way to do this review would be just to say 'Hey, its the Blind Sword System, with a Rick Barber map'! That should be enough for people to get out their credit cards, but we will continue with the regularly scheduled review for those of you still on the fence. The 'Blind Sword System' is based on a chit-pull mechanic, but then it goes much farther. The chits that can be pulled are these:


Event Chit
Wild Chit
CIC Chit
Division Activation Chit

 There are two other interesting mechanics in the game. The first is that after you have activated a Brigade you the have to give it 'Orders' for the turn. You have a choice of four types of 'Orders' to give your Brigade. These are:

Attack
Defend
Maneuver
Regroup


 The other somewhat strange mechanic is that Fire Combat takes place before movement.
 Some of the other rules that enhance the game are:


Canister fire for Artillery
Artillery can fire over friendly troops
Close Combat
Cavalry charging
Mounting and dismounting Cavalry
Cohesion Tests
Skedaddle Test


  I am surprised that we do not have a 'Buck and Ball' rule. The Victory Points for all of the scenarios are either control of victory Point hexes, or a combination of casualties and Victory Point hexes.


 As mentioned, the game comes with six scenarios, with two of them being what-ifs if you are so inclined. These are smaller battles, but the game mechanics are involved (which is a good thing). So, game time is rated at 130-480 minutes. Even though the game does not drown you in components, and the map is not large, you will get a large bang for your buck. I really like this game, even though I am so-so on the campaigns themselves. If you are a frequent reader you will know that I love the 'Blind Swords System', so there isn't much to say about that. The two Battles of Kernstown allow a player to deal with all sorts of military challenges. In both battles you can be the underdog or the force with a clear advantage. This game and the different scenarios are great if you have two opponents of differing skills. The system also works very well for solo play. You never know what is coming out of that chit cup. I am a big fan of Revolution Games, and I will have some links to other reviews I have done for them. Thank you Revolution Games for letting me review another of your splendid games.

Revolution Games:
www.revolutiongames.us/

Konigsberg:
https://www.awargamersneedfulthings.co.uk/2018/06/konigsberg-by-revolution-games.html

Longstreet Attacks:
https://www.awargamersneedfulthings.co.uk/2018/08/longstreet-attacks-by-revolution-games.html

Robert


Hitler's Paratroopers in Normandy The German II Parachute Corps in The Battle For France,1944 by Gilberto Villahermos...

Hitler's Paratroopers in Normandy: The German II Parachute Corps in The Battle for France,1944 by Gilberto Villahermosa Hitler's Paratroopers in Normandy: The German II Parachute Corps in The Battle for France,1944 by Gilberto Villahermosa

For your Wargamer, Toy soldier collector, MiniFig collector, military history nut. Reviews, interviews, Model Making, AARs and books!


Hitler's Paratroopers in Normandy

The German II Parachute Corps in The Battle For France,1944

by

Gilberto Villahermosa


 To Hitler, the day of the Fallschirmjäger ended with the invasion of Crete. They had suffered so many casualties during their successful attack that it was almost a Pyrrhic victory. At the siege of Stalingrad the Luftwaffe's airlift capacity was bled dry of pilots and planes. So even had Hitler changed his mind about the Fallschirmjäger, it wouldn't have mattered. Their wings were clipped. However, the Fallschirmjäger's usefulness was not over. They were some of the most highly trained soldiers in the Third Reich. They would continue to win laurels all over Europe as Fire Brigade soldiers, closing holes in the lines and stopping various Allied offensives in their tracks. When you think of the Fallschirmjäger in the infantry role, you usually think of their defense of Monte Cassino. This book shows how they were deeply involved with the defense of Normandy.

 The story of the Fallschirmjäger in Normandy is a story of dedicated soldiers who belonged to very different units as far as their training and abilities are concerned. The 3rd Parachute Division was the cream of the crop as far as both Fallschirmjäger and Infantry Divisions. It was one of the very few infantry Divisions that the German General Staff listed as well equipped and strong enough for offensive operations; let that sink in. According to Allied interrogation they believed their commander Generalleutnant Schimpf 'a god'. The division had its complete complement of soldiers and was the fourth strongest division in Normandy, behind three SS Panzer Divisions. The 5th Parachute Division was another story. It was made up of recruits, most who didn't have jump training, and not anywhere near its established amount of weaponry. The 6th Parachute Regiment of the 2nd Paratroop Division also was well thought of and fought in Normandy. Elements of the 6th Parachute Division also fought in Normandy.

 All of these units were part of the II Parachute Corps. The book tells the story of the II Parachute Corps, and its battles in Normandy to stem the Allied tide. The author goes through the Corps conception and birth. Not only is this a book about the Normandy battles, but it is also a reference book on the training and composition of not only the II Parachute Corps, but also the disparate units under its command.

 The 2nd Parachute Division, or some of it, was tasked with defending Brest under Generalleutnant Hermann Bernhard Ramcke. Ramcke was one of only twenty-seven men in the armed forces who were awarded The Knights Cross, with Oak Leaves, Swords, and Diamonds. The defense of Brest was considered of the highest importance, because the Allies desperately needed a port to use in Northern France. The only problem for the 2nd Parachute Division was after its mauling in Russia, the division was badly in need of men and supplies. An American assessment of its strength put it at 35% of its full complement. Ironically, for the Allies, the fight to conquer Brest so totally destroyed the city that it was unusable as a port. In fact, after the war, French authorities were even considering not bothering to rebuild the city where it was. The author shows us all of this desperate fighting.

 For the author's ability to help you visualize the Normandy battles the book is worth its weight. When you add in the incredible amount of detail that you will learn about the Fallschirmjäger the book is a steal. I cannot recommend it highly enough. Thank you Casemate Publishers and Pen andSword for allowing me to review this wonderful book.

Robert

Publisher: Pen & Sword
Distributor: Casemate Publishers

Gorizia 1916 La Sesta Battaglia dell'Isonzo  The Sixth Battle of the Isonzo by Europa Simulazioni  Wor...

Gorizia 1916 La Sesta Battaglia dell'Isonzo (The Sixth Battle of the Isonzo) by Europa Simulazioni Gorizia 1916 La Sesta Battaglia dell'Isonzo (The Sixth Battle of the Isonzo) by Europa Simulazioni

For your Wargamer, Toy soldier collector, MiniFig collector, military history nut. Reviews, interviews, Model Making, AARs and books!


Gorizia 1916

La Sesta Battaglia dell'Isonzo 

The Sixth Battle of the Isonzo

by

Europa Simulazioni


 World War I in Italy and Austria-Hungary is the story of two men. The first is Luigi Cadorna, who was the Chief of Staff of the Italian Army in World War I. The second is Franz Conrad von Hotzendorf, the Chief of Staff in the Austro-Hungarian Army. They had both risen to the highest places in their respective armies by hard work and seemingly excellent minds, with which to fight the largest war yet on the planet. The only problem was in both cases it was entirely a facade. They were stuck and hidebound, as many other generals in World War I, by outmoded thinking. Again, they both were  like everyone else at the start of the war, in love with the idea that with offensive spirit and with a good dose of 'we can conquer all' thinking the war could be won. Unfortunately for the troops under their command, most generals in the other armies learned the lessons of World War I. Not these two though, no sirree. They could not think of much beyond using their troops in headlong assaults against 20th century weaponry. von Hotzendorf was also obsessed with the idea of taking revenge on Italy (at the start of the war Italy was aligned with Germany and Austria-Hungary, but refused to enter the war). When Italy did enter the war, it was as a member of the Entente against their former allies. Both of these generals seemed unable to learn the new form of warfare that was happening and both were replaced after numerous failures on their armies' part. Strangely, their legacies are also similar. These generals have military historians as both their detractors and defenders. As far as planning, they both seemed to be able to come up with great plans on paper that did not take into account the realities of the war.

 The Sixth Battle of the Isonzo took place in 1916. There were twelve Battles of the Isonzo in all. Five of these are considered Italian victories, four are listed as Austro-Hungarian victories, and three are draws. The Austro-Hungarian Army had just finished attacking the Italians in the Battle of the Asiago or the Strafexpedition (Punitive Expedition). The Austro-Hungarians were stopped just after they had punched a hole in the Italian lines. The Russians also attacked in Galicia, causing them to remove large amounts of troops. The Austro-Hungarians did not believe that the Italians could strike back so soon after the Battle of the Asiago. The Italians were able to move large amounts of troops and artillery in a short amount of time to launch the Sixth battle of the Isonzo. Just as in most of the battles on the frontier between the countries, the assault started well and the Italians seemed to have victory within their grasp. Unfortunately, as was the norm, the attack sputterted out once real movement returned to the to the front. The inability of all of the combatants to keep up pressure once the lines had been broken was seen throughout the first three years of World War I.


 So, there is the background of the game. Sorry if it seems too long, but to me it is one of the most interesting fronts of World War I. This is the second game from Europa Simulazioni that I have had the pleasure of reviewing. Being a bit of an aficionado about this part of the war, I was very interested to see how ES's game compared to history. The game comes in English and Italian for the Charts and Tables. This is what you get with the game:


One 22"x34" map of  the battlefield
1120 die-cut counters
Standard rules and Scenario Instructions (three small and one large Campaign Scenario) 
Charts, tables
Dice
Box 


 The game is played in daily turns.
It comes with a campaign game of twelve days (August 6th to August 17th).


 The map comes with large hexes to help with the stacking that comes with a World War I game. It is a very nicely done map of the area of the battle. The colors for the different terrain work nicely together. Only two infantry units can be stacked in one hex, but there can also be artillery and some other units. With a 22"x34" map and four counter sheets, the larger hexes help with the congestion. The scale of the map is 1000 meters per hex. The four sheets of counters are all the same size, and the counters are 1/2" in size, and use NATO identifiers for the troop types etc. They are also color coded as to what division or brigade they belong to. There are four types of counters in the game: Combat Units, Artillery Units, Brigade Headquarters, and Informational Markers. The size of the counters means that there is a lot of information in a small place. The Rulebook is in black and white, but is set up in an easy to follow manner. The components are exactly what I was expecting from a Europa Simulazioni game.


 Just so we understand each other, this is an old school wargame. There are no plastic soldiers, it is not card driven, or do wooden blocks come with it. It is a dyed in the wool wargame whose antecedents are SPI and Avalon Hill. This game, except for the deeper rules and better done components, would be right at home on a table forty years ago. This is a deep simulation of World War I trench warfare on The Italian Front. This is the Sequence of Play:

1. Reinforcement Phase
2. Command Phase
3. Initiative Phase
4. Weather Phase
5. Supply Phase
6. Artillery Phase
7. Event Phase
8. Initiative Player Action Phase
 A. Tactical Movement and Assault Declaration
 B. Offensive bombardment
 C. Defensive Fire (by the Non-Initiative Player)
 D. Assault Resolution
 E. Counter-Assault Declaration (by the Non-Initiative Player)
 F. Counter-Assault Defensive Fire
 G. Counter-Assault Resolution (by the Non-Initiative Player)
 H. Action Completed
 I. Opponent Reaction

 At the end of step I, the Initiative Player can perform another Action Phase, repeating Phase 8 with another Brigade he has planned to activate, or he can 'pass', leaving the decision to the Non-Initiative Player to go to Phase 9 or pass in turn.

9. Non-Initiative Player Action Phase
  A. Tactical Movement and Assault Declaration
 B. Offensive bombardment
 C. Defensive Fire (by the Initiative Player)
 D. Assault Resolution
 E. Counter-Assault Declaration (by the Initiative Player)
 F. Counter-Assault Defensive Fire
 G. Counter-Assault Resolution (by the Initiative Player)
 H. Action Completed
 I. Opponent Reaction
10. Non-Activated Unit Movement Phase
11. Replacement and rally Phase
12.Victory Condition Check Phase


 There are rules about the following:

Logistics and initiative
Command
Supply
Bombardment
Interdiction
Force march
Disorganization
Fog of War


Austro-Hungarian


 The game also comes with special rules for these Units:

Engineer Units
Cavalry Units
MG Companies
Flamethrowers
Armored Cars
Austro-Hungarian Night Counterattacks


Italian


 The victory conditions are more in tune with the realities of World War I than many I have seen. This quote from the Rulebook sums it all up "The Objectives of both sides were territorial, their own or enemy losses were immaterial". The game can also abruptly end not only because of the Italian Player taking Victory Hexes, but also if he fails to do so. The rule 'Italian Offensive Halt', comes into play and the game is over if the Italian Player does not conquer a Victory Hex for three consecutive turns.


Is that Albert Einstein as the Game Turn Marker?

 The game is an incredibly immersive one about the Italian front during world War I. Everything you would want, or expect, in a World war I game is here. The writing of the rules are very well done for a non-English European game. There may be some usage errors. I am certainly not the one to find them, but the rules are easy to follow and clear cut. For a game about an obscure battle, at least outside of Europe, this is a full blown simulation of the battle. Many times not well known battles get the short shrift when it comes to games; not here. That the Victory Conditions do not include losses at all is a neat touch for a World War I game. Playing as the Italian Player you must, because of the sudden death rule, keep attacking each turn. The game forces you to disregard your losses, and this is as it should be. The Italian Player cannot take the time to get the odds just right, like you can in some games. The clock is ticking for the Italian Player also. Playing as the Austro-Hungarian you cannot trade space for time. You must defend everything as best you can. Hang on by the skin of your teeth if need be, but defend those victory hexes. The Austro-Hungarian night attack can be used once per game. If you pass the die rolls it gives you a Brigade to attack for practically free. As in the real world both sides must also balance Logistics and Supplies. Artillery fire used in 'Interdiction' is a powerful tool at your disposal. If you can use interdiction do so as much as possible. If you can you have made that enemy Brigade useless for the next turn.

 In summation, this is a great game on an obscure subject that more people should be playing. When you go the the Europa Simulazioni site, take the time to browse through their other games. I own several and they are just as well done. Thank you Europa Simulazioni for the chance to review this game. 

Europa Simulazioni:
http://italianwars.net/

Gorizia:
italianwars.net/games/gorizia_1916

My review of Europa Simulazioni's La Guerra Di Gradisca 1615-1617:
https://www.awargamersneedfulthings.co.uk/2019/12/la-guerra-di-gradisca-1615-1617-by.html

Robert


Here's a link to Part 1 in case you missed it. The Kingdom of Graykeep has already plunged head first into a new age of progr...

Shadow Empire Preview: The Graykeep AAR Part 2 Shadow Empire Preview: The Graykeep AAR Part 2

For your Wargamer, Toy soldier collector, MiniFig collector, military history nut. Reviews, interviews, Model Making, AARs and books!


The Kingdom of Graykeep has already plunged head first into a new age of progress, rapidly expanding its borders out from admittedly modest beginnings. As king, I have many decisions to make that will shape our future, but I am assisted by numerous advisors and staff. I plan to continue recruiting additional bureaucrats and using them to head new councils like one focused on foreign affairs, and another in charge of military research. The more funding we can provide to these councils, the more able they will be to provide me with stratagems, cards which I can play, at the cost of political points, to do things like improve diplomatic ties with a hostile neighbor, or change the tactics of individual military HQ's. Below you can see the world as we know it right now. There is much that is unknown to us, but we know that there is opportunity out in that darkness that exceeds the dangers.


Militarily, our situation is stable but still requiring my full attention. We face two points of contact with non-aligned rebel forces, and are being pressed by a minor power that has no respect for our expansion. Previously, I was able to secure basic diplomatic contact with my neighbors to the north, west, and south, and we all agreed to fix the borders in their current state. While future conflict is almost certainly still on the table, I feel comfortable enough to concentrate my forces to the east, where we have numerous active enemies, and several small towns up for grabs.


Amania (dark blue) makes a fatal error. Going beyond occupying the nominally unclaimed territory between us, they send their soldiers behind my lines, cutting off the bulk of my forces from supply just as we finish off the last of the rebels in the area. This will not stand! I have no choice but declare my first war. I had hoped to avoid this inevitability for as long as possible, at least until we had established a more robust economy, capable of replacing the losses we were sure to take. Fortunately, most of my forces still consist of militia, units which are able to replenish themselves without input from my government. On the downside, these forces are weak in terms of firepower. Our enemy appears to have two units of mechanized walkers to our single walker, but overall we have much greater numbers. 

First things first, I have my troopers breakthrough and take back control of the road leading back to Hawking, our capital. This will ensure my forces aren't soon starved for supplies. Then we begin working on turning the tables against the Amanians by cutting off a couple of their units and eliminating pockets one by one. Alas, the major power to the north, Zelaria, chooses this as an opportune time to shake us down for money. Their leader threatens war if we do not pay tribute. With their forces stationed on the border, immediately ready to attack my army from the rear if they so choose, I decide to pay the tribute that is demanded, and avoid a two front war. I've read that those never go well. 


Although it stings to lose a large portion of our hard earned cash, it will hopefully buy us time to deal with one enemy before facing another. My forces pounce on Amania forces and press them back. Unfortunately, their walkers are just as formidable as our lone steel beast, able to turn back entire companies of militia riflemen on their own. Our greater numbers soon tell, however, and we are able to isolate and defeat them piecemeal. The next turn, I notice that our borders in that area show only non-aligned rebel forces. Whether we have defeated them entirely, or if their rear was overrun by rebels, is unclear. The only thing that matters is that our front is secure and our forces can continue to advance and liberate more towns in the area. I order the expansion of our road network so that our supplies can flow to the front. With the foreign affairs situation relatively stable for the moment, more attention can be paid to internal matters. 

One matter , for example, is whether or not we should interact with an ancient AI computer found in some deep ruins back in Hawking. The machine predates all of our known histories and could give us some interesting revelations. It could cause us problems as well. In the spirit of boldness, I direct our scientists to turn it on and see what happens. The AI gives us a lengthy lecture on ethics, and then supplies the knowledge needed for us to produce more effective firearms. The ethics we take into consideration, the firearms we prepare for production.


Production, however, requires resources, and my advisors point out to me that we won't be able to build any of the nice new things they have been researching until we secure our own supplies of them. Namely, metal. Our militia army is fine for now, but if we want to build anything better, we need metal. Our dirt roads are fine for now, but if we want to build railroads, we need metal. If we want to expand our industrial base, again, metal. To that end I stop by the economic council meeting and direct them devote the vast majority of their funding to prospecting for resource deposits. The more passive approach I've taken so far has not yielded any results. I have the military continue to explore and bring more territory into our kingdom, hopefully increases the chances we will strike metal.

In the meantime I've begun buying metal on the limited open market. We have an excess of funds at the moment, since we aren't building much of anything (need metal!) and so buying it outright will get things moving for now.  I quickly learn that buying too much of one resource causes the price to sky rocket for a time, and vice versa, selling a large amount of food, something we have quite a lot of, causes its price to plummet. As a result, the amount of metal we can acquire at any one time is limited, but useful for finishing some construction projects we started long ago but never had the resources to complete.

There is one nice economic development, the first private construction pops up near the agricultural domes we built early on. A town to support the workers pops up on its own accord, and begins paying taxes. An excellent development indeed! 


Another internal matter comes across my desk. This one is a bit of a touchy subject. The Church of Syndic, by far the most popular cult within my kingdom, requests a hefty donation from the state to fund their ultimate project. They want to create some sort of super computer to solve all of our problems. Such cults are fairly common on our world, though each has its own objectives. Quite a few of my own staff are Syndic sympathizers, and they would be quite upset with me if I refuse, not to mention the church itself being cross with me. They point out that they have donated multiple priests to augment my forces by strengthening their resolve, at no cost at all to the state. In the back of my mind, I am wary of using such priests in our forces, I can't help but think that seeding too many of them among the companies might lead to some sort of insurrection. That said, they do greatly benefit the troops they accompany. 

I decide it is in the best interest of keeping everyone happy to make the hefty donation. That's money we could have used to buy more metal and other resources, but a kingdom is more than just buildings and roads, it must have a happy populace as well. Zelaria, our most powerful neighbor, is at it again with the demands for tribute. I can see their forces build up along our border at times, making everyone nervous. I tell them to shove off this time and the next. Not only because our forces now stand ready to repel any invasion, but also because I don't have that kind of money to spare at the moment.


Our investment in prospecting efforts finally pays off! A metal deposit is found in the southern region of the kingdom. Now I just need to order the construction of a metal mine and we will be in business! No more shortages, no more buying at exorbitant prices on the open market! We can really make some progress with a steady flow of materials. Oh, what's this? My construction chief is telling me that the site is too far away and outside of our logistics network. Apparently building such a facility in the middle of nowhere with no way to transport workers and construction equipment to the site is a problem. Ah, well, that makes sense. I consult the writings of my father (the game manual) and realize that I have indeed been neglecting the logistical side of things. Simply building dirt roads is not enough it seems. I order the construction of some transportation centers to get trucks on the road and supplies moving. Once again I'm forced to buy metal on the market to speed up the process. 

In the meantime, I look out across my kingdom. We have expanded further than I ever expected by this point. So far out in fact that our units can't be supplied and we begin losing contact with a few of them completely. Logistics really are important it seems! Being a king in this world is far more involved than simply ordering armies around. It requires management of trade, diplomacy, logistics, personal relationships, and more, in far greater detail than one might ever suspect. It looks like I've still got a lot to learn, but things are going quite well in the Kingdom of Graykeep. For now...


Shadow Empire is coming out soon from Slitherine Games. Stay tuned for more coverage of this fascinating title!

- Joe Beard

HOW THE WEST WAS SAVED: THE RUSSO-POLISH WAR FROM STRATEGEMATA Another fairly obscure war for many of us in the Western hemisphe...

HOW THE WEST WAS SAVED HOW THE WEST WAS SAVED

For your Wargamer, Toy soldier collector, MiniFig collector, military history nut. Reviews, interviews, Model Making, AARs and books!

HOW THE WEST WAS SAVED:
THE RUSSO-POLISH WAR
FROM
STRATEGEMATA

Another fairly obscure war for many of us in the Western hemisphere of Europe.  However, it is a topic I already had familiarity with through two prior gaming treatments. The first was the original GDW game Red Star/White Eagle [note the just released remake by Compass Games] and later The Eagle and The Star from the small Polish company Leonardo Games , which also underwent a superlative physical revamp some years ago by Academy Games under the title, Strike of the Eagle.  

As I have both the latest from Compass Games and Academy Games' very different system, I was delighted to be sent a review copy from the Polish company, Strategemata, of their game on the topic with its exceedingly long title, How the West was Saved: the Russo-Polish War!  

I admit that I had strong expectations that I would enjoy the game.  since the designer was Stephen Pole and the system used here is a modification of the one used in his three games covering WWII.  The latter are all in my collection and provide a highly playable and enjoyable system.  Also, they were all produced by White Dog Games and so I was equally interested in how the change to the Polish company Strategemata would affect the look of the components.

I'm pleased to say that the evolving and improving quality noted in my recent review of The Last Vikings continues.  First to be noted is a very clear and simple mounted map.  

On the left edge there is an equally clear and eminently readable terrain chart and on the right edge is the Turn display with the crucial number of Resource Points for each player, the list of victory point cities, the turn sequence and a large bold graphic explaining a unit's various factors. Though not usually over-keen on terrain displays on the playing board, perhaps because so many are not user friendly, this is so easy to read and commit to memory that I was more than satisfied.

The counters, though of fairly standard quality, are crisp and clean and hark back to the style of earlier days with three simple numbers for unit strength and movement.  Rather strangely, there is a single larger number at the top of the counter which is a unit's strength when acted from its top, facing edge, while the smaller number in the lower left hand corner number is for attacks across the over five sides of the hex.  This seems a strange differentiation both for the period in history and for the operational/strategic scale of the game.  The third number on the bottom right is the familiar standard movement allowance.


The red counters are the Russian forces and the white ones the Polish, while a small number in yellow with a blue band at the top are the Ukrainians, while the two red units with a green stripe are Russian-supporting Lithuanians.


One of the key points looking at the small number of units involved, especially compared with the numbers in Steve Pole's other three games using this system, is the much greater fluidity of play.  This is even more strongly seen from the set-up and reinforcement chart and the picture given, when the game is set up!
This really is low counter density and a very open situation at the beginning of the game.
The game turn sequence is very simple and straightforward.  Each turn begins with both players playing an Event card and these really are a lovely production from the picture on the front of each card to the wide range of historical images and illustrations from posters on the reverse.
Card Front
Reproduction of propaganda poster
Historical photograph
Here is the full sequence:

Random Events
Determine Resource Points
Depot Actions
Check Supply Status
Combat Unit Movement
Combat
Restoration of Units
Reinforcements

Much of this is quick and easy both to learn and to play.  So, Random Events as we've seen is simply each player playing and revealing a single card which will be executed at the appropriate stage that it applies to.

The number of each player's Resource Points is printed on the Turn Track and supplemented by the roll of two dice: one white D6 - a positive die and one red D6 - a negative die.  So each player may gain or lose from -5 to +5.  On the whole, there aren't major swings, but the possibility is always there.  A nice simple effective rule.

It is these Resource Points that are the heart of this system engine. First of all they are the "currency" to pay for virtually everything that happens in the game, starting with the next Phase: Depot Actions.  Here each player places alternately one new Supply Depot and, like nearly every single action in the game, the moment you decline to take the appropriate action for a Phase then you cannot take any more of that type of action.  Once both players have finished laying new depots you've got to pay for all that are now on the board out of your Resource Points. This chain of Supply Depots is absolutely vital, for in the next Phase [Check Supply Status] every full strength unit that is now out of supply is flipped to its weaker side and if already flipped is now eliminated!  Easy, effective and DEADLY!

Next comes Combat Unit Movement which again is done alternately.  Each stack of units that is moved costs one Resource Point and all the units chosen in a single stack must end in the same hex.  With resource points in short supply, there won't be too many movements made, which is another factor that makes this game run smoothly and swiftly.  Next comes Combat, again executed by each player alternately choosing to carry out one combat at a time and once again if a player declines to carry out a combat then they cannot carry any more later in the Phase. This cat and mouse, back and forth interaction is one of the elements that I relish strongly.
A close up of a small part of the battlefield
Finally, after Combat there is the opportunity to restore weakened units i.e. those that have been reduced to their weaker side can be flipped back to full strength.  Just one problem of course, to do so needs some of those precious Resource Points and, if by now you have some of these left, then you're probably managing better than I usually do!

The only things you don't pay for are your reinforcements and the limited number of four redeployments per player.  Finally, the rules conclude with a rare few Special Rules.  Overall, though the rules have relatively few illustrations and everything is in simple black and white, the clarity of the rules means that these are all that's needed.

Combat, though straightforward, is the section that needs most attention, because there are some interesting and fairly novel elements.  Attacks must be made through the top facing edge of the unit which shows a unit's stronger value and an attack is a single stack against a single stack.  Both players add up the total strength of their units in the single stack and add 1 strength point per additional stack adjacent to the defender. Only the attacker may attempt to bring in the full strength of one additional adjacent stack, but this is at the risk of a D6 die roll.  Roll 5/6 and the additional stack is added in; 3/4 the stack isn't added: BUT  roll 1/2 and the whole attack is cancelled!   To the final total strengths of each side is added the roll of a single D6.

Losses are dependent on the differences between scores.  For the loser it's half that number rounded down, for the attacker it 's half the number of the defender's losses,  This is with the added restriction that neither player can suffer more hits than the number of units inflicting the damage.  To give a simple example: if the difference were 6, then the loser of the combat would provisionally suffer 3 hits, but if the winner had only two units in his stack, then the most the loser would suffer would be 2 hits.

The other rule that needs care, and I say this as someone who has considerable familiarity with this system and the rules, is the use of depots and supply.  However, the care is not in understanding the rules [they are very clear], but in carrying them out.  Too often in the past, when playing Steve Pole's games set in WWII have I discovered that I've miscalculated the distance. As the distance restrictions are even more stringent in How The West Was Saved to reflect the earlier historical period,  you need to be even more careful.

For me, this is an excellent addition to those games already using this system.  It has the lowest counter density of them all; as a result it plays even faster.  The situation is more fluid and open and provides a good balance of attacking and defending for both players.  What's more in these unusual and constrained times where solo play is the enforced norm [unless you're playing online], it plays very well solitaire with only the play of Event cards being slightly problematic.

So many thanks once more to Strategemata for supplying my review copy.

Approx.  $65

Available in the UK : £59.95 from Second Chance Games


hpssims.com