second chance games

Search This Website of delight

 Napoleon Returns 1815 by Worthington Publishing  The Waterloo Campaign, Gettysburg, and the Bulge are the trifecta of wargaming. If we grog...

Napoleon Returns 1815 by Worthington Publishing Napoleon Returns 1815 by Worthington Publishing

For your Wargamer, Toy soldier collector, MiniFig collector, military history nut. Reviews, interviews, Model Making, AARs and books!


 Napoleon Returns 1815


by


Worthington Publishing


 The Waterloo Campaign, Gettysburg, and the Bulge are the trifecta of wargaming. If we grognards only had games on these three campaigns/battles, we would have enough to fill our shelves and play for a very long time. Of the three campaigns, in my mind Waterloo is the one that is the most of a toss-up. There are so many 'what-ifs' to the campaign. Napoleon who always, up to then, was conscious of time ( Napoleon's quote "I may lose a battle but I will never lose a minute), was an incredibly large part of making war successfully. He seemed to completely forget it in the Waterloo Campaign. He and his army were definitely affected by the 'slows' during the campaign. You can ascribe this to ill health, or any number of other things. At Ligny, the French had a chance to crush Blucher. After Ligny, the next day the French Army sauntered after the Prussian Army instead of herding it like cattle. The rainstorm the night before Waterloo, and Grouchy not 'marching to the guns' are more examples of 'what-ifs'. Enough of the history. Let's see what Worthington Publishing has put in the box:


Mounted Map 

18 French, British, and Prussian Corps Cubes

25 Small Yellow Wooden Markers

1 Six-Sided Die

2 Full Color Player Aid Sheets

2 Full Color RuleBooks

68 Battle Cards

5 French Objective Cards


 The map is meant to look like an old parchment map. It succeeds at this very well. It is a mounted map, and looks and feels to be able to live through as many games as you want to play on it. Movement on it is from point-to-point. Infantry Corps normally move one point, and Cavalry normally move two. The Corps wooden cubes that I received were uniform in size, except for the French Cavalry block, which was slightly larger. Friendly gamers playing the game would have no problem with this. If you are playing with someone who uses this to deduce where that block is, get yourself another gaming partner. They would also mark their cards. The Player Aid sheets are of strong stock, and slightly laminated. One side shows the setup for the pieces on the map. The other side gives the Sequence of Play etc. The back of the Combat Cards show a weary dejected Napoleon who is obviously suffering from piles. The front of the cards show a small painting from the different parts of the campaign. The Rulebook is eight pages long. It is made of paper with a bit of lamination on it, like a well done magazine. It is in full color and has examples of play included. All in all, the components are first rate.  


  The game is based on each corps' Cohesion Points. These can be deducted for Combat Losses, Extra Movement by Infantry (Forced March), and Retreat. So Cohesion in this game represents morale, combat losses, and fatigue of each of the Corps. Combat in the game is totally reliant on the Combat Cards. Each corps is worth 'X' amount of combat cards. Here is what it says in the Rulebook about Army Commanders and Corps:


"Below the army commander is a list of the corps in the

army. Each corps is listed by the corps name and its

leader name. Shown for each corps is the number of

combat cards that corps adds to combat if present, which

may be reduced based on its current cohesion point

number. Each corps has a tactical rating that determines

its ability to reinforce combat at an adjacent location and

its ability to counterattack during combat if no army

commander is present and if its Tactical Rating is used."


"Each corps has a set amount of cohesion points showing

how many cohesion reductions that corps can take in

movement, combat, and retreat before it is eliminated

from game play. Track cohesion by placing one of the

yellow cubes at the highest cohesion level for that corps

to begin the game. When a corps takes cohesion point

reductions, move the yellow cube the appropriate

number of spaces down the corps cohesion point track.

If a corps reaches cohesion point below 1, it is eliminated

and remove the corps unit from the game board. Shown

at the approximate halfway point on the cohesion track

for each corps is a mark that shows when the corps

reaches this level, any combat that it participates in, will

draw that reduced number of combat cards."


 Is the game a detailed simulation of Napoleonic warfare? Of course not. It is a game, very delightful and easy to play, but hard to master game. Does it give the player tons of choices on an operational level? You bet. You can play a few full games of it on gaming night. The components are simple, yet well done. The game mechanics can be described the same way. Thank you, Worthington Publishing for allowing me to review this game. My normal hex and counter obsession would have never let me really look at the game. 


Robert

Worthington Publishing:

Worthington (worthingtonpublishing.com)

Napoleon Returns 1815:

Napoleon Returns 1815 — Worthington (worthingtonpublishing.com)

NWS Wargaming Store A Wargamer's Best Friend  Naval Warfare Simulations is rightly known for its excellent line up of computer naval war...

NWS Wargaming Store NWS Wargaming Store

For your Wargamer, Toy soldier collector, MiniFig collector, military history nut. Reviews, interviews, Model Making, AARs and books!


NWS Wargaming Store


A Wargamer's Best Friend


 Naval Warfare Simulations is rightly known for its excellent line up of computer naval warfare sims. Among them:

Steam and Iron: The Great War at Sea

Steam and Iron: The Russo-Japanese War

Rule The Waves

Rule The Waves II

Warship Combat Navies at War

 What a lot of people do not know is that they also publish their own board wargames and miniature rules on:

www.navalwarfare.net


 It is my assumption that consumers do not realize that they run a wargaming store, and it is one of the best on the internet. Their prices are great, especially for slightly older games (although they are also good for new releases). They do not sell used board wargames, like some sites, but they sell minty fresh new in the shrink wrap games that a lot of people are paying way too much for on the 'used' market. 


 Their customer service is second to none. I have read almost no accounts of there being a problem buying from them. The two I believe I did read were taken care of right away, and actually had to do with the game's publisher, and not NWS. I have been dealing with them for years, and actually did some reviews of their computer naval wargames (I will post links below). On their contact page they have links for email, FB, and their help desk. 


 So, before you click buy on any used wargame make sure you check out the prices, and service, on NWS Wargaming Store. They have around 1500 items in their store now. They also cater to the miniature wargamer. 


Robert

NWS Wargaming Store:

NWS Wargaming Store

Naval Warfare Simulations:

SHOP | NWS Wargaming Store

Rule The Waves review:

Rule The Waves by Naval Wafare Simulations Review - A Wargamers Needful Things

Steam & Iron The Russo-Japanese War review:

Steam And Iron the Russo-Japanese War - A Wargamers Needful Things


  Aden by Tiny Battle Publishing   Tiny Battle Publishing promotes itself as 'Tiny Package, Big Fun'. We are privileged to see some ...

Aden by Tiny Battle Publishing Aden by Tiny Battle Publishing

For your Wargamer, Toy soldier collector, MiniFig collector, military history nut. Reviews, interviews, Model Making, AARs and books!


 Aden


by


Tiny Battle Publishing


  Tiny Battle Publishing promotes itself as 'Tiny Package, Big Fun'. We are privileged to see some truth in advertising. I have reviewed several of their games, and that is exactly what you get. These are not simple beer & pretzel games either. They are well thought out and a joy for both the advanced wargamer or a newer one. This is the blurb from Tiny Battle about the game:

"The civil war in Yemen has been going on since 2015; fought between the government, a rebellious faction, and their respective allies. Each group claims to be the legitimate government of Yemen. The fighting uses everything from World War 2 leftovers to modern ballistic missiles, with Saudi Arabian troops and US drone strikes helping the government and Iranian arms aiding the rebels.

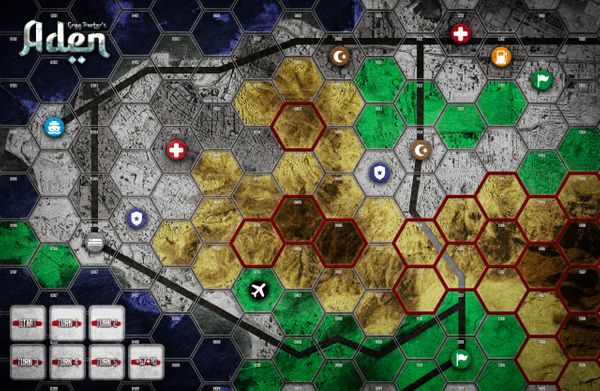
Aden is a 2-player (but very solitaire friendly) hypothetical campaign for control of this southern Yemen port city, a combined company- and platoon-level game where each battle takes place over the course of one or more days. Difficult terrain splits the east and west of the city, combatants often retreat to avoid taking losses before surging back, and making the most of your scattered leadership is the key to resupplying your people and sustaining an offensive. Units activate with a unique dice system, and combat is centered on an add-or-subtract dice method reminiscent of Greg's Armageddon War. 

The game remembers that Aden is a functioning city, with key points that will be strategic objectives in scenarios or have special combat effects. Destroy an enemy in sight of the international hotel where the media are staying? Extra victory points. Enemy is holed up near a major mosque? You cannot call artillery on them."


 This is what comes in the small package:

An 11 x 17 inch map of the city.

Seventy LARGE 1 inch counters for the government, rebels, allies and status markers, 

A 32-page rulebook with a six scenario campaign for control of the city, each player playing both sides to see who does it best.


 When Tiny Battle says large, they mean it. This game will become a hit at the grognard's retirement home for sure. The counters are naturally easy to read, even without my glasses. The map is colorful, but not garish. It also has equally large hexes on it. Terrain and line of sight is simple to see and work out. The rulebook is thirty pages long. It is mostly in black and white, with some color pictures of units and examples of play added. The Turn Sequence is:

1. Recovery Roll

2. Activate Units

3. Firing

4. Movement

5. Gone to Ground

 I really like the 'Gone to Ground' rule. it is very helpful for the weaker units. Here is what the rulebook has to say about it:

"A unit that has 'Gone to Ground' is basically hiding. It loses this status if attacked in Close Combat or if it does anything on its activation other than stay put. It cannot Opportunity Fire, but it also cannot be seen or attacked by enemy Units (including Artillery). This is a way for an outgunned force to avoid getting shot at but still control a hex. You have got to go in and dig them out the hard way. Going to ground is useful for the player who is on the defensive, or a player on the offense who is trying to retain control of an Objective hex that they have taken from the enemy." 

 The designer, Greg Porter, also designed 'Armageddon War: Platoon Level Combat in the End War. So you know that this game has a heavyweight pedigree. Armageddon War was also reviewed by me and I will put a link to the review below. 


 Aden as a game is small, but that does not mean it is simple. The Rulebook comes with six scenarios, but you can make your own easily enough. Command and control is a big part of the game. An Activation of up to four Units is possible if you have a Command Unit in the four. So, each side typically makes the enemy's Command Units high profile targets. 

 This is a game where you have some Units that are using high grade military vehicles, but not by highly trained army Units. The Rulebook states that the Saudi forces lost more Abrams than the entire amount lost by the USA in both Iraq Wars. Aden is a good small unit size game, with also a small game footprint. Setting up and putting away the game takes no time at all. The scenarios are easily played through. There is no need to have the map set up and taking up space somewhere. Thank you Tiny Battle Publishing for allowing me to review this little gem. 

Robert

Tiny Battle Publishing:

Tiny Battle Publishing

Aden:

Aden | Tiny Battle Publishing

Flying Pigs Games 'Armageddon War' Review:

Armageddon War by Flying Pig Games - A Wargamers Needful Things


 Korsun Pocket 2 by Pacific Rim Publishing   This is the Designer Notes for Korsun Pocket 2 that is on pre-order from Pacific Rim Publishing...

Korsun Pocket 2 Designer Notes by Pacific Rim Publishing Korsun Pocket 2 Designer Notes by Pacific Rim Publishing

For your Wargamer, Toy soldier collector, MiniFig collector, military history nut. Reviews, interviews, Model Making, AARs and books!


 Korsun Pocket 2


by


Pacific Rim Publishing


  This is the Designer Notes for Korsun Pocket 2 that is on pre-order from Pacific Rim Publishing. The original Korsun Pocket is considered a milestone in wargaming history, and is worth hen's teeth now. Thank you Jack Radey, and Pacific Rim Publishing for allowing me to post this.


"Designer’s Notes 

Korsun Pocket, Little Stalingrad on the Dnepr, was my first effort as a game designer.  I fell in love with Jim Dunnigan’s and Joe Balkoski’s “Wacht am Rhein” back in the latter part of the 1970s.  Immediately, I was thinking, “Gosh, that would be interesting on the other end of the war…”  As I ruminated on the thing, the Korsun Shevchenkovsky Operation came to mind.  I began to dig into it, and found it was just about the right size battle, and a very interesting situation.  Whereas the Battle of the Bulge was pretty much a straight penetration and exploitation, Korsun Shevchenkovsky was an encirclement.  Both sides would be attacking and defending.  Great.

So I began digging, and found immediately that it is easier to research a game where at least one side wrote up their reports in English.  But I taught myself some German, learned the Cyrillic alphabet and began to learn a little Russian.  And I was aided by David Serber, who went to the archives in Washington and returned with a lot of German microfilmed records, and Leslie D’Angelo, who translated a chunk of Grylev’s “Dnepr, Karpaty, Krym” from Russian for me.  Colonel John Sloan provided me Rotmistrov’s account of the battle, I translated part of Degrelle’s disgusting little book “Le Front D’Est” from French, and found the marvelous map collection at UC Berkeley.  The game was proclaimed a masterpiece of research, and its researcher and designer a master of all things Great Patriotic Warish.   Well…

Marx once described a fellow philosopher as “standing out like a high peak, due to the flatness of the surrounding terrain.”  Wargame companies who were intent on staying in business did not devote a year to research for a game, no matter how big.  The reputation I got has carried me far, but looking back, I do blush from time to time.  But the world has changed… The Soviets, who documented EVERYthing, and valued their WWII experience as their national treasure, from which they drew their military doctrine, kept their data very close, and even Soviet historians had difficulty accessing it.  So there were a lot of aspects of the battle that remained blurs to me.  I had the basis for some guesswork, but some of it was based on SPI’s writings, and much of that was either grossly in error or was misunderstood by me.

But since those days, first perestroika and glasnost caused the archives to open for a while, before the sad passing of the USSR set in motion events that led to their reclosing.  But the archives are all on war-time acid-based paper, and someone in the Russian staff realized that in twenty years or so they would be sitting on the world’s largest pile of dust.  So they have begun scanning it and dumping it onto the internet… by the trainload.  So when I asked my friend Charles Sharp to look into my guess that 4th Guards Army had attacked for three days and gotten nowhere at the beginning of the offensive, within 24 hours I had a rough summary of the Combat Journal of this army for the relevant days in my inbox, recounting precisely where the problems had been.  Color me gob smacked.  And then Helion Press brought out “Stalin’s Favorites – 2nd Guards Tank Army” (they were 2nd Tank Army at Korsun before they became a Guards army), with more detail on the strengths, losses, and activities of this army than I could have hoped to see in my wildest dreams.  I have not completely re-researched the battle, this would require either exploiting the friendship I have with people who could do the massive amounts of translation that it would require, but I have gained a much more detailed understanding of the events of January and February, 1944.  Consequently while you will recognize the basics of the game, there have been some changes, both based on better knowledge of the battle, and on some small knowledge of game design I have gained.


What’s the same?  The basic Dunnigan/Balkoski combat and movement systems.  My changes in the approach to Zones of Control, visibility, weather, etc.  The broad outlines of the battle.  The scenario structure.  Much as one longs for a scenario for just the pocket, the notion of using all four maps just to play a small scenario seems silly.  The map is pretty much the same, with a few additions.  The rules about tanks are the same, but require some explanation.  Why does a battalion of Panthers, say, with a tank strength of 4, break up into companies but still each has the same tank strength of 4?  Shouldn’t it be less per company? After all, it’s less tanks…  My thoughts, strongly supported by some friends who served in the armed forces, are that the difference between NO tanks, and a FEW tanks, is infinitely larger than difference between a FEW tanks and A BUNCH MORE tanks.  The actual tank strength numbers, unlike the attack and defense strengths, are based on the effectiveness of the tanks weapons and armor.  A tank with a bigger gun and heavier armor is inherently scarier and more destructive than more numerous tanks which have great difficulty damaging it.  Tank size figures in to this too.

What’s different?  Well, when I designed Korsun Pocket originally, I thought, “Amateurs talk tactics, professionals talk logistics.”  And an encirclement battle was going to require a more detailed treatment of logistics issues.  So I did some research and constructed a whole elaborate system for keeping track of supplies, and artillery ammunition (which makes up the bulk of supply tonnage).  As game systems go, it worked, and pretty much produced the results I was seeking, namely that both sides were plagued by supply problems throughout the battle, as well as the supply challenge that a large encircled force produces.  But looking back I fear that the operative words were “worked” and “plagued.”  After the game came out, I figured out a truth of design.  Time is the enemy of wargame design.  Time is a constant, you only have so much of it to spend gaming, so much time you can get a team together, so much time that table will be useable.  If there are a LOT of playing pieces in the game, it will take a lot of time to move them.  A game with only a few pieces in play can have complex detailed rules.  A game with a lot of pieces in it is already pushing the time envelope.  Adding more work for the players… something will have to give.

So I set out to create a new and cleaner supply system.  But being me, I dug into the research and found four credible sources who gave daily tonnage requirements for a full strength infantry or rifle division in combat.  And got numbers that said 300+, 200, 100, and 20 tons a day, respectively.  The 100-200 range seemed the most common number.  True, none of these units was anywhere near full TO&E, but the fact is a badly worn infantry division will retain most of its artillery, even as its line infantry is worn to a nub.  And artillery ammunition accounts for over 80% of the supply tonnage required.  Worse, the 20 tons per day, derived from the deliveries by air to the pocket, are very well documented.  I was pulling my beard out trying to come up with a compromise, so that a supply point would actually mean something in tonnage terms.  And then…

I stepped back, squinted so I could not make out the details, only the broad outline of the problem.  And it came to me.  Doh.  The bottom line truth is that while both sides experienced all kinds of problems getting supplies from railhead to fighting units, they succeeded in doing so sufficiently well to fight the battle.  Only the pocket forces faced destruction when their supplies were cut off, first by land and finally by air.  No complex systems, book keeping, supply points, or other fancy footwork required. 


Similarly the air rules took a haircut.  Bottom line, again, fighters were unable to prevent enemy air from having an effect on the battle, so why include them?

One other change evident is the counter mix.  KP 1 had some holes that I filled with fudge.  Some of the fudge has since failed to live up to the tasting.  So: no more Ferdinands (it turns out the Soviets used the term “Ferdinand” to describe any assault gun), JS-2s, or T-34-85s.  There weren’t any in the battle, they came out of my ignorance.  No more killer cavalry units, they have been tamed a bit.  No more tanks organic to panzer grenadier battalions, nor are the tanks that were part of 5th Mechanized Corps mushed into the motorized rifle battalions.  This is a far better OB for both sides, I believe I have it all. 

There is a matter that the players will have to ponder.  In the order of appearance, there are a number of situations where units are required to exit the map, some of whom return, some do not.  These units were usually withdrawn due to requirements for them somewhere outside of the scope of the game.  Since players have no control of these events, this seems more than reasonable.  The oddest may be the peregrinations of most of 5th Mech Corps, who immediately after the drive to Zvenigorodka, are forced to withdraw to the west, to reinforce a portion of the off-map front threatened by a German counterattack.  After a difficult march, they were turned around and marched back onto the map area in the game, as by this time the Germans had ended their attacks and were shifting their panzers east, towards the Korsun Shevchenkovsky area.

But another matter entirely were the various inter-formation transfers that are called for in the order of appearance.  While the Germans, sorely lacking in reserves, were known to pull a couple battalions from one division, attach an artillery battalion and maybe a company of antitank and another of engineers to a neighboring division in need of beefing up, the Soviets did a lot less of this.  The exception would be their tank brigades, which would sometimes be detached from their parent tank corps and attached temporarily to another corps, or to a rifle corps or army when there was not an immediate need for a tank concentration.  Then there is also the question of major reorganizations that happened historically.  Towards the latter part of the battle, 27th Army of 1st Ukrainian Front was transferred to 2nd Ukrainian Front, in order to put the forces around the pocket under a single headquarters.

All of these decisions were historically made within the scope of the player’s discretion and in response to the developments in the battle.  If the Soviets never formed pocket, would the inter-front transfer of 27th Army have happened?  Would corps have transferred between armies had things gone differently?  With this in mind, the players may choose to ignore all the transfers between on-map formations, or leave them up to the decision of the players – you could transfer 27th Army to 2nd Ukrainian Front, but you may decide not to.  However, all withdrawals from the map are still mandatory."


Pacific Rim Publishing:

Pacific Rim Publishing (justplain.com)

Korsun Pocket 2:

Korsun Pocket 2 | Pacific Rim Publishing (justplain.com)

  Waterloo Napoleon's Last Battle by Companion WarGames   Here we go down the rabbit hole again. There seems to be three battles that ev...

Waterloo: Napoleon's Last Battle by Companion WarGames Waterloo: Napoleon's Last Battle by Companion WarGames

For your Wargamer, Toy soldier collector, MiniFig collector, military history nut. Reviews, interviews, Model Making, AARs and books!


 Waterloo


Napoleon's Last Battle


by


Companion WarGames


  Here we go down the rabbit hole again. There seems to be three battles that every designer wants a crack at: The Bulge, Gettysburg, and Waterloo. I think wargame designers are born with a strange gene that others don't have. It eats at them to design a game based on the above three battles. Of those three battles, I have to say to my mind Waterloo is the most interesting. Gettysburg should historically be won or lost on the first day. The Bulge is pretty much a losing situation for the Germans, unless the designer skews the victory points etc. Waterloo is a totally different animal. Napoleon could very well have won the battle. There are so many 'ifs' involved in it. If Grouchy had actually stopped the Prussians. If Napoleon had attacked with the Guard at 6:30pm. If the ground had not been too soft for cannon fire in the morning. So, we all know that the battle was  "the nearest run thing you ever saw in your life" (Duke of Wellington). If he thought it was a close battle, who are we to argue with him. This is designer Mark Scarbrough's attempt at the the big one. let us see what Companion WarGames has put in the box:


Mounted Map 22"x34"

Hard 11"x17" French and English Setup sheets

Hard 11"x17" Prussian Reinforcement Schedule sheet

2 Hard One-Sided Player Aid Cards

1 1/2 Unit Counter Sheets, Large 3/4" Counters

1 Counter Sheet Of Control Markers

I Rulebook

4 Die (2 Red, 2, Blue)


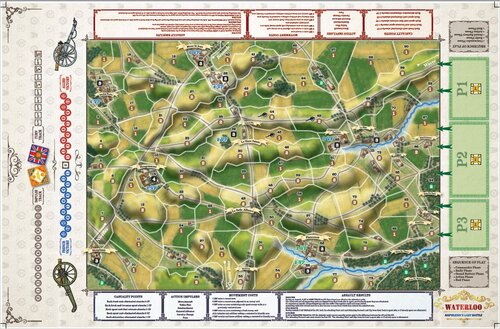
 The Mounted Map is normal size for most games. A mounted map causes some gamers to applaud compared to a paper one. I like either kind. You can always use a piece of plexiglass over a paper one. I will admit that mounted maps do hold up better and you will not see the creases in them that you get with an older game you have played a lot. The map itself is divided up into areas. There are no hexes on this map. The way the areas meet each other is meant to show how the battlefield topology was historically. So some movement is not allowed between some of the areas. The map might look a little busy to some because of the color scheme and the areas. I did not have a problem with it. The counters are very large and therefore very easy to read. They are done in bright colors. I like the combination with the map, but again, some may find objection. The only control markers are for the French side. If a marker is not in an area, it is considered to be in Allied control. The counters represent the English, French, and Prussian units. One player plays the French side, and the other plays the Allies (English, Prussian). The Player's Aid Sheets are easy to read and allow you to have a lot of information at your fingertips. The rulebook is thirty-four pages long. The rules themselves take up twenty-six and a half pages. From page twenty-seven there are optional rules that go to page twenty-nine. Pages thirty to thirty-four have examples of play. The Rulebook is in full color, and the print is large. The Rulebook is of paper, so you will get dog ears etc. if you are not careful. The whole presentation of the counters and map to me was excellent. Everything is nice and big, and easy to read and understand. For a first game this is a great effort by Companion WarGames.


 This is the Sequence of Play:

• Commander Phase

 • Rally Phase

 • Grand Battery Phase

 • Action Impulse Phase

 • End Phase


Countersheet 1


 The game has some interesting concepts, besides the area movement. This rule is meant to show the possibility of Napoleon's lethargy during the battle:

6.2 COMMANDER PHASE

Beginning on turn 2, the French player makes DR

during the Commander Phase to determine whether

Napoleon is active or inactive (fresh or spent) for that

turn.

6.2.1 Napoleon Activation. The French player

makes a DR. If it is equal to or greater than

Napoleon’s activation number on the fresh side

of the counter, Napoleon is active for the turn

and begins on his fresh side. If it is less than his

activation number, Napoleon starts the turn on his

spent side. 


Countersheet 3


 As any game in the 19th century, the rules are heavily dependent on the leaders on both sides. if your leaders are inept, or the subject of frequent bad die rolls good luck to you. Leader Activation works like this: You must roll 2 D6, and you must roll a number equal or higher than the Leader's Activation Rating. Commanders are Activated the same way. Once you have your leader activated you can do these actions:

Move/Assault

Volley Fire

Bombardment 

Cavalry Charge

General advance

 Commander/Leaders also have Special Actions they can carry out. These are:

Double Move (Commander)

Intervention (Commander)

Die Re-Roll (Leader)

Battle Participation (Leader)


 The game has rules for:

Grand Batteries

Skirmishers (A lot of games overlook these)

There are also Optional Rules included, these deal with:

Village Areas

Cavalry Exhaustion (Another overlooked item in games)

Expanded Rally


 As I mentioned before with the components, this is an excellent first game from a new company. The game has the feel of Napoleonics about it. It does not give you a feeling that this system would work for any era, like some games do. The leader/commander rules are well thought out and make the player have several contingency plans all at the same time, just in case you do not pass that all important die roll for activation. I want to thank Companion WarGames for allowing me to review this great game. They have four more games in the pipeline:

Seven Days to the Rhine - Cold War goes hot in 1979

Deus Volt - Crusades

Tour of Duty - A Year in Vietnam With the 1st Infantry

Voelkerwanderung - Barbarian Migrations and the Fall of Rome


Robert

Companion WarGames:

Companion Wargames

Waterloo: Napoleon's Last Battle:

CWG Games — Companion Wargames


  Junkers Ju52/3m by Cobi  The Junkers Ju 52/3m was originally designed in 1930. In its first flight it was only equipped with one engine. J...

Junkers Ju 52/3m by Cobi Junkers Ju 52/3m by Cobi

For your Wargamer, Toy soldier collector, MiniFig collector, military history nut. Reviews, interviews, Model Making, AARs and books!


 Junkers Ju52/3m


by


Cobi


 The Junkers Ju 52/3m was originally designed in 1930. In its first flight it was only equipped with one engine. Junkers soon realized that it was too underpowered with only one, and added two more engines. The Junkers designers used their J 1 aircraft (the first all metal aircraft) as its starting point. It was originally conceived as an airliner, but was turned into a bomber for a short time by the new Luftwaffe. It found its niche in life as a transport plane. As a transport plane before and during World War II, it was used constantly from 1936-1945. The German airmen and paratroopers called it 'Tante Ju' (Aunt Ju), or 'Iron Annie'. Very surprisingly the aircraft was also built by some other countries after the war. Some JU 52s were operational as late as the 1980s. It was also used as the personal aircraft of two countries' leaders during World War II. Both Hitler and Chiang Kai-shek had JU 52 personal airplanes. The plane type that Cobi has brought us was used as both a paratrooper and transport plane.


 The kit comes with 548 pieces. I was anxious to build this model for two reasons: One, I have always had a soft spot for the plane, Two, I had already built Cobi's Douglas C-47 (which is an excellent build and model), and I wanted to compare the builds and the finished product. 


  The building of the kit was as straight forward as usual with a Cobi kit. I believe I made one mistake, and just like during my other builds, it was my fault. Sometimes I get into a groove building these kits and I do not take the time I should to really inspect the instructions. However, a small flat edged screwdriver and some cursing always seems to do the trick. 


 The building of this kit was very enjoyable, as they all are. There is no glue stuck everywhere (especially on your fingers), and any mistake you make is easily righted. The Ju 52 took shape very early. The build starts with the wings so you know right away what the build is. Cobi tank kits mostly start out as a rectangle of blocks, and the tank does not show its excellent features until late in the process. With both of these plane builds I was able to see from the beginning how well the plane would look in the end. 


 As you can see, the kit in its finished form is a sight to behold. One thing, if you do not have much space to show off your kits, the bombers and transport planes are LARGE. The Douglas C-47 has a wingspan of 21" plus. The wingspan of the Junkers JU 52/3m is over 23". These are both big kits when finished.


 Once more, Cobi has given me a very enjoyable afternoon, and then followed it up with an excellent looking plane to add to my collection. Cobi kits are also great ways to start the young ones on the road to appreciating historical vehicles and the history behind them. I never really check how long a kit takes to finish. The building is so much fun and relaxing that the time just rolls by. I have never tried to speed build any of the kits. To me, that takes half the fun out the kit itself.


 The kit comes with two figures. A Luftwaffe pilot, and a Fallschirmjäger (Paratrooper). Just as with their kits, Cobi takes painstaking efforts to make sure they look as realistic as possible. So, once again I am in debt to Cobi for sending me this great looking Junkers Ju 52/3m kit. It is a magnificent build for anyone to display on their shelf. You can also buy the Junkers Ju 52/3m as a civilian version in white and blue, with Red Cross markings. The next Cobi kit I build will be a Sherman M4A3 (Easy Eight).

Robert

Cobi:

Blocks and toys for kids from Cobi - internet shop

Junkers Ju 52/3m:

Junkers Ju52/3m - WW2 Historical Collection - for kids 9 | Cobi Toys

  If you hear a rumor that long time wargame developer Battlefront is making a modern Combat Mission module about the place where you live, ...

Combat Mission: Black Sea Combat Mission: Black Sea

For your Wargamer, Toy soldier collector, MiniFig collector, military history nut. Reviews, interviews, Model Making, AARs and books!


If you hear a rumor that long time wargame developer Battlefront is making a modern Combat Mission module about the place where you live, you might want to look into taking an extended vacation. I say that because both of their titles set in our time were developed based on smoldering conflicts that soon after turned into serious real life wars. First in Syria with Shock Force, and then in Ukraine with Black Sea. The key difference in each game of course being the intervention of conventional NATO forces, which in both cases was at least within the realm of possibility. If you wanted to see just what a NATO intervention in Ukraine might have looked like, then you are in luck, because Combat Mission: Black Sea is here to provide that experience.


Although originally released back in 2014, Black Sea is now joining Shock Force 2 on Steam and the Matrix Store, as Battlefront continues their venture with Slitherine of bringing the Combat Mission series to the largest games platform around. I wrote my take on Shock Force 2 and to some extent the Combat Mission (CM) series as a whole in an article a few months back. Today I'll try to focus on what sets Black Sea apart and why you might want to add it to your collection. 


As mentioned, Black Sea depicts the most modern conflict of any game in the Combat Mission series, a war in Ukraine involving a full on United States military intervention. That means peer-on-peer conflict with the best Russia has to offer, as well as scenarios involving the slightly less well equipped Ukrainian forces. This is a far cry from the mostly asymmetric scenarios in Shock Force, where the highly trained and well equipped US and NATO troops faced a challenge only because they were asked to accomplish difficult objectives while taking minimal casualties. The enemy forces in that game usually varied in quality from militia rabbles to poorly motivated regular Syrian army units. One can also make a comparison to the WW2 settings of the other CM games. There, the forces are evenly matched in terms of quality most of the time, as they are here. However, as deadly as a WW2 battlefield could be, infantry firefights mostly involved bolt action rifles slinging only a moderate amount of lead around, and tanks could often shrug off a hit or three. Not so in Black Sea. 


In Black Sea, everything on the battlefield is a glass cannon. Every unit is deadly when positioned correctly, and dead when not. Modern optics and thermal sites and other gizmos make any move in the open a potential death sentence. In this kind of highly lethal environment, information becomes king. If you can see the enemy first, you can eliminate him without risking your own units. Unmanned drones are present in many missions, providing you with intel about whatever part of the battlefield you task them to observe. If you can get eyes on, say, an enemy APC holding an intersection, you can then drop a burst of precision artillery rounds directly on it and open a gap in the opposing defense. The same can happen to your units just as easily.


In a way, playing a battle in Black Sea can feel like something of a game of chess. This isn't a WW2 situation where you hurl an entire infantry company or two into a slugfest over a village, then roll in some tanks to provide extra firepower, and maybe throw in an artillery strike over a general area. This is a game where you carefully position each asset you have to maximize its potential, and hope it isn't blown up in an instant by some unseen foe.


The assets you have in Black Sea include many of the same units we saw in Shock Force, but with new bells and whistles to reflect a conflict a decade further into the future. For the United States, we have Abrams tanks, Bradley's, and Stryker's of all models. The Russians have T-72's and T-90's and of course a smorgasbord of BMP's, BTR's, and so on. The differences between these vehicles in Black Sea vs Shock Force reflect the nitty gritty details that make Combat Mission games shine. Depending on the exact model in question, many of these vehicles have better optics than they had in Shock Force. Some also have Active Protection Systems which can destroy incoming anti-tank rockets, giving these vehicles a fighting chance on the modern battlefield. Being aware of whether your vehicles are equipped with one of these systems or not is essential to forming a successful plan. Another easily overlooked difference from Shock Force is how the playing field has been leveled during night combat. In Shock Force, the Western forces ruled the night with their night vision equipped vehicles and infantry. Now everybody has some kind of night vision capabilities, although quality still varies. 


For better and ill, Black Sea is also still a very similar game to Shock Force and the other CM titles. The interface is exactly the same, which may be frustrating for some, but cozy enough for those already acclimated to it. Quick Battles against the AI are even more underwhelming here than in the WW2 titles, as the generic moves the AI makes in this mode tend to get their units wiped out. Performance with the engine continues to be a mixed bag. While it remains impressive that Battlefront can model a 1:1 battlefield with such exacting detail and at a realistic scope, the engine is just barely up to the task. The framerate can wildly swing as you move the camera around in medium to large scenarios, no matter how powerful your PC might be. Continued updates to the engine have improved things over the years and also made the game look nicer, but at this point I think we would all love to see a jump to something completely new. Hopefully the partnership with Matrix and additional funds from Steam sales will get them there.


The base game comes with 21 stand alone scenarios as well as a campaign for each faction, plus a training campaign. This will keep you busy for a quite a while, as most scenarios are difficult regardless of which side you play, and the campaigns even more so as you must keep your units alive to fight in battle after battle. If you want even more Black Sea, there is also the Battle Pack which adds a new campaign for the Russians and US Forces, along with 6 more stand alone scenarios. For only $10 it's a good amount of content that will keep you busy for hours. There are also a couple dozen user made scenarios and at least one campaign available over at The Scenario Depot that you can freely download.


If you are already a huge fan of Combat Mission, then Black Sea is an easy recommendation. The shift to a very modern battlefield really does make the game feel fresh as you must adjust your tactics to the high-tech, high-lethality reality of a conventional war between two major powers. If you've been putting off the purchase because you didn't like Battlefront's DRM policies of the past and messing with manual patches, well, there's no excuse now. With the game now on Steam, you are only one click away from having the most up to date version of the game on any computer, any time you want it. If you are new to the series and unsure about which game to purchase, remember that Battlefront is great about providing demos for every game. The demo for Black Sea includes a training scenario and two full scenarios from the game, more than enough to see what you are getting into.


Combat Mission: Black Sea is available on Steam, the Matrix Store, and directly from Battlefront.


- Joe Beard


  BY STEALTH AND SEA FROM DVG Not so long ago when I reviewed Pavlov's House , the designer David Thompson was a comparative unknown and...

BY STEALTH AND SEA BY STEALTH AND SEA

For your Wargamer, Toy soldier collector, MiniFig collector, military history nut. Reviews, interviews, Model Making, AARs and books!

 BY STEALTH AND SEA

FROM

DVG


Not so long ago when I reviewed Pavlov's House, the designer David Thompson was a comparative unknown and it was the topic and game company publishing it that drew my interest and many others'.  Fast forward to today and the question now is what's David Thompson designing next.  That has been accomplished through a number of very different successful designs and the makings of a "must-have" series that began with Pavlov's House.

If you, like me, want that third series game then you'll have to be patient for the arrival of Soldiers in Postmen's Uniforms.  Instead once again it's "... and now for something completely different."  Well that's not quite true.  It is a purely solitaire game. We are still in the period of WWII and, like Castle Itter, we're still with a topic barely known, never mind gamed!

By Stealth and Sea takes as its subject the exploits of Italian two-man torpedo actions in the Mediterranean.  If you're asking what on earth they are,  I was slightly ahead of you.  My encyclopaedic knowledge of the topic comes from a strip cartoon story in the hardback Christmas annual of one of my favourite childhood comics!  Perhaps, however, it's no surprise that the heroes of my comic were British and highly successful against insurmountable odds.  

In fact, the British "Chariot", as it was named, was directly inspired by the exploits of the Italians, but, as you'll discover, the Italian actions are a far cry from those depicted in my comic.

The presentation of the game, being a DVG product, is unquestionably immaculate and with some additional surprises.  This was most evident in the game board or, I should say, boards!  I had expected a generic map with terrain tiles in the style of Sherman Leader or, considering the nautical topic, that it would be even more likely to have an abstracted board as in U-Boat.

Far from it, there are three boards.  Each depicts a specific geographical location; the harbour areas of Gibraltar, Alexandria and Algiers.  In their monochrome grey-blue tones, they exude the feel of an aerial blue-print that I find adds to the impression of historical authenticity.


The boards also boast the traditional standard hexes for manoeuvring your equally traditional square cardboard units.  These mainly depict the various ships that will be both the targets for your Italian attackers and, in some cases, the ships that will be seeking to attack and thwart your plans.  You, yourself, have but three counters to manoeuvre - these are your three SLCs.  These letters SLC stand for "siluri a lenta corsa" or, as we called them, slow-running manned torpedoes.


Though much smaller than the counters familiar from other David Thompson designs, they have a similar appearance with a coloured edging identifying whether they are Navy, Cargo or Patrol vessels.  However, if you were hoping for the familiar head and shoulder profiles of historical individuals, they are still here.  In this case, they are not on counters, but on a set of small Operator Cards that depict each two-man team and there's a substantial range to choose from 


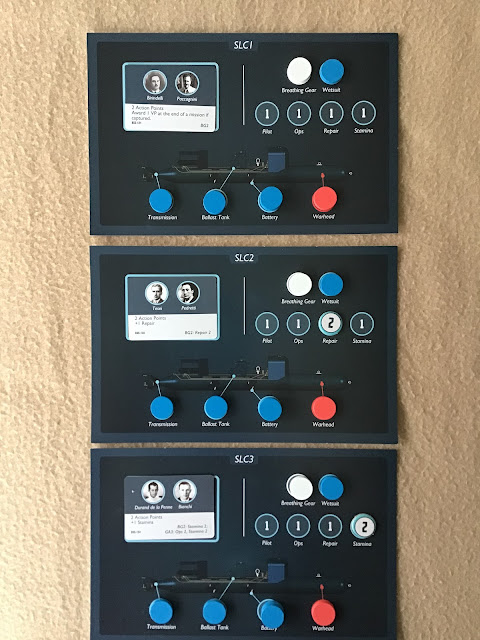
The ones you choose or those designated by the Scenario are placed on separate display sheets, one for each SLC.  The only slight criticism I have of the components is with the thin card for these displays.  A much more substantial quality would have added little to the cost.


By contrast, the several wooden discs that mark various items of equipment on these cards are much solider, as are the various A4 sized player aids that cover the Turn Sequence, potential SLC Actions, Roster Sheet for the Operators  of the manned torpedoes and both an Historic and a Custom Campaign After Action Report Sheet.

Finally, there are the two booklets: one of Rules, the other of Missions.  They are identical in being printed on quality glossy paper and laid out in large, clear text with an abundance of illustrations.  Though the basic rules occupy 20 pages, this is misleading as the generosity of diagrams and textual layout probably double the amount of space a less luxurious  production would fill.  In addition the rules are sequenced to take you step by careful step in chronological order through a turn.  The Mission set up uses the first scenario from the Mission Guide, the attack on Gibraltar harbour.

Nothing could be simpler or more straightforward - for those weened on the typically extensive choices and deliberations made in planning that begin most of DVG's solo games, this may be a welcome relief or a disappointing departure.  Even when you add in the extra elements introduced when playing a Campaign, the preparatory choices remain fairly few.

In fact, this is the main limitation of the game and it is a limitation based on the historical abilities of what is being simulated.  You are dealing with actions in which the participants could only manoeuvre their craft either on the surface or submerged. Their prime actions are avoiding detection until they can reach a target, detach the warhead that is part of the craft they are manning and attach it to the target ship.  Along the way you will mainly be coping with the vagaries and inadequacies of the equipment and as often as not these will determine the success or failure of even reaching your target. 

There are only four Phases to each turn.

The Fault Check Phase: its title is fairly self-explanatory.  The top card of the Fault deck is turned and a die roll check made.  Failure affects a range of six possibilities including individual items such as breathing gear or a wetsuit to the ballast tank of your manned torpedo or its warhead.

SLC Phase is where you choose two from the possible action list for each of your manned torpedoes.  Many of these choices are related to movement, either on the surface or submerged.  As a full move is two hexes and ordinary movement only one, while even changing facing takes up one Action, progress is very slow!  The other Action choices include diving and surfacing, repair [a highly likely essential choice], evading anti-torpedo nets, detaching the warhead, attaching the warhead to a target and attack from an SLC; these latter two are variations of the only type of attack you can make and lead to the compulsory Actions of Scuttling the SLC and Escape.  Nearly all of these involve some sort of die-roll check, though a few can be automatically achieved by spending both Action Points.

Harbour Defense Phase
Here the Alert Deck comes into play.  Some elements of the harbour defence are not immediately introduced, while others may be strengthened, particularly if playing a campaign of three scenarios.  Though typical elements such as Searchlights and Shore based Mortars feature, along with detection by ships,  All comes down to card turning, even the slightly more mobile element of Patrol Craft Response & Patrol Craft Attack follows the same lines. 

Clean-Up Phase
This simply covers the removal of Patrol Craft or their flipping from Exhausted to Ready and moving the Time marker on.

All in all, a very straightforward and easily assimilated system: even  playing a Campaign, which takes up the rest of the rule book, adds only a few more options, such as choosing the skills that can be increased and the Harbour defences developed.  Finally, there is an equally beautifully produced Mission Guide with 9 Scenarios of which six are devoted to Gibraltar, one to Algiers and two to Alexandria. 


The key decks that cover virtually all that you do.


All the contents bar the wooden markers.


The SLC  displays with appropriate markers


 The many targets at anchor in Gibraltar harbour

The history has been thoroughly and lovingly researched and crafted with the expected quality of production, but the nature of the situation leads to what I would call a very passive experience.  As a player you are very much in the hands of the turn of the various cards and the accompanying dice rolls.  I felt very much that I was in a narrative with too little control of its outcome and, more than anything, I was disappointed that all the many lovely counters depicting historical ships simply sit there as interchangeable targets for a last lucky or unlucky die roll!  Unlike both Pavlov's House and Castle Itter which are tense, pulse-raising every time, By Stealth and Sea didn't get my heart racing.


I first learned many of the details of the First Barbary War  from Ian Toll's excellent book Six Frigates , which was one of the best hi...

The Shores of Tripoli The Shores of Tripoli

For your Wargamer, Toy soldier collector, MiniFig collector, military history nut. Reviews, interviews, Model Making, AARs and books!


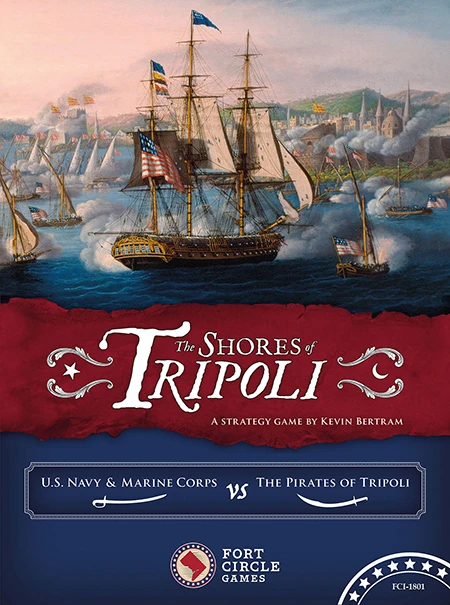
I first learned many of the details of the First Barbary War from Ian Toll's excellent book Six Frigates, which was one of the best historical works I've ever had the pleasure of reading. It was quite the tale of a scrappy young nation deciding it was better to fight the local bully than to pay him tribute. Now Fort Circle Games has released their first board game, which captures this moment in history with a very elegant and simple design. The Shores of Tripoli is a strategy game for two players that can easily be played in under an hour. 


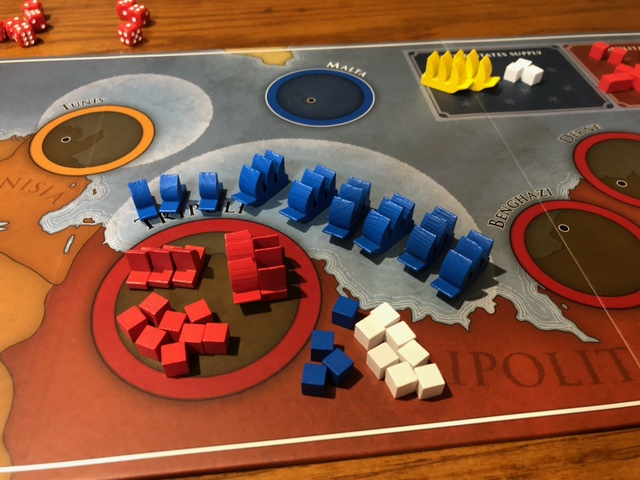
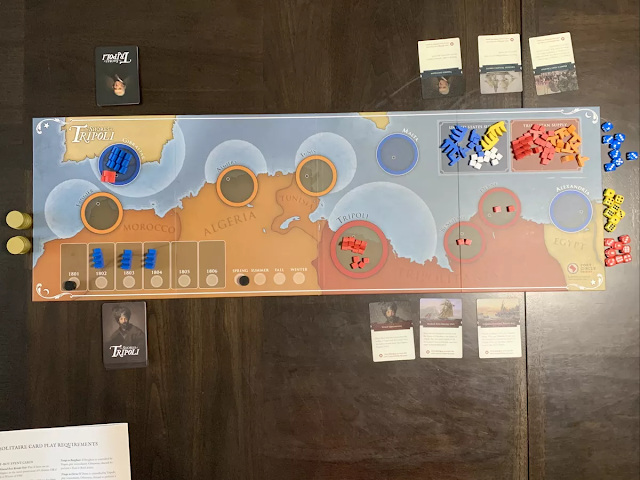
One player takes the side of the Americans, the other takes on the role of the Pasha of Tripoli. Each gets a hand of cards, but the actions that each player can take after that are almost entirely different. The American player has powerful frigates that they can freely move around the map, but these are very limited in number in the early phase of the game. America seeks to build up forces in the region, blockade the Barbary corsairs in their harbor(s), and potentially build an army on land. The Tripolitan player is racing against time to send their corsairs out on raids and gather all 12 gold coins before being overwhelmed. They can also win by managing to destroy 4 American frigates over the course of the game. Both players will feel stretched thin, and wishing they could take just one more action throughout the entire game. 


Sometimes things come down to a climactic battle!

The game is split up into 6 rounds each representing a year of time, and 4 turns within each year, with each player getting one action per turn. At the end of each year, the players draw more cards to refresh their hands, and potentially receive reinforcements. That means that, at most, there are only 24 actions to be had in a game of Shores. Therefore, every single action you take carries weight, and there is precious little margin for poor moves. At the same time, the game is so brief that if you do screw up, you won't have to wait long to get it over with and try again!


The cards each player has come in three flavors. Cards which let the player take a moderately powerful action, and then can be put in the discard pile to come back around later. Cards which trigger a unique event that can only fire once per game, and finally cards which can add on an extra twist to other specific events or battles. All cards can also be discarded to take a minor action (building a new small ship for both players, moving two frigates around for the US player, or going raiding for the Tripolitan player). On each turn, a player must either play one of their cards for an event, or discard one to take an action. There is also a hard hand limit, and so one must think carefully about cards they may want to hang onto for plans down the road.


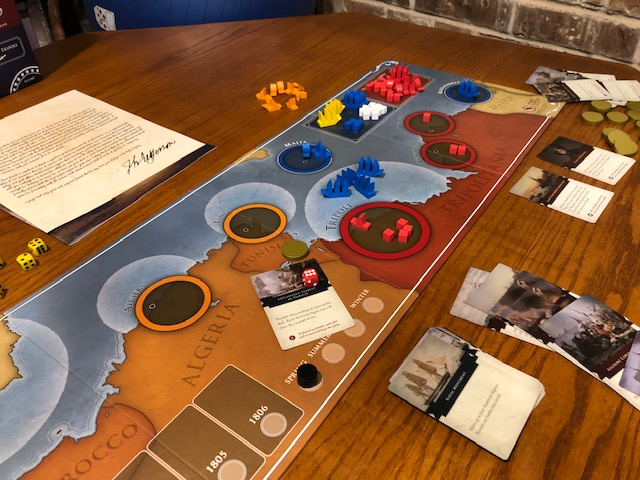
While I haven't fully explained the rules, there isn't much more than that to the rulebook. Players move satisfyingly chunky ship pieces around on a relatively simple map, where there are really only a handful of spaces that are used throughout the game. Combat is resolved via very simple rules and rolling big handfuls of dice. The game can even feel very luck based at first. However, after just a few plays, another level to the strategy emerges. There are not that many cards in each deck, and every single one will filter through the game at some point. With many of the most powerful cards being one use only and very specific in their function, strategies begin to build around guessing which cards your opponent has in their hand at any given time, and noting which cards they have already played. It's definitely a game that benefits from familiarity and repeated plays.


The game includes a solo mode in which you play as the Americans against a Tripoli bot who will mostly play sensible moves, but is predictable. That said, you will still need to play very smartly if you want to find a path to victory. I lost twice to the bot before finally winning on the very last turn of my third game. While I would not recommend buying this game to only play solo, it's nice that there is a satisfying opponent in the box. 


It shouldn't be very difficult to find a live opponent for The Shores of Tripoli, as the rules are extremely simple to teach, and the game can be played in a casual manner as one learns, while still having fun. Neither player can roll over the other without extreme luck, and the quick turns keep the game moving at a good pace. My wife, an occasional board gamer at best, and certainly no wargamer, was able to defeat me on her first attempt! 


If you are looking to learn more about the conflict, this game is a great place to start. Each of the unique event cards is based on either events which actually happened or very much could have happened. Besides the rule book, the game comes with a historical supplement which offers a great deal of context for the design of the game and the cards. One nice bit of fluff in the box is a copy of the letter sent by Thomas Jefferson to Yusuf Karamanli just before the war broke out.


The Shores of Tripoli is a charming game that could fit right in on any gamer's shelf. The mechanics are simple, the game plays fast, and each side offers a unique approach. The American player will need to be active, moving ships around, attacking when the time seems right, and trying to find the balance between covering ground and spreading themselves too thinly. The Tripolitan player is racing the clock, weighing risk and benefit with each raid, all while looking for openings to exploit. If you are at all interested in the historical conflict depicted, I heartily recommend The Shores of Tripoli. 


The game can be ordered directly from Fort Circle Games or from other vendors on the web. 


- Joe Beard


hpssims.com