second chance games

Search This Website of delight

FREEZING INFERNO FROM  PRINCEPS GAMES A stunning box art Quite a bit of newness to open with here.  First off is the company, Princeps Games...

FREEZING INFERNO FREEZING INFERNO

For your Wargamer, Toy soldier collector, MiniFig collector, military history nut. Reviews, interviews, Model Making, AARs and books!

October 2023

FREEZING INFERNO

FREEZING INFERNO

FROM 

PRINCEPS GAMES

A stunning box art
Quite a bit of newness to open with here.  First off is the company, Princeps Games, who started out in 2019.  Second is that Freezing Inferno is only their second wargame.  Their first March on the Drina was reviewed last year by my fellow reviewer, Robert Peterson.  Third is the topic, the Finnish-Soviet war of 1939-40.  This campaign has been visited before, starting with SPI's Winter War back in 1972 and returned to in 2021 by Decision Games as a magazine issue in their World at War series.  In between came GMT's Arctic Storm in 1992, not to forget the recent Finnish Expansion for Russia Besieged Deluxe edition.  So, a very limited treatment for what remains a relatively little known conflict.
So, a little background information.  What's generally referred to as the Winter War was a Soviet invasion of Finland launched in November of 1939, soon after the beginning of WWII.  Finland successfully withstood these attacks for over two months, but was ultimately overwhelmed after renewed Soviet offensives in February 1940 and the war concluded in March with the signing of the Moscow Peace Treaty.  Though the gains made by the Soviets were more than they had ostensibly sought  in their demands before the war, many writers take the view that their real intentions had been to conquer and establish a puppet government.  Certainly, many are of the opinion that the Soviet effort reinforced Hitler's decision to invade Russia.
Whatever the reality, in Freezing Inferno, you now have the chance to experience this war in what, for any company, can only be described as an excellent deluxe package.  I'd been very impressed by what I'd seen of March on the Drina, which introduced the basics of the system used here. I've no hesitation in saying that this game takes everything even further.
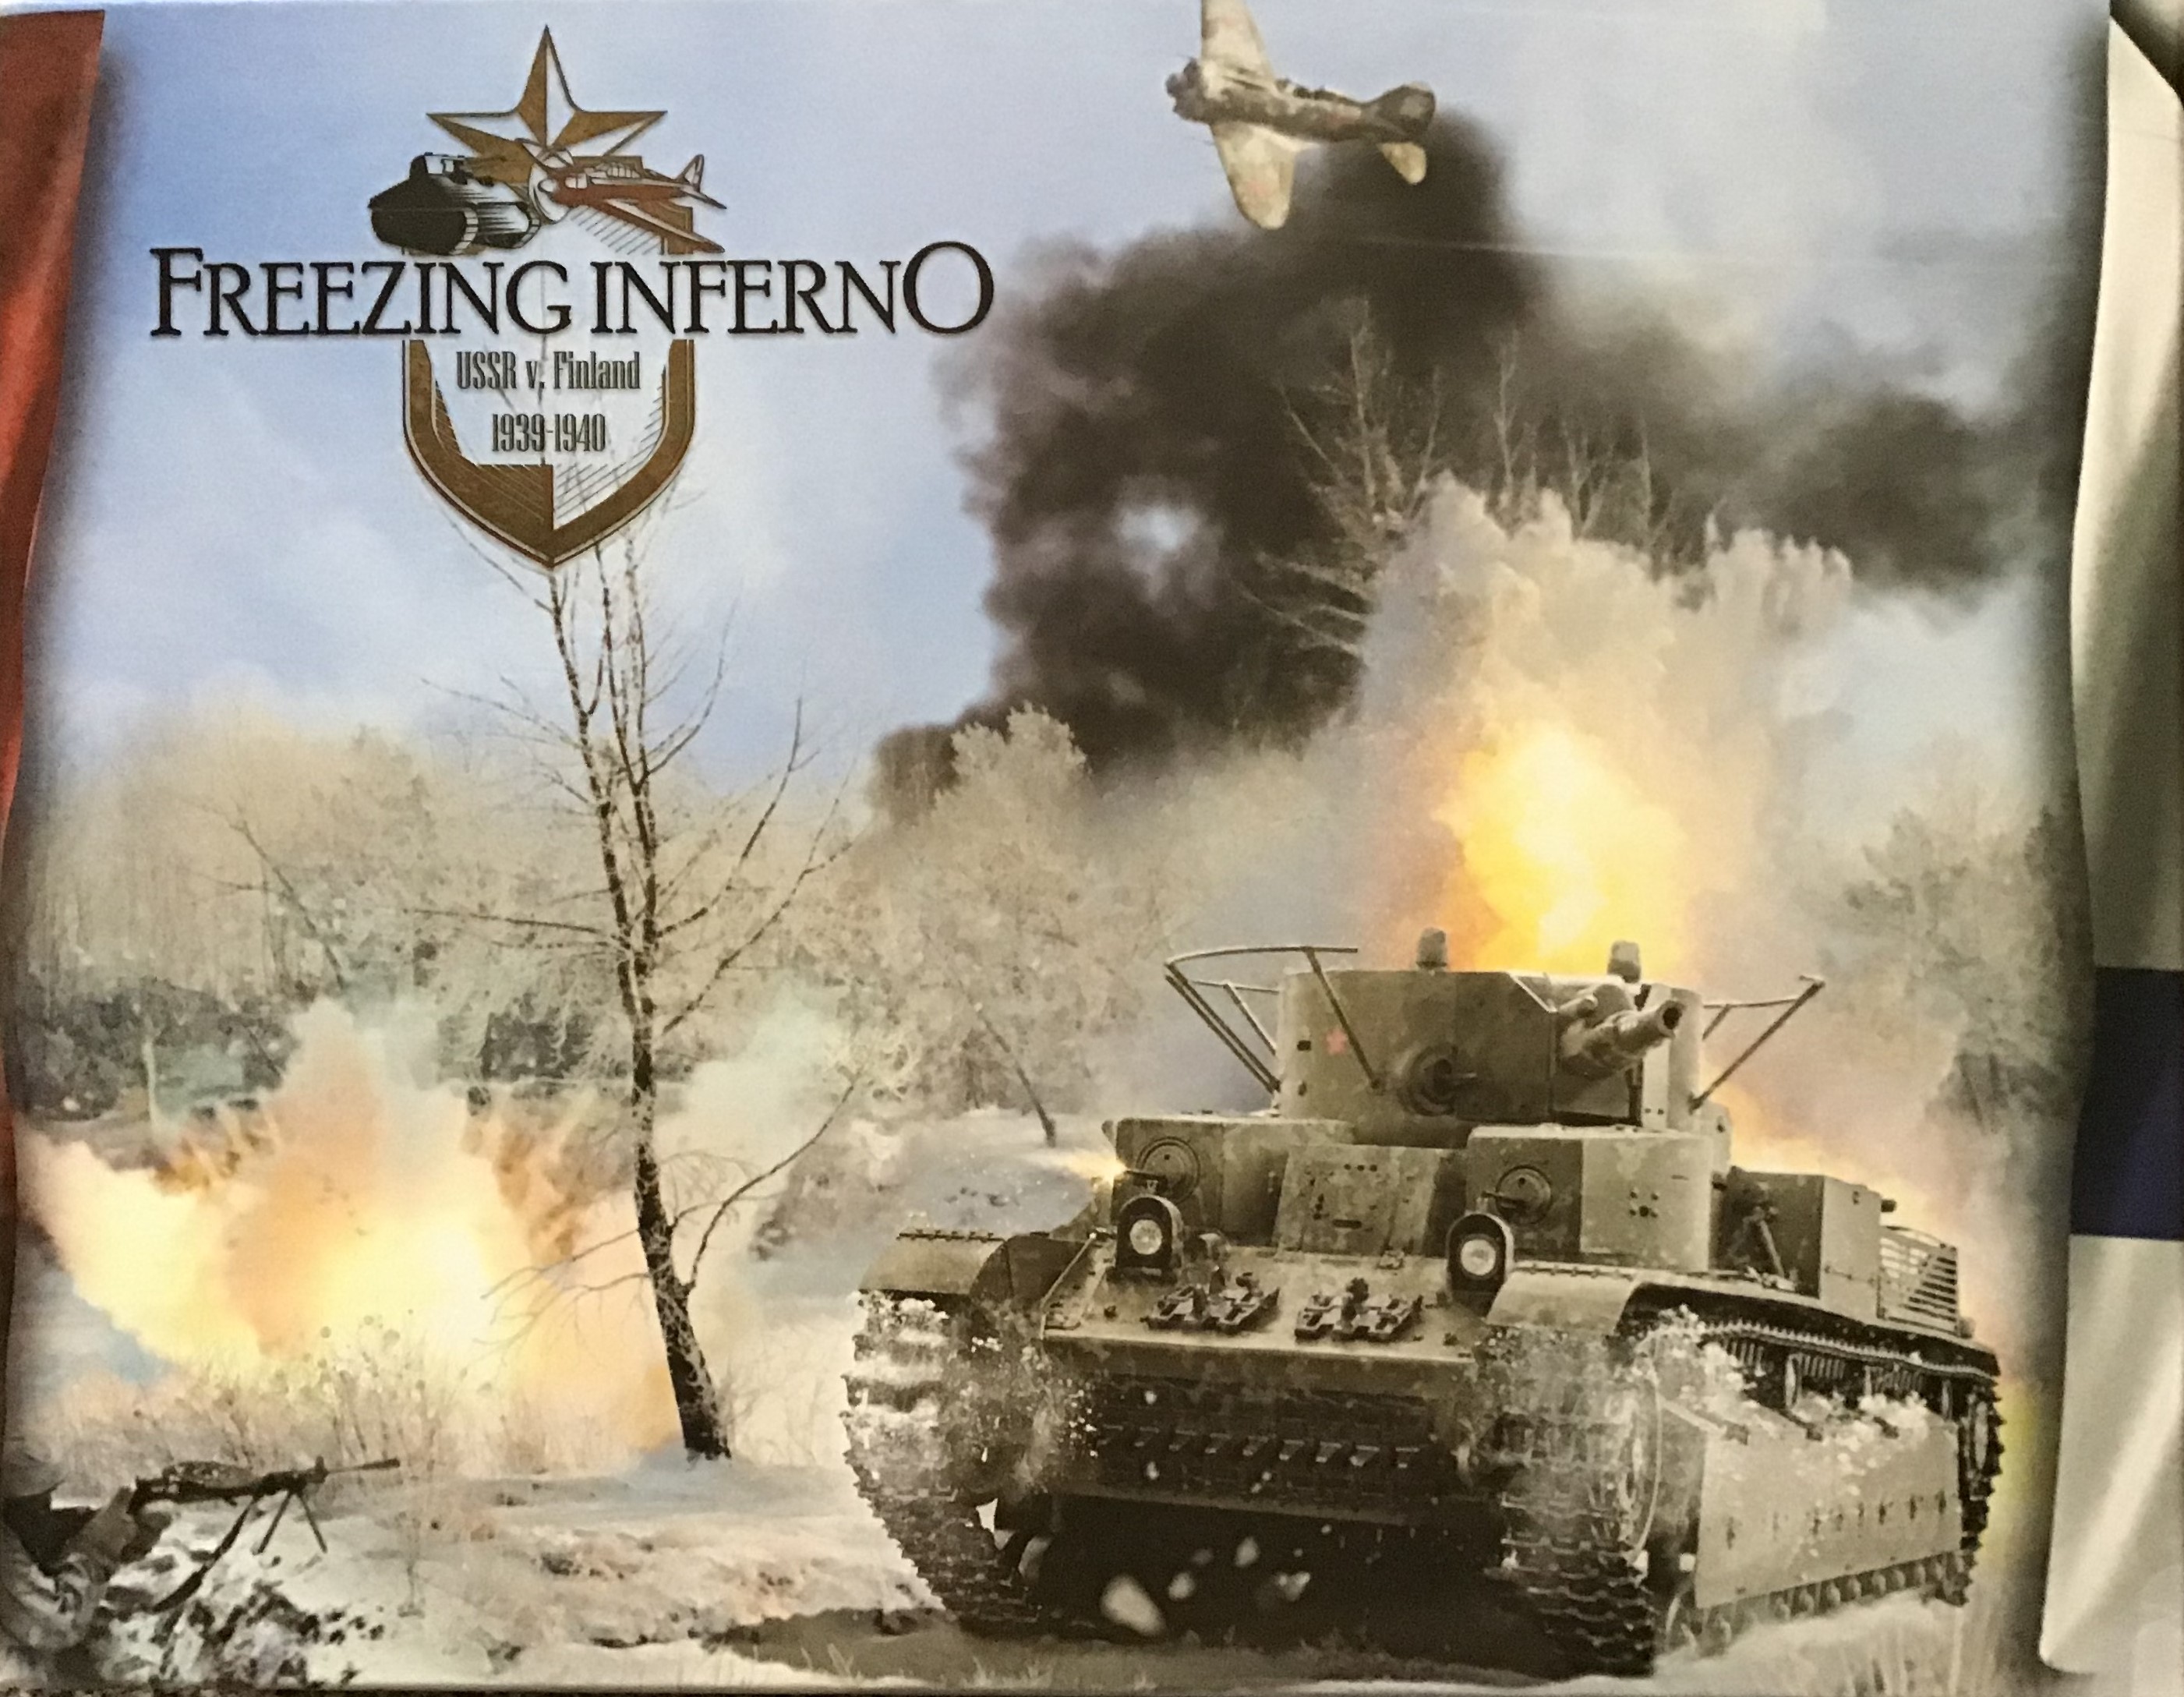
The box art is truly dramatic with its roiling black smoke and menacing tank back-lit by the explosion just behind it.  Opening the deep box, revealed a very safely bubble-wrapped map and when you open it out, what a map!

The mounted board is stunning and as each player sits either on the west or east side, the orientation of trees, cities, charts and military capacity track are all easily readable.  However, if you don't like this perspective, flip the map over and you swop from a semi-natural rendering to a more conventional game map perspective.  The latter, seen below, looks less striking, but I confess that I prefer it for game play purposes and also because it names all the cities on the map unlike the other map side.  Congratulations to Princeps Games for going the extra mile to provide us with a choice.


Digging deeper into the very deep box, beneath five sheets of magnificent counters, this is what's revealed...

... and here they are lifted out of the main box.


Five very impressive storage boxes.  The largest one contains six super thick, rigid play aids. Of the first two smaller boxes, initially one is empty and the other contains a variety of dice: 1 D8, 1 D10, 1D12 and 2 D20.  However, from the flags on each they are presumably intended for each side's counters.  My preference has been to bag and label them as well for ease of setting up.  Finally, in the other two smaller boxes, one contains the Military Capacity Tokens and the other a deck of twenty four tarot-sized cards, three for each of the eight game rounds.  It’s important to note here the terminology, as the rules use the word round for what is normally in most games called a full game turn and instead uses turn for each player’s individual part.
Military Capacity Tokens in four denominations

Turn Cards
The quality of every single item is magnificent.  To some extent, you may consider that this is not the essential aspect of any game. Bells and whistles don’t necessarily guarantee a good game, but the current trend is for lavish production values and this is never more true than in the game funding process where often it seems that a game is only valued by how many stretch goals it can pile up.
That said, the historical war and rather unexceptional previous games that have dealt with it would not have been likely to draw my attention, but the striking visual appeal of the game did.  I was also amazed by the remarkable base cost of $58, though I have to thank the generosity of Princeps Games for their willingness to provide a review copy and not just a proto-type, but the finished product.
As you can see , I’ve been more than satisfied by everything so far that relates to what constitutes the physical qualities of this game.  So the crucial test was how does this game play and how successful is the system and the rules that explain it.
I confess I had some confidence from what I’d read and seen of their first war game, March on the Drina.  The reality far exceeded my expectations.  At heart it is a fairly simple hex and counter wargame with a familiar igo-ugo sequence of play.  So, what lifts it way beyond that simple premise?
For me the first thing was the large scale of the map and the surprisingly low unit density.  The latter was the biggest revelation, as with five sheets of counters that are almost entirely combat units, I’d anticipated a very heavy, dense and possibly complex affair.  Not so, at start 24 Finnish units face off against 29 Soviet units and the numbers on the map will rarely go much beyond those figures.   The reason is that the designers have chosen to create most units at start as five step units with each unit having a counter for each step. That’s why there are so many counter sheets.  Apart from HQs and AA units that are single step, what you see on the map at the beginning of the game are single unit stacks of 5 counters.  This adds to the impressive visual appeal of the game.  

The photo really does not do justice to the visual impact of the game, nor can it convey the tactile pleasure of manoeuvring those counters.
As I did and several other commentators on the game, you may have initial reservations on learning about a counter for every strength step.  Will the stacks topple?  Will it make the game clumsy to manage?  Will it make unit strengths awkward to work out?  The answer is no, no and no.  One reason is that the hexes are so nice and large and the counters are equally large and solid.  Consequently the stacks are easy to handle and move around the map and it's far easier to see how many steps there are in them than having to lift up a counter to read a strength marker underneath.
There are so many small factors pertaining to these units that combine to make this both novel, easy to play and easy to understand.   But before moving into the smaller details that make this design shine, I'd like to outline some of the broader aspects of the rules that confirm the outstanding features of Freezing Inferno.  The first begins with set up and the great replay value it brings.  One of the game's contents is a pad of 48 mini-maps; 24 for each player.  The rules tell you how many of each type of unit you start with and all are at full strength (for most units, as I mentioned earlier, that's a maximum of 5 steps, except for HQs and AA units that can only ever have a single step). Each player designates the starting positions of their units on a mini-map and then sets up.  If this weren't enough to provide variety, the rule book contains eight different pre-designated set ups for each player.  The rules even suggest the two set-ups with which to start your first play of the game. Just personally choosing from these or even randomly rolling for them will keep you going for quite some time, but I'm quite sure that like me you'll soon want to experiment with your own planned set ups.  

Pad  of 48 mini-maps to log your initial set-up

Just in case that's not enough, an advanced option for set-up tells you how many strength points of each unit type you start with, but allows you to vary the strength of units.  This means that you can field more units, but some will be at less than full strength.  This one area of the game not only gives excellent replay value, but the chance to try out very different situations to begin the game and many different styles of play.   As the game comes with a straightforward bot for each side, solo play is also greatly enhanced by these rules.

Soviet BOT play aid

The next major area concerns the handling of reinforcements and directly links with the fact that each side's cities have a National Military Capacity (NMC) with which you buy your reinforcements.  Finland starts with cities totalling 28 NMC points and the Soviets 29 NMC points.  At the end of each player's turn, they will collect however many points worth of cities they control.  This is where those chunky oblong counters come in to record how many NMCs you possess and the large numerical track on the game board records what your current control level is.  Capturing an enemy city will deduct the full value of that city's points from your opponent, but will only gain you 1 NMC.  If your opponent retakes the city, you lose that 1 point and they regain its full value.  
How does all this then relate to and affect reinforcements? Very simply, at the beginning of specific rounds (3,5,7 & 8), each player can pay with the NMCs that they possess for reinforcements and build up steps lost in combat of units that are in supply on the map.  A very good point here is that replacement steps are allocated immediately at the beginning of the round, but reinforcements are only placed on the map at the end of a player’s turn,  Another very simple idea, but it creates for both players another small decision point.  It is these small incremental details that give the game so much flavour and individuality.
No more so than at least two of the three optional modules - all three of which add to the replay value and add a little more depth of game play without spoiling the basic simplicity and ease of play.  The first is weather which is rolled for at the beginning of rounds 2 -8. 

You roll for both temperature and weather conditions which are interlinked, affecting both terrain and movement costs.  Frankly, I don't think this should even be an option.  It's so quick and easy and was a significant factor in this war.  My advice - just include it from your very first game.  The other two modules bring in respectively technological-tactical factors and diplomacy.  Both involve expenditure of NMCs  and there is a chart in the rule book that shows how choice of either or both options marginally reduces the cost of replacement steps for each type of unit.  There is also a small section in the rules for Solo Mode that tells you how to prioritise bot choices if using these modules.  For me the Diplomacy Module offers least as, though you can affect the Diplomacy Track through Rounds 2-6, the potential effect may be very small and only comes in to play on round 7.  What is interesting about it is that the pro-Soviet benefit is hardly worth having, but the pro-Finnish one might just be enough to save the Finnish player from defeat.  So, if this option is chosen and the Finnish player decides to aim to use it to their best advantage, the Soviet player may feel forced to counter it just to avoid the possibility of a last minute influx of Finnish units.  A nice conundrum and so easy to include.  
The second module introduces the type of tech-tree concept found in  a range of WWII games.  What I like about this one is that again, for very little addition to the rules or game play time, it adds an element that contributes to the different feel of playing each side.  Some may perhaps feel that they don’t add enough difference, but I like the fact that none of them overbalance or over-complicate the  smooth and quick play of the game.  It also brings in such evocative words as sabotage and espionage, though what I think is most important for the game is that the benefits from the tech-tree add to the different and distinctive flavour of the two sides.


Finnish tech-tree
Turning to the basic game play, on your turn you move and have combat with one unit against one enemy unit before activating the next unit.  No adding up combat factors and dividing them by enemy combat factors.  Just determine what is the attacking unit’s attack strength and what is the defending unit’s defence strength.  Look this ratio up directly on the appropriate combat chart and roll the die.  It is as simple and quick as that.  Both combat results tables are printed on one of the excellent, solid card Play Aids.  Ground to Ground & Air to Air is on one side and on the reverse side is Air to Ground.
There are several novel , but easy to understand features related to Combat.  First of all, each unit has an initial attack value and defence value (as well as its movement value )clearly printed on its counter. To determine its strength, you simply add the value to the number of steps the unit currently has.  So, an infantry unit of attack value 2 with 4 steps would have an attack strength of 6.  If the defending unit was a tank of defence value 4 that had 2 steps, then the total defence strength of the tank would be 6.  Combat modifiers provided by terrain are very straightforward and easy to remember, though there is a very nice large, clear chart printed on the map and reproduced in the rule book.


Next important detail is that whichever unit suffers losses retreats one hex.  The only exceptions to this is the result where both sides suffer 1 loss in which case neither side retreats or the Defender 1(DR) result where the defender has the option not to retreat.   Additionally there are two other possible combat results.  CA is very familiar, the defending unit can CounterAttack, the other is - as far as I’m aware - totally original and that is NONT.  This means that a defending unit cannot attack or move on its next turn and also, if it suffers another NONT result during this same opponent’s turn, it will take a step loss.
These few rules are so easy to remember and apply and this is true of just about all the rules in this game.  This is a major reason why I like this game so much.  All your focus goes into the battle, not the rule book. There is a final and unusual option related to combat that I have similar praise for and this is Rule 6.4 Adjusting Luck! At the beginning of the game you decide whether you want to reduce the element of luck in your combats.  This is done by your choice of combat die.  The basic die for combat is a standard D8, but the game includes two different D20 dice that have the numbers 1-8 on them.  Because of the distribution of the numbers on the dice, each of these dice reduces the chances of rolling very high or very low.  Such a simple idea, but perhaps not for those who like to blame their defeats on the roll of the dice!!


Play aid for Sequence of Play
What other factors give this game its individuality?  Supply rather unusually is just a question of being within 7 hexes of an HQ and that’s it.  The HQ itself doesn’t have to be linked to any supply source.A little unusual, but it does throw even more emphasis on seeking to take out HQs and on protecting them. The next factor is air power.  At this scale it’s often just a question of air points.  Freezing Inferno gives you air units, but only a handful.  So, they play their role, but don’t overshadow the main ground game.  The rules too are clear and simple, with fighters only used to intercept bombers, not to directly attack ground units.  The air presence brings in a few AA units to add to the counter mix and what I really, really like most of all is the presence of airports - though, perhaps, a better translation would have been airdromes or even airfields!  A plane must have enough movement points to fly from an airfield to attack its target and return to another airfield - no kamikaze attacks in the European theatre!  Consequently, it does give the opportunity to have runways and control towers depicted on the map and, even more to my liking, the need to capture the hex with the control tower in order to control the whole 2 or even 3 hexes that make up the airport.  Again lots of feel added through some simple rules here and capturing airports is very important for the Soviet player if they are to maintain their bombers as a strength in the progress of their invasion, both directly as attackers or because of their capacity to transport infantry.

Soviets within striking distance of enemy airfield

Next up is how recording each Round is dealt with.  What the game calls Calendar cards don't just help you keep track of what Round you're playing, they add another small variable to the game!   Each Round has three cards and at the beginning of the game you randomly draw unseen one card for each Round.  These make up your Round Deck.  When you reveal the current Round card, it has a brief outline of an historical event and a small benefit or disadvantage for one side or the other.  Great stuff - I get to learn a bit about this little known war and it adds to play too.

The history and game effect for Round 4 of my current play

Finally, just a last couple of original ideas that are worth mentioning; neither of them have I encountered in any other game. The first is related to ZOCs.  Control of a hex’s ZOC is determined by which side has the most units imposing a ZOC on a hex.  Watch out for this one, as it obviously tends to benefit the Soviet player, as they are more likely to be able to muster the units to control a ZOC and deprive the Finnish player of control.  A useful minor but additional tool when you’re the main attacker.  
Last of all is what is called unit regrouping, not at all what I expected. Essentially, units can transfer strength between units of the same type by movement.  For example, a unit of strength 5 could detach say 2 strength steps using movement points to travel three hexes to a unit that has only a single step left.  If it wishes, the newly formed unit (now containing 3 steps) can move as far as the remaining movement points possessed by the unit that joined it.  This is, for me, an idea that I strongly welcome and is part of the great marriage this game creates between simple, familiar rules and equally simple, but innovative additions.
So, in conclusion, Freezing Inferno is a huge success in every aspect of its production qualities and gives excellent playability and play value in its rules.  It’s swift moving and wholly enjoyable whichever side you play.  It has bags of replay value and I believe successfully creates the feel of the Winter War.  What I don’t think it gives you is the historical Winter War.  As my previous games involving this war that strove for an historical simulation weren’t exactly the most exciting or enjoyable to play, I know that Freezing Inferno gets my vote for a great gaming session.

0 comments :

  Stargard Solstice by Three Crowns Games  It is 1945 and the Red Army is seeking vengeance for the horrors that were perpetrated in the Mot...

Stargard Solstice by Three Crowns Games Stargard Solstice by Three Crowns Games

For your Wargamer, Toy soldier collector, MiniFig collector, military history nut. Reviews, interviews, Model Making, AARs and books!

October 2023

Stargard Solstice by Three Crowns Games


 Stargard Solstice


by


Three Crowns Games


 It is 1945 and the Red Army is seeking vengeance for the horrors that were perpetrated in the Motherland. Conversely, the German Army is trying to hold back the red hordes from invading the Fatherland. The Germans are attempting to strike with Operation Solstice (Sonnenwende). Meanwhile, the Soviets are starting their East Pomeranian Campaign. The Germans are scraping the bottom of the barrel as far as manpower and armaments. The Soviets are also low on manpower, but they have plenty of artillery, tanks, and planes to support their offensive.


 This is what Three Crown Games has to say about their game:

"Stargard Solstice starts with one of the last German offensives of 1945, ‘Operation Solstice’. At the beginning Guderian had planned a pincer move to relieve Küstrin, but Hitler wanted to save troops to retake Budapest. This resulted in changing objectives to the relief of Festung Arnswalde and trying to cut the Soviet supply route towards Küstrin. The historical objective for the Soviets was to drive the Germans out of Pomerania and thereby protect their right flank while preparing to take Küstrin and make the final thrust towards Berlin. Stargard Solstice is a game recreating this campaign in Pomerania from 15th February – 6th March, 1945."


 This is what comes with the game:

 A full color A1 map

 16 page rulebook

 286 high quality, 15mm die cut counters

 Front and Back cover with game aids, charts and tables

 Sturdy 100my ZIP-lock bag


Game Turn: 2 days

Hex: about 3 to about 4 km

Units: Battalion to Division

Solitaire Playability: High

Complexity Level: Medium

Players: 2 or more

Playing Time: 3-10 hours


Soviet counters

 The map is a standard size one. It has large hexes and is easy to read. The Turn Record Track and some German and Soviet holding boxes are on it. As far as wargames maps go this is pretty standard. On its plus side is that there is no ambiguity to the terrain in each hex. The counters are also large and easy to read. There is no difficulty in distinguishing between the counters for setup purpose. Their color is pretty standard also, black for SS, gray for Army (Heer), with the Soviet regular troops brown and the guards units being red. Watch out when dealing with the counters. They look like the older ones we are used to, but these want to detach from the sprues in a slight breeze. The Rulebook is in black and white on thick paper. It is printed in double columns and the type is large. The Rulebook is sixteen pages long. The actual rules are only twelve pages and then comes the setup, Optional Rules, Designer Notes, and finally Random Events. There are two cardstock full page Player Aids. These are in full color. Most of the writing is fine, but the Terrain Chart writing is small. What we have here is a fine group of components for a wargame.


German counters


 This is the Sequence of Play:

Air Unit Phase

 Refitted Unit Return Segment

 Grounded Unit Refitting Segment

Random Event Phase

 Random Event Table Roll Segment

Command Phase

 Command Segment

 Movement Segment

 Combat Segment

Supply Phase

Reinforcement Phase

 Reinforcement Segment

 Soviet Replacement Segment

 Volkstrum Deployment Segment

End of Turn Phase


German counter with a Hetzer on it

 This is the fourth game in Three Crowns Games WWII Battle Series. Some of the other games in the system are:

Iskra, Tolling of the Bell, Konigsberg 45, Across the Narva 

 The game series has all the rules about everything we grognards expect to see: Fog of War, Command Chits, Regular and Strategic Movement, Rail Movement, Stacking, Reinforcements, Barrage, Retreats, Supply etc.

 So, pretty much if it walks, and looks and plays like a grognards wargame, it is one. This game and all of Three Crown Games games are meat and potatoes for grognards. Nothing too overly fancy with great gameplay. I have always liked the Random Events that they come up with in all of their games I have played. One thing about the game in the Designer Notes is the fact that the OOBs for the game are probably not spot on for the actual battle. It has all of the major units listed but, especially on the German side, it is hard to say for certain. With the destruction of records and the German forces completely falling apart, to assemble a complete OOB without any errors would be practically impossible. 

 The game plays like any wargame about the Eastern front in 1945. As the Soviet player, you are supposed to charge forward and crush everything with your tank tracks. As the German player, you are really emulating Hans Brinker. The only problem is that you only have so many digits to plug the holes. The game adds some chrome with a counter for Rudel among other things.

The Victory Conditions are:

Soviet Sudden Death Victory: If the Soviets have any of the Victory Hexes in Stettin.

German Sudden Death Victory: If the German player can get three attack-capable units off the map through the Landsberg Supply Line.

The normal Victory Conditions are based on the Soviet possession of Victory Point Hexes.

 Thank you, Three Crown Games, for allowing me to review another of your great wargames.


Robert

Three Crowns Games:

War Game Design | Three Crowns Games Production (3cg)

Stargard Solstice:

Stargard Solstice | 3CG (threecrownsgames.com)

Please see my review of their East Prussian Carnage:

East Prussian Carnage: The Tannenberg Campaign 1914 by Three Crowns Games - A Wargamers Needful Things

0 comments :

Fortress Games Talks About Their Games and Themselves   " Fortress Games was a product of two things: what I thought was a revolutionar...

Fortress Games Talks About Their Games and Themselves Fortress Games Talks About Their Games and Themselves

For your Wargamer, Toy soldier collector, MiniFig collector, military history nut. Reviews, interviews, Model Making, AARs and books!

October 2023

Fortress Games Talks About Their Games and Themselves


Fortress Games Talks About Their Games and Themselves


 "Fortress Games was a product of two things: what I thought was a revolutionary board game combo, and…Covid, lol.


Sitting around the house or just walking around the block here in Florida during early 2020 while restaurants, stores, and just about everything else was closed, I decided to dedicate a bunch of time to developing a solitaire game about the 8th Air Force’s bombing campaign against Germany in WW2. I’d always loved Avalon Hill’s “Luftwaffe” as a kid – preplanning your bombing missions and then executing them – but the game had several fatal (in my opinion) flaws: needing to chart out the missions with a pencil and pad each campaign turn, requiring all Luftwaffe planes of the same type to land at the same time (probably to save bookkeeping time on airborne German fighters), and other issues. There was for me a truly eureka moment on a walk around the block one day when I realized I had the solutions to all those issues and could build a great solitaire game. At the time, I assumed it would be another game for my and my friends’ entertainment.


A brief detour to disclose a little about me – I’ve designed games since I was a young kid. I definitely had a bit of a knack for it: when I was in college in the early 80s the war in El Salvador was in the news every day, so I designed a game about it and put it in the common area of my dorm. For the whole year you’d never walk in there without two kids playing it and others watching and commenting. Based on its success I designed a Vietnam game which was equally popular. With more titles in mind, we contemplated launching a game company to compete with Avalon Hill, SPI, etc. after we graduated but, upon doing a little research, realized that logistical work of starting a game company – lawyers for copyrights, trademarks; vetting artists; finding printers who could print all the game elements including printed and punched counters (good luck on that in 1983) – the whole thing was overwhelming for a bunch of 22 year olds, and we passed.


Fast forward to 2020 – all those things are easy (or easier) thanks to the internet! So, I had designed “8th Air Force” for my own amusement. In the process, I designed “20th Air Force” because it was a logical twin game. No one has done a game of the strategic bombing campaign against Japan that culminated in the atomic bombings of Hiroshima and Nagasaki, and the “8th Air Force” game system worked perfectly and the two campaigns were different enough that both games were unique. By the way, both games are seriously fun! I’ve designed dozens of games in my life, and I’ve enjoyed and developed them all to some extent or another, but I’d never designed a game as great as “8th Air Force” (and “20th Air Force”, but I give founders credit to “8th Air Force” because it was the desire to recreate that campaign that created all the concepts). Talking to some friends about it one day I was told why don’t you publish them? After an evening of discussing it I realized that, in 2020, that might actually be doable!


We launched our Kickstarter campaign in September, 2020 and sold $8,700 worth of folio games. While dedicated to delivering quickly and with quality to our customers, I nevertheless considered this likely a hobby of sorts, not a business, but the games got GREAT play reviews. Next thing I knew we completely sold out our inventory, just weeks after the KS campaign was fulfilled! Our customers had to wait weeks for our second, much larger print, and it sold like crazy. I realized I had an actual business.


Our next offerings were “Save Afghanistan, Comrade!” and “Save South Vietnam!” – again twin solitaire folio games, in a Kickstarter campaign which started October, 2021. We learned a lot from our first publications and I would venture that the component quality (game board and counter art, game manual structure, etc.) of these games were leagues superior to our first two offerings. This time we sold $9,000 worth of games and, again, sold out our inventory after the KS – this time I was a little ahead of the game and had restocked my inventory with a handful of games left in stock. A little background on the games, because how could we develop and playtest, etc., two new games that fast? They were already completely done. I designed them, “Save Afghanistan, Comrade!” first, around 2001 and had been playing ever since. I chose these themes because in 2001 I wanted a game about the Soviet war in Afghanistan and there simply was none. Similar to 8th AF & 20th AF, when I had designed “Save Afghanistan, Comrade!” and was thoroughly enjoying it, I realized the system leant itself perfectly to the US adventure in Vietnam and designed that game probably in 2002. At that time, I never even considered publishing them for the same reasons my college friends and I never launched in 1983. But after the success of 8th AF & 20th AF, especially with what I learned publishing them, it was pretty easy to get a fully designed and play tested game system published. The work was in the art and writing the game manual, but it’s nice to start with a fully developed system.


Finally, the high quality of the artwork in the “Save” game series compared with the “Air Force” series made me a little embarrassed at our first publication. In our defense, we were new and inexperienced when we launched 8th AF & 20th AF, and the game play received GREAT reviews and required no errata, but the component quality of these two great games was no longer acceptable. So, our last Kickstarter (January, 2023) was a complete redo of those two games: in shrink-wrapped BOXES not folios, on MOUNTED game boards no cardstock, laser-cut super-high-quality counters, all new game board player aid and counter artwork, and completely redone rulebooks including countless illustrations and illustrated examples. While our first two KS campaigns did about $9k each, this one did $38k, and the sales have been pouring in ever since. By the way, I tried very hard to take care of the original KS backers of 8th AF & 20th AF – if you were an original backer you got both games for $59, or $29.50 each. We sell them post-KS from our website for $69 each, or $139 for both. I went over my philosophical approach to our original supporters in an interview I did with the “Lead Pursuit” podcast which I have a link to on our website (click “News”, scroll down to 3/1/2023).


We currently have two more twin solitaire games in the works, but while the first one is very well along (90%, including fully playtested), the second one has lots of work ahead, including lots of playtesting, so it’s hard for me to imagine publication before mid-late next year. Again, we’ll launch them on Kickstarter."


 Thank you very much for this look under the hood, so to speak.


Fortress Games: Fortress Games – The Art of Wargames (fortress-games.net)


0 comments :

STUKA LEADER   FROM DVG After the amazing package of the latest Warfighter WWII boxed games and  the huge stack of expansion decks that I re...

STUKA LEADER STUKA LEADER

For your Wargamer, Toy soldier collector, MiniFig collector, military history nut. Reviews, interviews, Model Making, AARs and books!

October 2023

STUKA LEADER

STUKA LEADER 

FROM

DVG

After the amazing package of the latest Warfighter WWII boxed games and  the huge stack of expansion decks that I recently reviewed,  I am again indebted to Dan Verssen Games for their generosity in providing me with not only a review copy of Stuka Leader but all seven expansion packs!
If you've followed my reviews, you'll know that over the years the Leader series in the air, beneath the waves and on land have been a familiar feature among the many games I've reviewed here on A Wargamers Needful Things and in some ways it's hard to do more than say,  "Wow, they've done it again."
If somehow you haven't experienced any of these stunning games before, I'd suggest that you have a quick look first at both my earliest and my most recent review of the air games in the Leader corpus - links to which can be found at the end of this review.  This will give you all the background knowledge to this excellent system and how it works.  [For those of you new to the series and of an impatient disposition, I've copied in a lengthy extract at the end of this review that you might like to read now from my Zero Leader review that gives you an overview of the Sequence of Play.]
For those of you already familiar, I know it's been quite a lengthy wait for this much anticipated addition, but I hope you'll agree that, as always, your patience has eventually been rewarded with another amazing offering.
Component quality maintains the highest possible standards in all areas, with continued tweaks and additions that just add that extra touch of pizzazz.

It starts here with the mounted Tactical Display board where all the action takes place.  The information is much the same, but presented with just that touch more detail and style.  Where you will place your air unit  and the opposing enemy units has been upgraded from a simple  black or blue background to an aerial map image. This alone would be a nice cosmetic improvement, but the game comes with seven double-sided overlays to chime in with the many differing campaigns and locations you will be flying over.  From heavily urban dock waterfronts to what looks like a bend in the Thames through London and on to a convoy probably in the English Channel, each adds an element of historical depth to the situation.  

One of my favourite overlays
The turn track has been given just a little more clarity and prominence at the top left of the board and I love the sequence of holding areas illustrated with an ambulance, a fuel bowser and a supply truck, where you will place your medic tokens, fuel barrels and supply cubes.  
As always there is a massive number of unit counter sheets, eleven in all, and five packs of cards encompassing the expected stacks of pilots (83 in total), Event Cards and Target Cards.  The fifteen substantial Campaign sheets all on flexible A4 card stock, in fact, offer the ability to fight a massive total of 30 campaigns - all of which can be played as short, medium or long in turn length.  


To help you in your choice of Campaign, the back of the Rule Book contains 2 Appendices, both  of which list the degree of difficulty of each campaign ranging from Introductory level, through Standard and Skilled to Expert level.  One Appendix records which German fighters and bombers are available in each year and the other does the same for Enemy Aircraft.

The Battle of Britain Campaign Card
- not too surprising, it's a favourite of mine!

Of identical quality are four Play Aids: Key Terms, Hit Result Definitions, Player Help sheet and Skills, while the final two Play Aids: Stuka Dogfight and Turreted Bombers are substantial rigid A4 boards.  Love the pic of Marlene Dietrich in the top corner.


The final essential form is the Player Log, which remains, for what reason I've never understood, on thin paper, but at least this time it has been upgraded to the same glossy sepia colour as all the other Aids.
Among these many items, I was particularly thrilled by the range of Target Cards.  They cover so many tantalising situations from larger missions like bombing an airfield or radar installation to attacking a convoy of trucks or hitting an AA battery and even conducting an Air/Sea Rescue mission.
The rulebook remains almost identical in every way to previous Leader games that deal with the war in the air.  The same high quality of paper and print is matched by the attention to detail in drawing all the many illustrations and examples from the appropriate German material, even to a smattering of quotations from the Luftwaffe flying ace, Adolf Galland.  The rules, though detailed, are well-honed to perfection by now and continue to be in a layout that makes use of an exemplary use of white space.  As a result everything progresses in meticulous order from a thorough explanation of components through Set-up and into the exact Sequence of Play and ending with Aces expansion rules. a single page of very simple options and ending with five pages of aircraft data.
Though you get a few brief Aces rules, to use them you'll need the last of the seven Expansion packs that DVG so generously sent me.  Below is what each package looks like, before opening and unzipping.
They cover the following theatres of the war.
Expansion 1 Eastern Front 1
Expansion 2 Eastern Front 2
Expansion 3 Mediterranean 1
Expansion 4 Mediterranean 2
Expansion 5 Spanish Civil War
Expansion 6 What If?
Expansion 7 Aces
Despite there being several Eastern Front campaigns in the core box, I know that this is a focus I'll be drawn back to.  Though for me first on my list to explore has been the Spanish Civil War expansion, a period I've repeatedly been drawn to both in historical accounts and novels as well as board wargames.  Each Expansion pack includes a full counter sheet, a deck of cards containing mainly more pilots, but also a few Event and Target Cards and much to my delight not just one new campaign Sheet, but two!  The sequence of photos that follow come from the Spanish Civil War expansion


A nice thick stack of specific pilot cards
There's no doubt in my mind that this is not just a fantastic addition to the Leader series, but for me it's probably going to me my preferred choice- that is unless we can have a Spitfire Leader or Hurricane Leader.   Come on guys ... I know you can do it! 

Extract from Zero Leader review detailing Sequence of Play

Most steps in this game are fairly quick and easy to execute, with one major proviso and that is the need for a very careful initial sorting of components.  This is particularly advisable for all the Pilot cards, which, I suggest, need to be grouped according to some system that you feel comfortable with.  No solution can cover all the multiplicity of year ranges perfectly.   So, my own preferred, personal choice is by plane type and then according to the earliest year in which a given Pilot first appears.
As in all this series, there are 3 double-sided cards for each Pilot taking them from Newbie to Legendary level which you need to keep grouped together.  
With Target cards simply keep them in numerical order, draw the numbers needed for a specific Campaign and make sure they get slotted back at the end of a game.  Event cards are a boon as they are always shuffled at the beginning of a game!
For the many counters, the most important to sort are Site, Bandit and Bomber counters by year.  Though not as necessary, sorting the pilot counters by plane type is very helpful, though small groupings by alphabetical order is a good alternative.  

With that out of the way, you can get down to play where your first task is to choose one out of the fifteen Campaigns on offer.  This is the identical number to those in the Corsair Leader game, though I was pleased to see a few different choices here.  Each Campaign can be played for a Short/Medium/Long duration.  As a starter, I'd suggest an Introductory Campaign such as Midway [a personal favourite] played for a Short or Medium duration.  Next you'll select the appropriate Target cards as numbered on the well presented Campaign Card.

Among the many other details on the card are the types of Japanese  planes involved and the types of Allied bandits and bombers, you may come up against.  
Next you will select from among the named Pilot cards for the appropriate plane types and the year of the Campaign and the number of pilots allowed in your Squadron.  The rule book supplies the latter information on the number of pilots as well as the typical experience composition for the appropriate year and Campaign duration.  So, continuing as an example Midway and a Medium duration, I would choose 10 pilots made up of the following experience levels - 1 Newbie, 2 Green, 4 Average, 1 Skilled and 2 Veteran.  It's also worth noting that all Pilots are also divided into two categories;  Fast and Slow.  This is important for combat, as will be discussed later.
These details will be recorded on the Player Log [either a photocopy of the one supplied with the game or a downloadable copy from the DVG site] along with the number of Special Option [SO] points for the Campaign that allow you to further fine tune your Squadron by using them to upgrade experience or acquire specific skills to assign to individual pilots or improve the quality of a plane.

Above is a partially filled in Log for a short Midway Campaign.  I tend to include the type of plane under the Pilot name.  Each letter to the right indicates the pilot experience level and the black dots indicate in the first column the current Cool quality of the Pilot and in the second column their aggression.  Apart from keeping the completed Logs as a reminder of a Campaign, they're very handy if you want to quickly assemble a squadron and you don't have time for making a lengthy choice of a new squadron.
The duration of a Campaign will tell you how many days the Campaign will last and on each day you will be able to fly at most one Primary Mission and, possibly, one Secondary Mission.  Though the longer the Campaign the more pilots you will have in your assembled squadron, one of the delights/dilemmas/pressures of the game is how may pilots you assign to a given Mission.  Obviously the harder the Mission the more pilots is a pretty obvious decision, but so many factors come into play that it is rarely an easy choice!
I'm now going to step you through the basic play Sequence.
PRE-FLIGHT
Draw target card[s] and select one primary Mission. Determine and place sites according to info on the Target card. assign Pilots to the Mission - later in the war you may have the option to select Kamikaze aircraft or Ohka pilots. Finally prepare for the Mission.  This mainly involves choosing the weapons [essentially the bomb ordinance allowed by your plane] and drop tanks for added fuel.  However, Situational Awareness counters and Samurai Spirit counters may be assigned if purchased or originally allocated as part of your Pilot's profile.  Both obviously provide special benefits.
TARGET-BOUND FLIGHT
Draw an Event Card and consult the top box.  


After the Event is resolved, you can even abort at this stage - but I've found making that choice is very rare, unless you are doing very well in a Campaign or conversely very badly!
You then place your aircraft counters on the mapboard in one of the Pre-Approach Areas.  You also have to choose the altitude of your plane [either High or Low], as unlike all the modern era Leader games you won't be able to change this later, unless you are a dive-bomber or a kamikaze!

Here's one occasion when I went for all planes in one Pre-Approach Area, but beware as you don't know the exact Bandit [i.e. enemy plane] composition in the Approach Areas yet.  So, the next step is to draw them and you may get lucky and find that some of your draws may be No Bandits - great!  On the other hand, there may be some nastier opposition than you expected - not so great! 
Finally, you draw another Event card and consult and execute the instructions in the middle box and then place the Turn marker in the 1 position.  You now have 5 turns in the next Phase in which to complete your Mission.

Mission Pilots weaponed up!
OVER-TARGET RESOLUTION
At this stage you have 5 turns in which to complete your Mission. Each turn follows the same sequence:
[1] Dive Bombers or Kamikazes dive to low altitude. 
[2] Fast Pilots may make one attack on a Site, a Bandit or the Target - the choice will depend on the plane's location, altitude, appropriate range and weapon.
[3] Sites and Bandits attack
[4] Slow Pilots may attack
[5] All Pilots may move
[6] Bandits move
What happens will depend on whether you are in a Pre-Approach Area, an Approach Area or the Target Area.  If in a Pre-Approach  Area, not much more than moving your planes into an adjacent  Approach Area or adjacent Pre-Approach Area is likely to happen. But once into an Approach Area or the Target Area things are guaranteed to heat up!
It is also here that the main complexity of play also increases and is the major difference between all the modern era Leader games and Corsair Leader and Zero Leader.  That's because we're in WWII and DOGFIGHTING comes into play!

As can be seen it even has its own special mounted chart.  Unengaged, Engaged and Positioning all play their part with a matrix of manoeuvres bringing a series of potential modifiers and choices into play.  Some of these will also depend on qualities inherent on the Pilot card or Skills purchased with SO points. The element of Dogfighting was the one I was most looking forward to in this and its companion game.  It adds greatly to the level of detail, but I must admit it does add significantly to the many small rules that you need to master to play the game well.  
Herein lies the major complexity of playing Zero Leader.  The basic stages and rules of the game are clear and fairly easy to grasp and retain without too much return to the rule book.  However, the many skills, qualities and attributes when combined with the modifiers on the Dogfight chart and how they affect them, allowing usage of some and not of others can lead to a much greater level of checking and rechecking that I've got things correct.
Regular play of the game obviously smooths the path, but this is not a game that you can easily lift down from the shelf for the occasional and infrequent session.  Play is engrossing and as always, a system which has named Pilots invests the action with an element of personal involvement as Stress levels mount, planes suffer damage and for some go down in flames.
Battling through the Bandits and the defensive sites in both the Approach Areas and the central Target Area, eventually you get a crack at the target itself which may range from a simple shore battery all the way up to a carrier.

And here are my heroes taking on those shore batteries
This will have taken at least two or three of your five turns and so you'll find yourself with at the most three turns to destroy the target to gain your main victory points.  Whatever degree of success you've had, however, the game's not over yet - there's still one last stage to work through.
HOME-BOUND FLIGHT
One last Event card is to be drawn and instructions on the bottom row of the card carried out.

 In what's called a debriefing section, the success of your mission and the number of VPs gained is entered on your Pilot Log.  The quality of your Recon and Intelligence abilities on the game board may be improved to give your future benefits in new missions. Stress gained by all your participating pilots is recorded.  Experience points may be gained, leading to possible pilot promotion; stress may be recovered from and finally your Maintenance Crews come into play.  Yes, you even have a chance to put in some repair work, mend damage that might have been taken and by rolling on a special table, you can even push your crews to additional work at the risk of them gaining fatigue and at the very worst making a mistake in their efforts.
The game may be played out on a very stylised and abstract mounted board, but a great amount of realistic detail of this brutal war is packed into Zero Leader.  Consulting your Campaign success at the end of a gruelling 6 day Long Campaign from the VPs you've accrued may sound anti-climactic, but I can tell you it's not.  There is a profound sense of satisfaction even if you've only achieved Adequate and just don't ask about what went wrong if the result is deemed Dismal!

LINK 1 Phantom Leader

LINK 2 Zero Leader

0 comments :

hpssims.com