second chance games

Search This Website of delight

Showing posts with label World War I. Show all posts

 Caporetto 1917 by Europa Simulazioni  No one truly knows the actual casualty figures for the Italian Front in World War I. If you subscribe...

Caporetto 1917 by Europa Simulazioni Caporetto 1917 by Europa Simulazioni

For your Wargamer, Toy soldier collector, MiniFig collector, military history nut. Reviews, interviews, Model Making, AARs and books!

World War I


 Caporetto 1917


by


Europa Simulazioni


 No one truly knows the actual casualty figures for the Italian Front in World War I. If you subscribe to the "Lions led by Donkeys" idea of the English Army on the Western Front let me introduce you to the Italian High Command in World War I. I am not sure what you could call what the Italian Army was forced to do on this front. Field Marshal Luigi Cadorna, commander of the Italian Army, seems to have had no strategic, operational, or tactical thinking in his body. He seemed to believe that his plans were the greatest thing since sliced bread. The only reason the Italian Army was not in Vienna was because of useless subordinates and cowardly troops under his command. His plans consisted of charging straight ahead time after time. What is that old adage about the definition of insanity? Including the Battle of Caporetto, there are 12 Battles of the Isonzo River. Almost all of them were Italians attacking the Austro-Hungarians. Several times, by the sheer weight of numbers, the Austro-Hungarians' line came close to collapsing. Unfortunately, Cadorna would not change his plan of battle to take advantage of these moments. So, we come to 1917, and the Austro-Hungarian Empire is on the ropes. Their massive casualty lists from the Italian and Russian Fronts have just about finished them. Now with the Russians out of the war you would think that they had a chance for revenge against the Italians. Unfortunately for them, this is not true. The Hapsburg Emperor asks the Germans for another favor. He wants to have a joint German and Austro-Hungarian attack on the Italian Front to push back the Italians and give his Army some breathing room. So, the stage is set for the Battle of Caporetto. We do have to introduce a young German officer by the name of Rommel. He has been promised the 'Pour le Merite', the highest Prussian Medal, if he captures Monte Majur. He actually does so but gets semi-cheated out of the medal by another officer. The mistake is rectified eventually, and Rommel will be seen in his World War II pictures with the Blue Max firmly in place. Onto the game!


 This is what Europa Simulazioni has to say about the game:


"After Strafexpedition 1916, and Gorizia 1916, the third chapter is added to the Great War series: Caporetto 1917. Caporetto 1917 proposes the rules of the system in their updated version, to recreate, at battalion and company level, the most famous, tragic and controversial event of the Great War on the Italian Front.


Caporetto is a picturesque mountain village, located in the upper Soča valley. It has always been a border town; his German name is Karfreit, and its Slovenian name is Kobarid, but for the story he has the Italian name. Probably the most famous battle in Italian history, it is synonymous with "catastrophe", and in use in the Italian language with the same meaning. Also known as the Twelfth Battle of the Isonzo, the Battle of Caporetto was the aftermath of the Eleventh Battle of the Isonzo, which saw the Italian army advance across the Isonzo River, creating a dangerous salient for both Ljubljana and Trieste. To drive the Italians back and make them unable to carry out new offensives quickly, an offensive was needed, but the weakened Austro-Hungarian Empire lacked sufficient resources. German help was therefore needed. Aid materialized in the 14th Army, composed of some of the best German divisions, experienced in mountain warfare, and returning from successes in Riga and Romania. But above all that they employed unknown tactics and materials on the Italian front. Operation "Waffentreue " (Fedeltà d'Armi) was born, with the aim of pushing back the Italians to the Tagliamento. The results went beyond expectations. Recall the story of the first fateful days of that battle.


The game system has been updated and refined in version 2.0. It is based on the concept of action and reaction by the formations, typically brigades or regiments, which make up the opposing armies. It is a system that requires planning in the activation of formations, provides for a lot of interaction between them, and, at first glance, it may seem demanding. The use of artillery is greatly important, as it is the morale of the fighting troops, which can deteriorate as a result of fatigue or fighting.


The third volume of the series proposes, in turns of 12 hours each, the first four decisive days of the battle of Caporetto, in four scenarios:

1. The historical battle: The complete battle in the first four days, with the historical disposition of the Italian Army, in which the two players are both attacking and defending, respectively manoeuvering one wing of each side: attacking with an Austro-German wing, defending with the Italian one opposite the opponent. Each player, or team of players, will have to reach their goals faster than the opponent.

2. The battle that might have been: The battle as it might have been if the Italians had been better prepared. The clash is between the Italian player, who can arrange his troops more carefully and respond more quickly to the enemy manoeuvres, and the Austro-German player, however stronger, who must break through against a prepared enemy.

3. The Battle of Cividale: The final phase of the breakthrough on the Italian right flank. A short scenario, to learn the system, or commit a little time.

4. The Fall of Monte Maggiore: The final phase of the breakthrough on the Italian left flank. This is also a short and undemanding scenario." 

 I was lucky enough to do a review of Gorizia 1916 for Europa Simulazioni; links will be below. However, it took a long time to find a copy of Strafexpedition 1916, and it was worth its weight in hens' teeth.


Close-up of the map


 This is what comes with the game:


Two 22"x34" maps covering the battlefield area, from Monte Canin and Rombon in the West, to the bridgehead of Tolmino in the East, from Bovec and Monte Nero in the North to Cividale and the Friuli plain in the South

A reduced map of the Tolmin beachhead, for managing artillery in that congested sector

1400 counters

System rules and specific rules for the game, including Rommel Grouping ( Rommel Abteilung ), Stosstruppen, gas and mine attacks, the Fog of Caporetto, and more

Very detailed order of battle, the result of years of research and information gathering

Terrain Effects Chart, Assault and Bombardment Tables sheet; sheets to contain: German battalions, which can be divided into companies

Assignment sheet for Italian formations

Sheet for eliminated units, Turn Record Track and Logistics Points.

Boxed


 I was given a large coffee table book as a child about the great battles of history. For some unknown reason the Battle of Caporetto really stuck with me, and I have endeavored to get every book and game in English about this battle. While it is true that this game only shows us the first four days and a limited amount of the battle area on the map, it is by far the best representation I have found of the battle as of yet.


 Both maps are beauties. They have large hexes, instead of ones the same size as the counters. The Printing on the maps is also nice and large. The terrain and elevation is incredibly varied in the area, so Europa Simulazioni has done a great job in not making it busy looking. The hexes do have different terrain in most of them. The rulebook uses the expedient of whatever terrain the dot in the center of the hex is that hexes terrain. So, there should be no arguments between players. The one-page Tolmin beachhead is an elegant way to deal with the artillery in that area.


 The Rulebook is 28 pages long. It is in black and white and has two columns of type on each page. It does not have any examples of play, but it does have a few photos from the time. The actual length of the rules is about 21 pages. The reset of the rulebook is taken up by the different scenario information and historical notes along with design notes. The game comes with seven player aids. These are in full color and done in card stock. They are in both English and Italian. So, the player aids are either double-sided or separate sheets. The type on these is large and very easy to read. There is also a set of thick paper tear-off sheets for all for the different scenario setups and reinforcements, etc. 


 The counters are small at 1/2". As you can see below, the information on them is a bit busy. The leader counters have a small picture of the commander on them. This gives them a nice historical touch. I am on the fence about the counters. From a purely artwork point of view, they are excellent. It is just their size and the amount of information on them that gives me pause. However, I totally understand that to have around 1000 counters to show all of the troops involved, something had to give. As it is, the map does not show all of the area of the battle, just the main parts. To have larger counters would have caused the game to become a true monster wargame. Do I need to sometimes pick them up to read them, yes. Is this something I have been doing since the late 1960's, yes. So, my thoughts definitely fall onto the side of the counters are great, but I wish they were larger.


 Other than my hemming and hawing over the counter size the components of the game are excellent. The maps are worth the admission price by themselves. It is now so easy to understand all of the books about the battle and why the battle progressed in the way it did. This is something that you, unfortunately, only get with a wargame about a campaign or battle and I am eternally grateful to designers for them. If I cannot understand what a writer is trying to tell me about the terrain, or why things happened in wars, wargames always come to the rescue.


Counter samples including you know who.


 So, components be damned, how does this beautiful Italian car drive? The rules and the maps etc. give the player a real World War I battlefield to move your counters around on. This is not just a cut and paste set of rules that would be just at home with tanks or elephants. The troops that you can control are:

Infantry

Mountain Infantry

Bersaglieri

Bicycle

Cavalry

Machine Guns

Engineer

Flamethrowers

Infiltration Capable Infantry - The Italian Arditi and the Central Powers Stormtroops.

The artillery units you can control, after all artillery was the king in World War I:

Light Artillery

Medium Artillery

Heavy Artillery

Bombard/Minenwerfer


 The rules include Command Range, Stacking, Supply, Reaction, and yes, those horrific gas attacks. Playing as the Austro-Hungarian/German you need to act like water or oil. Do not attack needlessly and get bottled up against stiff Italian resistance. Flow like water trying to find the holes in a sieve. Press on for as fast and hard as you can. Once you have pierced the armor of the Italian crocodile, continue to surge forward into the Italian vitals. As the Italian player, play like you have played the Russians during Operation Barbarossa. Sacrifice your troops to gain time and space. You will be left reeling after the initial attack. However, try and make the A/H/G player dance to your tune. Try and channel them to where your reinforcements can stop them and then counterattack. Depending on the grognardness of the opposing player, this game can be a real nail biter. The first scenario has the interesting, but not unheard of, idea of one player controlling some troops from both sides during the battle. Therefore, you get to play as the attacker and defender at the same time but on different parts of the battlefield. Scenarios three and four are both two turn short ones. These both have a particularly important part of the battle but can also be used to learn the system before charging into the two larger scenarios. Scenario two is by far my favorite. This allows the Italian player to have either replaced Cadorna or given him something to turn his left lobe on. As the Italian player you can try and setup a defense against the A/H/G player. You are not left hanging out to dry when you realize that a hurricane is going to be let loose on you. This scenario represents most of the battles of World War I. Both sides know exactly where the other side is going to attack and take certain measures. I am not saying the A/H/G player cannot win but it is almost an entirely different game.


 Thank you, Europa Simulazioni, for allowing me to review this excellent portrayal of one of World War I's greatest battles. I have been looking for this game for a long time.


Robert Peterson

Caporetto 1917

Europa Simulazioni

Here are some of my Europa Simulations reviews:

Custoza Fields of Doom by Europa Simulazioni - A Wargamers Needful Things

Piacenza 1746 by Europa Simulazioni - A Wargamers Needful Things

Gorizia 1916 La Sesta Battaglia dell'Isonzo (The Sixth Battle of the Isonzo) by Europa Simulazioni - A Wargamers Needful Things

East Prussian Carnage: The Tannenberg Campaign 1914 by Three Crowns Games    The Second Battle of Tannenberg in 1914 is usually referred to ...

East Prussian Carnage: The Tannenberg Campaign 1914 by Three Crowns Games East Prussian Carnage: The Tannenberg Campaign 1914 by Three Crowns Games

For your Wargamer, Toy soldier collector, MiniFig collector, military history nut. Reviews, interviews, Model Making, AARs and books!

World War I


East Prussian Carnage: The Tannenberg Campaign 1914


by


Three Crowns Games


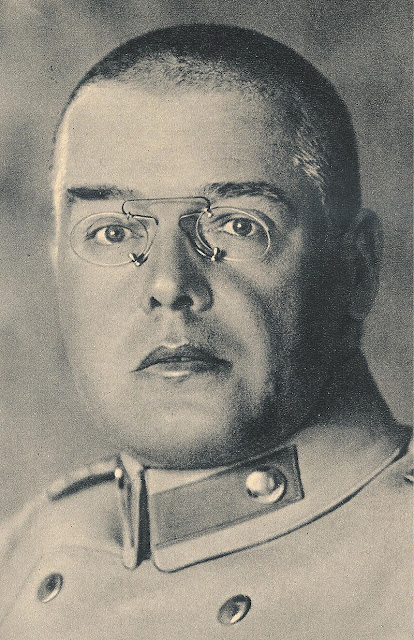
 The Second Battle of Tannenberg in 1914 is usually referred to as the first victory of the Hindenburg and Ludendorff duo. The actual truth is that the battle was won long before they stepped off the train in East Prussia. The Chief of Staff of the German Eighth Army was a man by the name of Carl Adolf Maximilian Hoffmann (usually just denoted as Max Hoffman). Hoffmann had devised the plan to attack both the Russian Armies that were invading East Prussia. The slowness of the Russians, the terrain, and the German railroad lines would allow the Germans to strike one Russian Army at a time. Unfortunately, Hoffmann was given no kudos, outside of the German Army, for his plan. Hindenburg and Ludendorff had become the heroes of Germany using Hoffmann's plan to virtually destroy the Russian forces.


Max Hoffmann courtesy of Wikipedia


  The fear of the Russian hordes by Helmuth von Moltke the younger, the German Army's Chief of Staff, is usually credited with the failure of the German Army on the Western Front to defeat France because he sent reinforcements to the German Eighth Army from the German Western Army. In actuality, due to Hoffmann's plan and its success, the German Eighth Army was in no danger. However, the Schlieffen Plan, not a real plan just a thought exercise, against France was never going to work. The German Western Army was nowhere near strong enough, even without the missing troops, to actually complete its envisioned defeat of France.


 The next question is why it is called the Second Battle of Tannenberg when it didn't really take place near there? This was because the Teutonic Knights were effectively crushed in the first battle by an allied army of Lithuanians and Poles. The German psyche needed to try and wipe that stain away. All three, Hoffmann, Hindenburg, and Ludendorff took credit for naming the battle.    


 So, Three Crowns Games has given us a game about the 1914 Tannenberg Campaign. While the German forces are outnumbered, you can use the above-mentioned factors in the Germans' favor to offset this. This is what comes with the game:


- A full color A1 map

- 16 page rulebook

- 143 high quality, 15mm die cut counters

- Front and Back cover with game aids, charts and tables

- Sturdy 100my ZIP-lock bag


 This is what Three Crown Games says about the game:

"East Prussian Carnage is a two-player game that recreates the stunning German victory over Russia at the beginning of World War One. The Germans must use superior command control, interior lines, and the mobility provided by railroads to stop the large but lumbering Russian army. The Russians must try to pin the Germans down and bring their superior numbers to bear."


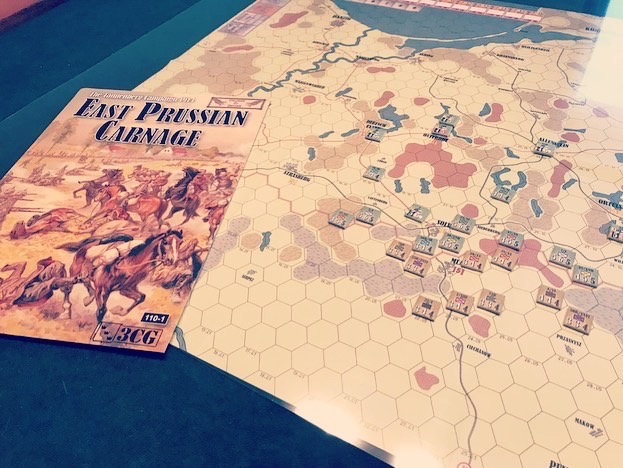
Part of the game being played.


 I have reviewed a few of Three Crowns Games, although some were published by different companies. I did review their 'Tolling of the Bell', and I will put a link to the review below. Their games come in ZIP-lock bags instead of boxes. However, this also means that the shipping costs from Sweden to other areas is cut down immensely. It does not take away anything from the actual games. Sometimes, a grognard just wants to play a smaller game and not have to reach over the table to move a stack or does not have the space at the moment for a large game. 

 The map is a little over 23" X 33" in size. The hexes are large in size. The map goes a little bit west of Thorn and Danzig on the western side to one hex east of Bialystok (The producers anyone?). The map colors are somewhat muted. The rivers also go along hex sides. The Turn Record Track and some other tracks are on the map. The counters are both thick and wide in size. They use the usual NATO markings on them. The numbers and the other information on them are nice and large. This is just what an old grognard wants to see. There are two Player Aid Cards. They are both one-sided and made of thick card stock. The Sequence of Play and any other chart or table you need are on them. They are also in full color and the writing is large enough to read without a problem. The Rulebook is sixteen pages in length. It is mostly in black & white with colored sections of Historical, Designer, and Game notes. The print is again of a nice easy to read size. The components are certainly up to snuff for a lower priced game. 


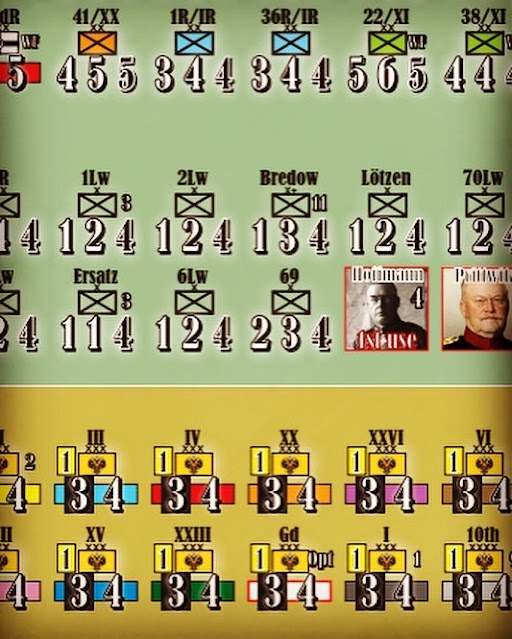
Some of the counter artwork.


 The game map represents 10km for each hex. The game is powered by a chit pull system for both the Russian and German Player. The Turn Track specifies how many German and Russian Command chits are used in each turn. There is also one German Special Command chit. The game uses Zones of Control in a pretty standard pattern. They block lines of supply, and you have to lose a step if forced to retreat in an enemy ZOC among other rules for them. The game also comes with a few optional rules. These mainly affect the German Player and his use of the Hoffmann counter. There are two scenarios in the game:

The Campaign Game of sixteen turns.

The Battle of the Masurian Lakes from turn twelve to sixteen.

 This is the third iteration of this game designed by Magnus Nordlöf. The game is the first one in Three Crowns Games Collison of Empire Series of games. These are to represent battles and campaigns from 1870 - 1920. 

 The first thing about the game you should know is it is no lightweight. It comes closer to a simulation than just a beer and pretzels wargame. The one thing that sticks out is its Random Events Table. Every single turn has different events that could happen. These even include a player getting points for taking a specified hex. This amount of randomness in both the chit pulls and the events means that the game does not get stale. Each time you play there are going to be differences compared to your last time. 

 I am just as impressed with this game as I have been with the other designs from them that I have played. Both the Russian and German player have a chance for victory. The German player must make use of his interior lines to deal with the Russian hordes. The Russian player must ponderously try and use his elephant to stomp the German lion into the ground. It is a good nail biter of a game.

 Thank you, Three Crowns Games, for letting me review East Prussian Carnage. I thoroughly enjoyed the game and the amount of history that was put into it. Please take a look at their game, but also the two that Revolution Games has published of theirs:

Konigsberg

Across the Narva

Robert

Three Crowns Games:

East Prussian Carnage: The Tannenberg Campaign 1914:

My review of Tolling of the Bell:


  Death in the Trenches The Great War 1914-1918 by Compass Games  'The Great War', 'The War to End All Wars', these were epi...

Death in the Trenches: The Great War 1914-1918 by Compass Games Death in the Trenches: The Great War 1914-1918 by Compass Games

For your Wargamer, Toy soldier collector, MiniFig collector, military history nut. Reviews, interviews, Model Making, AARs and books!

World War I


 Death in the Trenches


The Great War 1914-1918


by


Compass Games


 'The Great War', 'The War to End All Wars', these were epithets that have been used to name the First World War. This war was a first for many reasons: aerial bombardment, poison gas, tanks, and masses of machine guns were used in it. Death and destruction of civilians was not a new thing. It had been happening since the dawn of wars. The First World War just took it to a new and frightfully unprecedented level. The western countries have always looked at it from the mostly static trench lines in France. The Eastern Campaigns usually had more freedom of movement and only stayed in one place for at most a year and usually not even that long. Four great empires were dissolved by the carnage of World War I: the German, Austro-Hungarian, Russian, and the Ottoman empires all fell. The horrific loss of life led straight to the devil-may-care 1920s. All of the soldiers who escaped this abattoir were scared by it, whether mentally, physically, or both. In this game the designers have tried to put you into the shoes of the Entente or Central Powers from a strategic viewpoint. You will be in control of your forces across the globe, whether it be in the sky, on the ground, or at sea. 


 Compass Games has once again produced a game about World War I. As I mentioned in another review, they seem to be on a roll as far as games taking place during it. So far, their batting average has been excellent as far as each game goes. Let us see if they can keep this streak going.


 This is what comes with the game:


1 34×22″ map covering Europe and the Near East – Mounted

3+ countersheets (9/16″) of military unit counters, markers and chits – total 400 (double sided)

1 rules booklet (Game System and Random Events included)

6 8½ x11″ color player aid and display sheets

10 six sided dice

1 full-color box and lid set


 This is the hex size and turn length etc.:


Complexity: Medium (about 6 out of 10)

Playing Time: 10+ hours

Solitaire Suitability: Excellent

Time Scale: 1 turn = 3 months

Map Scale: 1 hex = approximately 80 miles

Unit Scale: Army and Corps

Designers: R. Ben Madison and Wes Erni

Artist: Jonathan Carnehl


 This is a blurb from Compass Games that I believe is worth reading:


"Death in the Trenches is a strategic-level World War I game covering the entire war, from the opening shots in Serbia and Belgium to the final defeat (or victory!) of Germany and its allies in 1918. The map, executed by Jonathan Carnehl, is designed to give you a feel for 1914 by using textures and colors featured in atlases of the time. It stretches from the Pyrenees to Moscow, and from Norway to the Sudan, covering every square inch of territory in Europe and the Near East which saw combat from 1914 to 1918, in a manageable 34×22″ format. Colonial battles around the world take place on an additional 8½x11″ map showing Germany’s empire.


The game also features 456 beautifully-illustrated counters depicting all the national armies that fought in the war – from the Germans, French, British and Russians all the way down to the Persians, Montenegrins, Armenians, South Africans, and a host of specialized units (French Foreign Legion, Gurkhas, Italian “Arditi”, Cossacks, Tyrolean Kaiserjäger, Zionists, Bavarians, “Dunsterforce”… even China may send a small expeditionary force).


For the World War I buff, the game’s simple off-map system of Allocation markers fills your world with historical detail: Tanks, Alpenkorps, artillery barrages, flamethrowers, poison gas, Krupp guns, Mustapha Kemal, the Royal Air Force, French elan, Rommel’s mountain tactics and Galliéni’s taxicabs… while the great wartime leaders all leave their mark (good or bad!) on history: Bruchmuller, Haig, Hoffmann, Mackensen, Hindenburg and Ludendorff, Rennenkampf and Samsonov, Sarrail, Von Francois, Foch, Brusilov, Nivelle, Plehve, Putnik and Yudenich. All this detail is added without forcing you to remember special rules.


What other WWI games make ruthlessly complex, Death in the Trenches simulates with elegant simplicity. Face-up units are entrenched; face-down units aren’t! Simple as that. Emphasis is on the fun stuff rather than the boring stuff; there is no bean counting of production points, supply rules and strategic redeployment are easy, and in combat there are no complicated terrain modifiers to memorize – those are baked right into the combat die roll."


 Let us first take a look at the components. The heft of the box is pretty good. However, now that so many games, this one included, come with mounted maps this is no longer a variable denoting gaming goodness (it actually may never have been). We grognards were always sucked in by large and heavy boxes. 

 The map has been judiciously set up to give the player the entire European and Near Eastern areas where campaigns took place, and more, on one normal sized map. That the designers were also able to include the turn record track and some other tables, and a subset map of India, is even more impressive. The map, while appearing plain, has an innate beauty, at least to me. The major cities that did and could have been a part of the campaigns are included. It would seem from the amount of area squished into the map that it would lose something in the conversion. However, at eighty miles a hex it seems just perfect for a strategic view of the area. Naturally, with this large of an area depicted you do not get much of the tactical obstacles, or benefits. The map's muted colors seem to match the somber tones that should accompany this war. There is a one sheet mounted map that has the areas in the Pacific, German East Africa, German Cameroon, and German South Africa that were also fought over during the war. This game is one of the very few that depict these areas. 

 The Rulebook is in full color and is twenty-eight pages long. The type is a bit on the small size. The rules go out of their way to explain that this is not your father's wargame. The game rules etc. have been based on Wes Erni's calculations and his WESCOM (the Warfare Equivalency System and Combat Operations Model). I will have more to say about this later in the review. The Events Book is twenty pages long and has a little color but is mostly in black and white. The first few pages are for the game setup. The next few pages are a complete catalog of what is in each hex. I do not remember ever seeing this in a game before and it is a nice touch. The last eleven pages are of all the events that can take place in each year. The game comes with six hard stock Player Aids. There are two fold out Omnibus Markers Track sheets. One is for the Entente and the other for the Central Powers. Then we have two Special event sheets, one for each side, that both have twenty-five events on them. Then there is a Battle Board and an Attacker Battle Chart. Some of the printing on this is also on the small side. Next up, we have four countersheets. These are adorned with the owning country flag on them. They come pre-rounded and easily come out of the sprues. These would be the most colorful part of the game. A few of them also come adorned with ships, artillery, and planes. The package on the whole is one that your game table will be calling for. 


 Now we will have a blurb from the Rulebook on WESCOM:

"WESCOM (the Warfare Equivalency System and Combat Operations Model) was created by Wes Erni, for the game Absolute Victory (designed in the 1990s but not published until 2016 by Compass Games; the first edition of Death in the Trenches was actually published first). It has been used in several other
games. The principle behind WESCOM is to engage a player’s personality in the Battle system, so that a player’s own level of aggression, or timidity, is vividly expressed in the way that player approaches each individual battle. The key to the WESCOM system is the infamous “Overroll”, where the player rolls as many dice
as he wants to, trying to achieve a die roll as high as possible but without going over a limit; if you go over the limit, you achieve nothing! In this way, the aggressive player constantly risks disaster. While critics who don’t understand the system complain (“What do you mean I rolled all those dice and did no damage?!”), thoughtful players of these games enjoy the emotional roller-coaster that the system forces them to ride. Firepower is essentially an index of offensive power, and takes into account morale, equipment, low-level commanders, and national temperament.

Fortitude is essentially an index of defensive strength, and takes into
account morale, equipment, low-level commanders, and national temperament.

In DEATH IN THE TRENCHES, Fortitude ratings are a little hard to decipher as they have been abstracted to show vast disparities in unit sizes. But the effect is to make every Division worth “one” on attack and defense, which enormously simplifies Battle mechanics for the player compared with the First Edition. Players should note that while Firepower seems like an “offensive” quality and Fortitude seems like a “defensive” quality, both ratings are used by both sides
in a battle, because Battle is simultaneous. While most games have a simplistic "I attack you all along the front, then you attack me all along the front” system, WESCOM accurately represents the intricate ballet of forces on the battlefield."

 Per the above, I hope that I am seen as a 'thoughtful player'.


 This is from the designers describing their thoughts on each country's relative strength:

"The basic unit of force in the game is the “division,” abbreviated “Div”. The exact size of a Div in the game is a mathematical
abstraction, but conceptually you can think of a Div as equaling approximately this many men: AH 20,000; USA 19,000; Russia 18,000; Italy 17,000; France 16,000; Turkey 15,000; Britain 14,000; Germany 11,000. Those numbers are not trivial! The Battle and logistical systems in Death in the Trenches are driven by Wes Erni’s finely tuned mathematical calculations. For game purposes, for instance, an Austro-Hungarian Division is nearly twice the size
of a German Division. This means that an Austro-Hungarian Division has a Battle advantage over a German Division, if only on account of its enormous size. The effect in the game can seem bizarre at first glance – Austrian units actually perform better on attack than Germans do! This is only because they are so much
larger. The flip side of this, however, is that Austrians are much harder to replace, because their casualty rates are so much higher. While this may feel like the Austrians are hard-to-replace ‘élite’ units while Germans are below-average ‘grunts’, the per capita effect is exactly the opposite. Just be aware that this entire system is extremely counterintuitive and takes some time getting used to. "

 Precisely because the system is so 'counterintuitive' is why I have decided to post the designer's words in full. On the outside this game seems like a cross between Axis and Allies and the old Avalon Hill game 'Guns of August'. While the ideas are simple, they do seem to be completely different than almost any other wargame. Most wargames battles are still based on a CRT and a set of modifiers. In simple games it will only be a few modifiers while in others it will be a list as long as your arm. Having a game based upon how lucky or belligerent a player feels means that you get a game where you can have battles like the Somme or Verdun. The battles can be absolutely brutal as far as casualties go. 

 Another interesting concept from the game is Reserve Divisions. These can be used by the player for:

Strategic Redeployment

Building Armies

Special Event Loss

Destroyed in Battle


 I must admit having been taken in by the look of the game. I was not expecting the game to be anywhere near as deep as it actually is. The game mechanics also help with the counter clutter. You do not feel as if you are a God that is using a tweezer to negotiate the buildings of the Manhattan Skyline. The designers have actually gone with a KISS style to the game. The only thing the player needs to do is to open himself up to new ways of thinking about wargames and their rules. Without, hopefully, beating a dead horse, they are counterintuitive. However, they work and work very well to simulate World War I. The game is listed as being as either one or two players. It is also given high marks for playing in solitaire mode. I can agree wholeheartedly with this assertion.

 Some of the Events are:

Achtung, Panzer - Germany's lumbering clumsy A7V tanks attack. This gives +7 firepower to any German attack in a clear hex.

Bruchmüller - Artillery genius, great for surprise attacks. This gives +30 firepower to any German attack

Strosstruppen - This gives +10 firepower to any German attack.

Foch - At the start of any EP pulse, you may "unflip" one stack of French Armies.

Voie Sacrée - At the start of any EP pulse roll three die. The French may add that many Divisions to Armies in any one hex in France.

Smith-Dorrien - At the start of any EP pulse, you may "unflip" one stack of EP Armies (at least one Army must be British).


 This is the Sequence of Play:

2.1 First Random Events Phase
1. Draw one chit to determine what Random Events occur (see 3.0).
2. Divisions are now added to Reserves/Armies by the Events just drawn (3.1).
3. The EP player may now transfer Fleets from Sea to Sea (8.2).
4. The CP player may now transfer Fleets from Sea to Sea (8.2).
5. Players may now challenge Naval Supremacy (see 8.3).

2.2 CP Logistics Phase
1. Each CP unit in a CP Units Holding Box may be built, or rebuilt, by the CP
Player (5.3). You may leave units in the Holding Box if you choose. Armies built at this time may also be reinforced by attaching Divs from Reserves (as in step #3 below).
2. CP may transfer Divs from one unflipped Army to another unflipped Army of the same nationality within 3 hexes (marching distance).
3. CP may transfer Divisions from Reserves, to unflipped Armies (Rule 6.4). This includes the transfer of Minor Forces (4.3) from the Minor Forces Reserve Box to the map.
4. CP may now transfer Divisions from unflipped Armies, to Reserves (Rule 6.4). This includes the transfer of Minor Forces (4.3) from the map to the Minor Forces Reserve Box.

2.3 EP Logistics Phase
The EP player repeats the preceding steps (2.2), using his own Armies and Divisions. Both Players can do this simultaneously if they trust one another.

2.4 Pulse Phase (see 6.0 and 7.0)
[2.4.1] During the Pulse Phase, play proceeds by a series of alternating pulses, kind of like chess moves. First one player goes, then the other player, and back again, alternating until both sides either have nothing left to move, or don’t want to move anything.
[2.4.2] The player who moves first in the turn is indicated on the Turn-Record Track next to the turn number (CP on Turns 1, 2, and 3; EP on Turn 4, etc.)
[2.4.3] During a Pulse, the player who is moving (“the phasing player”) moves one stack of units as explained in Rule 6.0. If this results in the moving stack entering an enemy-controlled Hex occupied by enemy units, the Battle occurs, as explained in Rule 7.0.
Certain Special Events (3.4) are done during, or instead of, movement.
[2.4.4] A player may also “pass” during his Pulse, and hand the right to move to his opponent. If both players “pass” consecutively, the Pulse Phase ends. (So be careful – don’t give the other Player a chance to end the Turn unless you’re prepared to live with the consequences!)

2.5 Unflipment Phase
1. All Armies on the map which were flipped, now “unflip” and return to printed-side-up.
2. Spend Divisions to Repair forts (8.4).
3. Roll for Armenian Massacres (14.2).
4. Surrender Checks (12.0); check Russian “Hammer and Sickle” cities (13.2).

2.6 Second Random Events Phase
1. Draw again for Events, as in 2.1 (every turn).
2. Divisions are now added to Reserves/Armies by the Events just drawn (3.1).
3. Put all Event Chits back into the cup for use during the next year (Fall turns only: see rule 3.0).
This concludes one turn. The cycle repeats until one player resigns, or Fall, 1918 has ended (see 16.0).

 As you can see, deciding to when to 'Pass' during the Pulse Phase is an important decision on the player's part. 

 Another interesting rule is 'Reds' (Partisans). If any Great Power Surrenders (except Russia), the victor places two Reds Armies in the territory of the surrendered nation. These will be commanded by the opposite player. So, if France surrenders, the Reds would be under the control of the Central Power Player. The Russian Revolution has its own set of rules. 


 Thank you very much Compass Games for letting me review this great addition to World War I games. The most important thing about our hobby is to learn things, at least to me. This game does not really teach you that much history, you should already know all of that. It does make you open your mind to learn a new way of thinking toward playing and understanding wargames. A day without learning something is a day wasted. I have really enjoyed playing this game.

 Please remember that Compass Games Expo is coming up on November 10-14, 2022. This will take place at the beautiful Comfort Inn & Suites in Meriden Ct. I hope to see you there.

 It is also that time of year again. Compass Games yearly sale is in full swing. Please take a look.

Robert

Death in the Trenches: The Great War 1914-1918:

Compass Games:

Compass Games Expo:

  Death of an Army Ypres 1914 by Revolution Games  "The Ypres Salient in Belgian Flanders was the most notorious and dreaded place in a...

Death of an Army Ypres 1914 by Revolution Games Death of an Army Ypres 1914 by Revolution Games

For your Wargamer, Toy soldier collector, MiniFig collector, military history nut. Reviews, interviews, Model Making, AARs and books!

World War I


 Death of an Army Ypres 1914


by


Revolution Games


 "The Ypres Salient in Belgian Flanders was the most notorious and dreaded place in all of the First World War, probably of any war in history. Typical was this British infantryman's reaction on being told that his battalion was to go there: "I mentioned Ypres and he cursed the place. Rumors of what waited ahead of us had disturbed everyone." This was said between men who had just gone through the ordeal of the Battle of the Somme, where more than 50,000 British soldiers became casualties on the first day.

 From the autumn of 1914 to the autumn of 1918 Flanders was, in effect, a gigantic corpse factory. Hundreds of thousands died there for ground where gains were measured in mere yards. It was where, in 1914, the British professional army was virtually annihilated, though it had stopped the German drive to capture control of the English Channel." (Winston Groom in 'A storm in Flanders')

 The Battle of Ypres in 1914 has many times been described as the 'Death of the British prewar Army. The actual name of this game should be 'Death of Armies'. This is because the German Army was also bled white here. The Germans have their own mythology about the First Battle of Ypres. This is called the 'Kindermord', roughly the 'Massacre of the Innocents'. On November 10, 1914, the Germans attacked the town of Langemarck (hex 0813 on the map). The story that was told was that eighteen-year-old German soldiers clasped arms and sang the German National Anthem while they marched to their death. While the actual history has found this to not be correct, the battles for Ypres did turn the area into an abattoir for the German reservist troops. As an aside, the British troops called it 'Wipers'. This is a game I have been waiting to have in my hot little hands for a long time.


 This is what comes with the game:

22" x 34" Map

Exclusive Rulebook

Series Rulebook

2.5 5/8" Countersheets

3 Player Aids

1 Scenario Setup Sheet

Box or Ziploc Bag

1 Six-Sided Die (Boxed Version)


 This is a blurb from Revolution Games about the game:

"The Battle of the Marne signaled the failure of the Schlieffen Plan and of German hopes to win a quick, decisive victory. In turn, this triggered the Race for the Sea as opposing armies attempted to outflank each other. Then, in a final bid to gain the upper hand, both Allied and German Armies clashed in the First Battle of Ypres. On these fields, the British Expeditionary Force, the professional army of Britain, and the strongest on the Continent, was bled dry.


Death of an Army, Ypres 1914 is a brigade/regiment level simulation of the First Battle of Ypres. Players assume the roles of the commanders of the German and Allied troops as they desperately fight for this valuable position in the line."


 The map shows us exactly why this small patch of territory was fought over for four years. These small ridges, 200' or so in height, are the only high ground to be found in Flanders. With their control of them, the Germans were able to see everything going on in the Ypres salient. Not only that, but their guns were able to target the area, thus turning the salient into a deathtrap for the French and British troops that were stationed there.


German Counters


 The Map is nicely done even though it is mostly made up of clear spaces. There are some important features, such as the canal and the ridge that is almost in the center of the map. The area was also sparse as far as woodlands. The towns and woods that are there are mostly named and will be remembered by people who are familiar with the later battles such as Polygon wood. The map also has the turn record track on it. It is made of the normal glossy paper that we have come to know over the last few decades. The scale of the Map is 1,350 yards per hex. The counters are large and are easy to read. They use the NATO symbols. The counters might look a little busy to some. However, I didn't mind them at all at 5/8" size. Two of the Players Aids are exactly the same. These have The Combat Results Tables on one side and the Terrain Effects on the other. The third Player Aid is one-sided and has a Markers Reference sheet on it. The Scenario Setup sheet is double-sided and has the information for the game's three scenarios on them. The Great War Battles Series Rulebook is twelve pages long and is in black and white with large type. Last but not least, the Exclusive Rulebook is only four pages long. The components some might complain, are Plain Jane, but they are infinitely better than what we used to play with. They also help to keep the game's cost down. You may not get all the bells and whistles with them, but all of Revolution Games productions I have played do come with a lot of gaming, which is really what we are after anyway.


Allied Counters


 As mentioned, there are three scenarios. These are:

Battle of Langemarck  - October 20th until October 24th

Fabeck's Attack - October 29th until November 4th

First Battle of Ypres (Campaign Game) - October 20th until November 12th

 The game plays out in daily turns so the Campaign Game is 24 turns long.

 This is the Sequence of Play:

First Player Turn

The first player is the phasing player and conducts the following events in sequence.

Coordinated Combat Phase: the first player may conduct 
coordinated combat with his units against opposing units (see 6.0).

Movement Phase: the first player may move his units (see 7.0).

Hasty Combat Phase: the first player may conduct hasty combat with his units against opposing units (see 11.0).

Surrender Phase: the first player checks whether any of his 
isolated units surrender (see 12.4).

Second Player Turn

The second player becomes the phasing player and conducts 
the same sequence of events as described for the first player.


Markers and a few more German counters


 So, what is the verdict? Just like any other Revolution Games effort I have played, this game is a winner. Not only if you are interested in the game for its history, but also if you are looking for a great gaming experience. This is early in World War I so air power and even air reconnaissance is in its infancy. You do not have to worry about tanks or poison gas either. This is a straight of battle of king of the hill. One thing a player has to keep in mind is that casualties will mount up and usually mount up quickly. This is the maneuver battle that all of the generals were hoping for after the trench system was built. Artillery is king of the battlefield, as it remains for the rest of the war. You can attack without artillery, or not enough of it, but be prepared to pay the cost. All of the Victory Conditions in all of the scenarios are based on the capture or defense of the high ground. It is a simple concept, and they are right there for you to see. Your problem is getting control of them. It is a rough and tumble affair that simulates the horrific blood loss of the year 1914. One thing really good games have is an ebb and flow to each side. The reinforcements that come in for each side at different times help greatly with the 'what happened, I was winning last turn', feeling that you get in this game.

 This is a blurb from the Designer Notes:

"For Ypres 1914, I wanted to create a simple, fluid game that moves quickly -- sort of a Napoleon at Waterloo for the First World War. Well, it didn’t quite turn out that way - simple, perhaps, fluid, not quite. There aren’t many innovative rules per se but one significant departure from most games is the reversal of the movement and combat phases. The decision to begin with a combat phase was intended to capture the general flow of the battle of the Great War. Most attacks were planned overnight and started at dawn of the next day. Generally, troops were positioned accordingly, often in plain sight of the enemy. After the initial attack, communications would falter, and the original plans would disintegrate. It then fell on the initiative on individual commanders leading smaller units to carry it on, with limited artillery support. The former reflects the co-ordinated combat and the latter the hasty combat procedure."

 I cannot wait for more games in the series.


 Thank you, Revolution Games, for allowing me to take this game for a spin. I will admit I was expecting a lot from the game. The books about the Ypres battles are some of my favorite reads. I was immensely happy that the game played out historically, and all of the outcomes were entirely plausible. While you are at their site, please take a gander at the rest of their games it is definitely worth it.

Robert

Revolution Games:


  Imperial Tide The Great War 1914-1918 by Compass Games   There was always a dearth of World War I games. Because of the nature of the West...

Imperial Tide: The Great War 1914-1918 by Compass Games Imperial Tide: The Great War 1914-1918 by Compass Games

For your Wargamer, Toy soldier collector, MiniFig collector, military history nut. Reviews, interviews, Model Making, AARs and books!

World War I


 Imperial Tide


The Great War 1914-1918


by


Compass Games


  There was always a dearth of World War I games. Because of the nature of the Western Front trench system many players and designers stayed away from gaming the war. Oh, here and there were excellent games on the subject, but never the amount that the war deserved. In the last few years that has thankfully changed. Compass Games is mostly to thank for this change of events. They have released a large number of games, from the strategic level on down to the tactical level. These are:


 On the Strategic level:

The Lamps are Going out: World War I, 2nd Edition

Balance of Powers

An Attrition of Souls

Empires and Alliances

Europe in Turmoil, Prelude to the Great War


Tactical Games, The Red Poppies Campaigns:

The Battle for Ypres

Last Laurels at Limanowa

Assault Artillery


 Solitaire Games:

Raiders of the Deep: Uboats of the Great War 1914-1918

Zeppelin Raider


Do not forget these two that are coming up:

Western Front Ace1916-1918 - Solitaire

Death in the Trenches - Strategic


 They also carry this game from Australian Design Group:

Fatal Alliances - World in Flames game set in World War I


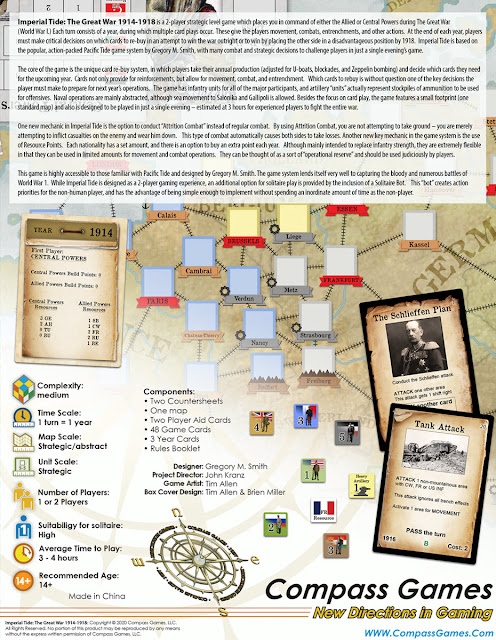
 This is what comes with the game:


One Rulebook

Two Counter Sheets with 216 Counters

One Solitaire Play Aid Card

One 22" x 34" Mounted Map

One Deck of 51 Cards

Two six-sided Die

There are three types of cards. These are Year, Central Powers, and Allied Powers cards.


 Sequence of Play:


Alternate card play or resource expenditure play. The first player is noted on the year card.

When both players pass without having played a card or used a resource point, the year ends.

At year end, any besieged forts are destroyed. Out of supply units surrender and are removed from play.

Put the next year card in the year card box. Zero out all resource points. Place new resource points per the new year card.

Receive the new year's cards for free and spend build points to rebuy previous cards.

Shuffle all the purchased, held, and new cards face down, deal two into two piles, and choose one pile randomly (or take the larger pile if uneven). The next turn starts.


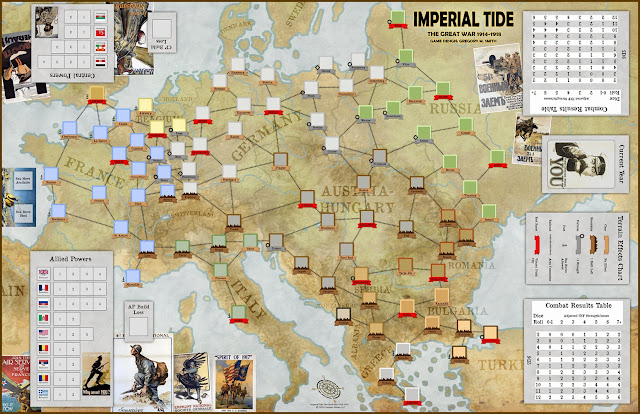
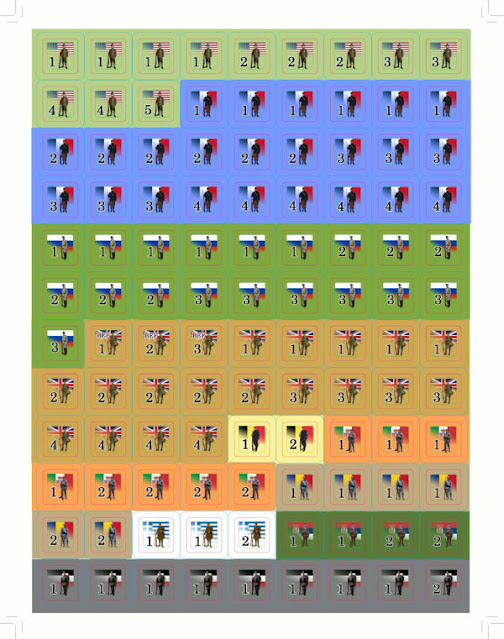
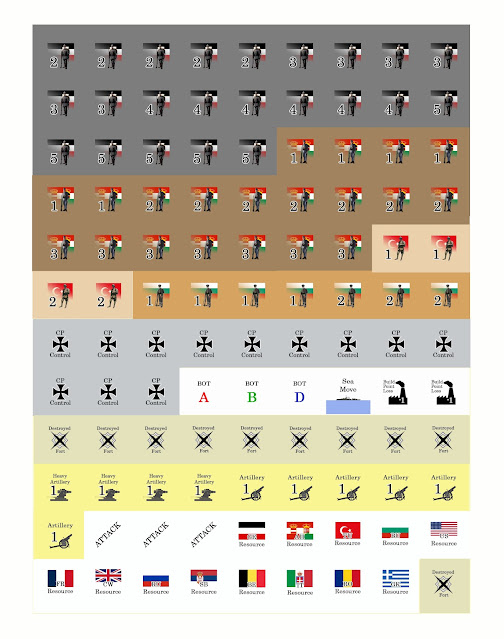
  Let us take a look at the components. The Mounted Map is very nicely done. It uses point-to-point movement so there is not much terrain on the map except for major rivers. The terrain for each point is at the bottom of each movement box. This makes it simple with no confusion. The Map also has all of the charts on it. So, you do not have to worry about off map sheets with tables. If you have room for the map in your playing space, you are good to go. There is only one Player Aid Card and that is for playing solitaire. A solitaire 'bot' or way to play is quickly becoming a must in our hobby. The Player Aid Card is two-sided and is made of hard stock. The Rulebook comes in color and is only thirteen pages long. It is easy to read and is written so that you will be up and playing in no time. There is also a page of a play example of the first year. The last page has the Designer Notes. I, like many others, love to read the thoughts of the designer of my games. The next part up is the counters. They are color and flag coded. They have generic numbers on them for strength, and they are large. They will pop out of the sprues in a small breeze and are pre-rounded. It might not seem like much, but the other day I bought an older game and was forced to pull out the old scissors and cut apart two counter sheets of small counters. I believe I now have Carpal Tunnel in my other hand. Compass Games components are some of the best in the marketplace. After dealing with the older counters, I was just so thankful that these counters were so easy to deal with. Next up is the Cards. These are your standard game size cards and have well done pieces of art on them. They are easy to read and simple to figure out. 


  So, what we have so far is: a strategic World War I game with very good components and a short, but informative Rulebook. It is a simple to learn game that has many nuances. The rules make you feel that you are playing a World War I game and not pushing Panzers around the map. By that I mean that is does not seem cookie cutter in play. Playing either side you will be forced to deal with the realities of early 20th century warfare. Naturally, this would be as the designer sees it. This game adds in the ability of both sides to use 'Attrition Combat'. This effectively just inflicts casualties on your opponent, but also yourself. However, this was used throughout World War I as a viable strategy. The game also uses Resource Points for each country in every year of the war. The design is meant for the player to use the Resource Points as an Operational Reserve for whatever use they are needed. 


 This is some of what Compass Games has to say about Imperial Tide:

"The core of the game is the unique card re-buy system, in which players take their annual production (adjusted for U-boats, blockades, and Zeppelin bombing) and decide which cards they need for the upcoming year. Cards not only provide for reinforcements, but allow for movement, combat, and entrenchment. Which cards to rebuy is without question one of the key decisions the player must make to prepare for next year’s operations.

The game has infantry units for all of the major participants, and artillery “units” actually represent stockpiles of ammunition to be used for offensives. Naval operations are mainly abstracted, although sea movement to Salonika and Gallipoli is allowed."


   The cards for each side explain to the players what effects they will have on play. These are some of each side's cards:

Central Powers:

Verdun
Poison Gas
U-boats Attack
Zeppelin Attacks

Allied Powers:

Messines Mine Attack
Miracle of the Marne
Brusilov Offensive
Salonika

The Year Cards show how many Build Points each side gets, along with their Resource Points.


 The gameplay is fast but deep and gives the player a lot of different options, while still putting on him the constraints of a commander in World War I. The designer, Gregory M. Smith, also designed the game Pacific Tide. So, if you are familiar with that game the learning curve is almost nil. Mr. Smith was looking to design a fun game that was playable in under three hours, along with sufficient depth to keep the players interested. I believe he has done just that.

 Thank you, Compass Games for letting me review this game. The next game I will be reviewing for Compass Games takes us back to the 18th century. It is 'War for America: The American Revolution, 1775-1782'. 

Robert

Compass Games:

Imperial Tide: The Great War 1914-1918:


hpssims.com