second chance games

Search This Website of delight

STUKA LEADER   FROM DVG After the amazing package of the latest Warfighter WWII boxed games and  the huge stack of expansion decks that I re...

STUKA LEADER STUKA LEADER

For your Wargamer, Toy soldier collector, MiniFig collector, military history nut. Reviews, interviews, Model Making, AARs and books!

STUKA LEADER 

FROM

DVG

After the amazing package of the latest Warfighter WWII boxed games and  the huge stack of expansion decks that I recently reviewed,  I am again indebted to Dan Verssen Games for their generosity in providing me with not only a review copy of Stuka Leader but all seven expansion packs!
If you've followed my reviews, you'll know that over the years the Leader series in the air, beneath the waves and on land have been a familiar feature among the many games I've reviewed here on A Wargamers Needful Things and in some ways it's hard to do more than say,  "Wow, they've done it again."
If somehow you haven't experienced any of these stunning games before, I'd suggest that you have a quick look first at both my earliest and my most recent review of the air games in the Leader corpus - links to which can be found at the end of this review.  This will give you all the background knowledge to this excellent system and how it works.  [For those of you new to the series and of an impatient disposition, I've copied in a lengthy extract at the end of this review that you might like to read now from my Zero Leader review that gives you an overview of the Sequence of Play.]
For those of you already familiar, I know it's been quite a lengthy wait for this much anticipated addition, but I hope you'll agree that, as always, your patience has eventually been rewarded with another amazing offering.
Component quality maintains the highest possible standards in all areas, with continued tweaks and additions that just add that extra touch of pizzazz.

It starts here with the mounted Tactical Display board where all the action takes place.  The information is much the same, but presented with just that touch more detail and style.  Where you will place your air unit  and the opposing enemy units has been upgraded from a simple  black or blue background to an aerial map image. This alone would be a nice cosmetic improvement, but the game comes with seven double-sided overlays to chime in with the many differing campaigns and locations you will be flying over.  From heavily urban dock waterfronts to what looks like a bend in the Thames through London and on to a convoy probably in the English Channel, each adds an element of historical depth to the situation.  

One of my favourite overlays
The turn track has been given just a little more clarity and prominence at the top left of the board and I love the sequence of holding areas illustrated with an ambulance, a fuel bowser and a supply truck, where you will place your medic tokens, fuel barrels and supply cubes.  
As always there is a massive number of unit counter sheets, eleven in all, and five packs of cards encompassing the expected stacks of pilots (83 in total), Event Cards and Target Cards.  The fifteen substantial Campaign sheets all on flexible A4 card stock, in fact, offer the ability to fight a massive total of 30 campaigns - all of which can be played as short, medium or long in turn length.  


To help you in your choice of Campaign, the back of the Rule Book contains 2 Appendices, both  of which list the degree of difficulty of each campaign ranging from Introductory level, through Standard and Skilled to Expert level.  One Appendix records which German fighters and bombers are available in each year and the other does the same for Enemy Aircraft.

The Battle of Britain Campaign Card
- not too surprising, it's a favourite of mine!

Of identical quality are four Play Aids: Key Terms, Hit Result Definitions, Player Help sheet and Skills, while the final two Play Aids: Stuka Dogfight and Turreted Bombers are substantial rigid A4 boards.  Love the pic of Marlene Dietrich in the top corner.


The final essential form is the Player Log, which remains, for what reason I've never understood, on thin paper, but at least this time it has been upgraded to the same glossy sepia colour as all the other Aids.
Among these many items, I was particularly thrilled by the range of Target Cards.  They cover so many tantalising situations from larger missions like bombing an airfield or radar installation to attacking a convoy of trucks or hitting an AA battery and even conducting an Air/Sea Rescue mission.
The rulebook remains almost identical in every way to previous Leader games that deal with the war in the air.  The same high quality of paper and print is matched by the attention to detail in drawing all the many illustrations and examples from the appropriate German material, even to a smattering of quotations from the Luftwaffe flying ace, Adolf Galland.  The rules, though detailed, are well-honed to perfection by now and continue to be in a layout that makes use of an exemplary use of white space.  As a result everything progresses in meticulous order from a thorough explanation of components through Set-up and into the exact Sequence of Play and ending with Aces expansion rules. a single page of very simple options and ending with five pages of aircraft data.
Though you get a few brief Aces rules, to use them you'll need the last of the seven Expansion packs that DVG so generously sent me.  Below is what each package looks like, before opening and unzipping.
They cover the following theatres of the war.
Expansion 1 Eastern Front 1
Expansion 2 Eastern Front 2
Expansion 3 Mediterranean 1
Expansion 4 Mediterranean 2
Expansion 5 Spanish Civil War
Expansion 6 What If?
Expansion 7 Aces
Despite there being several Eastern Front campaigns in the core box, I know that this is a focus I'll be drawn back to.  Though for me first on my list to explore has been the Spanish Civil War expansion, a period I've repeatedly been drawn to both in historical accounts and novels as well as board wargames.  Each Expansion pack includes a full counter sheet, a deck of cards containing mainly more pilots, but also a few Event and Target Cards and much to my delight not just one new campaign Sheet, but two!  The sequence of photos that follow come from the Spanish Civil War expansion


A nice thick stack of specific pilot cards
There's no doubt in my mind that this is not just a fantastic addition to the Leader series, but for me it's probably going to me my preferred choice- that is unless we can have a Spitfire Leader or Hurricane Leader.   Come on guys ... I know you can do it! 

Extract from Zero Leader review detailing Sequence of Play

Most steps in this game are fairly quick and easy to execute, with one major proviso and that is the need for a very careful initial sorting of components.  This is particularly advisable for all the Pilot cards, which, I suggest, need to be grouped according to some system that you feel comfortable with.  No solution can cover all the multiplicity of year ranges perfectly.   So, my own preferred, personal choice is by plane type and then according to the earliest year in which a given Pilot first appears.
As in all this series, there are 3 double-sided cards for each Pilot taking them from Newbie to Legendary level which you need to keep grouped together.  
With Target cards simply keep them in numerical order, draw the numbers needed for a specific Campaign and make sure they get slotted back at the end of a game.  Event cards are a boon as they are always shuffled at the beginning of a game!
For the many counters, the most important to sort are Site, Bandit and Bomber counters by year.  Though not as necessary, sorting the pilot counters by plane type is very helpful, though small groupings by alphabetical order is a good alternative.  

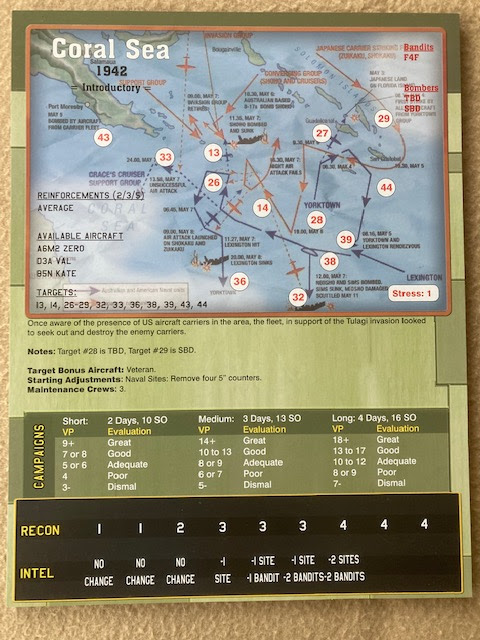
With that out of the way, you can get down to play where your first task is to choose one out of the fifteen Campaigns on offer.  This is the identical number to those in the Corsair Leader game, though I was pleased to see a few different choices here.  Each Campaign can be played for a Short/Medium/Long duration.  As a starter, I'd suggest an Introductory Campaign such as Midway [a personal favourite] played for a Short or Medium duration.  Next you'll select the appropriate Target cards as numbered on the well presented Campaign Card.

Among the many other details on the card are the types of Japanese  planes involved and the types of Allied bandits and bombers, you may come up against.  
Next you will select from among the named Pilot cards for the appropriate plane types and the year of the Campaign and the number of pilots allowed in your Squadron.  The rule book supplies the latter information on the number of pilots as well as the typical experience composition for the appropriate year and Campaign duration.  So, continuing as an example Midway and a Medium duration, I would choose 10 pilots made up of the following experience levels - 1 Newbie, 2 Green, 4 Average, 1 Skilled and 2 Veteran.  It's also worth noting that all Pilots are also divided into two categories;  Fast and Slow.  This is important for combat, as will be discussed later.
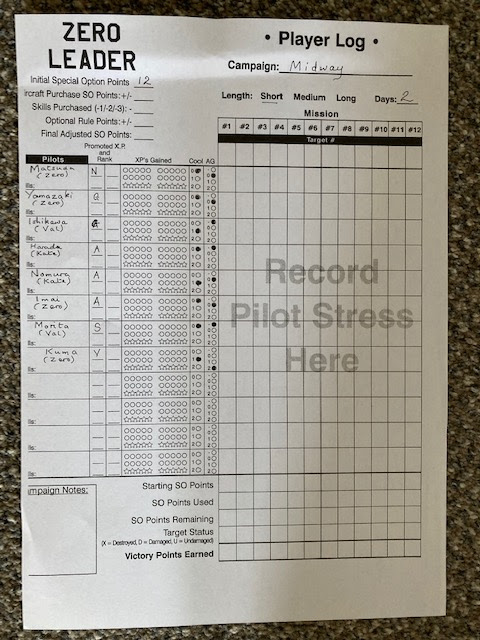
These details will be recorded on the Player Log [either a photocopy of the one supplied with the game or a downloadable copy from the DVG site] along with the number of Special Option [SO] points for the Campaign that allow you to further fine tune your Squadron by using them to upgrade experience or acquire specific skills to assign to individual pilots or improve the quality of a plane.

Above is a partially filled in Log for a short Midway Campaign.  I tend to include the type of plane under the Pilot name.  Each letter to the right indicates the pilot experience level and the black dots indicate in the first column the current Cool quality of the Pilot and in the second column their aggression.  Apart from keeping the completed Logs as a reminder of a Campaign, they're very handy if you want to quickly assemble a squadron and you don't have time for making a lengthy choice of a new squadron.
The duration of a Campaign will tell you how many days the Campaign will last and on each day you will be able to fly at most one Primary Mission and, possibly, one Secondary Mission.  Though the longer the Campaign the more pilots you will have in your assembled squadron, one of the delights/dilemmas/pressures of the game is how may pilots you assign to a given Mission.  Obviously the harder the Mission the more pilots is a pretty obvious decision, but so many factors come into play that it is rarely an easy choice!
I'm now going to step you through the basic play Sequence.
PRE-FLIGHT
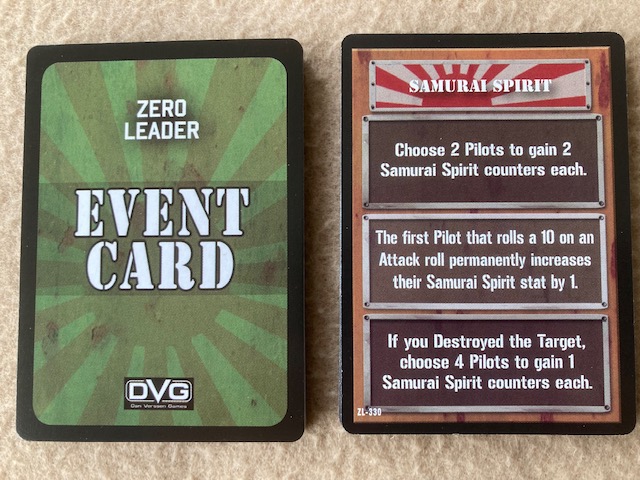
Draw target card[s] and select one primary Mission. Determine and place sites according to info on the Target card. assign Pilots to the Mission - later in the war you may have the option to select Kamikaze aircraft or Ohka pilots. Finally prepare for the Mission.  This mainly involves choosing the weapons [essentially the bomb ordinance allowed by your plane] and drop tanks for added fuel.  However, Situational Awareness counters and Samurai Spirit counters may be assigned if purchased or originally allocated as part of your Pilot's profile.  Both obviously provide special benefits.
TARGET-BOUND FLIGHT
Draw an Event Card and consult the top box.  


After the Event is resolved, you can even abort at this stage - but I've found making that choice is very rare, unless you are doing very well in a Campaign or conversely very badly!
You then place your aircraft counters on the mapboard in one of the Pre-Approach Areas.  You also have to choose the altitude of your plane [either High or Low], as unlike all the modern era Leader games you won't be able to change this later, unless you are a dive-bomber or a kamikaze!

Here's one occasion when I went for all planes in one Pre-Approach Area, but beware as you don't know the exact Bandit [i.e. enemy plane] composition in the Approach Areas yet.  So, the next step is to draw them and you may get lucky and find that some of your draws may be No Bandits - great!  On the other hand, there may be some nastier opposition than you expected - not so great! 
Finally, you draw another Event card and consult and execute the instructions in the middle box and then place the Turn marker in the 1 position.  You now have 5 turns in the next Phase in which to complete your Mission.

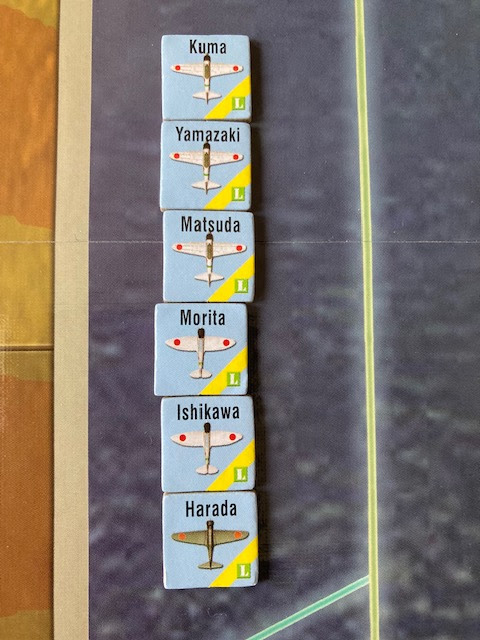
Mission Pilots weaponed up!
OVER-TARGET RESOLUTION
At this stage you have 5 turns in which to complete your Mission. Each turn follows the same sequence:
[1] Dive Bombers or Kamikazes dive to low altitude. 
[2] Fast Pilots may make one attack on a Site, a Bandit or the Target - the choice will depend on the plane's location, altitude, appropriate range and weapon.
[3] Sites and Bandits attack
[4] Slow Pilots may attack
[5] All Pilots may move
[6] Bandits move
What happens will depend on whether you are in a Pre-Approach Area, an Approach Area or the Target Area.  If in a Pre-Approach  Area, not much more than moving your planes into an adjacent  Approach Area or adjacent Pre-Approach Area is likely to happen. But once into an Approach Area or the Target Area things are guaranteed to heat up!
It is also here that the main complexity of play also increases and is the major difference between all the modern era Leader games and Corsair Leader and Zero Leader.  That's because we're in WWII and DOGFIGHTING comes into play!

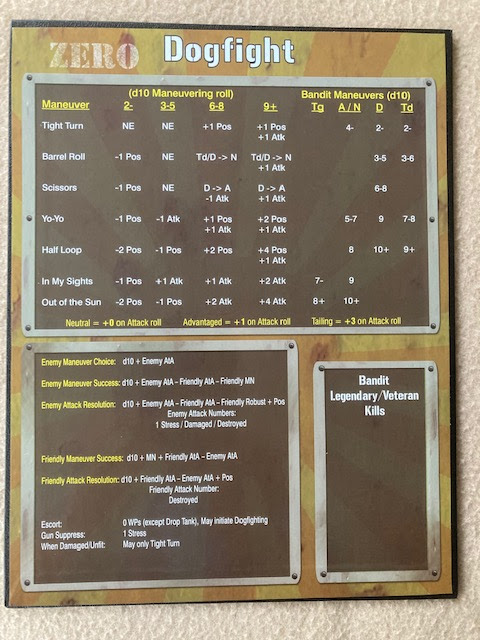
As can be seen it even has its own special mounted chart.  Unengaged, Engaged and Positioning all play their part with a matrix of manoeuvres bringing a series of potential modifiers and choices into play.  Some of these will also depend on qualities inherent on the Pilot card or Skills purchased with SO points. The element of Dogfighting was the one I was most looking forward to in this and its companion game.  It adds greatly to the level of detail, but I must admit it does add significantly to the many small rules that you need to master to play the game well.  
Herein lies the major complexity of playing Zero Leader.  The basic stages and rules of the game are clear and fairly easy to grasp and retain without too much return to the rule book.  However, the many skills, qualities and attributes when combined with the modifiers on the Dogfight chart and how they affect them, allowing usage of some and not of others can lead to a much greater level of checking and rechecking that I've got things correct.
Regular play of the game obviously smooths the path, but this is not a game that you can easily lift down from the shelf for the occasional and infrequent session.  Play is engrossing and as always, a system which has named Pilots invests the action with an element of personal involvement as Stress levels mount, planes suffer damage and for some go down in flames.
Battling through the Bandits and the defensive sites in both the Approach Areas and the central Target Area, eventually you get a crack at the target itself which may range from a simple shore battery all the way up to a carrier.

And here are my heroes taking on those shore batteries
This will have taken at least two or three of your five turns and so you'll find yourself with at the most three turns to destroy the target to gain your main victory points.  Whatever degree of success you've had, however, the game's not over yet - there's still one last stage to work through.
HOME-BOUND FLIGHT
One last Event card is to be drawn and instructions on the bottom row of the card carried out.

 In what's called a debriefing section, the success of your mission and the number of VPs gained is entered on your Pilot Log.  The quality of your Recon and Intelligence abilities on the game board may be improved to give your future benefits in new missions. Stress gained by all your participating pilots is recorded.  Experience points may be gained, leading to possible pilot promotion; stress may be recovered from and finally your Maintenance Crews come into play.  Yes, you even have a chance to put in some repair work, mend damage that might have been taken and by rolling on a special table, you can even push your crews to additional work at the risk of them gaining fatigue and at the very worst making a mistake in their efforts.
The game may be played out on a very stylised and abstract mounted board, but a great amount of realistic detail of this brutal war is packed into Zero Leader.  Consulting your Campaign success at the end of a gruelling 6 day Long Campaign from the VPs you've accrued may sound anti-climactic, but I can tell you it's not.  There is a profound sense of satisfaction even if you've only achieved Adequate and just don't ask about what went wrong if the result is deemed Dismal!

LINK 1 Phantom Leader

LINK 2 Zero Leader

Atlantic Chase The Kriegsmarine Against the Home Fleet 1939-1942 Intercept Volume One by GMT Games   The box cover, I believe, shows the Bis...

Atlantic Chase: The Kriegsmarine Against the Home Fleet 1939-1942 by GMT Games Atlantic Chase: The Kriegsmarine Against the Home Fleet 1939-1942 by GMT Games

For your Wargamer, Toy soldier collector, MiniFig collector, military history nut. Reviews, interviews, Model Making, AARs and books!


Atlantic Chase


The Kriegsmarine Against the Home Fleet 1939-1942


Intercept Volume One


by


GMT Games


 The box cover, I believe, shows the Bismarck and the Prinz Eugen breaking out into the North Atlantic during 1941 Operation Rheinubung. This would lead to the sinking of both the H.M.S. Hood and the Bismarck. At first glance, the naval balance between Britain and Germany looks ridiculous. How are the Germans supposed to try and attack the Royal Navy? In 1939, the Germans have two battlecruisers and two battleships being built, with some heavy and light cruisers. In battleships alone, the British Navy had fifteen on hand with another seven being built. It seems on paper that Britain had nothing to worry about. In actuality, the British Navy had to patrol the North Atlantic, Mediterranean Sea, and Southeast Asia. So, it was spread pretty thin, especially after Japan declared war on Britain. Obviously, there was not going to be another Battle of Jutland during the Second World War. All of the German ships would be used in the North Atlantic as commerce raiders. So now let us see what comes in this hefty box. This is a review of the 2nd printing of the game.


The mounted map


 This is what GMT says about the game:

"Atlantic Chase simulates the naval campaigns fought in the North Atlantic between the surface fleets of the Royal Navy and the Kriegsmarine between 1939 and 1942. It utilizes a system of trajectories to model the fog of war that bedeviled the commands during this period. Just as the pins and strings adorning Churchill’s wall represented the course of the ships underway, players arrange trajectory lines across the shared game board, each line representing a task force’s path of travel. Without resorting to dummy blocks, hidden movement, or a double-blind system requiring a referee or computer, players experience the uncertainty endemic to this period of naval warfare. This system also has the benefit of allowing the game to be played solitaire, and to be played quickly.

 
The German player’s task is clear: sever Britain’s lifeline to its overseas colonies and allies.  All hangs on the fate of convoys. Ultimately, success or failure in Atlantic Chase will hinge on the Kriegsmarine’s ability to breakout into the Atlantic and find convoys while frustrating British attempts to catch his raiders. The game chronicles the development of the Royal Navy’s strategy to contain the German fleet by pitting players against each other in five successive operations that comprise a Campaign Game. Seven additional scenarios treat specific historical actions, including a Sink the Bismarck scenario, a PQ17 scenario, and the Channel Dash. The game features battleships, aircraft carriers, cruisers, convoys, and pocket battleships, while U-boats, elusive armed merchant raiders, and air assets play an important role too. Operations during the Campaign Game and stand-alone historical scenarios each take 1-2 hours to play."


Some counters


 This is what comes in the box:

22 x 34" mounted game board
Two 8.5"x11" Inset Maps
Three 11"x17" player aid cards
Two 8.5"x11" player aid cards
Two Task Force Displays
Sheet and a half of counters
240 wood segments and cylinders
Rule book
Advanced Battle Rules
Tutorial booklet
Solitaire Scenario booklet
Two-player Scenario booklet
Four six-sided dice


Some scenarios and setups


 These are the awards it has won:

2021 Charles S. Roberts Wargame of the Year Winner
2021 Charles S. Roberts Best World War II Era Board Wargame Winner
2021 Charles S. Roberts Best Solitaire or Cooperative Board Wargame Winner
2021 Charles S. Roberts Best Board Wargame Rules Winner
2021 Charles S. Roberts Best Board Wargame Playing Components Winner


 After the list above, I should just post this and say "Goodnight Gracie".


A game in progress

  I am not often staggered by the contents of a wargame. I have more than a few that are monsters. However, I was really surprised about the number of contents that GMT Games was able to stuff inside the box. It was like a cornucopia, and seemed to be a never-ending stream of things, especially Rulebooks. I was a little trepidatious about what I had gotten myself into. Read on to see if I had bitten off more than I could chew. 

 For the contents, we will start with all of the booklets. First off, all five of them are made from glossy magazine type paper (although thicker). They also all come in full color. The printing, examples, and pictures throughout them are very large. It is always nice to see a game company help out us old timers. The Rulebook is sixty-three pages long! However, remember that everything in them is large. The Tutorial Booklet comes in next at fifty-five pages. Once again it is filled with large examples of play. The last four pages are the Design Notes. Please read this because it explains the missing elephant in the room. After that comes the Solitaire Scenarios Booklet. This comes in at seventy-one pages, and the last three pages are Historical Notes. The Two-Player Scenarios Booklet is sixty-three pages long. The runt of the litter of booklets comes next. This would be the Advanced Battle Rules Booklet at a mere fifteen pages. This is a bit funny if you have been keeping track of the pages from the other Booklets. Before the Advanced Rules Booklet, the total pages are a whopping 252! I was beginning to wonder if playing the game would give me some college credits.


 The next component is the mounted map. The map goes from the Canadian Maritime provinces to the top of Greenland on the western edge. On the eastern edge it goes from Gibraltar to the top of Norway/USSR. There are boxes to represent all of the different ports on the map. The Battle Board that is used to plot out ship gunnery exchanges is on the right side of the map. It also has sundry tables/charts that are needed for play. The colors are muted, and nothing was added to take away from gameplay. As in most naval wargames, the majority of the map is the big blue ocean. There is also a double-sided hard card stock map. One side has the western side of Norway on it and the other side has the North Sea hemmed in by Britain, Norway, and Denmark. There are two double-sided and fold out Players Aids. These are both easy to read and nice and sturdy. Up next are two double sided Player Aids that on one side have the Campaign Player Aid and the other has the British/German Force Pool Schedule. After that comes two single-sided British/German Task Force Displays. Then we have the last one, another foldout and double-sided Advanced Battle Rules Player Aid. 

 The last things to talk about are the wooden pieces and the counters. The wooden pieces are all uniform in their segments and cylinders, meaning that there are no flash or missing chunks of wood in any of them. When I saw them, I gave a sigh of relief. Why, you ask? Because they are already pre-marked for the game. I was not looking forward do dealing with 240 stickers. I have stickered many a game, but I do not enjoy it. The counters are fully functional and easy to read. The capital ships, cruisers and above, are represented by large rectangular counters that are almost universal in naval wargames. These have the obligatory silhouette of the ship in question. The leaders and 'Intel' markers are 5/8" square. The other markers are 1/2" in size.

 I know we grognards are a hard to please bunch. However, GMT Games should be proud of their endeavors with this game's manufacturing (so should we game buyers). I really have not had a game from them that was subpar in components, and I do not think it is because I am lucky.


Game situation


  The missing elephant in the game box are U-boats. When the designer (Jeremy White) started talking about his new design, the first question was "where are the U-boats?". When he answered that they were not really present in the game, the next query would be "so, it is another sink the Bismarck game?". Apparently when told the answer to that question most people were a bit confused. He writes that some grognards even begged him to put in U-boats. The various Air and submarine assets of both sides are represented as adjuncts to the surface war. I will let him address the issue from his Design Notes:

 "U-boats appear in Atlantic Chase as an effect rather than a fleet of machines. The U-boat arm operated independently (and invisibly) of surface vessels, for the most part, but because they hunted the same waters, this game presents opportunities for their operations to overlap with those of the surface arm. The player should understand that Admiral Donitz and his fleet of Steel Wolves are busy throughout this game, but that activity is not particularly visible."

 The story of how this game started out in the 1990s because of working on command and control in the American Civil War is a very interesting story. The designer definitely does a deep dive into the background story of the game and its mechanics. 


 So, the first thing you absolutely need to know that this game is not one that you can set up and glance through the Rulebook and be at it in no time flat. The tutorials are your friend and spoon feed you bit after tasty bit of what you can handle from one to the next. The complexity level of the game is only marked at a five, and I believe that is correct. There are a lot of things going on in the game, but none of them by themselves is a deal breaker or insurmountable object. You will not feel like Sisyphus while learning the game. The hardest part, and that is not correct either, is learning about the trajectories. Those would be the different colored rectangles snaking across the map. The thing you have to remember is that you are playing the admiralty of either nation, not an admiral at sea. So, you somewhat know where your forces are heading and what bearing they will be following, but because of radio silences etc. you are not quite certain exactly where they are at any given moment. The designer explains that the board is not meant to represent the actual ocean, but instead the operational maps that were hung up in the Admiralties of London and Berlin. These would have the trajectories charted out with colored string and pins. He has just brought the representation to the 21st century for us to have a blast with. Because of the new way of representing naval warfare, it is a bit hard to describe. All I know is that the system works extremely well but does not take the fun out of gaming. 


 Thank you, GMT Games, for allowing me to review this really excellent and innovative game which works just as well as a solitaire game and a two-player one. You do not need a shoehorn to make it fit into one or the other. Much like the word love, innovation is used far too often for just a change or even a slight change in a gaming mechanism. The Atlantic Chase mechanism is really innovative and, as many people have said, is ripe for being used in so many other situations in wargames. The designer should be wearing shades, because his future looks bright indeed. Pardon me, I have to now go to YT and listen to Timbuk 3.

Robert 

Atlantic Chase:

GMT Games:


  Terminator: Dark Fate - Defiance by Slitherine   This is a demo of Slitherine's new real time strategy game based in the Terminator un...

Terminator: Dark Fate - Defiance by Slitherine Terminator: Dark Fate - Defiance by Slitherine

For your Wargamer, Toy soldier collector, MiniFig collector, military history nut. Reviews, interviews, Model Making, AARs and books!


 Terminator: Dark Fate - Defiance


by


Slitherine


  This is a demo of Slitherine's new real time strategy game based in the Terminator universe. I will state this right up front, I am not a big fan of RTS games. They are usually way too frenetic in pace. I have always liked turn based strategy games with their slower pace and with the ability to think about what you are doing each turn. That being said, it is good to get out of your safe space in games every once in a while. 


Screenshot from the first mission


 This is what Slitherine has to say about the demo:


"The Terminator: Dark Fate – Defiance Demo will give you an insight into the campaign and skirmish modes in the final game. The demo will be published on October 9th as part of the Steam Next Fest, and will be available to everyone for a limited amount of time.


The Steam Next demo includes the first 3 single player campaign missions, and includes 1 Skirmish Map. This preview demo is identical, except it doesn’t have the skirmish map yet. 


The early campaign missions will teach you the basics of the game but doesn’t include the multi-choice RPG aspects seen in later missions, where players can choose which factions to ally with (or attack), which objectives to follow or ignore, and how to respond to other characters through multi-response conversations. 


These early missions also don’t include the army management screen. Here, you can upgrade skills, weapons and armor for your squads and vehicles. It’s possible to buy and sell manpower, vehicles, equipment, weapons and ammo at bases and trading zones, place troops into vehicles, and edit and rename your unit names. Your army is taken from mission to mission, so if you lose a unit in a mission, then it’s gone! But if you upgrade a squad, they’re ready for the next mission. 


The Skirmish Mode in the demo includes an Assault Mode map. This Mode allows only the Founders or Legion to be selected and includes Assault Mode gameplay, with objectives to either attack or defend points on the map. 


The release will also include Domination Mode maps that allow Founders, Legion or Movement forces to be selected, with different reinforcement rules. 


All skirmish maps will also be available in Multiplayer, which isn’t provided in this initial preview. Multiplayer will allow up to 4 players to play within a map, in 1v1, 2v1, 2v2 modes."


Terminator: Dark Fate – Defiance will be available on PC later this Fall.


Screenshot from the second mission

 I can tell you three things about the demo that I really like. The first is that the game is really nice looking you can almost say beautiful to behold. The second is that you are given a few different orders to give to your small soldiers and vehicles. The third is something you do not usually see in a RTS at least when they are first released, and that is a pause button. I have played more than a few RTS games where the pause button was added in an update or is a mod made by a player.


This is a screenshot from the third mission 


 Another thing I like is that you are really given a storyline to follow. In the demo you are a Policeman who has decided to help both civilians and the army units. So, you become immersed in the game. Instead of just sprites, the characters in the game actually mean something to you. Before the second mission begins you find out that it is ten years later, and you are now a Major in the Founders. This would be the remnants of the civilians and army that have coalesced after the rise of the machines. The machine army is called the Legion. 


Another pic from the third mission

 I was quite pleasantly surprised by the demo and the gameplay, especially the pause button. For a demo of a game it was very immersive and really left me wanting more to play.


Another screenshot from the third mission


 The game will come with the ability to play either side, at least in skirmish mode, and that is another point on the plus side. The only thing about the demo I did not like was the inability to zoom out much at all. You can zoom in to see separate soldiers. However, there is an inset map that even if the zoom is not increased can be used to keep an eye on your units and the enemy. Thank you Slitherine for letting me take this demo for a ride.


Robert

Slitherine

Terminator: Dark Fate - Defiance


1212 Las Navas de Tolosa by Draco Ideas  The year is 1212 and El Cid has been dead for thirteen years. The deadly conflict between the Musli...

1212 Las Navas de Tolosa by Draco Ideas 1212 Las Navas de Tolosa by Draco Ideas

For your Wargamer, Toy soldier collector, MiniFig collector, military history nut. Reviews, interviews, Model Making, AARs and books!


1212 Las Navas de Tolosa


by


Draco Ideas


 The year is 1212 and El Cid has been dead for thirteen years. The deadly conflict between the Muslims and Christians for Spain is still going on. In fact, the Reconquista will continue for almost three hundred years. The tide had turned and the Muslims, commanded by their Caliph Muhammad al-Nasir, were taking a good number of Spanish fortresses. It had gotten so bad that the pope, Innocent III, had called for a crusade in Spain. I am simplifying the historical tale. Both the Christians and Muslims were a loose group of smaller states that fought each other as often as they fought against their supposed enemies. The crusaders and a number of Christian states banded together to fight against a similarly made-up army under the Caliph. This is the backdrop behind the Battle of Las Navas de Tolosa.


 This is an excerpt from a written account of the time:

 "They attacked, fighting against one another, hand-to-hand, with lances, swords, and battle-axes; there was no room for archers. The Christians pressed on." – (The Latin Chronicle of The Kings of Castile)

 This is what comes with the game:

Board

54 Unit Markers

9 Combat Cards

6 help cards

12 special cards (6 from each side)


 This is what Draco Ideas has to say about the game:

 "1212: Las Navas de Tolosa is an asymmetric, two-player wargame in which Almohad and Christian troops face each other, reliving the emblematic battle of the Reconquista.

Fast games and a very contained deployment, in which the battle is decided in about 30 minutes, with a card engine to determine the initiative and the outcome of the combat.

Although small in size, 1212 Las Navas de Tolosa perfectly integrates the theme in a reduced number of components, placing special emphasis on the asymmetry of the sides to revive the different strategies that took place in the battle that would change the course of the Reconquista.

Among other features, Christian units receive bonuses if they are activated by cards with their King’s shield, adding a further decision to the player on when to play the cards in his hand.

For his part, the Almohad player can use a free ‘Tornafuye’ (karr wa-l-farr) action, which allows him to make a counterattack after a Christian cavalry charge, and also has special units such as the Black Guard protecting the Caliph an-Nasir, or the Jihad Volunteers, fanatical troops that will throw themselves into combat advancing if they manage to create a breach in the Christian defense."

A Muslim Counter


 I know it is a cliche, but sometimes good things do come in tiny boxes. Most of the parts of the game are small. The board is a mounted one. It measures around 11 3/4" x 8". It consists of eighteen rectangles (nine for each side). It is pretty much made up of open terrain with a few trees and the Caliph's stockade on the edge of one side. The counters are large at 18mm and come pre-rounded. Each counter comes with a very nicely done picture in the middle of it. The designer/artist (Pablo Sanz) has drawn them to look like period pieces of the battles' time. The Rulebook is small, about half the size of a normal Rulebook. It is however, done in full color. It is only twenty pages in length with the last page being a quick reference for the rules. The regular rules are fifteen pages in length. Then there is a two-page Advanced Variant for the rules. The game comes with two Rulebooks: one in English and one in Spanish. Next up are the Victory Conditions and a Historical Context. The Cards come with six cards for quick refence. On one side is English and the other is in Spanish. There are nine regular cards to be played with the normal game. A further 12 cards (six per side) are used with the Advanced Variant. That sums it up for the game's components. Draco Ideas does put a lot into the physical presentation of their games.


One of the Cards for the Regular Game


 The game was designed to take up a very small footprint and to be played in about thirty minutes. Draco Ideas has succeeded in both of these endeavors. This is a quick playing fun game that also has both strategy and tactics built into it. The addition of the Advanced Variant makes it so the game does not get stale or boring. The regular game is a good game, but it might get too repetitious for some people. The Advanced Variant Cards are either commanders in the game or units. These Cards give the player either Action Points or extra attack power when played. 

 This is the Sequence of Play:

Initiative Phase: 1 card from each player. The highest wins the initiative and ties go to the Christian player.

Action Phase: 2 cards for Action Points, playing alternative turns.

Exhaustion: Tilted units (exhausted units) can neither attack or rally. They recover at the end of the turn.

 These are a few of the rules:

Ties in the standard attacks = 1 damage per side.

If there are no cards left in the game deck, turn over the discard pile Without Shuffling.

 Action allowed per turn:

Maximum 3 units per board zone

Maximum 2 combat actions per turn

Maximum 1 archer attack per turn


Christian Counter


 The Victory Conditions are:

The Christian Player wins if Caliph al-Nasir's unit is eliminated.

The Muslim Player wins if the Christian Player is not occupying any of the nine Muslim zones and there are less than four Christian occupied zones.

Either side wins if they control twice as many zones as the other side.

 1212 Las Navas de Tolosa was designed to be a fun short game that can be setup and taken down with ease. The price point of the game is also easy on the player's wallet. This is not just a beer & pretzels game. It is certainly not as deep as some wargames but to win you have to put on your thinking cap. 

 Thank you Draco Ideas for allowing me to review this game. This game and their SCOPE series of games are built on the same premise. Please take a look at their War Storm series of games. They are tactical gems of games. Their two games on the Spanish Civil War (A las Barricadas! and Help Arrives) are two of the finest tactical games on the subject.

Robert

Draco Ideas:
1212 Las Navas de Tolosa:

 HALLS OF HEGRA FROM TOMPET GAMES When my gaming friends and I first heard of this title, the general consensus was that it must be a game i...

HALLS OF HEGRA HALLS OF HEGRA

For your Wargamer, Toy soldier collector, MiniFig collector, military history nut. Reviews, interviews, Model Making, AARs and books!

 HALLS OF HEGRA

FROM

TOMPET GAMES


When my gaming friends and I first heard of this title, the general consensus was that it must be a game in the fantasy genre.  Intrigued, I'm glad I delved deeper to discover that it was a distinctly unusual WWII battle in the Norwegian defence against the invading German army and so I contacted the publishers, Tompet Games, who generously provided me this review copy.  On its very rapid arrival, a first sight of the components and a reading of the historical background made me think I had got my hands on the next David Thompson design in his series of "siege" games.  Though that is not the case, the reasons for thinking so will quickly become obvious.  First the components - they are all excellent whether it be the mounted playing board, the variety of cards, the wooden pieces, the cardboard counters and the full colour rule book.  Second, the historical situation - quoting from the back of the game box and the front of the rule book -  "From an abandoned mountain fortress you command a group of Norwegian volunteers fighting numerically superior German forces in the early days of WW2."  
The continuation again quoted from both back of the game box and the front of the rule book sounds very familiar - "Halls of Hegra is a solo only game where you play as the commander during the siege, which is divided into three stages.  The mechanisms you will use are worker placement, bag building and area control/tower defence."  Certainly the game shares many of the system features seen in David Thompson's designs and three stages calls to mind Postmen in Soldiers' Uniforms, while the map section of the game board has visual echoes of Lanzerath Ridge.  Considering both are set in snow bound locations that's not surprising.
Map section of Halls of Hegra
Knowledge itself of the Norwegian campaign is for most British citizens very, very limited and despite playing most of the few rare games related to either individual battles or the whole campaign, this last desperate defence was a revelation for me.  Its details certainly promised some intriguing and novel situations.  The situation spans 11 turns corresponding to 11 days.  As mentioned,  the game plays out the three stages of the historical event.
Stage 1 Mobilisation [Days 1-3] - during this stage, you as the defender will explore, clear snow, find equipment  (some damaged and needing to be repaired), establish supply routes and gather supplies and defenders.
Stage 2 1st Attack [Days 4-6] - you will be defending against a variety of German attacks, while continuing final preparations for the siege and gathering supplies.
Stage 3 Siege [Days 7-11] - Fortress Hegra is defended by you against bombardment and infantry attacks while you try to maintain morale amongst your volunteer force.
So, there's the overall picture in brief, now on to how the game fairs accomplishing this.
The complexity of the mechanics of playing this game is reflected in the two pages of the rule book dedicated to SetUp.  There are eleven tracks needing a marker cube to be placed to record each's initial starting point, German artillery pieces to be set out on the Artillery Track; Air tiles, Damage tiles, and Status tiles to be placed; German Patrol tokens; wooden discs for the Defender units and Doubt discs and wooden German unit meeples.  All these have their allotted places at start either on the game board, in a Reserve Area [any conveniently handy area near the game board] or placed into one of the colourful three draw bags.

... and when that's all complete, there is a wealth of cards to be sorted into a variety of decks and shuffled!  49 Event cards get sorted into five decks, 22 Morale cards into  two decks, Hope & Despair cards into two decks and last but not least 11 Snow tiles!

Above are some of those Snow Tiles revealed that give one-off benefits or provide permanent actions that you can allocate defenders too.

While below is the busy game board before any of these elements are placed on or near it.

The bottom left hand section even has a double-sided mini-board placed on it at the beginning.  

The side above is needed for Stage 1: Mobilisation and then turned over for Stage 2: 1st Attack and then removed to reveal  the section of the whole game board it covered, which is used for Stage 3: Siege.
As you can see, there is quite a lot to follow through carefully in the Rule Book just to set up the game. 

When it comes to Gameplay, which is the meat of the rules, the outline beckons as tantalisingly simple.  The eleven turns are broken down into three Stages.  Stage 1: Mobilisation covers turns 1-3.  Stage 2: 1st Attack covers turns 4-6 and Stage 3; Siege covers turns 7-11. These three Stages are each divided into the same three Phases: Event Phase - Morning Phase - Day Phase.  What follows and how it is organised in the Rule Book belies that simplicity.  First of all, the actions for the Event Phase for each of the three Stages are explained in order. Then the shortest Phase - the Morning Phase - is explained Here steps you carry out are  identical in each of the the three Stages and are largely simple steps.  Hurrah!  
Finally, you come to the third and last Phase for each Stage and that is the Day Phase.  This is by far the most complex and lengthy section in each turn of the game. The basic concepts are logical.  Each Stage prepares for the next Stage.  So in Mobilisation you are largely creating supply routes and gathering supplies, building up the numbers of your defenders and clearing snow to reveal actions and objects that you can use in Stages 2 and 3.  As you move into these later two Stages, the enemy actions gather in number and power and work to reduce the number of your defenders and limit the range of actions available to you.
Everything set out at the start of the game

I love these ideas and the realistic feel it gives to the game.  I just wish the rule book could have explained them more clearly.  There are two major difficulties to learning and understanding the rules.  The first difficulty is the tendency to explain a number of actions for Stage 1 and then move on to Stage 2 and tell you which are identical to the previous Stage and then explain what's added and finally Stage 3 tells you what is the same as in Stages 1 & 2 and now explains what's new in Stage 3.  Take for example, the Day Phase.  There are in total Seven numbered sections (0-6) to learn.  BUT there is no turn when all seven sections are ever performed in full.  For example section 0 only occurs on turns 1 to 3, while section 01only occurs on turns 4 to 11.  Similarly what actions may be carried out in each section is not consistent for every turn.  Sometimes, a specific action is just not performed on certain days. Other actions depend on a variety of circumstances, such as whether the item to be used has been dug out of the snow on earlier turns or damage has been repaired to make it usable and, of course most important is whether one or more of your defenders has been allocated to perform it.
Here we are for example part way through the game. Working from left to right.  Gun 1 has one section active, the next is jammed and the third is damaged.  The ability to send out a new Supply Run is available, but no Defender has been assigned to activate it.  Below is the Medicine Cabinet that was dug out of the snow earlier on and has had a medic Defender allocated to gain its benefits. To the right is another action, Counter Patrol, that was revealed earlier in the game.  It too has no Defender currently assigned to take this action, but notice the cross on the medic symbol, which tells you that a medic defender cannot be placed here.  After all, your medics are far more valuable doing jobs elsewhere!  This is just one small area of the board with the potential for so much to be happening there.

On top of all that is the need to work through different steps on each Event card as it is drawn. which add a lot of flavour, but also mechanics to the game system.  The outcome I've found is that you will spend quite a few games with the rule book in hand with frequent reference to it and, even with much more familiarity, it will be a game where you will still forget whether you can or can't perform an action and will need to check.
The second major difficulty is that there are quite a number of symbols to be mastered, some of which direct you in adjusting markers on the many tracks in the game or affect actions that you can take.  These are not all clearly explained and has led to doubts about interpretation of rules. These add to the central complexity of the game that stems from the many interactions that build up and multiply as the game progresses.  It's fascinating, but I've found there's a steep learning curve that only comes through repetition.  
In my view the key to learning and coming to enjoy the game is to avoid trying to take in everything at once.  In fact, it is one game where I would suggest that you don't even skim through all the rules.  
Start by playing through Stage 1 Mobilisation [Turns 1-3], perhaps even practising them several times.  Then move on to play Stage 1 and Stage 2: 1st Attack and finally settle down to play through the whole game.  The other important advice is watch the several excellent videos on YouTube that play through several turns.  I would particularly recommend  "JP Plays Halls of Hegra", but as always with such videos remember that there will be a few changes, often minor, that have taken place since the videos were made and the game was published!
So what are my final thoughts.  First of all it is a quality product in all its many components.  The situation, like quite a few other Siege games, is unusual and focuses on a brief and for most people unknown and obscure incident in WWII.  It's engrossing and has so many options with the constant pressure of multiple choices of action clamouring for your attention, but so few defender units to carry them out.  It has great replayability, both because of these many choices of actions, but also because the different Event cards and the order in which they get drawn will always throw up new problems to solve each time you play.  Consequently, it is a game that will constantly test you out with little likelihood of a winning formula emerging- for me that's always a good quality.  I hate games, especially solitaire ones if they turn to have either a limited focus or a method that's soon mastered  All these are very positive elements, but you will also need to put in a good deal of time and effort to learn and understand the game's mechanics.  It's definitely not a game for beginners in the board war game world or those who want a "light" game. Nor is it for the gamer who must have absolute certainty or suffers from "analysis-paralysis".  On the other hand it is definitely a game to get your teeth into and bury yourself in the action.


  Bloody Verrieres The I. SS-PanzerKorps' Defence of the Verrieres - Bourguebus Ridges Volume II by   Arthur W. Gullachsen  This is volu...

Bloody Verrieres: The I. SS-PanzerKorps' Defence of the Verrieres - Bourguebus Ridges Volume II by Arthur W. Gullachsen Bloody Verrieres: The I. SS-PanzerKorps' Defence of the Verrieres - Bourguebus Ridges Volume II by Arthur W. Gullachsen

For your Wargamer, Toy soldier collector, MiniFig collector, military history nut. Reviews, interviews, Model Making, AARs and books!


 Bloody Verrieres


The I. SS-PanzerKorps' Defence of the Verrieres - Bourguebus Ridges Volume II


by


 Arthur W. Gullachsen


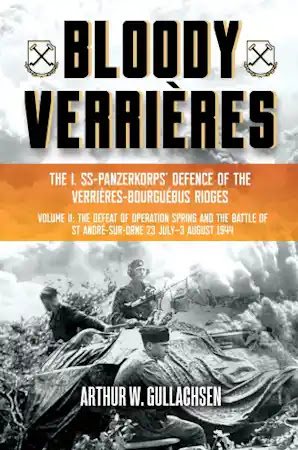
 This is volume II of a comprehensive look at the defense of the ridges during the Normandy Campaign. This book will have a tough time equaling its older brother. Volume I was full of history tidbits that I have not seen anywhere else and there are tons of books on this part of the Normandy Campaign.

 Have no fear, the author has continued in Volume II to shine a light onto the history of the battles for the ridges. He also never fails to report on the bravery and tenacity of the British, and Canadian etc. attackers. He does, however, find fault with what he calls their "bite and hold" tactics. He feels that they are using outdated World War I tactics in World War II. This is a point that he makes throughout the book with plenty of examples. He shows us how the German 1st SS Panzerkorps used a defense in depth to absorb the British and Commonwealth attacks. He also contends, along with other writers, that the British and Commonwealth attacks and losses were not in vain (although they could have been better commanded and planned out). They kept the main striking power of the German Army in Normandy in a desperate battle for Caen and the surrounding area. This allowed the Americans to break through on the German left flank. 

 In the book he dispels some of the myths that we have been taught about the campaign. Such as, Sepp Dietrich did not know how to read a map or that the SS in Normandy were just fanatics that had no real tactical ability. The author shows that the Germans were able to halt the Commonwealth forces even though they were completely outmatched in artillery and air power.

 The book comes in at just under 300 pages including the appendices, end notes, bibliography, and index. It shows the battle for the ridges from July 23 - August 5, 1944. The author concentrates on the 2nd Canadian Corps attack during Operation Spring starting on July 25th. The book continues with the German counterattacks after Operation Spring. This shows how the German forces were still resilient even after the long battle for the environs of Caen. 

 Thank you, Casemate Publishers, for allowing me to review this second volume from this author. He is a captain in the Canadian Army and also a teacher of military history in the Royal Military College of Canada's History department. The books are two of the best to read about the tactical warfare during the Normandy Campaign. They should be in the library of anyone who has any interest in the campaign.


Robert


hpssims.com