second chance games

Search This Website of delight

The Battle of KhalKhin Gol July - August 1939 by Princeps Games  For those of you who have never heard of the Khalkhin Gol, or Nomohan, camp...

The Battle of KhalKhin Gol July - August 1939 by Princeps Games The Battle of KhalKhin Gol July - August 1939 by Princeps Games

For your Wargamer, Toy soldier collector, MiniFig collector, military history nut. Reviews, interviews, Model Making, AARs and books!


The Battle of KhalKhin Gol July - August 1939


by


Princeps Games


 For those of you who have never heard of the Khalkhin Gol, or Nomohan, campaign this is the most important battle that took place before the normal date given to the start of World War II (September 1939). In actuality, Japan and China had been fighting since 1931 and in full war mode since 1937. The Japanese had taken Manchuria away from China. They had installed their own puppet regime and called it Manchukuo. This comprised the entire Northeast of China. Abutting Manchukuo was the nominally free state of Mongolia. Japan wanted to force Mongolia into their sphere of influence. However, the big Soviet bear was watching. This showdown between the Japanese and Soviets is tremendously important. It may be one of the most important battles ever fought. The Soviets steamrolled through the Japanese forces and gave them a very bloody nose. The Soviets were partially commanded by one of the few generals in the Soviet Army who still had a pulse, Georgy Zhukov. The Japanese had up until that time been fighting a war between their own Navy and Army. The Army wanted to 'strike north' and attack the Soviet Union. The Japanese Navy wanted to 'strike south' toward the oil, rubber, and other commodities of the South Pacific Islands. The mauling that the Japanese Army received from the Soviet Army convinced the Japanese Generals to agree to the strike south proposition of the Navy. Imagine what would have happened in late 1941 if the Japanese had invaded the Soviet Union instead of going to war with the US and Great Britain etc. We know that in the final battle for Moscow in 1941, the Soviet Army units from Siberia turned the tide against the German invaders. If Japan had attacked the Soviet Union, it would have been faced with a war on two fronts and would have been unable to use their Asian forces to help stem the German tide. So, as you can see, a lot is riding on your shoulders, general, no matter which side you decide to play. Onto the game.


 This is what comes with the game:


1 Game Box - 14" x 11" x 4" 

1 Mounted Game Board - 34" x 36"

24 Calendar Cards - 2.8" x 4.8" 

18 Air Battle Cards 

16 Air Strike Cards 

The First Player Token 

1 Combat Result Table - 8.8" x 5.5" 

2 Player Cards - 8.8" x 5.5" 

2 Players'Aid Card - 8" x 4" 

1 Attack Modifier Chart - 8" x 4" 

5 Counters Sheets - Over 200 Counters

50 Sheets of Minimap - 6" x 4" 

1 Rulebook -6.8" x 9.6′′ 

45 Money Chits 2"x1" 

1 Die D8 

1 Die D10 

1 Die D12 

2 Dice D20 

 All of the Players Aid Cards are mounted like the map.


One side of the map


This is what Princeps Games has to say about Khalkhin Gol:


"The Battle of Khalkhin Gol is a beginner’s level wargame covering the WW2 border clash between Japan and the USSR at the very dawn of this global conflict.

It is a hex & counter game with unique battle mechanism, a lot of strategy and a number of features specific to the harsh conditions of the setting.

Khalkhin Gol is medium level complexity, with variable setup and random cards bringing effects to the game which offers great replayability.

Game duration is 2-4 hours and it can be played by 1 or 2 players age 14+.

The game uses unique battle resolving mechanisms from ‘March on the Drina’ and ‘Freezing Inferno’ but with many upgrades such as terrain and weather modifiers, usage of Combat Result Table and Technological-tactical improvements.

The Calendar with the most important events of the period as used in “March on the Drina” is also an important part of the game and here it comes upgraded – you have three cards for each round of the game so the effects the cards bring are different every time you play. This, combined with variable setup regarding to the units number, layout and strength and variable winning conditions make this game’s replayability value high.

The game has a beautiful twelve-folded mounted board with thick 20x20mm counters and a practical cardboard insert for storing your punched counters, markers and dice, which allow the players to store and move the game without having to worry that the components might get damaged."


Boxes inside the main box for storage


 This is a review of a preproduction copy of the game. Most of the parts are the finished product but some, like the rules, are not. It also does not have all of the great stretch goals add-ons.

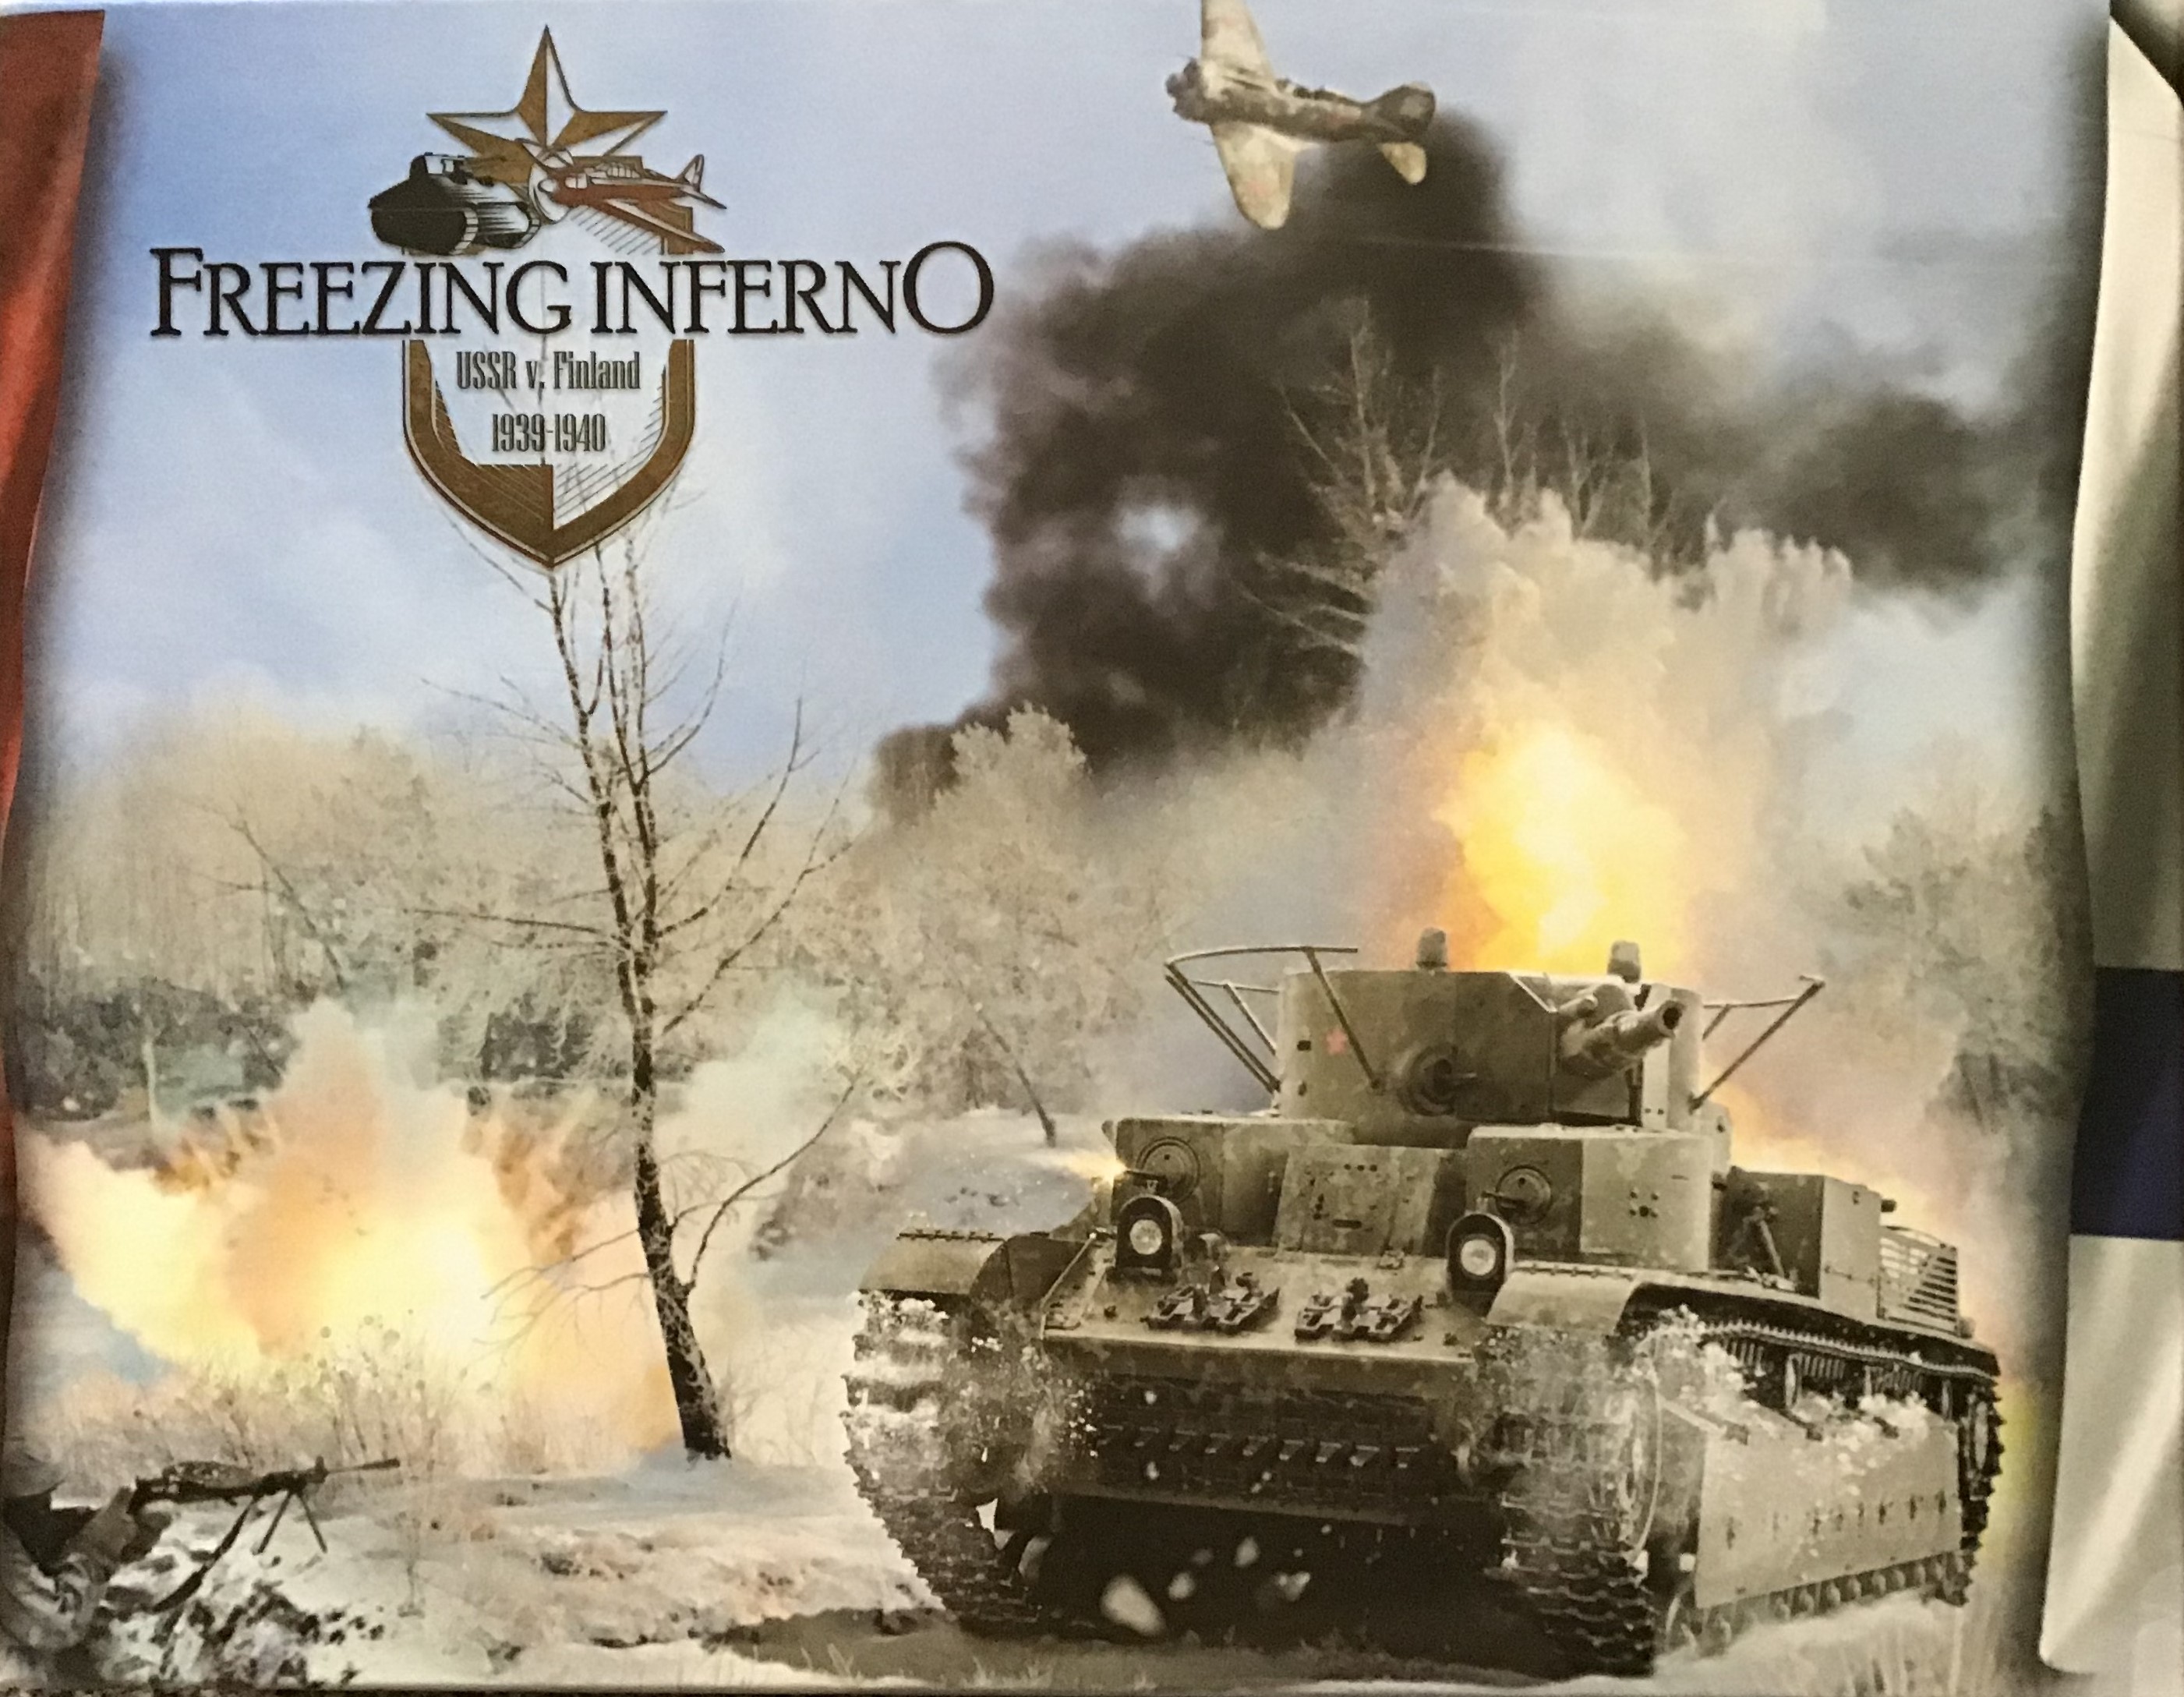
 The map is interesting because it is two-sided. One side you might call the artistic wargame map side, and it is just that. It has a lot of color and is very well done. The other side, we will call the simple side, is a map that looks like an old Panzerblitz or even a Tactics II map. It is pretty much as plain Jane as you can get. However, both sides of the map work just fine. There is no ambiguity of the terrain in each hex. The only thing that each represents is the choice of the player/players at the moment of setup (Freezing Inferno also has the two-sided map choice). The Players' Aids are all mounted and easy to read. The fact that they are not just pieces of paper is a very nice touch. The counters are large and come pre-rounded. You can see below that the counters are easy to read. Three of the card decks are on the small side. However, they are very easy to read with large print. The Event Cards Deck are the size of playing card and have a good amount of historical information on each one. The card size allows the print on the Event Cards to also be nice and large. Then we come to another piece of the game that would be familiar to players of Freezing Inferno. This would be the small setup sheets for both sides. There are fifty for both sides and they come on a pad in which you tear off the sheets. This, along with the cards, makes for a ton of replayability. The components are definitely up to the high standards that Princeps Games have set for themselves.


Counter close-up


 If you have played their Freezing Inferno game most of the concepts will be known to you. That does not mean that you cannot start your gaming with Khalkhin Gol. While it may seem that there are many cogs and wheels working at the same time, the game is not hard to learn at all. It is a simple process that the rules work you through one by one. With all of the decks it may seem like a card driven game. However, it is not; it is just a card assisted game. Unlike most designers or game companies, (hint, hint), they have done excellent videos on YouTube to walk you through their games step by step. Perhaps the hardest part to understand are the Air rules. If the step-by-step version in the rules still gives you pause, once again I point to their video on YouTube about them. 

Soviet Cards
Japanese Cards


 These are the Victory Conditions:


"Victory Condition No.1: In order for the USSR to win, it must occupy 5 of the 9 checkpoints on the disputed territory (marked with white flag) and hold them until the beginning of the next round, while also controlling at least 4 of its 6 checkpoint on the Soviet territory. If this is not achieved by the end of the 8th round, the winner of the game is the player who controls Japan.

Victory Condition No.2: If the Soviet player takes control of the Nomonhan and holds it until the beginning of their next turn the Soviet player wins the game.

Victory Condition No.3: If the Japanese player takes control of the Tamsak-Bulak and holds it until the beginning of their next turn the Japanese player wins the game.

The game uses unique battle resolving mechanisms from 'Freezing Inferno', the previous game of Princeps Games studio, successfully funded on Kickstarter last year."


 This is a YouTube video about how the Air Battle System works:

https://youtu.be/_T9ajDV5hAo


 This is the Sequence of Play:

INITIAL OPERATIONS
1. The Players set markers on PPC
  2. Players take the appropriate number of units from the box
  3. Minimaps are filled and players place units on the board according to the minimaps
  4. A deck of calendar cards is formed
  5. Initial weather conditions are set
  6. Tactical progress boards are placed
ROUND I
1. A calendar card is revealed and effects that last a full round are applied
  2. Air Superiority Battle is Resolved
  3. USSR’s turn
  3.1. Actions with units (move, attack, regroup)
  3.2. The PPC marker is adjusted if a Check Point is captured
  3.3. The player takes as many PCs as indicated on the PPC
  4. Japan’s turn
  4.1. Move, attack, regroup units
  4.2. The PPC marker is adjusted if a Check Point is captured
  4.3. The player takes as many PCs as indicated on the PPC
  5. End of round
ROUNDS II - VIII
         1. A calendar card is revealed and effects that last a full round are applied
  2. The weather is adjusted
  3. Players replenish units on the board and buy new ones (only in round III, V, VII and VIII)
  4. Air Superiority Battle is Resolved 
  5. USSR’s turn
  5.1. Tactical progress is adjusted on the Player’s Card
  5.3. Actions with units (move, attack, regroup)
  5.4. The PPC marker is adjusted if a Check Point is captured
  5.5. A player takes as many PPs as indicated on the PPC
  5.6. Places newly formed units on the board (only in rounds III, V, VII and VIII)
  6. Japan’s turn
  6.1. Tactical progress is adjusted on the Player’s Card
  6.3. Actions with units (move, attack, regroup)
  6.4. The PPC marker is adjusted if a Check Point is captured
  6.5. A player takes as many PPs as indicated on the PPC
  6.6. Places newly formed units on the board (only in rounds III, V, VII and VIII)
  7. End of Round/Game


 Historically the Soviets' equipment and troops, mostly equipment, were far better than the Japanese material, except maybe in their air assets. You will be playing on the defense as the Japanese most of the time unless you get and play the right cards and some die rolls go your way, this could change. The Soviet Player may want to be more cautious than they were historically. As the Soviet player, you will more than likely start on the attack (this can also be completely up in the air if you are using the hidden setup maps). The Japanese are not equipped or have tactics to deal with armor battles in the Second World War. This is strange in that they were one of the few armies that embraced tanks and their mobility early on. When faced with the Chinese and the equipment that the Allied nations had in the beginning of the war it did not matter much. Against the Soviets, this was another matter altogether. The Soviets had not yet given up on the 'Deep Battle' strategy that they would hone to a sharp point in the end of WWII. 


 This is a very enjoyable game from both the game and history sides of the coin. I like Princeps Games because they do a lot of historical research, and it shows in their games. Then they are also able to make the situation into a good playable game.


 Thank you very much, Princeps Games, for allowing me to play this very good reproduction of the fighting in Mongolia in 1939. It achieves all Princeps Games was looking to produce with this game. It is somewhat quick playing, compared to many wargames, and gives the player a lot of choices in their tactics and strategy. Princeps Games has now produced March on the Drina, Freezing Inferno, and Khalkhin Gol wargames. The games are definitely some of the finest produced games out on the market.

 The KickStarter for KhalKhin Gol is here:

The Battle of Khalkhin Gol by Princeps Games — Kickstarter

It has already hit two stretch goals and is very close to the third.

You can purchase all three of Princeps Games wargames during this KS campaign (March on the Drina, Freezing Inferno, and Khalkhin Gol) for the unbelievable cost of only $160 in the US and Canada. The three games are a steal at that price.


Robert

Princeps Games:

Home - Princeps Games 

Khalkhin Gol:

The Battle of Khalkin Gol - Princeps Games

This is a review of Freezing Inferno that Polydor did for AWNT:

FREEZING INFERNO - A Wargamers Needful Things


  FROM FANTASY FLIGHT GAMES Just a few crucial preliminary points, in case this series is new to you.  Most important is that you will often...

DESCENT: LEGENDS OF THE DARK - THE BETRAYER'S WAR DESCENT: LEGENDS OF THE DARK - THE BETRAYER'S WAR

For your Wargamer, Toy soldier collector, MiniFig collector, military history nut. Reviews, interviews, Model Making, AARs and books!


 FROM

FANTASY FLIGHT GAMES


Just a few crucial preliminary points, in case this series is new to you.  Most important is that you will often find this game abbreviated to Descent Act II.  It is, despite its rather eye-watering cost, an Expansion and so owning Act I is essential for playing this game.  If you choose to read on, be warned that I cannot be held responsible for what may lead to an unfortunate hole in your bank balance!
First a little history (which may be skipped over by those who do own Act I).  The Descent lineage of games began with Descent: Journeys in the Dark - a relatively conventional, though excellent, fantasy cooperative quest style game with an active evil games master controlling and seeking to win by thwarting all the efforts of the good guys (I use the latter word as an all embracing gender term). Later came Descent: Legends of the Dark - Act I.  This was a monumental step forward in a similar mould to and from the same people who created Journeys in Middle Earth. (Another favourite of mine.) In other words, the marriage of a table top fantasy game with an app that not only fulfilled the role of dungeon/quest-master, but also controlled many other facets of the game.
Virtually anything, if not absolutely everything, that has been said about Act I can be said about Act II.  Supreme quality - check.  Amazing miniatures - check.  Massive narrative arc -check.  Zillions of tokens - well ok, not as many, because you already have all the ones from Act I, but some new ones.  Lots of cards - check. And so on…
Briefly too, we’re still inhabiting the world of Terrinoth and working cooperatively to accomplish a sequence of quests with the same six heroic characters as in Act I, using at most four out of the six characters in any individual quest.  It is a linear game in its time-line and order of play with each turn divided into a Hero Phase and then a Darkness Phase.
In this next section, I’m going to look at the physical contents of Act II and make some comparisons with Act I.  As is my custom, I’ll point out now that these are often opinions and your taste may differ from mine.  My first statement, however, should (fingers crossed) be agreed on by all.  The boxes that the games come in are well nigh identical, except for colour and title.  Very large, very heavy and looking as if the top section and bottom section have been separated by another box - which is a fairly accurate description of things!
Raising the top section and looking into the top layer, you find the most amazing three packages of miniatures.  
The miniatures in their recessed trays

One of which is absolutely awesome and then some!  The supreme agent of evil - a towering 10 inch (25cm) sculpture of striking detail - all alone in its individual recessed container.  Next to it are six brand new miniatures for each of the six heroes: Brynn, Galaden, Vaerix, Syrus, Kehli and Chance. Then there is a surprise seventh miniature, Indris, which introduces one of the new concepts in this expansion, namely Companions. Indris is the only Companion in Act II.  A Companion is explained as a separate type of figure from either heroes or enemies.  It’s controlled by a hero when they activate, but has an independent sculpt and a double-sided card just like a hero. Does this hint at future expansions with other Companions?  
Just my personal view on the heroic figures - I find them in general more finely sculpted than their matching ones in Act I and this level of detail is equally brought out in the 18 enemies they face off against.  These too are all outstanding, especially the fantastically named Dragon Hybrid Doom Caller with the equally fantastically massive bell that they carry on their backs.  

Dragon Hybrid Doom Caller


...and his mighty bell

As before, all the enemy figures come with bases that have room for coloured inserts so that you can distinguish between them when you have more than one of the same type appearing in a given quest.  For the inserts themselves you’ll need to use the ones from Act I.   
Just a few random views on both the heroes and their opponents.  I love the fact that in Act II, Brynn is swinging her mighty hammer and has exchanged her massive winged helmet (not one of my favourites) for a much neater piece of headgear (a winged tiara?)!  

Brynn and that immense hammer
Chance has, shall we say, stepped from the shadows and no longer sports a mask - an item I did like! - while  Kehli seems a little less chunky and both she and Chance are in even more dynamic poses almost seeming about to launch themselves from their bases. 
Kehli & Chance: a dynamic duo

Perhaps my favourite change is the new figure of Vaerix.  Now he sports not just his mighty spear which is slung on his back, but swings with great power his bell weapon.  


Still, the most significant change must be that Syrus and Indris, the phoenix, are no longer one bonded sculpt, as the short rule book tells us, “As Syrus’s mastery over elemental magic has grown, so has his bond with Indris …(who) can now move independently across the map.”
Syrus & Indris

Confronting them are the new forces of evil in all the glorious detail familiar from the figures in Act I.

Out of these four, all bar the vampiric figure have four copies apiece, while the Doom Caller has two, along with the smaller salamander/dragon.

Moving from the world created in plastic to that in cardboard, there is everything you might expect.  Starting once more with a new set of large double sided cards, one for each hero, you’ll find a similar change and one that, like the figures, I’ve welcomed.  Act I’s cards were for me slightly too cartoonish - these seem slightly more mature, more adult almost.  Each new Hero card features new abilities, increased health and improved statistics and additional Surge abilities.  Indris, though now an independent figure, is still very much bound up with Syrus and so, as a Companion, does not get their own large card, but a smaller playing card sized one.  This cannot be flipped in the way the hero cards can to reveal new attributes, but has a defeated side instead that affects Syrus.  

Brynn's new character card

The two substantial packs of cards cover the many new items be be revealed as the campaign progresses.   Among them are weapons and stacks of skills for our heroes, a variety of light, medium and heavy armour and a new type of card, Legends.  Each Hero has up to three of these Legend cards which may be unlocked based on decisions made or their performance in the various quests.  Though double-sided, you can choose only one side to be used in this current campaign and there are several other features of these cards that make them stand out and differ from previous familiar card use.  Typically the app has a handy tab that can be called up which shows the legends and skills that each hero has unlocked so far and can equip themselves with at the beginning of a quest. Added to all this is an assortment of cards for trinkets and consumable items.
All this information and the rules linked with them is covered in the compact 12 page booklet.  Each Hero is prefaced by a brief piece of atmospheric text and introduces one major new unique feature.  For Syrus, as I've explained, there is Indris as his Companion.  Chance possesses Umbra Tokens to help friends and elude enemies.  Kehli has acquired Contraptions that she can lay about the terrain, while Galaden brings Shroud Tokens in to playOver and above these specific Hero-related elements, there's a new status - Confused - that can be laid on their enemies by attacks and abilities, as well as a new feature that benefits enemies - Resistances - that will initially be unknown until they suffer damage from whatever they are resistant to.  Nor should you forget that all the rules and everything presented and unlocked in Act I carry over to Act II.
So, plenty of new twists and turns to add layers of depth to the ongoing saga and finally, of course, there's plenty of new terrain pieces.  Here's a comprehensive look at everything when constructed and for someone not gifted at assembling most things these went together with little problem and in remarkably quick time by a careful attention to the four page guide to construction.


Ladders, columns (in three sizes), a cart, a bridge, a couple of shrines an arch with two choices of bells (one for the Heroes to ring, the other for the Evil Ones!) and lurking at the left rear a statue that figures can physically be located on!  In the centre you can see the range of tokens and another new element: fire.  Rather like barricades in Act I, fire can play its part in adding to the damage caused by Heroes and their enemies alike.  I particularly appreciated the single piece fires that can be attached to other items of furniture.  Anyone for a spot of book burning!
Below you can see an impressionistic creation to allow you to see how some of this might work together.   Pay special attention to the large stone platform some of the forces of evil are standing on.  


This is not just a great item playing a single scenic part.  It can also be inverted to form a walled courtyard and then, at the end of a day's gaming, reverts back to being a very successful container for all the other terrain!

Walled courtyard or storage box!
Without giving away any detail, the beginning quest of Act II is a substantially long introduction and then the campaign settles down to sequences of similar length to Act I.  The system rolls on well polished wheels and, though I've been told the campaign is estimated to be slightly shorter in overall length than Act I, you should be more than satisfied by its length and the whole promises many more hours of game play.  What I find is a final incentive to buy is that all that is unlocked in Act II can potentially make an appearance through the wonders of the app, if you decide to return to Act I again.  

To feed you with the nightmare that awaits should you succumb to this game, here are three final shots to dwell on! 


Finally, I must express great thanks to Asmodee for providing me with this review copy and the opportunity to tread this absorbing path.

FREEZING INFERNO FROM  PRINCEPS GAMES A stunning box art Quite a bit of newness to open with here.  First off is the company, Princeps Games...

FREEZING INFERNO FREEZING INFERNO

For your Wargamer, Toy soldier collector, MiniFig collector, military history nut. Reviews, interviews, Model Making, AARs and books!

FREEZING INFERNO

FROM 

PRINCEPS GAMES

A stunning box art
Quite a bit of newness to open with here.  First off is the company, Princeps Games, who started out in 2019.  Second is that Freezing Inferno is only their second wargame.  Their first March on the Drina was reviewed last year by my fellow reviewer, Robert Peterson.  Third is the topic, the Finnish-Soviet war of 1939-40.  This campaign has been visited before, starting with SPI's Winter War back in 1972 and returned to in 2021 by Decision Games as a magazine issue in their World at War series.  In between came GMT's Arctic Storm in 1992, not to forget the recent Finnish Expansion for Russia Besieged Deluxe edition.  So, a very limited treatment for what remains a relatively little known conflict.
So, a little background information.  What's generally referred to as the Winter War was a Soviet invasion of Finland launched in November of 1939, soon after the beginning of WWII.  Finland successfully withstood these attacks for over two months, but was ultimately overwhelmed after renewed Soviet offensives in February 1940 and the war concluded in March with the signing of the Moscow Peace Treaty.  Though the gains made by the Soviets were more than they had ostensibly sought  in their demands before the war, many writers take the view that their real intentions had been to conquer and establish a puppet government.  Certainly, many are of the opinion that the Soviet effort reinforced Hitler's decision to invade Russia.
Whatever the reality, in Freezing Inferno, you now have the chance to experience this war in what, for any company, can only be described as an excellent deluxe package.  I'd been very impressed by what I'd seen of March on the Drina, which introduced the basics of the system used here. I've no hesitation in saying that this game takes everything even further.
The box art is truly dramatic with its roiling black smoke and menacing tank back-lit by the explosion just behind it.  Opening the deep box, revealed a very safely bubble-wrapped map and when you open it out, what a map!

The mounted board is stunning and as each player sits either on the west or east side, the orientation of trees, cities, charts and military capacity track are all easily readable.  However, if you don't like this perspective, flip the map over and you swop from a semi-natural rendering to a more conventional game map perspective.  The latter, seen below, looks less striking, but I confess that I prefer it for game play purposes and also because it names all the cities on the map unlike the other map side.  Congratulations to Princeps Games for going the extra mile to provide us with a choice.


Digging deeper into the very deep box, beneath five sheets of magnificent counters, this is what's revealed...

... and here they are lifted out of the main box.


Five very impressive storage boxes.  The largest one contains six super thick, rigid play aids. Of the first two smaller boxes, initially one is empty and the other contains a variety of dice: 1 D8, 1 D10, 1D12 and 2 D20.  However, from the flags on each they are presumably intended for each side's counters.  My preference has been to bag and label them as well for ease of setting up.  Finally, in the other two smaller boxes, one contains the Military Capacity Tokens and the other a deck of twenty four tarot-sized cards, three for each of the eight game rounds.  It’s important to note here the terminology, as the rules use the word round for what is normally in most games called a full game turn and instead uses turn for each player’s individual part.
Military Capacity Tokens in four denominations

Turn Cards
The quality of every single item is magnificent.  To some extent, you may consider that this is not the essential aspect of any game. Bells and whistles don’t necessarily guarantee a good game, but the current trend is for lavish production values and this is never more true than in the game funding process where often it seems that a game is only valued by how many stretch goals it can pile up.
That said, the historical war and rather unexceptional previous games that have dealt with it would not have been likely to draw my attention, but the striking visual appeal of the game did.  I was also amazed by the remarkable base cost of $58, though I have to thank the generosity of Princeps Games for their willingness to provide a review copy and not just a proto-type, but the finished product.
As you can see , I’ve been more than satisfied by everything so far that relates to what constitutes the physical qualities of this game.  So the crucial test was how does this game play and how successful is the system and the rules that explain it.
I confess I had some confidence from what I’d read and seen of their first war game, March on the Drina.  The reality far exceeded my expectations.  At heart it is a fairly simple hex and counter wargame with a familiar igo-ugo sequence of play.  So, what lifts it way beyond that simple premise?
For me the first thing was the large scale of the map and the surprisingly low unit density.  The latter was the biggest revelation, as with five sheets of counters that are almost entirely combat units, I’d anticipated a very heavy, dense and possibly complex affair.  Not so, at start 24 Finnish units face off against 29 Soviet units and the numbers on the map will rarely go much beyond those figures.   The reason is that the designers have chosen to create most units at start as five step units with each unit having a counter for each step. That’s why there are so many counter sheets.  Apart from HQs and AA units that are single step, what you see on the map at the beginning of the game are single unit stacks of 5 counters.  This adds to the impressive visual appeal of the game.  

The photo really does not do justice to the visual impact of the game, nor can it convey the tactile pleasure of manoeuvring those counters.
As I did and several other commentators on the game, you may have initial reservations on learning about a counter for every strength step.  Will the stacks topple?  Will it make the game clumsy to manage?  Will it make unit strengths awkward to work out?  The answer is no, no and no.  One reason is that the hexes are so nice and large and the counters are equally large and solid.  Consequently the stacks are easy to handle and move around the map and it's far easier to see how many steps there are in them than having to lift up a counter to read a strength marker underneath.
There are so many small factors pertaining to these units that combine to make this both novel, easy to play and easy to understand.   But before moving into the smaller details that make this design shine, I'd like to outline some of the broader aspects of the rules that confirm the outstanding features of Freezing Inferno.  The first begins with set up and the great replay value it brings.  One of the game's contents is a pad of 48 mini-maps; 24 for each player.  The rules tell you how many of each type of unit you start with and all are at full strength (for most units, as I mentioned earlier, that's a maximum of 5 steps, except for HQs and AA units that can only ever have a single step). Each player designates the starting positions of their units on a mini-map and then sets up.  If this weren't enough to provide variety, the rule book contains eight different pre-designated set ups for each player.  The rules even suggest the two set-ups with which to start your first play of the game. Just personally choosing from these or even randomly rolling for them will keep you going for quite some time, but I'm quite sure that like me you'll soon want to experiment with your own planned set ups.  

Pad  of 48 mini-maps to log your initial set-up

Just in case that's not enough, an advanced option for set-up tells you how many strength points of each unit type you start with, but allows you to vary the strength of units.  This means that you can field more units, but some will be at less than full strength.  This one area of the game not only gives excellent replay value, but the chance to try out very different situations to begin the game and many different styles of play.   As the game comes with a straightforward bot for each side, solo play is also greatly enhanced by these rules.

Soviet BOT play aid

The next major area concerns the handling of reinforcements and directly links with the fact that each side's cities have a National Military Capacity (NMC) with which you buy your reinforcements.  Finland starts with cities totalling 28 NMC points and the Soviets 29 NMC points.  At the end of each player's turn, they will collect however many points worth of cities they control.  This is where those chunky oblong counters come in to record how many NMCs you possess and the large numerical track on the game board records what your current control level is.  Capturing an enemy city will deduct the full value of that city's points from your opponent, but will only gain you 1 NMC.  If your opponent retakes the city, you lose that 1 point and they regain its full value.  
How does all this then relate to and affect reinforcements? Very simply, at the beginning of specific rounds (3,5,7 & 8), each player can pay with the NMCs that they possess for reinforcements and build up steps lost in combat of units that are in supply on the map.  A very good point here is that replacement steps are allocated immediately at the beginning of the round, but reinforcements are only placed on the map at the end of a player’s turn,  Another very simple idea, but it creates for both players another small decision point.  It is these small incremental details that give the game so much flavour and individuality.
No more so than at least two of the three optional modules - all three of which add to the replay value and add a little more depth of game play without spoiling the basic simplicity and ease of play.  The first is weather which is rolled for at the beginning of rounds 2 -8. 

You roll for both temperature and weather conditions which are interlinked, affecting both terrain and movement costs.  Frankly, I don't think this should even be an option.  It's so quick and easy and was a significant factor in this war.  My advice - just include it from your very first game.  The other two modules bring in respectively technological-tactical factors and diplomacy.  Both involve expenditure of NMCs  and there is a chart in the rule book that shows how choice of either or both options marginally reduces the cost of replacement steps for each type of unit.  There is also a small section in the rules for Solo Mode that tells you how to prioritise bot choices if using these modules.  For me the Diplomacy Module offers least as, though you can affect the Diplomacy Track through Rounds 2-6, the potential effect may be very small and only comes in to play on round 7.  What is interesting about it is that the pro-Soviet benefit is hardly worth having, but the pro-Finnish one might just be enough to save the Finnish player from defeat.  So, if this option is chosen and the Finnish player decides to aim to use it to their best advantage, the Soviet player may feel forced to counter it just to avoid the possibility of a last minute influx of Finnish units.  A nice conundrum and so easy to include.  
The second module introduces the type of tech-tree concept found in  a range of WWII games.  What I like about this one is that again, for very little addition to the rules or game play time, it adds an element that contributes to the different feel of playing each side.  Some may perhaps feel that they don’t add enough difference, but I like the fact that none of them overbalance or over-complicate the  smooth and quick play of the game.  It also brings in such evocative words as sabotage and espionage, though what I think is most important for the game is that the benefits from the tech-tree add to the different and distinctive flavour of the two sides.


Finnish tech-tree
Turning to the basic game play, on your turn you move and have combat with one unit against one enemy unit before activating the next unit.  No adding up combat factors and dividing them by enemy combat factors.  Just determine what is the attacking unit’s attack strength and what is the defending unit’s defence strength.  Look this ratio up directly on the appropriate combat chart and roll the die.  It is as simple and quick as that.  Both combat results tables are printed on one of the excellent, solid card Play Aids.  Ground to Ground & Air to Air is on one side and on the reverse side is Air to Ground.
There are several novel , but easy to understand features related to Combat.  First of all, each unit has an initial attack value and defence value (as well as its movement value )clearly printed on its counter. To determine its strength, you simply add the value to the number of steps the unit currently has.  So, an infantry unit of attack value 2 with 4 steps would have an attack strength of 6.  If the defending unit was a tank of defence value 4 that had 2 steps, then the total defence strength of the tank would be 6.  Combat modifiers provided by terrain are very straightforward and easy to remember, though there is a very nice large, clear chart printed on the map and reproduced in the rule book.


Next important detail is that whichever unit suffers losses retreats one hex.  The only exceptions to this is the result where both sides suffer 1 loss in which case neither side retreats or the Defender 1(DR) result where the defender has the option not to retreat.   Additionally there are two other possible combat results.  CA is very familiar, the defending unit can CounterAttack, the other is - as far as I’m aware - totally original and that is NONT.  This means that a defending unit cannot attack or move on its next turn and also, if it suffers another NONT result during this same opponent’s turn, it will take a step loss.
These few rules are so easy to remember and apply and this is true of just about all the rules in this game.  This is a major reason why I like this game so much.  All your focus goes into the battle, not the rule book. There is a final and unusual option related to combat that I have similar praise for and this is Rule 6.4 Adjusting Luck! At the beginning of the game you decide whether you want to reduce the element of luck in your combats.  This is done by your choice of combat die.  The basic die for combat is a standard D8, but the game includes two different D20 dice that have the numbers 1-8 on them.  Because of the distribution of the numbers on the dice, each of these dice reduces the chances of rolling very high or very low.  Such a simple idea, but perhaps not for those who like to blame their defeats on the roll of the dice!!


Play aid for Sequence of Play
What other factors give this game its individuality?  Supply rather unusually is just a question of being within 7 hexes of an HQ and that’s it.  The HQ itself doesn’t have to be linked to any supply source.A little unusual, but it does throw even more emphasis on seeking to take out HQs and on protecting them. The next factor is air power.  At this scale it’s often just a question of air points.  Freezing Inferno gives you air units, but only a handful.  So, they play their role, but don’t overshadow the main ground game.  The rules too are clear and simple, with fighters only used to intercept bombers, not to directly attack ground units.  The air presence brings in a few AA units to add to the counter mix and what I really, really like most of all is the presence of airports - though, perhaps, a better translation would have been airdromes or even airfields!  A plane must have enough movement points to fly from an airfield to attack its target and return to another airfield - no kamikaze attacks in the European theatre!  Consequently, it does give the opportunity to have runways and control towers depicted on the map and, even more to my liking, the need to capture the hex with the control tower in order to control the whole 2 or even 3 hexes that make up the airport.  Again lots of feel added through some simple rules here and capturing airports is very important for the Soviet player if they are to maintain their bombers as a strength in the progress of their invasion, both directly as attackers or because of their capacity to transport infantry.

Soviets within striking distance of enemy airfield

Next up is how recording each Round is dealt with.  What the game calls Calendar cards don't just help you keep track of what Round you're playing, they add another small variable to the game!   Each Round has three cards and at the beginning of the game you randomly draw unseen one card for each Round.  These make up your Round Deck.  When you reveal the current Round card, it has a brief outline of an historical event and a small benefit or disadvantage for one side or the other.  Great stuff - I get to learn a bit about this little known war and it adds to play too.

The history and game effect for Round 4 of my current play

Finally, just a last couple of original ideas that are worth mentioning; neither of them have I encountered in any other game. The first is related to ZOCs.  Control of a hex’s ZOC is determined by which side has the most units imposing a ZOC on a hex.  Watch out for this one, as it obviously tends to benefit the Soviet player, as they are more likely to be able to muster the units to control a ZOC and deprive the Finnish player of control.  A useful minor but additional tool when you’re the main attacker.  
Last of all is what is called unit regrouping, not at all what I expected. Essentially, units can transfer strength between units of the same type by movement.  For example, a unit of strength 5 could detach say 2 strength steps using movement points to travel three hexes to a unit that has only a single step left.  If it wishes, the newly formed unit (now containing 3 steps) can move as far as the remaining movement points possessed by the unit that joined it.  This is, for me, an idea that I strongly welcome and is part of the great marriage this game creates between simple, familiar rules and equally simple, but innovative additions.
So, in conclusion, Freezing Inferno is a huge success in every aspect of its production qualities and gives excellent playability and play value in its rules.  It’s swift moving and wholly enjoyable whichever side you play.  It has bags of replay value and I believe successfully creates the feel of the Winter War.  What I don’t think it gives you is the historical Winter War.  As my previous games involving this war that strove for an historical simulation weren’t exactly the most exciting or enjoyable to play, I know that Freezing Inferno gets my vote for a great gaming session.

  Stargard Solstice by Three Crowns Games  It is 1945 and the Red Army is seeking vengeance for the horrors that were perpetrated in the Mot...

Stargard Solstice by Three Crowns Games Stargard Solstice by Three Crowns Games

For your Wargamer, Toy soldier collector, MiniFig collector, military history nut. Reviews, interviews, Model Making, AARs and books!


 Stargard Solstice


by


Three Crowns Games


 It is 1945 and the Red Army is seeking vengeance for the horrors that were perpetrated in the Motherland. Conversely, the German Army is trying to hold back the red hordes from invading the Fatherland. The Germans are attempting to strike with Operation Solstice (Sonnenwende). Meanwhile, the Soviets are starting their East Pomeranian Campaign. The Germans are scraping the bottom of the barrel as far as manpower and armaments. The Soviets are also low on manpower, but they have plenty of artillery, tanks, and planes to support their offensive.


 This is what Three Crown Games has to say about their game:

"Stargard Solstice starts with one of the last German offensives of 1945, ‘Operation Solstice’. At the beginning Guderian had planned a pincer move to relieve Küstrin, but Hitler wanted to save troops to retake Budapest. This resulted in changing objectives to the relief of Festung Arnswalde and trying to cut the Soviet supply route towards Küstrin. The historical objective for the Soviets was to drive the Germans out of Pomerania and thereby protect their right flank while preparing to take Küstrin and make the final thrust towards Berlin. Stargard Solstice is a game recreating this campaign in Pomerania from 15th February – 6th March, 1945."


 This is what comes with the game:

 A full color A1 map

 16 page rulebook

 286 high quality, 15mm die cut counters

 Front and Back cover with game aids, charts and tables

 Sturdy 100my ZIP-lock bag


Game Turn: 2 days

Hex: about 3 to about 4 km

Units: Battalion to Division

Solitaire Playability: High

Complexity Level: Medium

Players: 2 or more

Playing Time: 3-10 hours


Soviet counters

 The map is a standard size one. It has large hexes and is easy to read. The Turn Record Track and some German and Soviet holding boxes are on it. As far as wargames maps go this is pretty standard. On its plus side is that there is no ambiguity to the terrain in each hex. The counters are also large and easy to read. There is no difficulty in distinguishing between the counters for setup purpose. Their color is pretty standard also, black for SS, gray for Army (Heer), with the Soviet regular troops brown and the guards units being red. Watch out when dealing with the counters. They look like the older ones we are used to, but these want to detach from the sprues in a slight breeze. The Rulebook is in black and white on thick paper. It is printed in double columns and the type is large. The Rulebook is sixteen pages long. The actual rules are only twelve pages and then comes the setup, Optional Rules, Designer Notes, and finally Random Events. There are two cardstock full page Player Aids. These are in full color. Most of the writing is fine, but the Terrain Chart writing is small. What we have here is a fine group of components for a wargame.


German counters


 This is the Sequence of Play:

Air Unit Phase

 Refitted Unit Return Segment

 Grounded Unit Refitting Segment

Random Event Phase

 Random Event Table Roll Segment

Command Phase

 Command Segment

 Movement Segment

 Combat Segment

Supply Phase

Reinforcement Phase

 Reinforcement Segment

 Soviet Replacement Segment

 Volkstrum Deployment Segment

End of Turn Phase


German counter with a Hetzer on it

 This is the fourth game in Three Crowns Games WWII Battle Series. Some of the other games in the system are:

Iskra, Tolling of the Bell, Konigsberg 45, Across the Narva 

 The game series has all the rules about everything we grognards expect to see: Fog of War, Command Chits, Regular and Strategic Movement, Rail Movement, Stacking, Reinforcements, Barrage, Retreats, Supply etc.

 So, pretty much if it walks, and looks and plays like a grognards wargame, it is one. This game and all of Three Crown Games games are meat and potatoes for grognards. Nothing too overly fancy with great gameplay. I have always liked the Random Events that they come up with in all of their games I have played. One thing about the game in the Designer Notes is the fact that the OOBs for the game are probably not spot on for the actual battle. It has all of the major units listed but, especially on the German side, it is hard to say for certain. With the destruction of records and the German forces completely falling apart, to assemble a complete OOB without any errors would be practically impossible. 

 The game plays like any wargame about the Eastern front in 1945. As the Soviet player, you are supposed to charge forward and crush everything with your tank tracks. As the German player, you are really emulating Hans Brinker. The only problem is that you only have so many digits to plug the holes. The game adds some chrome with a counter for Rudel among other things.

The Victory Conditions are:

Soviet Sudden Death Victory: If the Soviets have any of the Victory Hexes in Stettin.

German Sudden Death Victory: If the German player can get three attack-capable units off the map through the Landsberg Supply Line.

The normal Victory Conditions are based on the Soviet possession of Victory Point Hexes.

 Thank you, Three Crown Games, for allowing me to review another of your great wargames.


Robert

Three Crowns Games:

War Game Design | Three Crowns Games Production (3cg)

Stargard Solstice:

Stargard Solstice | 3CG (threecrownsgames.com)

Please see my review of their East Prussian Carnage:

East Prussian Carnage: The Tannenberg Campaign 1914 by Three Crowns Games - A Wargamers Needful Things

hpssims.com