second chance games

Search This Website of delight

 VON MANSTEIN'S TRIUMPH FROM NAC WARGAMES Initially, I was drawn to Von Manstein's Triumph purely by the bold dynamic box art.  It ...

VON MANSTEIN'S TRIUMPH VON MANSTEIN'S TRIUMPH

For your Wargamer, Toy soldier collector, MiniFig collector, military history nut. Reviews, interviews, Model Making, AARs and books!

November 2022

VON MANSTEIN'S TRIUMPH

 VON MANSTEIN'S TRIUMPH

FROM

NAC WARGAMES


Initially, I was drawn to Von Manstein's Triumph purely by the bold dynamic box art.  It may be good advice not to judge a book by its cover, but I'm more than glad that this striking picture caught my attention and made me explore further! 
The game is published by NAC Wargames, itself a branch of the Spanish Publisher, Ediciones MasQueOca.  Up to now, the latter company's focus has been on providing Spanish and Portuguese language versions of well-known designs. The company's avowed intent now is to focus on historical wargames that relate to the history of Spain.  
Though Von Manstein's Triumph may geographically and in terms of nationality lie outside this intent, I can only express my delight that this superb design from Francisco Ronco has been one of their choices.  It's also warm thanks to NAC and Ediciones MasQueOca for providing this copy for me to review.
First of all, its components live up to the extremely high standards of the company's past publications and secondly, the design brings a series of new twists both to the field of block units, area movement and card-driven games.
Though Manstein features in the title of a fair number of wargames, including at least two that cover the siege of Sevastopol, all those that I am aware of utilise the standard hex and counter system that is the basis of much wargaming design.
Starting with the components, every item ticks the box for excellence.  The map is a deluxe mounted version sporting a Spanish text version on one side and an English version on the other.

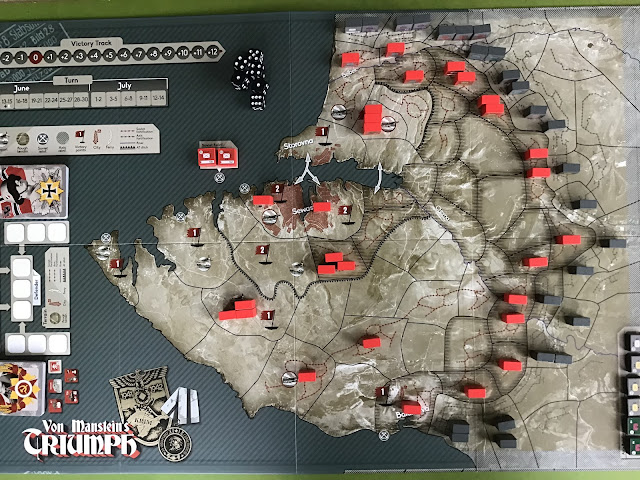
This direct, overhead view picks out clearly the sombre relief, the trench defences, clearly marked VP flags, ferry points and heavy soviet shore batteries, along with all necessary charts and a simple combat display for transferring your units to.  Your forces are wooden blocks of first-rate smoothness.  I mention this because of the tendency of several more recently purchased block games I possess to have slightly ribbed or striated surfaces - not as good for sticking power. 
An additional point in this attention to quality is the inside of the sturdy box, which instead of the usual plain white cardboard is printed with similar details to those on the Playbook.

A touch of box quality
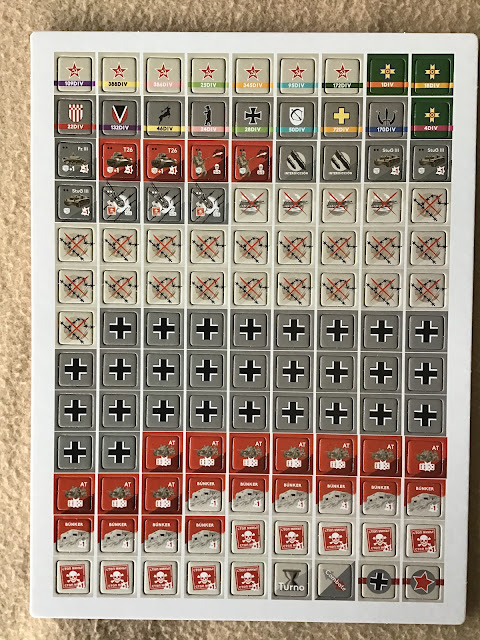
 As usual there is the familiar set of adhesive labels to apply, though as the photo shows this is a relatively low block count - so not an onerous task.  The units are based on divisions that possess from 2 to 4 individual blocks identified by colour-coding and a number of  independent units identified by white colouring.  It is this colour coding which brings my single criticism of the presentation.  First, the typical black dots that indicate the strength of a unit are very small and hard to make out against the generally dark background of the labels. but the major problem lies in distinguishing the colour-coding of the divisions when playing under artificial lighting.
Having initially played in normal daylight, they were perfectly identifiable and attractive, but later play on a wintery evening revealed the problem of clearly differentiating units, especially as divisions begin to intermingle.
On the other hand, praise goes out for the sheet of counter stickers containing two identical sets.  Although I've never had a problem with ones peeling off other games, this is always a nice sign of a company's careful attention to potential player needs.
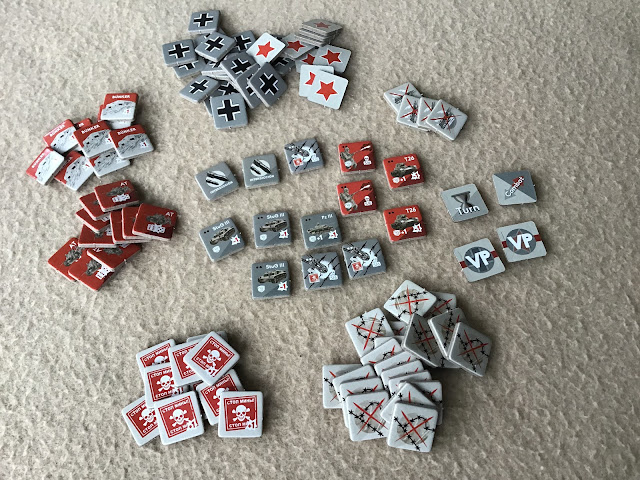
Next up is a single sheet of cardboard markers, ranging from the obvious turn marker to a colourful range of assets, including bunkers, anti-tank guns, armour and pioneers, as well as minefields, area control markers for the German player, and trench destroyed markers.

They all punch out perfectly with the much appreciated, rounded corners that are becoming a more familiar item from many companies.


At the heart of game play are the two decks of cards, one for each nationality.  I find the backs of the cards particularly appealing, with their strong feel of wartime propaganda posters.  

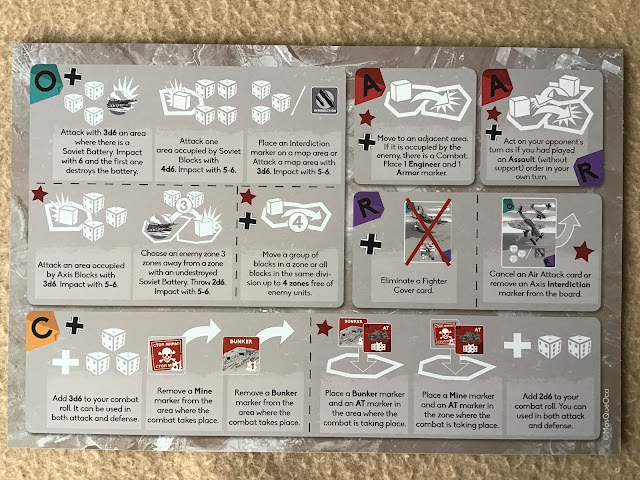
Included with them are similar-sized cards giving each player's card manifest, terrain effects, counter and marker effects, a very useful short-hand list of modifiers to the number of dice thrown in combat and finally the Sequence of Play.  All these and the larger Play Aids, one for each player that summarise the usage of all the different cards in the Player Decks, are helpfully printed in Spanish on one side and English on the other. 
Play Aid detailing usage of cards in the Player Decks
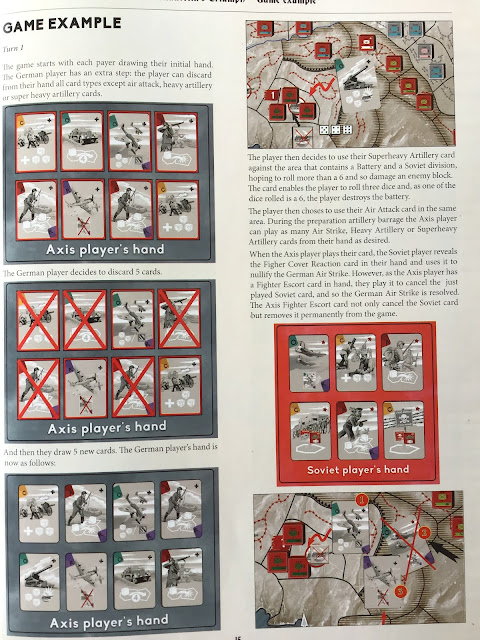
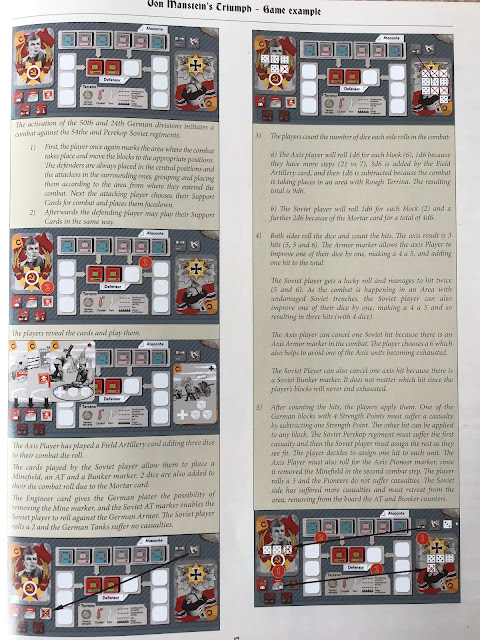
All in all, an admirable package, completed by what's becoming almost the norm in board wargames, a separate rulebook and playbook.  Both are very glossy products with an abundance of illustrations.  The Playbook starts with 5 pages of photographs that show the Set-Up map section by map section; a very useful asset indeed.  Next is a page and a half of Design Notes and slightly more than a page of Player Notes, followed by six pages of Historical Commentary.  All this is rounded off by a five-page example that takes you through the first turn of the game - once more a feature that is always welcome, however easy to understand the rules are.

These two photos show the consistently high level of illustration used throughout.


The Rulebook is supported to the same degree with pictorial examples and, basically, the Sequence of Play is ultra-simple.  Apart from a preliminary German Bombardment on Turn 1, each Turn follows two identical Phases; the German Action Phase and the Soviet Action Phase.  Each Player's Deck of cards contains four different types: Assault, Reaction, Order and Combat Support.  Though essentially simple, play is by no means simplistic and what might, at first, seem an igo-ugo system has a degree of back and forth play that means that both players are totally involved and engaged.
Another distinctive feature that helps the game to shine is the asymetrical design of the decks.  Both players have a core element of Assault cards, but even here there are distinct differences, as the German player has far more of these that are dual action allowing them to interrupt the Soviet Action Phase.  In the same way both the Order and Combat Support cards include a mix of near identical cards and those specific only to one player. By these means the decks create the appropriate emphasis between the attacking besieger and the defensive besieged. [Here I would love to see the system adapted for ancient or medieval siege warfare.]  A final point to make about the cards is that both players draw to full hand size at the end of each Player Phase rather than at the end of a complete Turn.  This adds greatly to keeping both players constantly absorbed in the game play
Player Aid summarising the effects of all the different cards
As the cards are the very heart of the system, I can think of few games that go to such lengths to make sure that you both understand them and then can use them with the minimal amount of effort and rule checking.   First of all, they are introduced in detail, step-by-step early in the rule book and then a three-page section at the end of the rulebook summarises each one.  As shown above, each player has a player aid that sums up the use of both his cards and his opponents, as well as most of the counters used in the game.

One of three pages summarising each card's usage

Oddly there are one or two German counters not included on the large player aid, though they are all clearly explained in the rule book and covered by the three small playing-card sized aids that cover Terrain effects, Counters and Markers and Combat dice.  Finally, each card in your Action Deck pictorially shows how to use it.  Consequently, after a few games, you'll find yourself playing smoothly with each card's use easily fixed in your head.  

Front cover of the Playbook

So, how does the game play out.  Being the besieger, the drive and onus of the action is naturally on the German player.  They have certain advantages, the most obvious being hand-size which is 8 cards as against the Soviet player's 6 cards.  They also have more cards that can inflict hits as opposed to the Soviet ability to place bunkers and minefields and, though both sides start in defensible trench areas, predominantly it's going to be the German player who's leaving their own protection behind to advance into the Soviet trenches.   As mentioned earlier, the German player also has more double-use cards that allow an immediate reaction during the Soviet player Phase.
Generally, the German player will be seeking to soften up areas with air strikes and heavy or superheavy artillery in order to weaken Soviet blocks and destroy the fixed coastal batteries printed on the map.  The Soviet player for their part has field artillery and the power of those coastal batteries, as well as the ability to place bunkers and minefields.  Other abilities from card play cover ATs, Stugs, fighter cover and fighter escorts and mortars, while the map itself includes those powerful coastal batteries that are so important for the German player to destroy, ferry crossing points an anti-tank ditch and a plethora of trench lines.
It is, like any siege, a difficult grind forward for the attacker, but the variety of action and play and counter-play of cards, all so simply, but effectively introduced whether as Actions, Orders or Combat Support, makes the experience a continually dynamic and tension filled one.   Whichever side you play, you'll find yourself fully engaged and immersed the whole of the game.
 

0 comments :

  JMBricklayer RC Tiger Tank 61501   Oddly enough, I do not have a Tiger I or a King Tiger in my block made kit menagerie. So, I jumped at t...

JMBricklayer RC Tiger Tank 61501 JMBricklayer RC Tiger Tank 61501

For your Wargamer, Toy soldier collector, MiniFig collector, military history nut. Reviews, interviews, Model Making, AARs and books!

November 2022

JMBricklayer RC Tiger Tank 61501


 JMBricklayer


RC Tiger Tank 61501


  Oddly enough, I do not have a Tiger I or a King Tiger in my block made kit menagerie. So, I jumped at the chance to build this kit from JMBricklayer. The RC tanks that I usually see advertised have always seemed to me to be long on the RC part and rather short on the looks end. Oh, for a child that doesn't really care if it looks like a Tiger I or not they are fine. However, when these kits are being built by us old folks it is a different story. What we want is a Tiger I that looks like one and was not developed from a sketch of Picasso's. You will be pleased to know that this kit is a well-done representation of a real Tiger I (Panzerkampfwagen VI to you sticklers). 


  Building the kit was pretty straight forward. Just so you understand, with all of the kits from different companies that I have built, there have been problems with assembly. The main problem is me. I get too nonchalant about looking as closely to the instructions as I should. I get into a groove and just start building. That is, until 3-10 pages later I find that I messed up and need to disassemble everything I have done for the last five minutes. 


 With this kit I only had two slipups and one of them was minor. The only thing that scared me when I opened up the package was when I saw that the tracks came unassembled. I had visions that the tracks were going to be a complete nightmare to build with my non-adroit fingers. I was extremely happy to find out that putting the tracks together was one of the easiest parts of the build. I remember what a living hell it was putting tracks together for a glued plastic model. I swear I would end up with one or two tracks glued to my forehead. 


 This is what JMBricklayer has to say about its kit:

Exquisite Building Block Kit】: This tiger tank is composed of 800 high-quality building blocks, which can be used with confidence. The entire model measures 9.60in(L) x 5.11in(W) x 4.33in(H), plus, all accessories are packaged in individual bags in the order of assembly, with colorful assembly instructions to help you easily distinguish and complete assembly. You can do it with your family, and it will be fun.
【Creative Design】: The military tank is rich in structure, unique and creative in design, and is a fantastic toy model. It can go forward and backward, left and right, and can drive in all directions. And it is equipped with a rotating turret, and a built-in gyroscope, and can simulate the sound of the engine, which truly restores the tank experience. Overall, this is a very refined and flexible military building block vehicle.
【Easy to Operate】: The military tank building block toy has a motor and a lithium battery, which can be driven flexibly. It supports a mobile phone APP or 2.4GHZ remote control (without battery) Bluetooth control, the signal is stable, and remote operation can be realized, you don’t need to worry about operation problems. You can enjoy assembly with your family and friends and unlock its various functions together when you’re done.


This is a picture of the box


The contents before I opened up the bags


 I am well aware that you should separate all of the different pieces into piles of like pieces before you even start building. This would be just like doing a puzzle. However, I prefer the 'Where is Waldo?' type of building. It adds time and sometimes leads to a little annoyance, but it works like the game of 'Concentration' during the build.


 This kit was pretty enjoyable to put together. It took about three hours in total. However, I was not just sitting there doing the construction straight through. I spread the build over two days and was doing other things in the meantime. As I had mentioned, the tracks were quite easy to put together. The instructions were a little hard for me at the beginning of the build. They are all diagrams as usual. What JMBricklayer does is use a red line around where the new pieces are supposed to go. Do not build it like me and just assume you know where pieces are supposed to go. Look for those red lines and you will not make any mistakes like I did. 


 The kit also comes with markings for the tank. I always had trouble with those when building plastic models. I could never get them where they needed to be put on. I had no problem at all with these markers from the Tiger kit. These are different than the others that I have worked with. With these you put them on and then rub them for a bit. Then you actually peel back the clear plastic leaving the marker. 


 While I have never been a fan of RC vehicles and have not owned any until now, I was impressed with the sound and movement of the Tiger I. Thank you JMBricklayer for allowing me to review this fine product of yours. The next review for them will be of their 3-in1 Remarkable Ancient Machine.

 Here is some discounts and sale information:

1. for USA customer, shop on Amazon store:
Link: https://www.amazon.com/JMBricklayer-30001-Medieval-Model-Kit/dp/B0BCK2F7MF
Discount: 30% off
Code: VIPJMB30
Time: Nov 24- Nov 28
Free shipping

2. For worldwide free shipping (including to USA as well), shop on online store:
Link: https://www.jmbricklayer.com/product/3-in-1-medieval-weapon-30001/
Discount: 30% OFF
code: no need
Time: Nov 24- Nov 28
Free shipping

3. All sets on online store that if they are not in discount, here is a coupon for them
Discount: 15% off 
Coupon code: VIPawargamer15%
Time: Now - Dec 31

Robert

JMBricklayer:

RC Tiger Tank 61501:


0 comments :

  Warsaw 1920 by Revolution Games  This was supposed to be the start of the world Communist revolution. All the Red Army had to do was to ma...

Warsaw 1920 by Revolution Games Warsaw 1920 by Revolution Games

For your Wargamer, Toy soldier collector, MiniFig collector, military history nut. Reviews, interviews, Model Making, AARs and books!

November 2022

Warsaw 1920 by Revolution Games


 Warsaw 1920


by


Revolution Games


 This was supposed to be the start of the world Communist revolution. All the Red Army had to do was to march into Poland,  the oppressed workers would join them, and then it would march through the rest of the world. What really happened was that the Poles rose up in force to defeat the Red Army. This was just another time that Poland was left to defeat a rapacious neighbor. The picture on the cover is of Field Marshal Piłsudski, the main Polish hero of the Polish-Soviet War in 1920. During the first part of the war, the Red Army went from victory to victory and almost succeeded in taking Warsaw. The Poles then held them off and counterattacked to push the Red Army back over the border. On the Soviet side Marshal Tukhachevsky and Stalin and some of his cronies: Budyonny etc. were in charge of some of the troops.


 This is what Revolution games has to say about the game:


"Warsaw 1920” is a two-player wargame that recreates the Battle of Warsaw in 1920, 101 years ago. One player controls the Polish (including Ukrainian and Lithuanian) and the other controls the Russians.

The war between Poland, which has regained its independence, and Russia, which wants to export the revolution to Europe, also called the "Soviet-Polish War," has been waged since September 1919 without a formal declaration of war. Full-scale combat began in April 1920, when the Polish army launched an offensive in the south and occupied Kiev while the Russian army was extracting troops from the front to clear the remnants of the White army.

However, the Polish didn't achieve the results they expected, and were repulsed by a counterattack of Semyon Budyonny’s 1st Cavalry Army. In July, the West Front Army, led by Mikhail Tukhachevsky, launched an offensive, and the Polish left wing collapsed. The Western Front reached the gates of Warsaw after defeating two Polish army groups and advanced 500 km in five weeks. In August, when Poland was thought to be engulfed by the red tsunami, reorganized troops and Polish units from the south launched an unexpected counterattack from the south against the Russian flank. Relentless and aggressive, the Polish continued to move forward, inflicting heavy losses on exhausted Russian troops and destroying many of them.

This game shows the battle from July 1920, when the Western Front began its offensive, to the end of August, when Tukhachevsky’s army was almost eliminated by Polish counterattack.

Designed by Yasushi Nakaguro"


 This is what comes with the game:

-22 x 34 inch map

-1 counter sheet of 5/8" counters

-Rule Book

-Player Aid

-Ziplock Bag


 This is the Sequence of Play:

1. Polish Player Turn 
1. Reinforcement and Reorganization Phase 
2. 1st Operation Phase (Game Turn 2 or later) 
3. 2nd Operation Phase (Game Turn 3 or later) 
4. 3rd Operation Phase (Game Turn 5 / 6 or later) 
5. Refit Phase 
2. Russian Player Turn 
1. Reinforcement and Reorganization Phase 
2. 1st Operation Phase 
3. 2nd Operation Phase 
4. 3rd Operation Phase 
5.Refit Phase 

After the Russian Refit phase is finished, advance the turn marker to the next turn, and start a new game turn. At the end of turn 8, the game is over, and the winner is determined


 The map is not sartorial, but more of a modest type. The hexes are nice and large, and the terrain is easy to discern. The Pripet Marshes divide the eastern side of the map into two separate areas. The counters, as you can see, are also large and east to read. You will not have any counter clutter with this game. The Polish Player is allowed to have two units in a hex. The Russian Player can have up to three units in a hex. The only caveat to those rules is that units from the Russian Western and Southwest Fronts may not stack together. Polish units are not allowed to stack with Lithuanians either. The Rulebook is twelve pages long with ten of them being the actual rules. Pages eleven and twelve are the counter manifests. Like every other Revolution Game Rulebook, these rules are short and sweet and to the point. There is no ambiguity here. It is in full color and has some examples of play in it. The Player Aid is one sided and has the CRT and Terrain Effects Chart.

 Looking at the counters you will see that the Soviets are hampered by a slow movement rate. Their infantry units have a movement ability of four and the Polish infantry have one of five. The cavalry units for both sides are a different matter. The Polish cavalry have a movement rate of nine compared to the Russian six. The Russian Western Front does have two artillery units. The war was probably the last where cavalry formations were one of the largest parts of each army. In fact, most of the war was determined by swirling masses of cavalry. 

 The Victory Point system is a bit long so let us take a look at how Revolution Games explains it:

"The game begins in July 1920, when Tukhachevsky’s West Front 
launches the offensive, and ends in August, when the Polish 
army almost eliminated it (exception: see 4.2 Russian Sudden 
Death Victory). Victory is determined by the number of controlled cities / major cities, eliminated elite units, and surrendered units.
4.1 Win by Victory Points
At the end of the Game Turn 8, both players calculate each victory point: The side with the higher number wins. Draw if tie
4.1.1 VPs for Controlling Cities / Major Cities
At the end of the game, a player receives one VP for each controlled city hex: 2 VPs for each controlled major city hex. The 
Polish player receives four VPs if they control Warsaw (Exception: 
4.2, the Russian receives only two VPs for Warsaw). However, 
neither player can score from a city / major city unless it can 
trace a continuous railroad from its hex to a controlled friendly 
supply source (see below).
4.1.2 Supply Source
Polish supply sources are Warsaw and the railroad hex at the 
western map edge (printed national emblem). Russian supply 
sources are Smolensk and Kiev (printed red star). At the end of 
the game, if you can trace the unblocked railroad from a controlling city / major city to any friendly supply source, you can 
receive VP from that hex. Enemy units and EZOC that are not 
cancelled by friendly unit blocks railroad trace.
Note: The Polish player always receives 4 VPs from a Polish controlled Warsaw because Warsaw is a supply source. 
4.1.3 VPs for Eliminating Elite Units
The Polish player receives one VP for each eliminated Russian 
Cavalry Division and/or Artillery Brigade. The Russian player 
receives one VP for each eliminated the Polish unit belonging to 
the Polish Legion. Those units have a red star (Russian) or eagle 
(Polish) on the upper right.
4.1.4 VPs for Surrendered Units
Both players receive one VP for each two surrendered enemy 
units (see 12.3) round up.
4.1.5 Russian Re-supply
If the Russian player did re-supply (see 8.3), the Polish player 
immediately gets one VP for each two supply points (round up, 
calculate each front) the Russian player received.
Example: On Game Turn 4, the Southwest Front received 5 supply 
points by re-supply. The Polish player immediately receives 3 
VPs. On Game Turn 5, the West Front received 7 supply points by 
re-supply. The Polish player immediately receives 4 VPs.
4.1.6 Piłsudski’s Early Counterattack
At the beginning of Game Turn 3, the Polish player must decide 
to counterattack on Game Turn 5 or 6 (see 5.3). If the Polish 
player chooses Game Turn 5, the Polish side will lose 4 VPs at the 
end of the game. No VPs are lost if the counterattack begins on 
Game Turn 6. 
4.1.7 Recording VPs
Both players have VP markers. To record VPs place it on the 
VP Record Track. Almost all VPs are recorded at the end of the 
game. During the game, the Polish player may need to record 
VPs for the Russian re-supply if the Russians choose to receive 
them. Use the back side of the VP marker if your VPs exceeds 10 
VPs.
4.2 Russian Sudden Death Victory
If the Russian player controls Warsaw before re-supplying (see 
8.0) the game ends with a decisive victory for the Russians at 
that moment. No need to trace the supply source railroad connection (4.1.2) for this condition. After Russian Re-supply, Warsaw is treated as a major city for the Russian for all purposes"

 Warsaw 1920 is a fast-paced game that is built around the historic war. Both sides have a chance to win - just like in reality. This is another game from Revolution Games that has both a small footprint and deep gameplay. For a game with only ten pages of rules it also has plenty of immersion. Thank you, Revolution Games, for letting me review this fine product. I can recommend the game for both its history and gameplay.


Robert

Revolution Games:

Warsaw 1920 Rules:


0 comments :

  Donnerschlag Escape From Stalingrad by Vuca Simulations  One of the biggest questions that comes out of World War II is whether the German...

Donnerschlag Escape From Stalingrad by Vuca Simulations Donnerschlag Escape From Stalingrad by Vuca Simulations

For your Wargamer, Toy soldier collector, MiniFig collector, military history nut. Reviews, interviews, Model Making, AARs and books!

November 2022

Donnerschlag Escape From Stalingrad by Vuca Simulations


 Donnerschlag


Escape From Stalingrad


by


Vuca Simulations


 One of the biggest questions that comes out of World War II is whether the German troops surrounded in Stalingrad could have escaped or not. There are many games about the entire Fall Blau Campaign and most of them have scenarios about the attempt that was made to break though the Soviet units and reestablish contact with the 6th Army. This is one of the few games that are just about the break into Stalingrad or break out from there. The overwhelming consensus of historians is that even if the troops in Stalingrad did break out, they would have done so only with the clothes on their backs and what they could carry. The other issue is that all of the Soviet divisions around Stalingrad would then be able to hunt this moving mass of men across the frozen steppe. Many historians have theorized that the only reason the German Southern front in Russia did not collapse completely is because so many Soviet divisions were tied up around Stalingrad. 


Notice the A, B, and C zones


 This is what Vuca Simulations has to say about the game:

"'Donnerschlag' is a two player game which is playable in one sitting. It is more of a game than a simulation and intended to bring a high player interactivity and replayability to the player's table.

 From December 12 to December 23 in 1942, "Unternehmen Wintergewitter" was in progress. This was the code name for a relief attack by Heeresgruppe Don to free the trapped 6th Army in Stalingrad.

 The Axis formations entered with 50,000 men and 250 tanks, while the strength of the Soviet formations was reported to be about three times that. For the enterprise to have any chance of success, the troops in the encirclement had to break out and meet the advancing Axis troops. The breakout had to be precisely coordinated with the advance of the relief troops and was to commence on the cue “Donnerschlag”. The breakout was never ordered and the troops in Stalingrad were never able to be relieved. This sealed their fate.

 Players will be recreating this episode, with the Axis side attempting to secretly establish and reach a meeting point, thus effectively freeing the 6th Army, while the Soviet will try to impede such outcome."


 This is what comes with the game:


One rulebook.

One mounted map.

184 counters.

Two player aid charts.

Two Setup Displays.

126 Cards.

Two 6-sided dice.


The Scale

A hex represents 4 kms (2.5 miles) of terrain from side to side.

Each turn represents a period of 1-2 days.

Combat units are mostly Brigades & Regiments for the Soviets and Romanians, Battalions & Abteilungen for the Germans.


  As usual, Vuca Simulations has hit another long ball with their components. The map is a mounted one. It is roughly 21 3/4" X 34" in size. The color is of a winter landscape, which fits the campaign fine. The Turn Record Track and a place for both sides' cards are also on the map. It is a very fine-looking piece of work. The counters are what we have come to expect from Vuca Simulations. They are pre-rounded and come off the sprues easily. They are color coded with a band across the top for their different formations. Nato symbols are used for everything except the various armor units. You actually get a choice with the armor unit counters. There are two different styles to choose from. One style is the normal profile of the tank. The other is a little more artsy, with the tank looking like it is charging at you. They also included a good number of 'Breached Minefield' counters for use in their 'Theseus' game. All of the information is pretty easy to see on them. The Rulebook is glossy and in full color. The rules are really only ten pages long. Then come four and a half pages of 'Historical Notes'(these are very well written). Next up is one page of 'Designers Notes'. This is followed by a setup page and last by the Index. Even though they are only ten pages long, there are a good number of play examples in the rules. The game comes with four Players' Aids. The first thing to say about them is that they are of hard cardboard. These are not as thick as the map, but I was still pretty amazed that they were not just paper. Two of them are one-sided and have the German and Soviet setup and reinforcement information on them. Then there are two identical Player Aids for each Player. On one side, there is an extended Sequence of Play. The other side has The CRT and Terrain Effects Chart etc. Having them be on a hard piece of material is just another way that VS shows how much effort they put into the manufacture of their games. 

 Next, we have three decks of Cards. There is an Activation Deck for both the Soviets and the Germans. There is also a Combat Deck. The cards have all of the information and die rolls needed for the activation of the different formations. They are not artsy, just plain large instructions in English. Even the boxes you get with VS games are better than normal. They are very heavy duty and have an interesting matte finish on them. 


 This is the Sequence of Play Summary:

1. Admin Phase
a. ‘Schwerpunkt’ marker is placed 
  (after becoming available).
b. Reinforcements placement. 
c. Deal Formation Cards and Combat Cards 
  & place Cards in the STAVKA/OKH box 
d. In Turn 4 (and possibly in Turn 8): Reshuffle 
  and add Formation Cards & Combat Cards.
e. Calling out ‘Donnerschlag’.
f. ‘Schlachtenglück’-Marker goes back to the Axis.
2. Action Phase
  Resolve Activations alternatingly 
  with the German player always going first. 
  An Activation consists of the following four steps:
a. Play one Activation Card and activate Units
b. Check Supply of activated units only
c. Movement
d. Combat 
  If there are Activation Cards left in 
  the hand, return to step a.
  If there are none, advance to segment e.
3. Advance ‘Donnerschlag marker’
4. Adjust Turn Track Marker


You can see the profile compared to the art for the tank units


 Before we start into playing the game itself, we need to take a small course in German first.

Donnerschlag - Thunder Clap (Donner being the German equivalent to the Norse God Thor)

Schwerpunkt - Main Effort

Schlachtengluck - Fortune of War


Alarmgruppe-Einheiten - Alarm Group

Kraftfahrzeug-Haftpflichtversicherung - Motor Vehicle Liability Insurance

 Okay, you really do not need the last one. It is officially the longest word in German. Mark Twain wrote an essay called "The Awful German Language". He also wrote this "In German, a young lady [das Mädchen] has no sex, but a turnip [die Rübe] has." Enough said.

  So, the first thing that happens after setup will be the placement of the Schwerpunkt counter (when it becomes available by one of the Combat Cards). This game is very much about command and control of your units by their HQs. The Schwerpunkt counter allows all friendly units within four hexes to be activated. Other than that counter, all units need to be activated by the owning player's Activation Cards. These work muck like a Chit Pull System for activation. 

 The Schlachtengluck counter allows the owning player (it physically goes to the opposing player after use) to reroll a die or to discard a card and draw a new one. The counter returns to the Axis player at the beginning of every turn. 


 The Donnerschlag marker and use is a bit convoluted so I will use the designers' words from the Rulebook:

"With the code word “Donnerschlag”, the breakout of the 6th Army
begins. On any turn, the Axis player may call out “Operation
Donnerschlag!” in the corresponding segment of the turn and
secretly determine a Meeting Zone. Place the Donnerschlag
Marker on the “0” box of the Donnerschlag Advance Track.
In each corresponding segment, the Donnerschlag Marker is
moved forward one box.

There are five boxes on the Donnerschlag Advance Track. When
the Donnerschlag Marker reaches Box 4 on the track, the game
ends and Victory Conditions are checked. If currently on the "6.
Army Survival" side, the game ends when the marker reaches
Box 5 instead.

If the Axis cannot meet the victory conditions in the Victory
Check Segment, that means the 6th Army could not be reached.
The 6th Army then disintegrates and the Soviet player wins.
This usually means, from the moment “Donnerschlag!”' is
called out, that the Axis player must reach the chosen Meeting
Zone exactly four turns later in order to win the game (and
must be in Supply and in Command).

Special Case
The Axis player can extend the survival of the 6th Army by one
turn (and only one turn). To do so, he must successfully play
the “Air Fleet 4” event. (If “Donnerschlag!” is called in Turn 4
and the “Air Fleet 4” event is played in Turn 7, then —and only
then — does a Turn 8 occur. Conversely, if the Axis units are
progressing well and “Donnerschlag” is called before Turn 4,
there can be no Turn 8.)
 Assuming the German plays 'Luftflotte 4' and thus unlocks
Donnerschlag box 5 for turn 8, but then fulfills the Victory
Conditions already at the end of turn 7, the game would end
with a German victory.
 If ‘Donnerschlag’ is called out after turn 4, we did not explain
this rule well enough.
There are special rules for Turn 8:
The last great effort
There are special rules for Turn 8—No Activation Cards are dealt.
There are only five Activations for each side. These Activations
take place as follows:
Axis Player
 At each Activation, the player decides whether to activate an
HQ or the Schwerpunkt Marker.
Soviet Player
 At each Activation, the player decides whether to activate an
HQ, or a formation, or the color of an army.

15. VICTORY CONDITIONS
Axis Victory
The Donnerschlag Marker must be in Box 4 of the Donnerschlag
Advance Track (either side) and at least one Axis unit must be
in Supply and in Command in the chosen Meeting Zone at the
end of the turn. (Note that if on its “6. Army Survival” side, the
marker can be in Box 5.)
Soviet Victory
If the Axis does not meet its victory conditions, the Soviet player
wins."


 To me the game hits the sweet spot in between a simulation and a game. It has more 'meat' to it than Vuca Simulations suggests in their writeup about the game. The game is based solely on if Operation Thunderclap would succeed in linking up with the German pocket at Stalingrad. The player does not have to worry about what to do when you get there (thankfully). So, you can try as hard as you like to meet the victory conditions without having to worry about trying to get back. The little extras that have been added to the game make it much more than a game. Only quick thinking, and not just luck, will help you playing either the defender or attacker.  


 One little twist to the game happens after the German player announces Donnerschlag. At that time, he must also choose which zone he is to meet up with the besieged in Stalingrad 6th Army. If you noticed, there were three zones at the top of the map marked A, B and C. On the map, there is also a track for these three different areas. The German player chooses which zone to strive for and then puts the three markers down (two are dummy counters). This rule helps to make the Soviet player not really sure where to place his units and which one to defend against.


 Once again Vuca Simulations has come through. The components are top notch and the rules and gameplay easy to follow. In their summary about the game, they said they strove to make it fun to play and were not going for a hardcore simulation. As far as the former, they hit the nail right on the head. As far as it not being a simulation that is a bit hard to judge. It is certainly not Axis and Allies, that is for sure. The game has only one map and a small number of counters. It is also playable in an evening or shorter. So, they have met all of the parameters they set out in the beginning. I can easily recommend this to anyone who is looking for a smaller game that can give the players a lot of enjoyment. Thank you Vuca Simulations for letting me review this fine game. Hopefully, it gets more press than it has gotten.

 If you get the chance, have a look at 'Nach Paris' from Vuca Simulations. It is about the 1914 campaign on the Western Front. Any gamer with even a passing interest in World War I will want this game. They have also released 'The Chase of the Bismarck: Operation Rheinubung - 1941' with Jack Greene as a co-designer.

Robert

Vuca Simulations:

Donnerschlag Escape From Stalingard:


0 comments :

  Europa Simulazioni Upcoming Games  Here is a look at the first game:  " The long-awaited "prequel" of All is lost save Hono...

Europa Simulazioni Upcoming Games Europa Simulazioni Upcoming Games

For your Wargamer, Toy soldier collector, MiniFig collector, military history nut. Reviews, interviews, Model Making, AARs and books!

November 2022

Europa Simulazioni Upcoming Games


 Europa Simulazioni


Upcoming Games


 Here is a look at the first game:

 "The long-awaited "prequel" of All is lost save Honour is finally here. A game about the campaigns fought during the Italian Wars (1494-1530), the long struggle for Italy between the Habsburgs (the Empire) and the French Crown. This second volume is centered about the wars in Southern Italy, from 1494 to 1503. Featuring also the unfortunate Lautrec's campaign of 1528"


The Campaigns

This second volume includes all the major campaigns fought in Southern Italy:

- Ferrandino’s War, 1495-96, the Aragonese, with the help of El Gran Capitán, retake the Kingdom of Naples to the French.

- The fight for the Kingdom of Naples, 1502-1503, the French and Spanish, led by El Gran Capitán, fight for the Kingdom of Naples. This campaign historically included the two most famous battles of Cerignola and Garigliano (1503), where Cordoba gained the title "El Gran Capitán".

- Lautrec’s last chance, 1528, the unfortunate campaign of Lautrec to conquer Naples once again

- The crusade of Charles VIII (a what-if scenario), 1495-96, what if Charles VIII would have not decided to come back to France soon after his conquer of the Kingdom of Naples ?


These were longer campaigns with respect to the first game, and fought on larger areas. Scale has been adapted to these facts (3x in space and time)


Map Sample


Highlights

* The game system of All is lost save Honour, scaled 3x to adapt it to campaigns which were longer and fought on much wider areas

* Operational-level warfare in the XVIth century

* Highly interactive sequence of play, focused on Manoeuvre and careful planning

* Various forms of combat: Major battles, Skirmishes, Sieges

* a 22" x 34" fine-art Map , reproducing all of XVIth southern Italy, based on an accurate study of ancient maps and sources

* Gorgeous iconic counters representing all the main Capitani who fought there and the different combat units

* Detailed (as it is possible) order of battle, with combat units differentiated by strength, maximum movement, quality and reliability

* Very low counter density and limited play time


Counters


Components:


22"x34" map of southern Italy, depicting the Kingdom of Naples

280 1/2" die-cut counters

Standard rules

Optional rules and Scenario Instructions for 4 campaigns

Charts, tables

Boxed

Designer: Nicola Contardi


Counter Samples

Historical introduction

"This game encompasses a long period of the Italian Wars when the two main European powers, France and Spain, confronted for the possession of Southern Italy. Both countries claimed their rights upon this part of Italy, for dynastic and religious motivations. But the true stake was political of course. Southern Italy at the end of Middle Ages was a rich and fertile countryside, within the parameters of the era. Furthermore it was in the center of the Mediterranean Sea, focal point of all sea trading routes for Spain towards Middle East. After the Angiovin domination, the Kingdom of Naples passed in the hands of the Aragonese Crown, a dynasty of Spanish origins. King Ferdinand of Spain and his wife Isabella, the catholic kings, appointed Gonzalo Fernández de Córdoba as commander in chief for the Spanish operations in Naples. Gonzalo gained his glory, and the name "El gran Capitán, while Ferdinand gained the south of Italy to Spain for centuries."


 The next game that is coming from Europa Simulazioni has me drooling.


The Great War Vol.III

Caporetto 1917

"After Strafexpedition 1916, and Gorizia 1916, the third chapter is added to the Great War series: Caporetto 1917. Caporetto 1917 proposes the rules of the system in their updated version, to recreate, at battalion and company level, the most famous, tragic and controversial event of the Great War on the Italian Front."

The Battle

"The third volume of the series proposes, in turns of 12 hours each, the first four decisive days of the battle of Caporetto, in four scenarios:
1. The historical battle: The complete battle in the first four days, with the historical disposition of the Italian Army, in which the two players are both attacking and defending, respectively manoeuvering one wing of each side: attacking with an Austro-German wing, defending with the Italian one opposite the opponent. Each player, or team of players, will have to reach their goals faster than the opponent.
2. The battle that might have been: The battle as it might have been if the Italians had been better prepared. The clash is between the Italian player, who can arrange his troops more carefully and respond more quickly to the enemy manoeuvres, and the Austro-German player, however stronger, who must break through against a prepared enemy.
3. The Battle of Cividale: The final phase of the breakthrough on the Italian right flank. A short scenario, to learn the system, or commit a little time.
4. The Fall of Monte Maggiore: The final phase of the breakthrough on the Italian left flank. This is also a short and undemanding scenario."


Counter Sample


Highlights

"The game system has been updated and refined in version 2.0. It is based on the concept of action and reaction by the formations, typically brigades or regiments, which make up the opposing armies. It is a system that requires planning in the activation of formations, provides for a lot of interaction between them, and, at first glance, it may seem demanding. The use of artillery is greatly important, as it is the morale of the fighting troops, which can deteriorate as a result of fatigue or fighting."


Map Sample


Components:

a 22"x34" map covering the battlefield area, from Monte Canin and Rombon in the West, to the bridgehead of Tolmino in the East, from Bovec and Monte Nero in the North to Cividale and the Friuli plain in the South
a reduced map of the Tolmin beachhead, for managing artillery in that congested sector
1400 counters
system rules and specific rules for the game, including Rommel Grouping ( Rommel Abteilung ), Stosstruppen, gas and mine attacks, the Fog of Caporetto, and more
very detailed order of battle, the result of years of research and information gathering
Terrain Effects Chart, Assault and Bombardment Tables sheet; sheets to contain: German battalions, which can be divided into companies
assignment sheet for Italian formations
sheet for eliminated units, Turn Record Track and Logistics Points.


Also included is the game " Fire & Water, 1918", which reproduces the Italian offensive in the Piave delta in July 1918, with the same system and scale, including:
a 11.7”x16.5”(A3) map, representing the area between the Venice Lagoon, the mouth of the Piave at Cortellazzo, and San Donà di Piave.
140 counters
Specific rules for the game
Designer: Andrea Brusati


Historical introduction

"Caporetto is a picturesque mountain village, located in the upper Soča valley. It has always been a border town; his German name is Karfreit, and its Slovenian name is Kobarid, but for the story he has the Italian name. Probably the most famous battle in Italian history, it is synonymous with "catastrophe", and in use in the Italian language with the same meaning. Also known as the Twelfth Battle of the Isonzo, the Battle of Caporetto was the aftermath of the Eleventh Battle of the Isonzo, which saw the Italian army advance across the Isonzo River, creating a dangerous salient for both Ljubljana and Trieste. To drive the Italians back and make them unable to carry out new offensives quickly, an offensive was needed, but the weakened Austro-Hungarian Empire lacked sufficient resources. German help was therefore needed. Aid materialized in the 14th Army, composed of some of the best German divisions, experienced in mountain warfare, and returning from successes in Riga and Romania. But above all that they employed unknown tactics and materials on the Italian front. Operation "Waffentreue " (Fedeltà d'Armi) was born, with the aim of pushing back the Italians to the Tagliamento. The results went beyond expectations. Recall the story of the first fateful days of that battle."

 I have done a few reviews of their games and they have always impressed me. Below are the Links:

Europa Simulazioni:

ES Preorders:

My Review of Gorizia 1916:

My Review of Custoza Fields of Doom:

My Review of Piacenza 1746:


0 comments :

hpssims.com