second chance games

Search This Website of delight

Conflict of Heroes Storms of Steel: Kursk 1943 (Third Edition) by Academy Games  Kursk was one of the biggest...

Conflict of Heroes Storms of Steel Kursk 1943 (Third Edition) by Academy Games Conflict of Heroes Storms of Steel Kursk 1943 (Third Edition) by Academy Games

For your Wargamer, Toy soldier collector, MiniFig collector, military history nut. Reviews, interviews, Model Making, AARs and books!

May 2020

Conflict of Heroes Storms of Steel Kursk 1943 (Third Edition) by Academy Games


Conflict of Heroes Storms of Steel: Kursk 1943 (Third Edition)

by

Academy Games


 Kursk was one of the biggest battles in World War II, although it was not the largest tank battle. That distinction we now know goes to Dubno in 1941. Still, it was a massive clash between the Russian and German armies. Guderian had worked tirelessly to rebuild the Panzer force in the early months of 1943. He was able to build a large hard hitting force by the Summer. Kursk was an on again off again operation that kept being postponed from April until it finally occurred in July. Hitler was staking all on his new pet cats, the Tiger and Panther, and the massive Ferdinand, although the Germans took an incredible toll of the Russian forces. They also were damaged, but they just couldn't break through to Kursk. Then the other Allied Nations invaded Sicily, so the offensive was called off. Manstein had wanted it to continue to bleed dry the Russian reserves. The Germans lost a good number of tanks and men at Kursk, but they were really bled dry by the defensive battles they had to fight in the Autumn of 1943. So, this is the backdrop to the game; let us see what comes with it:


4 Folding Mounted maps (19.5" x 14.75")
1 Mounted Board That Comes With 6 Various Shaped Pop-out Geomorphic Pieces
4 d6 Battle Dice
2 Custom d10 Spent Dice
4 Counter Sheets
 1 with 70 German Units
 1 with 70 Soviet Units
 1 with 15 German Units, 15 Soviet Units, and Hit Markers
 1 with Miscellaneous counters
1 Round and Victory Track
4 Command Action Point Tracks
48 Battle Cards
7 Weapon Cards
10 Veteran Cards
1 Rulebook 40 Pages long
1 Mission Book 36 Pages - With 14 Missions
2 Rules Summary Sheets


 This is the Third Edition of the game. Here is a rundown of what is new:

Featuring the latest 3rd Edition Conflict of Heroes Rules!
We have updated the maps and overlay artwork to be highly detailed and more beautiful than the original!
Storms of Steel 3rd Edition will feature a number of new firefights in addition to classics from the original!
All new counters in addition to new versions of the previous counters!
New box format, with updated tray inserts designed by Game Trayz!


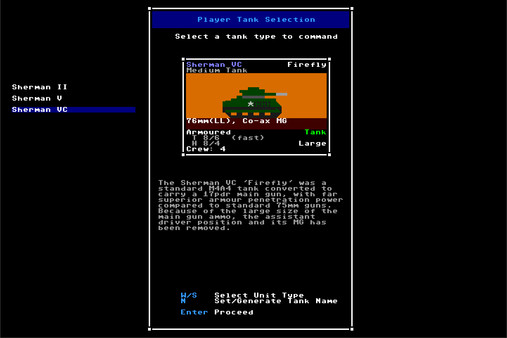
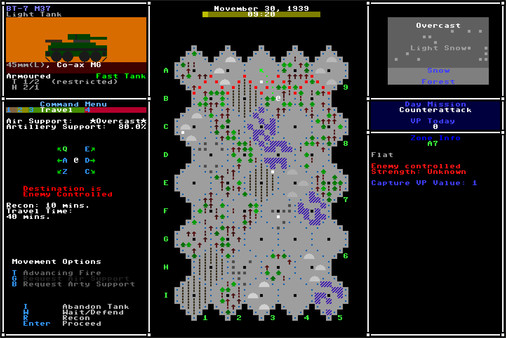
 The maps are very well done, and the hexes are huge at 1 1/4". They represent a lot of the same terrain, so there is not that much difference in color from map to map. However, they work extremely well and the size of the hexes makes it very easy to determine the terrain. Each hex has a dot in the middle of it. Whatever terrain that dot is in represents the terrain for the entire hex. The map hexes represent 50 meters of real terrain. Now we get to the really good stuff. The counters are fantastic and are a full inch in size. This means we can not only read them without glasses, but they are also easily handled by less nimble fingers. The unit and armor pictures on the counters are very well done. It is also very easy to see what each counter represents. The Rulebook is in full color and fits in with the rest of the components, meaning that it is very colorful and wonderfully put together. The way the Rulebook is setup up is this: You read x amount of pages and then play the suggested scenarios. After playing those you read a few more pages and then you are ready to play the next few scenarios. So each scenario has a level of the rules involved in playing it. So, by the end of the Rulebook you are thoroughly prepared to play any scenario that comes with the game. Everything about the components is meant to thrill a wargamer. Even the trays for the counters are done differently than normal. Instead of just laying in a heap, they are laid out for the player like a flattened out rolodex. The two Rule Summary Sheets are the only pieces where the writing is a bit small. 


 The game is played in 'Rounds' with players taking alternate Turns. Here is a description:

"The Player who has the Initiative takes the first Turn.
On your Turn, take a Single Action or Pass.
The Rounds ends when both players Pass consecutively."

 "To take an Action follow these steps in order:
1.Select a Unit.
2. Perform an Action.
3. Determine the Action Cost.
4. Make a d10 Spent Check."

These are Common Actions a Player can take:

"Move to an adjacent hex / pivot.
1. Attack a Target hex.
2. Rally to remove a Hit Marker.
3. Stall.
4. Play Action Card."

 As you can see the game uses many elements that we wargamers are used to. The game works with Command Action Points as its main mechanic. This way of giving each side a certain amount of points to use each turn for actions is also a well known feature of wargames. In Storms of Steel, it is the interconnected usage of these mechanics that makes this such a great game.


 Storms of Steel won a ton of awards when it was first released, and it only keeps getting better. The greatest praise that you see for the game is that people believe it is one of the best games for teaching a new player its rules. The Rulebook states that you will be up and playing in five minutes, even if you know nothing about the system at all. I would believe that amount of time is right on the money. However, that does not mean that this game is a beer & pretzel one. Each player has to keep thinking, and thinking quickly, because the rules make it so that everything can change in a heart beat. All of your well laid plans can go up in smoke in an instant. The play is not only very fun, but very deep. The Third Edition has been worked on for a few years, and it includes many suggestions from players. The designer team of Uwe and Gunter Eickert originally released a winner and each edition just keeps getting better. 


 I was first introduced to the Conflict of Heroes series when Matrix/Slitherine were developing the PC versions years ago. I liked the games and played them a lot. One of the things I remember about them was that the designers were trying to make them as close to the boardgames as possible. A lot of the players of both were surprised how much they got right in the PC games. Now that I have had a chance to play a boardgame version of COH Storms of Steel I am completely blown away. Everything about the game feels and looks so well done. I do not think I could ever go back to the PC version. This boardgame is that good. This is pretty astounding when you add in the fact that it was meant, and succeeds, to be a players game, and not a rule heavy monster. 


 Than you so very much Academy Games for letting me review this excellent edition of an already great wargame. For anyone who is looking for a game that you can quickly learn, here it is. People looking for a historical portrayal of the Kursk battle look no further. Those two sentences are rarely seen together in a review about a wargame. When they do coincide you know that you have a real winner.

 I changed the size of the boards to represent their actual size. I forgot to times by 2. I am still not used to this getting old stuff.

 This is a blurb that one of the designers sent me that explains the difference in the Third Edition, better than I could.

"The biggest change in the 3rd ed is that a player takes an action with ANY of their fresh units. No more tracking APs. After the action, you test to see if the unit becomes spent by taking a stress test. That's it. Quick and simple
The stress test checks that Unit's cognitive suppression probability (its natural tendency not to move towards or interact in fire interchange. Units will often 'stop to assess the situation' before continuing on.
And this is what makes the 3rd ed so much different from the previous editions"

This is the Academy Games site:

This is the Storms of Steel site:

This is a review I did earlier on Academy Games 1754:
Robert


0 comments :

EUROPE DIVIDED from PHALANX I'm a great admirer of David Thompson's designs, particularly his two solo games that I'v...

EUROPE DIVIDED EUROPE DIVIDED

For your Wargamer, Toy soldier collector, MiniFig collector, military history nut. Reviews, interviews, Model Making, AARs and books!

May 2020

EUROPE DIVIDED

EUROPE DIVIDED
from
PHALANX

I'm a great admirer of David Thompson's designs, particularly his two solo games that I've already reviewed and, in the current situation, are getting even more play.  So, I was eagerly anticipating his next project. Knowing that this two-player game was scheduled to be released by Phalanx, a games company noted for the quality of its products was an added bonus.  Once again I have not been disappointed.
I was intrigued above all by the highly individualistic box art with its haunting, enigmatic face and its symbolic colouring of red and blue.  For me, there is something cold, emotionless and withdrawn about that face - a curious, but effective choice.  By serendipity, I chanced to play a friend's Kickstarter version the day before my review copy arrived!  I was even luckier in also being able to take my copy along to the last convention I was able to attend shortly before the current lockdown descended on us. 
The game spans the period from 1992 - 2019 [essentially the present day, as when conceived],  as such it may be considered Son of Twilight Struggle.  In that respect this is only because the first covered the Cold War, while this covers what has been termed the Post-Cold War.  The most obvious difference is that the latter game spanned the whole globe, whereas as the title proclaims this focuses more narrowly on the European continent alone.  The mounted map is less abstracted and I find it particularly appealing in its rich colours.


Mounted map

My copy is the retail version, while, as mentioned at the beginning, I have also played with the Kickstarter version.  There are very few differences, namely the Kickstarter has metal coins and wooden pieces for the armies and the many D6s, highly important to the game, have a symbol in place of the six pips for number 6.  
My personal preference is for the card board armies of my retail version for their clearly distinguished colouring and shape for each side.  Metal coins are frankly always attractive, but my stock from other games is such that I have no real need for more and I know that many of my friends and fellow gamers prefer a supply of poker chips that they introduce into any game that features currency.  As for the dice, I'm totally at home with the totally standard ones seen below in the retail version. 


There are a few more card board counters and then the other wholly attractive components are the various decks of cards, which I shall explore when looking at game play. 
The few cardboard components


Once more we are in situation of mutual rivalry for influence over the many countries of thee realigned Western and Eastern Europe.  This influence is symbolised by the use of the various coloured dice.  Red unsurprisingly are used by the Russian player, while his/her opponent fields a double set: Yellow representing the EU and Blue for NATO.  This and the fact that this player [whois named the Europe Player] starts with more cards and more money may give the initial impression of a one-sided contest.  Sufficient ink has been spilt already on the perennial game question of which side is the more likely to win.  My experience has been that all games so far have been close, with an almost equal balance of wins for both sides. 
The essence of this Euro-board wargame hybrid is a 20 turn game that takes in [1]the achieving of a victory points by accomplishing a series of short term goals and [2] two rounds of scoring each player's influence, one at the end of turn 10 and the other at the end of the game.  The central mechanic is the play of cards, that involves a limited form of deck-building.   That this takes place in rarely more than 2 hrs of nip and tuck play has certainly gained my vote. 


The game takes place over two 10-turn Periods: Period 1 includes events from 1998-2008 and Period 2 from 2009-2019. Each player has a separate Headline Deck and separate sets of Action and Advantage Decks.  


A sample of the Headline Cards
The Headline cards are played by each player from his limited hand and resolved on alternate turns.  Each depicts an Event from the period. It also carries a goal to be achieved by the turn on which the card will be resolved and awards points for their achievement.  This is the first stage of each turn and, after Turn 1, you will always have one pair of objectives laid out that are imminently going to be resolved at the end of the turn and one pair that will be resolved at the end of the next turn.
This is the first major aspect of the game's systems and is one that I relish.  This battling for short term objectives provides ongoing tension.  Sometimes the decisions are clear cut, as when preventing your opponent gaining 3 victory points [in game speak Prestige] is balanced against you gaining 1 VP.  But more often than not the choices are more subtle and balanced.  
I'd also add in that if, like me, you enjoy reading the cards, there's quite a bit of knowledge as well as geography to be picked up on route.  Though that might have more to do with my poor geographical knowledge!
How do you go about achieving these goals?  That takes us on to the main meat of the action, namely playing Action cards and sometime supplementing them by the play of an Advantage card.  Each player starts with their own separate deck of Action cards, the play of which leads to the build up of influence in various regions of the map.  The cards in your deck at start represent all the countries that you "control" and which can never fall under the influence of the other player, because your opponent can never place dice in them.

The Europe player starts with more in their hand than the Russian player.  This is a double-edged sword; on the one hand you will have more options initially, but the Russian player will be able to cycle through their deck faster.  This sets up a simple and effective dynamic.  Each card will contain some or all of a number of basic Actions to choose one from and execute.  All the thirteen cards the Europe Player starts contain purely a mixture of these basic  actions: Increase Influence, Gain Money, Build Army and Move Army.  Each card also has a background of one of the EU or NATO constituent countries.  
In contrast, Russia starts with only seven cards.  These too hold a range of basic Actions, but several also include a Special Action in a textual instruction and here is where the power often lies. It's also interesting that only two refer to geographic regions, while the others have titles such as News Media, Military Industrial Complex and Secret Services.


The bottom two cards illustrate part of 
the Russian at-start deck


Before I move on, I think it's important to say a word or two about Build Army and Move Army.  You can never have more than one Army in a region and the entry of an enemy Army into a region where you have an Army means mutual elimination.  This concept of "Army" needs some explanation and sadly this is the one thing missing from the excellent rule book.  There are no designer notes - a section in any game I look for eagerly to see the thinking behind concepts.  The decision was a deliberate one to keep the rules to a slim booklet.  However, there is a superb and very extensive Designer's Diary that I've included a link to at the end, if you share my interest in this aspect of a game.  It also includes a cracking AAR playthrough too.
So what are Armies and what is happening when they come into conflict?   Rarely if ever, is this guns and bullets directly flying between the two players historically - not that in the regions affected there weren't people dying by military actions sometimes.  They're a very wide range of effects from the overtly military as seen say in the Ukraine or other regions of the former Soviet Union to threats of military action, sabre rattling manoeuvres, promises of aid [military or political], treaties etc, etc.
To return to the Action cards, we come to the next feature that wins my praise hands down.  Each Player also has a set of twelve additional Action cards:  one for each of the twelve Regions that the Players are vying to have most influence in.  You gain your copy of the card when you have 5 or 6 pts of influence in a Region.  Consequently, both players may come to hold a copy of the same Region's card.   But each card contains different basic actions to choose from and a different Special Action too.  Not only does this reflect the different political and historical perspectives of each side, but also continue the elements of asymmetry in two sides' play.  Full marks for this design feature.

Just to stir the mix a little more, there is each Player's small deck of Advantage cards that as you can imagine throw in a few more distinctive traits of both sides.


Russia Advantage Deck
Europe Advantage Deck
The rule book provides understanding of this highly innovative design through a simple text supplemented at each step by a substantial parallel set of illustrations and exemplifications.  The next two photos show exactly what I mean.
Some of the Basic actions explained 
Information on Armies and Influence Dice
The one thing that you cannot do is play this game solo.  You might try to or at least practice a little solo to acquaint yourself with this new design.  But it really demands the two players for which it is purely designed.  At the moment, it's languishing under lockdown and social distancing, but like other games [as I've discovered] providing both of you have a copy FaceTime, Zoom or other such means of communication work fine or, of course, there's always tabletopia and perhaps somewhere down the line a vassel module.

This is another great design from David Thompson and another corner stone of my collection.  Enjoy.


Link to Designer's Diary

0 comments :

The Great Crisis of Frederick The Great by Vuca Simulations  Friedrich der Große was an anomaly for an 18th c...

The Great Crisis of Frederick The Great by Vuca Simulations (formerly Furor Teutonicus) The Great Crisis of Frederick The Great by Vuca Simulations (formerly Furor Teutonicus)

For your Wargamer, Toy soldier collector, MiniFig collector, military history nut. Reviews, interviews, Model Making, AARs and books!

May 2020

The Great Crisis of Frederick The Great by Vuca Simulations (formerly Furor Teutonicus)


The Great Crisis of Frederick The Great

by

Vuca Simulations


 Friedrich der Große was an anomaly for an 18th century general. He was more than happy to engage in battle. Most of his comtemporaries would fight wars of maneuver. This didn't mean they did not fight battles, it was just the cost of training troops was always on their minds. Frederick reminds me of Robert E. Lee. He had plenty of victories, and some defeats, but the cost in manpower of even his victories was too much for Prussia in the end. The last two years of the Seven Years War he was forced to fight a war of maneuver, because he could not afford to fight battles. The death of the Russian Empress Elizabeth, who hated him, and the coronation of Peter III, who worshipped him, really saved Frederick. Elizabeth's death was called the 'Second Miracle of the House of Brandenburg'. Strangely, Hitler was hoping for such a change of heart in one of the Allies in 1944-45. He referred to Frederick's luck at the end of the Seven Years War constantly. In a complete reversal of alliances France and Austria, enemies for hundreds of years, were now aligned with Russia against Prussia and England. So the stage is set for the Seven Years War. Let us see what is in the box from Vuca (their name was Furor Teutonicus, however because of its far right wing conotations, they changed it.)


One rulebook
One mounted map
198 large unit counters / 360 counters total
32 tactics cards
Four six-sided dice


 This list does not do the contents of the box any justice. I previously had reviewed Vuca Simulations 'Crossing The Line: Aachen 1944', and the components were wonderfully done. I can say that most of the ones for this new game are equally well manufactured. The map is mounted and it is simply gorgeous for a wargame map. The style is point-to-point movement. All of the information you need to play is right on the map. The fortresses and cities of central Europe are all there in pristine glory. There is also a deck of thirty-two 'Tactics Cards' split evenly between the Prussian and Austrian Player. The cards are just as well done as the map. The counters and different chits needed are, just like the first game, very well done and come with pre-rounded corners. The only difference I had with this game was that the counters were connected to the cardboard sprue almost too well. This time I had to be careful when removing the counters because I thought I might rip some of them. I was kind of surprised, because in the last game the counters popped free very easily. This is not that much of a ding on the game, just make sure you are careful taking them apart. The Rulebook is only sixteen pages long and the actual rules only take up eleven of them. The rest are examples to play, and a full two page spread of the map to show the player where to set up the counters. The Rulebook is in complete color, and is set up for the player to easily understand the game mechanics. The actual print is a little on the small size, but even I could read it without squinting, so it must not be that small. 

 So, it is beautiful, but can it be played? The easy answer is a resounding Yes! For any player who has used a point-to-point map before the mechanics are simple to pick up. Even if you are more used to hexes, the game mechanics are easy to follow. This is the sequence of play:

Procedure of a phase: During their phase, each activated army follows this procedure:
1. All Alliances check their LoC network and mark isolation. (see 4.2).
2. Determines their Action Points  (AP; see 6.).
3. Recovers and moves their forces  (see 6.1 and 6.2).
4. Fights battles  (see 6.3).
5. Removes recovery markers  from units.
6. Marks control of spaces by placing  or removing control markers (see 4.1).
7. Checks if he may draw tactics cards (see 7.4).

8. Checks Victory for his Alliance.
 Each single strength point on a counter represents 4000-6000 troops. 


 Vuca Simulations, and the designer, have kept the game as historically accurate as possible. This means that the Prussian Player has the ability to roam about and put out fires. On the other hand, the Austrian Player has to learn how to herd cats. The Austrian Army under some generals (Browne, Daun) is capable of putting up a very good fight. The French Army is quite a different subject. It represents a threat in being to the Prussian Player, but is as hard to start as a Model T. The Russian Army gave the Prussian Army fits historically, but again it was hard to get into 1st gear. For those of you familiar with the Battle of Antietam, the analogy fits pretty well. McClellan, the Austrian Player, was capable of crushing Lee, the Prussian Player, but because of fear and an unwieldly Union army, Lee was able to fend off all of the disparate attacks by the Union forces. The Prussian Player in this game must play like Lee at Antietam. He must rush around the board and fight off every new invasion of his territories. The Prussian Player must remember that he does not have an endless supply of soldiers. He cannot afford to take as many losses and chances that Frederick did. The Austrian Player has overwhelming strength, but he must be able to bring it to bear. He is like a sumo wrestler fighting an MMA fighter. The Austrian Player must take advantage of any mistakes that the Prussian Player makes.


 The game play is based mainly on Lines of Communications and Resource Points. Keeping your Lines of Communication open to your different forces is vital. If a force becomes isolated, they are penalized by the fact that only four units can move, compared to the usual eight. Their dice rolls for attack and defense are also halved. Resource Points can be either a city or a Resource Fort. Victory is determined a few different ways. If Prussia survives until the end of the game, that is a Prussian Victory. Prussia can also win  after the death of Elizabeth of Russia. Each turn after her death a die is rolled. If a one is rolled then there is a peace settlement. If the Prussian Alliance controls sixteen or more resource Points, that is also a Prussian win. The Austrian Alliance wins if they are able to remove Frederick from the game, or Prussia has only eight resource Points or, nine if the Austrian alliance controls Berlin. 


 Battles and sieges take place off board with each side's troops lines up. The actual mechanics are very like a game with a separate 'Battle Board'. The low amount of units in most battles, and the absence of reserves etc. means that an actual battle board is not needed.


 The game rules are not long at all, but the game is very deep nonetheless. The rules are also easy to remember, and well written. You do not need to put on your judge's wig to determine what the designer meant in each rule. These are clear and concise and you will be up and playing in no time. For the game's sheer beauty some people might want this in their collection. For the person who plays games it is also an excellent addition to his hoard. There is a new version of the Rulebook with errata add in that is about a month old. I will have a link to it below. Thank you Vuca Simulations for allowing me to review this excellent and beautiful game. I think I will have to put an old Avalon Hill game into moth balls, if you catch my drift. 

Vuca Simulations:
https://vucasims.com/

The Great Crisis of Frederick The Great:
https://vucasims.com/collections/available-games/products/the-great-crisis-of-frederick-ii

Rulebook Errata:
https://cdn.shopify.com/s/files/1/0295/6650/0908/files/08_04_2020_Frederick_Errata_V4_A4.pdf?v=1586361960

My review of 'Crossing the Line':
https://www.awargamersneedfulthings.co.uk/2020/01/crossing-line-aachen-1944-by-furor.html

Robert


0 comments :

Roguelike. Wargame. Two genres that you usually don't imagine mashing together. Perhaps it's time for that to change, if Armou...

Armoured Commander II Armoured Commander II

For your Wargamer, Toy soldier collector, MiniFig collector, military history nut. Reviews, interviews, Model Making, AARs and books!

May 2020

Armoured Commander II


Roguelike. Wargame. Two genres that you usually don't imagine mashing together. Perhaps it's time for that to change, if Armoured Commander II is any indication of the possibilities. Now, of course, that fact that this game is a sequel indicates that the idea has been around for a bit, but I've only recently become aware of the series. I'm glad I found it, because as an avid fan of all stripes of roguelikes, I was excited to try something completely different. 

Armoured Commander II (AC2), made by solo developer Gregory Adam Scott, does indeed bring some fresh ideas to the table, and does some cool things with a very simple interface. As you'll notice, AC2 is not a visually impressive game, though the blocky tank designs are charming in their own way. What is impressive is the UI design and the fact that anyone could pick up this game and be playing in a matter of minutes, with no need to even look at the manual. The action follows a distinct series of phases, and all available actions in each phase are either explained on screen or self-explanatory. 


The game begins by letting you choose between a variety of campaigns. You can start at the beginning with the invasion of Poland, or jump to the late war rush across Europe by the Allies, and many stretches in between. Even more campaigns are planned for the future, including North Africa, the Eastern Front, and perhaps even the Pacific one day. Once you pick a campaign, you are given a choice of several tank models. All the mainstays are here, along with some rare models. I enjoyed the historical tidbits included about each model. 


Each campaign consists of multiple missions, broken down into individual days. The gameplay is then split between something of a strategic view, and more zoomed in tactical battles. Each day you have some sort of objective, such as breaking through the enemy lines, and proceed around the hex-based map in an effort to accomplish it. You aren't alone in this effort, as allied forces will take some spaces as the day goes on, occasionally giving you some extra breathing room. Artillery and air support is also on call when available, though you can't fully rely on it. Every action you take on this map consumes part of the day, time which you would ideally be using to rack up victory points. You can choose whether to spend time conducting reconnaissance into neighboring hexes, or just roll right in. Sometimes you will arrive in a hex to find fierce resistance, and sometimes nothing at all. As the day goes on you will begin running short on shells, and perhaps take some damage, making the decision of whether to press on or turn back all the more tense. Leaving the field early will cut your victory points for the day in half, but discretion is the better part of valor after all.


Before long, you will find yourself in a tactical battle against one or more enemies. This is where the meat of the game begins. Now the hex map zooms in, putting your tank in the center and foes all around. At the beginning of each round of combat you will decide what each member of your crew is doing. Naturally, each member has different options available, though all can "spot" for enemy contacts. The driver can prepare to drive, the gunner can prepare to gun, but the commander can only lend his direction to one of them at a time. Depending on what tank you are in, there will be other assistant crewman who can help out by reloading the main cannon, or manning a machine gun, or doing other activities. In the event on of your boys takes a hit (never a pretty sight inside a tank, best not to think about it), you can have one of these crewmen slide over into their place and carry on. All of the selections you make here at the beginning of the turn will dictate what your options are for the rest of the turn, and how likely you are to succeed in those actions.


Combat is deceptively simple in AC2. When you fire a cannon or machine gun, you'll get a percentage chance to hit. This chance depends on a number of factors, such as the size and type of target, whether they are in cover, whether your tank just moved, and whether the commander is directing the fire, among other things. At the end of the firing phase, there is another roll of the dice to see if the target is damaged or destroyed. Each round the enemy is doing roughly the same thing back at you. This sounds simple enough, but there are a lot of neat little twists built in. You can direct your driver to seek a hull down position. He might succeed or not, maybe you should have had the commander help him out? Alternatively, you can have the driver attempt to overrun the position of an enemy AT gun or rifle squad. Do you roll into battle un-buttoned, able to survey the entire battlefield, or button up to keep safe but leave yourself almost blind? The game has many little trade offs like this that keep each turn interesting. 

If you survive and go on to the next battle, your crew will begin to level up and gain new skills. Letting you customize your experience in each campaign and add some RPG flavor to the game. The men each have their own stats like morale and grit that change over time. Each crewman also has a name and even a bit of history, and it will sting to lose one or see him badly wounded after many fights together. I didn't get deep enough into any one campaign to see a lot of this system just yet, but I love that it's a part of the game.


I wasn't sure whether or not I would like AC2 when I first fired it up, but after my first session I could see the appeal, and after my second session I was hooked. Like other roguelikes, AC2 makes you want to see what's around the next corner, and then the next. Maybe you'll find a juicy target, or maybe a nasty surprise. Your first time out might be a dismal failure, but each subsequent run will be made with the experience you've gained. Different campaigns come with different varieties of terrain, enemy forces, and tanks to command. There is a lot of variety here already, and the one-man developer promises to keep adding on over time. The game has technically just begun early access, but you can buy it right now, and expect a full experience already, and a steady stream of updates to come. In the past week since release there have been near daily patches to fix bugs and make small improvements.

At a very modest $8, this game is certainly worth a look for anyone who fancies a new roguelike, a fresh take on WW2 combat, or all of the above. Even if you aren't a fan of the Dwarf Fortress level graphics, the solid UI and compelling gameplay will suck you in before you know it. Like some kind of grognard Neo, you won't be seeing punctuation marks and abstract shapes, you'll be seeing a battlefield alive with dug-in AT guns and deadly panzers.


Since this is just the initial early access release, I plan to follow the game for a while and post a full review once it is deemed complete by the developer.

Armoured Commander II can be purchased on Steam.

Official Blog


- Joe Beard

1 comments :

Kernstown 1st Kernstown (March 23,1862) 2nd Kernstown (July 24,1864) by Revolution Games  These two batt...

Kernstown: 1st Kernstown (March 23,1862) 2nd Kernstown (July 24,1864) by Revolurion Games Kernstown: 1st Kernstown (March 23,1862) 2nd Kernstown (July 24,1864) by Revolurion Games

For your Wargamer, Toy soldier collector, MiniFig collector, military history nut. Reviews, interviews, Model Making, AARs and books!

May 2020

Kernstown: 1st Kernstown (March 23,1862) 2nd Kernstown (July 24,1864) by Revolurion Games


Kernstown

1st Kernstown (March 23,1862) 2nd Kernstown (July 24,1864)

by

Revolution Games


 These two battles were fought more than two years apart, but they have a lot in common. Both were fought because Confederate troops were trying to tie up the Union forces in the Shenandoah Valley. The Confederates were also trying to put enough fear into Washington to bring back Union troops outside of Richmond. In 1862 McClellan was trying to take Richmond, and in 1864 it was Grant's turn. In the 1st battle of Kernstown it was Thomas 'Stonewall' Jackson in charge of the small Confederate Army. At the 2nd Battle of Kernstown it was Jubal Early's (Per Lee: "His bad old man") turn to take command. The first battle is one of the few blots on Jackson's record. It was a tactical defeat for Jackson who unknowingly attacked a force about twice the size of his. The second battle saw Jubal Early triumphant on his way north through the valley to put a good scare into Federal authorities. Oddly enough, Union General George Crook played the part of Jackson at the second battle. He also believed he was facing a smaller force. As a side note: Richard Garnett, one of the commanders under Jackson at 1st Kernstown, was accused by him of 'neglect of duty' essentially cowardice in Garnett's eyes. Whether through physical constraint or to clear his name, or both, Garnett was the only officer that was on horseback during Pickett's charge at Gettysburg. Miraculously, he was within twenty yards of the Union lines before he was shot down. So, you can see that we get a two-fer here as far as battles. This is what comes in the box:

- 22x34" map
- 2 x 5/8" counter-sheets (352 counters)
- Rulebooklet
- 5 charts/playeraids
- Box or ziploc bag
- 2 dice (Boxed version only)


The game info per Revolution Games:

Complexity: 6 out of 10
Solitaire Suitability: 6 out of 10
Time Scale: 20 minute turns
Map Scale: 150 yards per hex
Unit Scale: regimental
Players: one to two, best with two
Playing Time: three to ten hours depending on scenario


 The map is beautiful and is done by Rick Barber, whose style has graced more than a few Civil War battle games. The hexes on the map represent roughly 140 yards across. Terrain level is divided into thirteen levels, each one of twenty-five feet. The lowest levels of the map are in the darkest color of green. The highest levels are in yellow. All you have to do is look online to see how many people really like this style of map. The counters are 5/8" so they are nice and large. They are very well done with pictures of the leaders on their counters. The combat units show the outline of their recruitment state. There are five Players' Aids; three are in full color and two are black and white. The Union and Confederate Player  each have their own Players' Aid card, and there is one for the Turn Record Chart and eliminated Units etc. The other two full color  Players' Aid cards are for the CRT and terrain, among other charts and tables. I have reviewed both 'Longstreet Attacks' and 'Konigsberg' from Revolution Games, so I am used to their attention to detail and their very well done artwork.


 This is the game's Sequence of Play:


1. COMMAND DECISION PHASE 
 a. Both players choose event chits and set up draw cup
2. ARTILLERY PHASE
 a. Union Artillery Step (move or fire)
 b. Confederate Artillery Step (move or fire)
 c. Both sides alternate “a” and “b” above until done
 d. Artillery Rally/Rebuild Step
3. CHIT DRAW PHASE
 a. Held Event Chit Step (play any held events)
 b. Draw Chit Step 
   If Event chit, owning player keeps it or plays it, draw new chit  If Wild chit, resolve immediately, draw new chit 
   If CIC chit, owning player selects brigade and proceeds to Phase 4 or holds the chit 
   If Division Activation chit, proceed to Phase 4
4. BRIGADE ACTIVATION PHASE
 a. Orders Step
 b. Fire Combat Step
 c. Movement Step
 d. Close Combat Step
 e. Rally Step
 f. If any chits remain in the cup, return to Phase 3.
 g. If no chits remain in the cup, go to Phase 5
5. END TURN PHASE
 a. Final Held Event Chit Step
 b. Victory Point Awards Step
 c. Flip over all “Activated” brigade markers to their “Available”   side
 d. Broken Track Adjustment step
 e. Each player gathers all his Event chits together and then   advances the Game Turn marker


 The game uses the 'Blind Swords' chit-pull system for play. The system emphasizes the three 'FOWs': fog-of-war, friction-of-war, and fortunes-of-war. Once again, I really like the system in any of the games that I have played that uses it. 

 The game comes with six scenarios, with two being 'what-ifs' of each battle. The scenarios are:

The Stone Wall - 1st Kernstown
The Historical Battle - 1st Kernstown
Jackson is aware - 1st Kernstown
Breckenridge Attacks - 2nd Kernstown
Historic 2nd Kernstown
'What If' - 2nd Kernstown


 The simplest way to do this review would be just to say 'Hey, its the Blind Sword System, with a Rick Barber map'! That should be enough for people to get out their credit cards, but we will continue with the regularly scheduled review for those of you still on the fence. The 'Blind Sword System' is based on a chit-pull mechanic, but then it goes much farther. The chits that can be pulled are these:


Event Chit
Wild Chit
CIC Chit
Division Activation Chit

 There are two other interesting mechanics in the game. The first is that after you have activated a Brigade you the have to give it 'Orders' for the turn. You have a choice of four types of 'Orders' to give your Brigade. These are:

Attack
Defend
Maneuver
Regroup


 The other somewhat strange mechanic is that Fire Combat takes place before movement.
 Some of the other rules that enhance the game are:


Canister fire for Artillery
Artillery can fire over friendly troops
Close Combat
Cavalry charging
Mounting and dismounting Cavalry
Cohesion Tests
Skedaddle Test


  I am surprised that we do not have a 'Buck and Ball' rule. The Victory Points for all of the scenarios are either control of victory Point hexes, or a combination of casualties and Victory Point hexes.


 As mentioned, the game comes with six scenarios, with two of them being what-ifs if you are so inclined. These are smaller battles, but the game mechanics are involved (which is a good thing). So, game time is rated at 130-480 minutes. Even though the game does not drown you in components, and the map is not large, you will get a large bang for your buck. I really like this game, even though I am so-so on the campaigns themselves. If you are a frequent reader you will know that I love the 'Blind Swords System', so there isn't much to say about that. The two Battles of Kernstown allow a player to deal with all sorts of military challenges. In both battles you can be the underdog or the force with a clear advantage. This game and the different scenarios are great if you have two opponents of differing skills. The system also works very well for solo play. You never know what is coming out of that chit cup. I am a big fan of Revolution Games, and I will have some links to other reviews I have done for them. Thank you Revolution Games for letting me review another of your splendid games.

Revolution Games:
www.revolutiongames.us/

Konigsberg:
https://www.awargamersneedfulthings.co.uk/2018/06/konigsberg-by-revolution-games.html

Longstreet Attacks:
https://www.awargamersneedfulthings.co.uk/2018/08/longstreet-attacks-by-revolution-games.html

Robert


0 comments :

Hitler's Paratroopers in Normandy The German II Parachute Corps in The Battle For France,1944 by Gilberto Villahermos...

Hitler's Paratroopers in Normandy: The German II Parachute Corps in The Battle for France,1944 by Gilberto Villahermosa Hitler's Paratroopers in Normandy: The German II Parachute Corps in The Battle for France,1944 by Gilberto Villahermosa

For your Wargamer, Toy soldier collector, MiniFig collector, military history nut. Reviews, interviews, Model Making, AARs and books!

May 2020

Hitler's Paratroopers in Normandy: The German II Parachute Corps in The Battle for France,1944 by Gilberto Villahermosa


Hitler's Paratroopers in Normandy

The German II Parachute Corps in The Battle For France,1944

by

Gilberto Villahermosa


 To Hitler, the day of the Fallschirmjäger ended with the invasion of Crete. They had suffered so many casualties during their successful attack that it was almost a Pyrrhic victory. At the siege of Stalingrad the Luftwaffe's airlift capacity was bled dry of pilots and planes. So even had Hitler changed his mind about the Fallschirmjäger, it wouldn't have mattered. Their wings were clipped. However, the Fallschirmjäger's usefulness was not over. They were some of the most highly trained soldiers in the Third Reich. They would continue to win laurels all over Europe as Fire Brigade soldiers, closing holes in the lines and stopping various Allied offensives in their tracks. When you think of the Fallschirmjäger in the infantry role, you usually think of their defense of Monte Cassino. This book shows how they were deeply involved with the defense of Normandy.

 The story of the Fallschirmjäger in Normandy is a story of dedicated soldiers who belonged to very different units as far as their training and abilities are concerned. The 3rd Parachute Division was the cream of the crop as far as both Fallschirmjäger and Infantry Divisions. It was one of the very few infantry Divisions that the German General Staff listed as well equipped and strong enough for offensive operations; let that sink in. According to Allied interrogation they believed their commander Generalleutnant Schimpf 'a god'. The division had its complete complement of soldiers and was the fourth strongest division in Normandy, behind three SS Panzer Divisions. The 5th Parachute Division was another story. It was made up of recruits, most who didn't have jump training, and not anywhere near its established amount of weaponry. The 6th Parachute Regiment of the 2nd Paratroop Division also was well thought of and fought in Normandy. Elements of the 6th Parachute Division also fought in Normandy.

 All of these units were part of the II Parachute Corps. The book tells the story of the II Parachute Corps, and its battles in Normandy to stem the Allied tide. The author goes through the Corps conception and birth. Not only is this a book about the Normandy battles, but it is also a reference book on the training and composition of not only the II Parachute Corps, but also the disparate units under its command.

 The 2nd Parachute Division, or some of it, was tasked with defending Brest under Generalleutnant Hermann Bernhard Ramcke. Ramcke was one of only twenty-seven men in the armed forces who were awarded The Knights Cross, with Oak Leaves, Swords, and Diamonds. The defense of Brest was considered of the highest importance, because the Allies desperately needed a port to use in Northern France. The only problem for the 2nd Parachute Division was after its mauling in Russia, the division was badly in need of men and supplies. An American assessment of its strength put it at 35% of its full complement. Ironically, for the Allies, the fight to conquer Brest so totally destroyed the city that it was unusable as a port. In fact, after the war, French authorities were even considering not bothering to rebuild the city where it was. The author shows us all of this desperate fighting.

 For the author's ability to help you visualize the Normandy battles the book is worth its weight. When you add in the incredible amount of detail that you will learn about the Fallschirmjäger the book is a steal. I cannot recommend it highly enough. Thank you Casemate Publishers and Pen andSword for allowing me to review this wonderful book.

Robert

Publisher: Pen & Sword
Distributor: Casemate Publishers

2 comments :

Gorizia 1916 La Sesta Battaglia dell'Isonzo  The Sixth Battle of the Isonzo by Europa Simulazioni  Wor...

Gorizia 1916 La Sesta Battaglia dell'Isonzo (The Sixth Battle of the Isonzo) by Europa Simulazioni Gorizia 1916 La Sesta Battaglia dell'Isonzo (The Sixth Battle of the Isonzo) by Europa Simulazioni

For your Wargamer, Toy soldier collector, MiniFig collector, military history nut. Reviews, interviews, Model Making, AARs and books!

May 2020

Gorizia 1916 La Sesta Battaglia dell'Isonzo (The Sixth Battle of the Isonzo) by Europa Simulazioni


Gorizia 1916

La Sesta Battaglia dell'Isonzo 

The Sixth Battle of the Isonzo

by

Europa Simulazioni


 World War I in Italy and Austria-Hungary is the story of two men. The first is Luigi Cadorna, who was the Chief of Staff of the Italian Army in World War I. The second is Franz Conrad von Hotzendorf, the Chief of Staff in the Austro-Hungarian Army. They had both risen to the highest places in their respective armies by hard work and seemingly excellent minds, with which to fight the largest war yet on the planet. The only problem was in both cases it was entirely a facade. They were stuck and hidebound, as many other generals in World War I, by outmoded thinking. Again, they both were  like everyone else at the start of the war, in love with the idea that with offensive spirit and with a good dose of 'we can conquer all' thinking the war could be won. Unfortunately for the troops under their command, most generals in the other armies learned the lessons of World War I. Not these two though, no sirree. They could not think of much beyond using their troops in headlong assaults against 20th century weaponry. von Hotzendorf was also obsessed with the idea of taking revenge on Italy (at the start of the war Italy was aligned with Germany and Austria-Hungary, but refused to enter the war). When Italy did enter the war, it was as a member of the Entente against their former allies. Both of these generals seemed unable to learn the new form of warfare that was happening and both were replaced after numerous failures on their armies' part. Strangely, their legacies are also similar. These generals have military historians as both their detractors and defenders. As far as planning, they both seemed to be able to come up with great plans on paper that did not take into account the realities of the war.

 The Sixth Battle of the Isonzo took place in 1916. There were twelve Battles of the Isonzo in all. Five of these are considered Italian victories, four are listed as Austro-Hungarian victories, and three are draws. The Austro-Hungarian Army had just finished attacking the Italians in the Battle of the Asiago or the Strafexpedition (Punitive Expedition). The Austro-Hungarians were stopped just after they had punched a hole in the Italian lines. The Russians also attacked in Galicia, causing them to remove large amounts of troops. The Austro-Hungarians did not believe that the Italians could strike back so soon after the Battle of the Asiago. The Italians were able to move large amounts of troops and artillery in a short amount of time to launch the Sixth battle of the Isonzo. Just as in most of the battles on the frontier between the countries, the assault started well and the Italians seemed to have victory within their grasp. Unfortunately, as was the norm, the attack sputterted out once real movement returned to the to the front. The inability of all of the combatants to keep up pressure once the lines had been broken was seen throughout the first three years of World War I.


 So, there is the background of the game. Sorry if it seems too long, but to me it is one of the most interesting fronts of World War I. This is the second game from Europa Simulazioni that I have had the pleasure of reviewing. Being a bit of an aficionado about this part of the war, I was very interested to see how ES's game compared to history. The game comes in English and Italian for the Charts and Tables. This is what you get with the game:


One 22"x34" map of  the battlefield
1120 die-cut counters
Standard rules and Scenario Instructions (three small and one large Campaign Scenario) 
Charts, tables
Dice
Box 


 The game is played in daily turns.
It comes with a campaign game of twelve days (August 6th to August 17th).


 The map comes with large hexes to help with the stacking that comes with a World War I game. It is a very nicely done map of the area of the battle. The colors for the different terrain work nicely together. Only two infantry units can be stacked in one hex, but there can also be artillery and some other units. With a 22"x34" map and four counter sheets, the larger hexes help with the congestion. The scale of the map is 1000 meters per hex. The four sheets of counters are all the same size, and the counters are 1/2" in size, and use NATO identifiers for the troop types etc. They are also color coded as to what division or brigade they belong to. There are four types of counters in the game: Combat Units, Artillery Units, Brigade Headquarters, and Informational Markers. The size of the counters means that there is a lot of information in a small place. The Rulebook is in black and white, but is set up in an easy to follow manner. The components are exactly what I was expecting from a Europa Simulazioni game.


 Just so we understand each other, this is an old school wargame. There are no plastic soldiers, it is not card driven, or do wooden blocks come with it. It is a dyed in the wool wargame whose antecedents are SPI and Avalon Hill. This game, except for the deeper rules and better done components, would be right at home on a table forty years ago. This is a deep simulation of World War I trench warfare on The Italian Front. This is the Sequence of Play:

1. Reinforcement Phase
2. Command Phase
3. Initiative Phase
4. Weather Phase
5. Supply Phase
6. Artillery Phase
7. Event Phase
8. Initiative Player Action Phase
 A. Tactical Movement and Assault Declaration
 B. Offensive bombardment
 C. Defensive Fire (by the Non-Initiative Player)
 D. Assault Resolution
 E. Counter-Assault Declaration (by the Non-Initiative Player)
 F. Counter-Assault Defensive Fire
 G. Counter-Assault Resolution (by the Non-Initiative Player)
 H. Action Completed
 I. Opponent Reaction

 At the end of step I, the Initiative Player can perform another Action Phase, repeating Phase 8 with another Brigade he has planned to activate, or he can 'pass', leaving the decision to the Non-Initiative Player to go to Phase 9 or pass in turn.

9. Non-Initiative Player Action Phase
  A. Tactical Movement and Assault Declaration
 B. Offensive bombardment
 C. Defensive Fire (by the Initiative Player)
 D. Assault Resolution
 E. Counter-Assault Declaration (by the Initiative Player)
 F. Counter-Assault Defensive Fire
 G. Counter-Assault Resolution (by the Initiative Player)
 H. Action Completed
 I. Opponent Reaction
10. Non-Activated Unit Movement Phase
11. Replacement and rally Phase
12.Victory Condition Check Phase


 There are rules about the following:

Logistics and initiative
Command
Supply
Bombardment
Interdiction
Force march
Disorganization
Fog of War


Austro-Hungarian


 The game also comes with special rules for these Units:

Engineer Units
Cavalry Units
MG Companies
Flamethrowers
Armored Cars
Austro-Hungarian Night Counterattacks


Italian


 The victory conditions are more in tune with the realities of World War I than many I have seen. This quote from the Rulebook sums it all up "The Objectives of both sides were territorial, their own or enemy losses were immaterial". The game can also abruptly end not only because of the Italian Player taking Victory Hexes, but also if he fails to do so. The rule 'Italian Offensive Halt', comes into play and the game is over if the Italian Player does not conquer a Victory Hex for three consecutive turns.


Is that Albert Einstein as the Game Turn Marker?

 The game is an incredibly immersive one about the Italian front during world War I. Everything you would want, or expect, in a World war I game is here. The writing of the rules are very well done for a non-English European game. There may be some usage errors. I am certainly not the one to find them, but the rules are easy to follow and clear cut. For a game about an obscure battle, at least outside of Europe, this is a full blown simulation of the battle. Many times not well known battles get the short shrift when it comes to games; not here. That the Victory Conditions do not include losses at all is a neat touch for a World War I game. Playing as the Italian Player you must, because of the sudden death rule, keep attacking each turn. The game forces you to disregard your losses, and this is as it should be. The Italian Player cannot take the time to get the odds just right, like you can in some games. The clock is ticking for the Italian Player also. Playing as the Austro-Hungarian you cannot trade space for time. You must defend everything as best you can. Hang on by the skin of your teeth if need be, but defend those victory hexes. The Austro-Hungarian night attack can be used once per game. If you pass the die rolls it gives you a Brigade to attack for practically free. As in the real world both sides must also balance Logistics and Supplies. Artillery fire used in 'Interdiction' is a powerful tool at your disposal. If you can use interdiction do so as much as possible. If you can you have made that enemy Brigade useless for the next turn.

 In summation, this is a great game on an obscure subject that more people should be playing. When you go the the Europa Simulazioni site, take the time to browse through their other games. I own several and they are just as well done. Thank you Europa Simulazioni for the chance to review this game. 

Europa Simulazioni:
http://italianwars.net/

Gorizia:
italianwars.net/games/gorizia_1916

My review of Europa Simulazioni's La Guerra Di Gradisca 1615-1617:
https://www.awargamersneedfulthings.co.uk/2019/12/la-guerra-di-gradisca-1615-1617-by.html

Robert


0 comments :

hpssims.com