Tuesday, March 07, 2017
Afghanistan '11, developed by Every Single Soldier and published by Slitherine, is the sequel to Vietnam '65. This new title ta...
Early Access Preview: Afghanistan '11 - Part 1

Early Access Preview: Afghanistan '11 - Part 1
Early Access Preview: Afghanistan '11 - Part 1
by
Joe Beard
Tuesday, March 07, 2017
Afghanistan '11, developed by Every Single Soldier and published by Slitherine, is the sequel to Vietnam '65. This new title takes the established formula of fighting an insurgency, while winning over the hearts and minds of civilians, and adds several new layers to it. The game is scheduled for release later this month on March 23rd, so I thought I would do a preview consisting of an AAR (After Action Report) to give you an idea of how the game plays.
 |
| Scenario Selection Screen |
In Vietnam '65, there were no distinct scenarios, only a randomly generated map which always asked you to complete the same set of general victory conditions. Afghanistan '11 includes an 18 mission campaign in which you must complete specific objectives in addition to the normal gameplay loop.
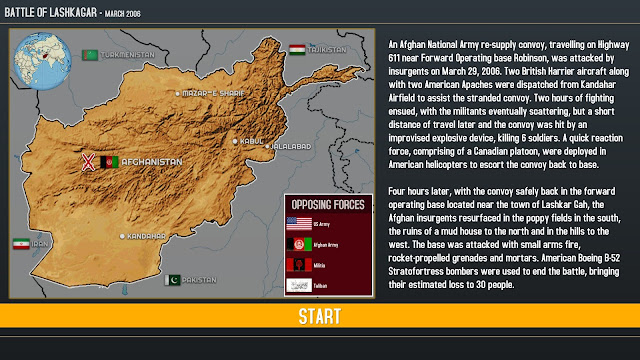 |
| Scenario Briefing |
For this AAR, I will be attempting the first mission after the tutorial, loosely based on the Battle of Lashkagar. Although the game is titled Afghanistan '11, the campaign begins at the start of the conflict. These scenarios are not detailed recreations of the events described, but the map design and objectives take their inspiration from the same type of challenges faced in reality.
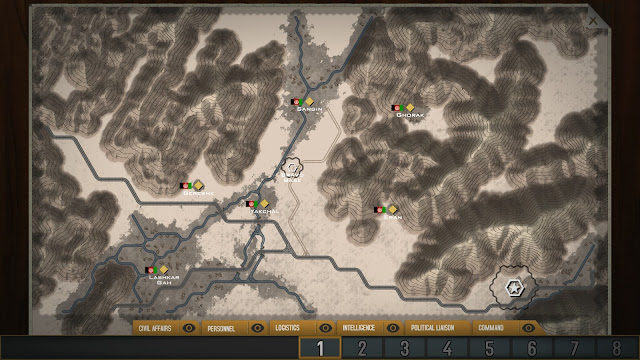 |
| The Strategic Map View |
Above you see the strategic map, which includes tabs for a lot of useful information, and icons showing everything of importance in the field. My objective for the scenario is to resupply the FOB (Forward Operating Base) in the middle of the map, with my main base of operations located at the star in the lower right corner. I must then keep the FOB intact and keep the hearts and minds score at 50 or better. (This score can usually be seen in the top-middle of the screen, on the left.) The other icons are villages spread across the area which I must try to keep friendly. The initial obstacle here is that my HQ is really far away from everything else. My plan is to greatly reinforce FOB Bravo and use it as a jumping off point to control the villages around it.
 |
| The road from HQ (bottom right) to FOB Bravo (upper left). |
I expect that a lot of IEDs will have been placed along the lengthy stretch of highway between my starting point and FOB Bravo. Luckily, the US forces can call in a Husky mine clearing vehicle to lead the way. The only downside is that it is a bit slow compared to the other vehicles. However, the rest of the convoy would get blown up without it, so we must make do.
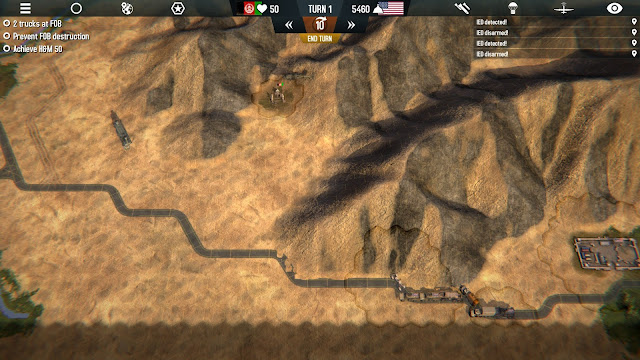 |
| The convoy sets out. |
I have a ton of political points available, so I deploy a fairly substantial force right off the bat. A large convoy carrying supplies, infantry, special forces, and an engineering unit, the Buffalo. I also send a Chinook ahead with heavy artillery for the FOB and send some Blackhawk-borne troops to visit the nearest village.
Political points are used for pretty much everything you do. Requesting reinforcements, building new FOBs or roads, and even moving units around costs political points. You have to balance between using enough to get the job done (so you can generate more points) and overstretching yourself to the point that your forces become ineffective, as you cannot do as much once you run out of points. This number can even go negative, so you have to be careful.
 |
| Trouble ahead. |
Before going any further, I use one of my special abilities, the UAV, to scout ahead. It spots three militia units on or near our planned route. Militia spawn in undetectable caves in the mountains and proceed to place IEDs along roads and around villages. Although you can't stop them from spawning, if you attack them they will flee and abandon their bomb planting mission. Taliban units are much nastier and more aggressive, they will flee when attacked, but then regroup and continue their mission. Initially Taliban will only appear along the east map edge, representing the Pakistan border, but if you let the allegiance of a village slip away the Taliban will start spawning deeper into the area of operations.
 |
| An Apache attack generates mixed results. |
I take out the militia along the road with a powerful airstrike, another of my abilities which has a three turn cooldown. It also costs political points to use, if you run out it is no longer an option. I request an Apache to help me take out the other militia units. While engaging the first group the Apache suffers some damage. This costs political points as the folks back home don't like to see American forces damaged or defeated. Being a rookie commander, I didn't notice that the Apache can make a long range attack, which would have been far safer.
 |
| Heavy Artillery. Look at that range! |
The rest of the journey to FOB Bravo is uneventful. The Husky clears several more IEDs, but no enemy infantry are spotted. Back at HQ, a special forces unit has finished training a new artillery company for the Afghan National Army (ANA). Your Special Forces units are not good in direct combat, and can't make village visits, but they do have several special abilities, which includes training ANA units. This saves you from calling in more expensive American units. At the HQ you can train artillery and APC units, and at FOBs they can train ANA infantry companies. The ANA troops are better for visiting villages, but aren't quite as good in a fight compared to the American infantry. In some scenarios you will need to build up a sizable ANA force before reaching a certain turn when the US forces will leave and the ANA will have to fend for itself.
 |
| The FOB artillery can now cover the central region of the AO. |
Once my Buffalo engineer unit reached the FOB I had it build an artillery pit and maintenance yard. These upgrades are fairly expensive, but will be needed to make the FOB a hub for my activities here.
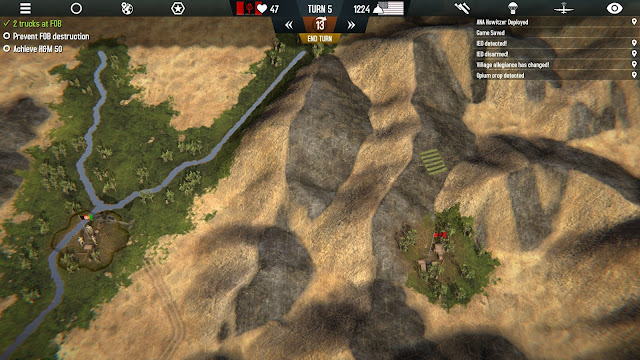 |
| An opium field spotted north of the right village. |
While the ground convoy moved to the FOB, I had my Blackhawk continue carrying an infantry unit to the villages furthest north. The one on the right, up in the mountains, proved uncooperative and is leaning towards the local militia. The people in the village on the left were more helpful, and told us about the location of an opium farm back near the first village. Helicopters are much more expensive to operate than ground transports, but can get your troops around the map in a hurry. I was able to visit both of these villages in a single turn.
 |
| The Taliban shows up. |
Back at FOB Bravo, things become a touch hotter as Taliban and Militia forces move in. Some rapid artillery strikes send them running. I also send an infantry company south to the contact the nearby village, sweeping for IED's along the way. Clearing these explosives always makes the closest village favor you more.
 |
| More Taliban! |
Up north, my troopers take care of the opium field, and also spot a Taliban technical on their way in. The Taliban unit fled, but my UAV spotted them again. Another airstrike and the world is a safer place. Removing the opium fields helps you by cutting off funds for the Taliban, but also makes the associated village dislike you, since your forces just took away their only cash crop.
 |
| An ideal sight! |
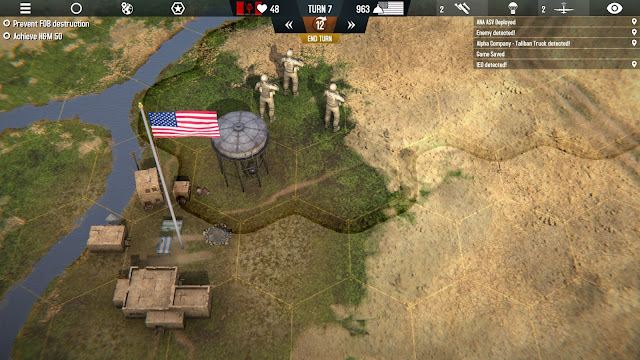
On the next turn I send my Buffalo engineer unit south from FOB Bravo to build waterworks in the village there. These people are very appreciative and now fully support us. After re-supplying the Buffalo I will send it back to connect the road to this village. Building up the infrastructure of local villages like this will help you win the hearts and minds campaign, but also costs political points to build, and creates new targets for your foes.
 |
| Cast your vote. |
Election time eventually comes, and I must choose who the Coalition will support for President. The candidates will have various positions that make your life easier or harder. You can spend some political points here to ensure a victory, or just try to maintain order on the battlefield. The Taliban will also step up its efforts right before an election.
 |
| My second convoy runs into trouble. |
Several turns later, things have gone against me to some degree. Although I have won over a couple of villages, others have swung against me. I decide to send a second, smaller convoy out to the FOB in preparation for an expedition into the western half of the map. Another FOB there will give me a strong point to work from in that region. Unfortunately, my Husky stumbles into a Taliban unit and suffers some damage. The Taliban forces flee and the infantry patrol I send out to find them has no luck. My UAV is already engaged elsewhere.
 |
| My Chinook bites the dust. |
On the next turn, disaster strikes. My Chinook had just completed a mission to supply a village with U.N. aid (which pushes favor in your direction, and of course is all warm and fuzzy). On the way home it flew right over a Taliban squad that damaged it. Then, just out of reach of the HQ, it ran into another Taliban squad, which was able to shoot it down. This gave me a pretty severe political point loss, and now my options become more limited for the time being. I hadn't realized that the helicopters were so vulnerable when moving. My movements must be much more careful in the future.
 |
| The situation as it stands on Turn 11. |
At the end of 11 turns, my situation is a mixed bag. I have lost political support at home, but not everything is bad in the field. I have the full support of two villages, and have a very strong position in the middle of the map. Several enemy units have been destroyed, and numerous IED's cleared. My planned move into the west should net me one more village there. I must work to win over the village between my FOB and HQ, since it is now spawning Taliban units, and they are throwing serious wrenches in my plans.
The elections will conclude next turn. Hopefully the Coalition friendly candidate will win, and the momentum will shift back to us.
Look for Part 2 very soon!
- Joe Beard


0 comments :