Klotzen! Panzer Battles
From Maxim Games/Available on the Steam Platform
Wargamers have been playing Panzer General and its spin-offs since the first game was released by SSI in 1994. The entire series has been aptly described as "wargaming lite," which may be a dubious distinction for some of AWNT's readers.
If so, a more in-depth treatment of the classic game - with a greater emphasis on supply, leaders, and air operations (among other things) - may very well be a welcome addition to the more hard-core board wargamer's digital library. In fact, this is one of the reasons why developer Zoran Stanic of Maxim Games and his team created Klotzen! Panzer Battles (Klotzen!), which released on the Steam game platform on April 27, 2022.
"The idea for Klotzen! was to provide fans (like me) of the old Panzer General with a design featuring similar game play, but more depth," says Stanic. "In addition to a deeper supply system and an improved simulation (and on-map resolution) of the air war, the 'replayability' of the game has been significantly increased, with the addition of many what-if scenarios and campaign events that can change the course of World War 2."
As far as the meaning of "Klotzen," it is a rather complex, intransitives verb in the German, with several possible connotations depending on the context. So, we'll leave that for readers to discover for themselves.
Panzer General Revisited?
To answer the question above, we need to fast-forward almost three decades to the latest spiritual successor to the venerable Panzer General series entitled
"Panzer Corps 2." The game is published by Matrix/Slitherine and developed by
veteran studio Flashback Games. It debuted on Steam just two years ago
and is a solid success based on Steam player feedback. Order of Battle:World War II
is another Matrix title, this one from 2015, which is slightly more complex than
the Panzer Corps series and has also enjoyed mostly positive reviews on
Steam.
While Klotzen! clearly stands out as a unique gaming experience, it may be instructive to make some comparisons with Panzer Corps 2 in this article for several reasons.
The huge Battle of Kursk (northern salient) courtesy of Panzer Corps 2 (with fog-of-war off).
An earlier start of the Battle of Kursk in May 1943, again showing the northern pincers, courtesy of Klotzen!.
Comparing Klotzen! with Panzer Corps 2 makes sense because experienced AWNT wargamers may have been holding out for a game of somewhat greater complexity than Panzer Corps 2.
Second, because dedicated Panzer Corps 2 players may be intrigued by this newcomer and its ability to offer wargamers a different level of challenge.
And third, although Klotzen! is designed to be an unofficial, yet significant successor to the Panzer General series of games, a comparison with a product released in 1995 would only do our readers a disservice. Panzer Corps 2 is arguably the latest and greatest of the General Series and can be had at a similar price point with Klotzen!
Beer With Your Pretzels
Titles like Panzer Corps 2 can easily be seen as the American "Budweiser" of the beer-and-pretzels game genre, whereas Klotzen! is definitely a micro-brew.
Taking this analogy one step further, there's also a small price to pay when going with home-grown. For example, the user interface and various game menus are not immediately intuitive in Klotzen!, but the learning process can be part of the fun.
In fact, Klotzen!'s design is original enough that discovering the inner workings of the game is another element of the challenge. Even without referencing the 90-page manual, most players will be able to get on quite well, with few frustrations in the process.
Most important, we need to address the bottom-line right up front: If one is satisfied with the Panzer General/Panzer Corps series of games and doesn't want to go any deeper, then keep playing those games. For the rest of us, who both enjoy and yearn for a somewhat different approach to Panzer Corps game play, Klotzen! should be seriously considered.
Klotzen! showing Kursk from the south. The prized city is in the northeast corner. Also, notice the airfield further west.
Axis forces point toward Prokhorovka in Panzer Corps 2's version of the Battle of Kursk.
The Scenarios and Campaigns
There are an impressive 65 scenarios and two full-length campaigns included with the game. This represents at least three full DLCs of content and a $70 investment if this were a Panzer Corps release. This surely makes the $40 U.S. asking price for Klotzen! quite reasonable, and the $35 release-week sale a bargain.
And yes, we're going to list all of Klotzen!'s campaigns and scenarios right here, in order to give readers an idea of the length, breadth, height and depth of the historical and what-if content available. The campaigns and scenarios can be played from either side. On release, Campaigns 3-8 were playable directly, but currently this option is undergoing some revisions. The scenarios are listed in alphabetical order:
Campaigns
1. Prelude (The Spanish Civil War, circa 1936, followed by Poland, and beyond)
2. Eagle Rising (The Axis effort through the fall of France)
3. Africa (or should we say "Afrika Corps"?)
4. Early East (beginning in the Balkans)
5. Barbarossa (a late start in 1942)
6. Defense of the Reich East (Kursk in 1943 until the bitter end)
7. Defense of the Reich West (Italy through Berlin)
8. Operation Tannenbaum (the German plan to invade Switzerland)
Scenarios
1. Alexander (October 1942 - A hypothetical battle featuring the Allies attempt to topple Franco.)
2. Algeria (Tunisia)
3. Aragon Offensive (Spain 1938 - The Nationalists Attack)
4. Ardennes
5. Bagration
6. Balkans
7. Barbarossa '42
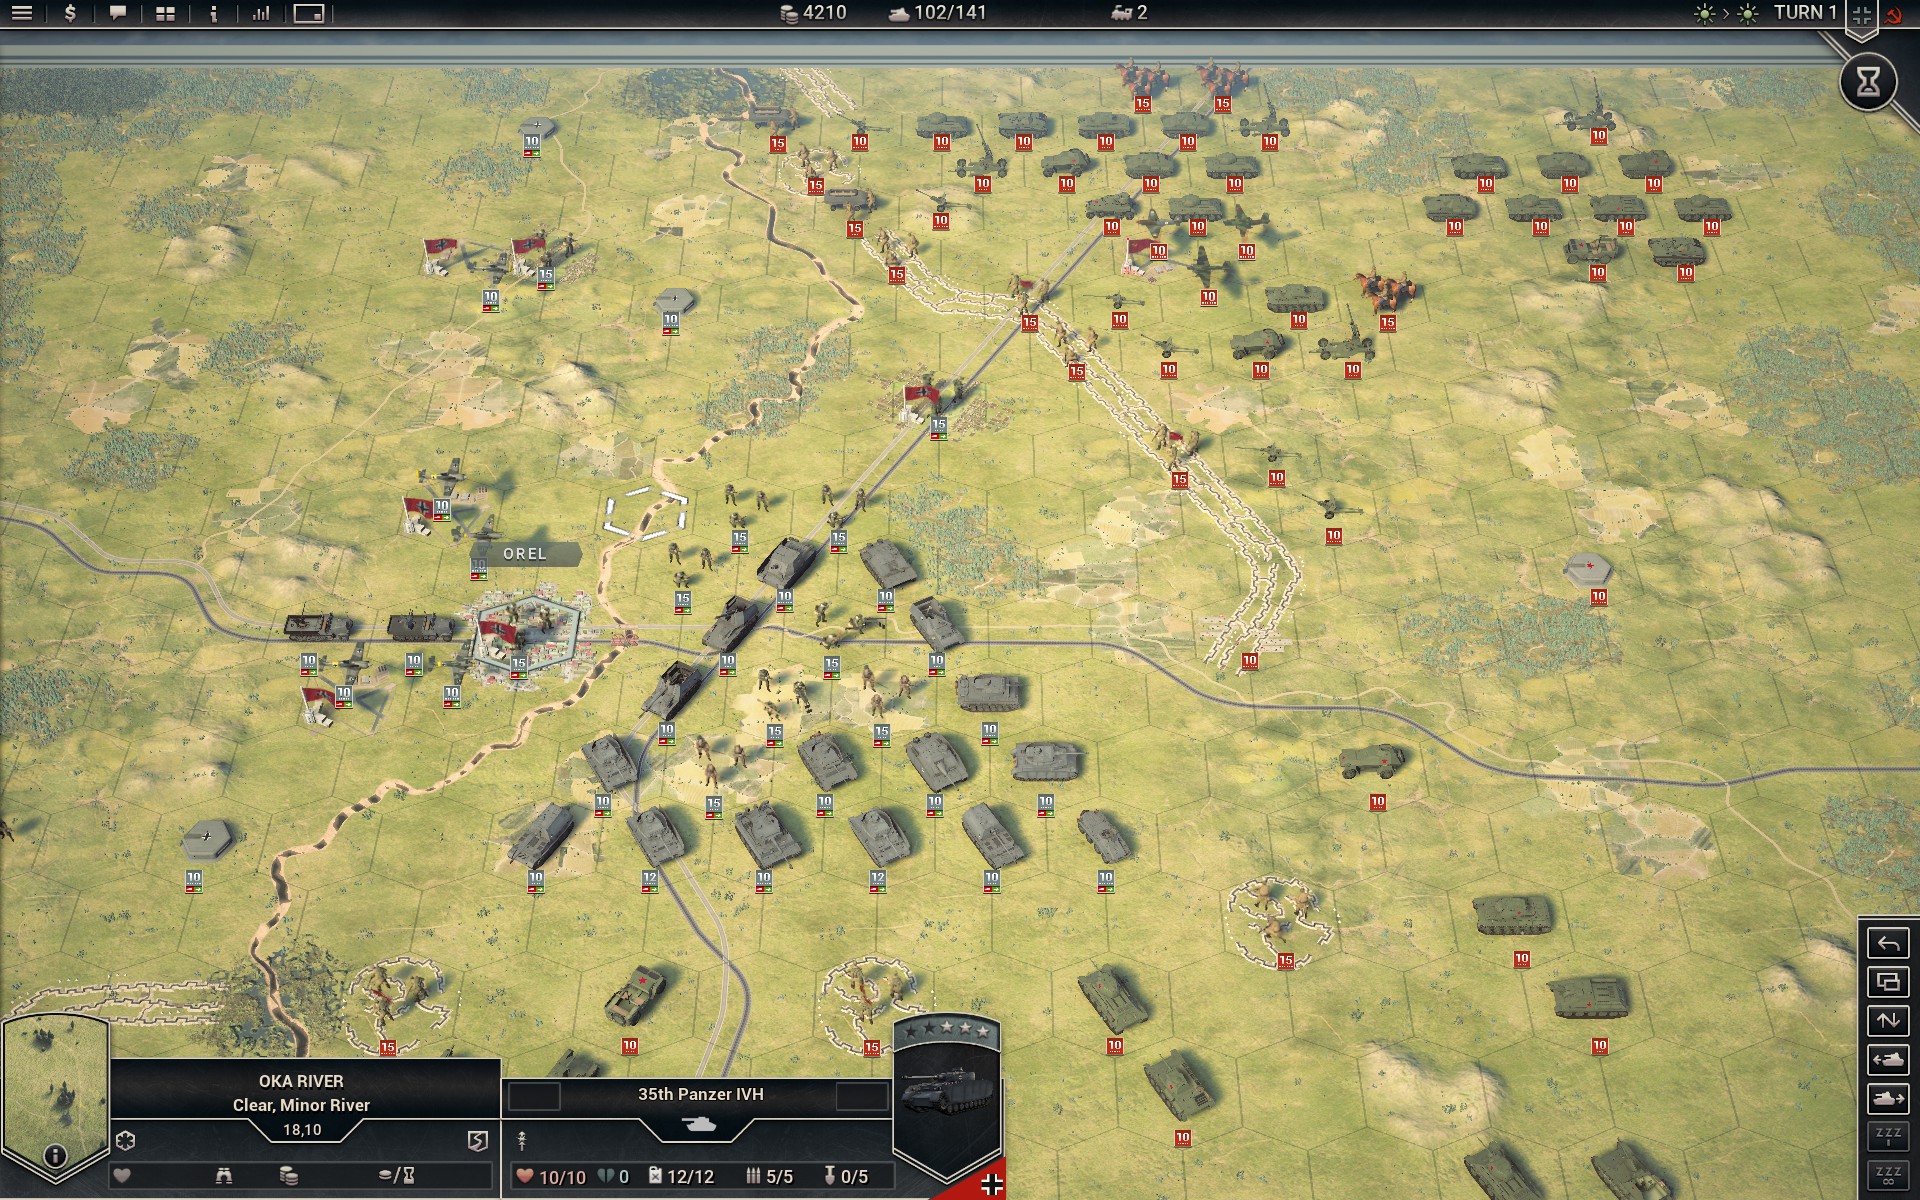
8. Barbarossa Center
9. Berlin
10. Bruderkampf ("Brother Fight" - The German invasion of an intransigent Austria; a unique offering that forces players to use some finesse and limit Austrian losses.)
11. Buran (Eastern Front 1943)
12. Case Blue
13. Catalonia (Spain, of course)
14. Condor (German invasion of Britain, May 1942)
15. Crete
16. Crusader
17. East Ukraine (March 1944 - a large map and painful reminder of the current crisis.)
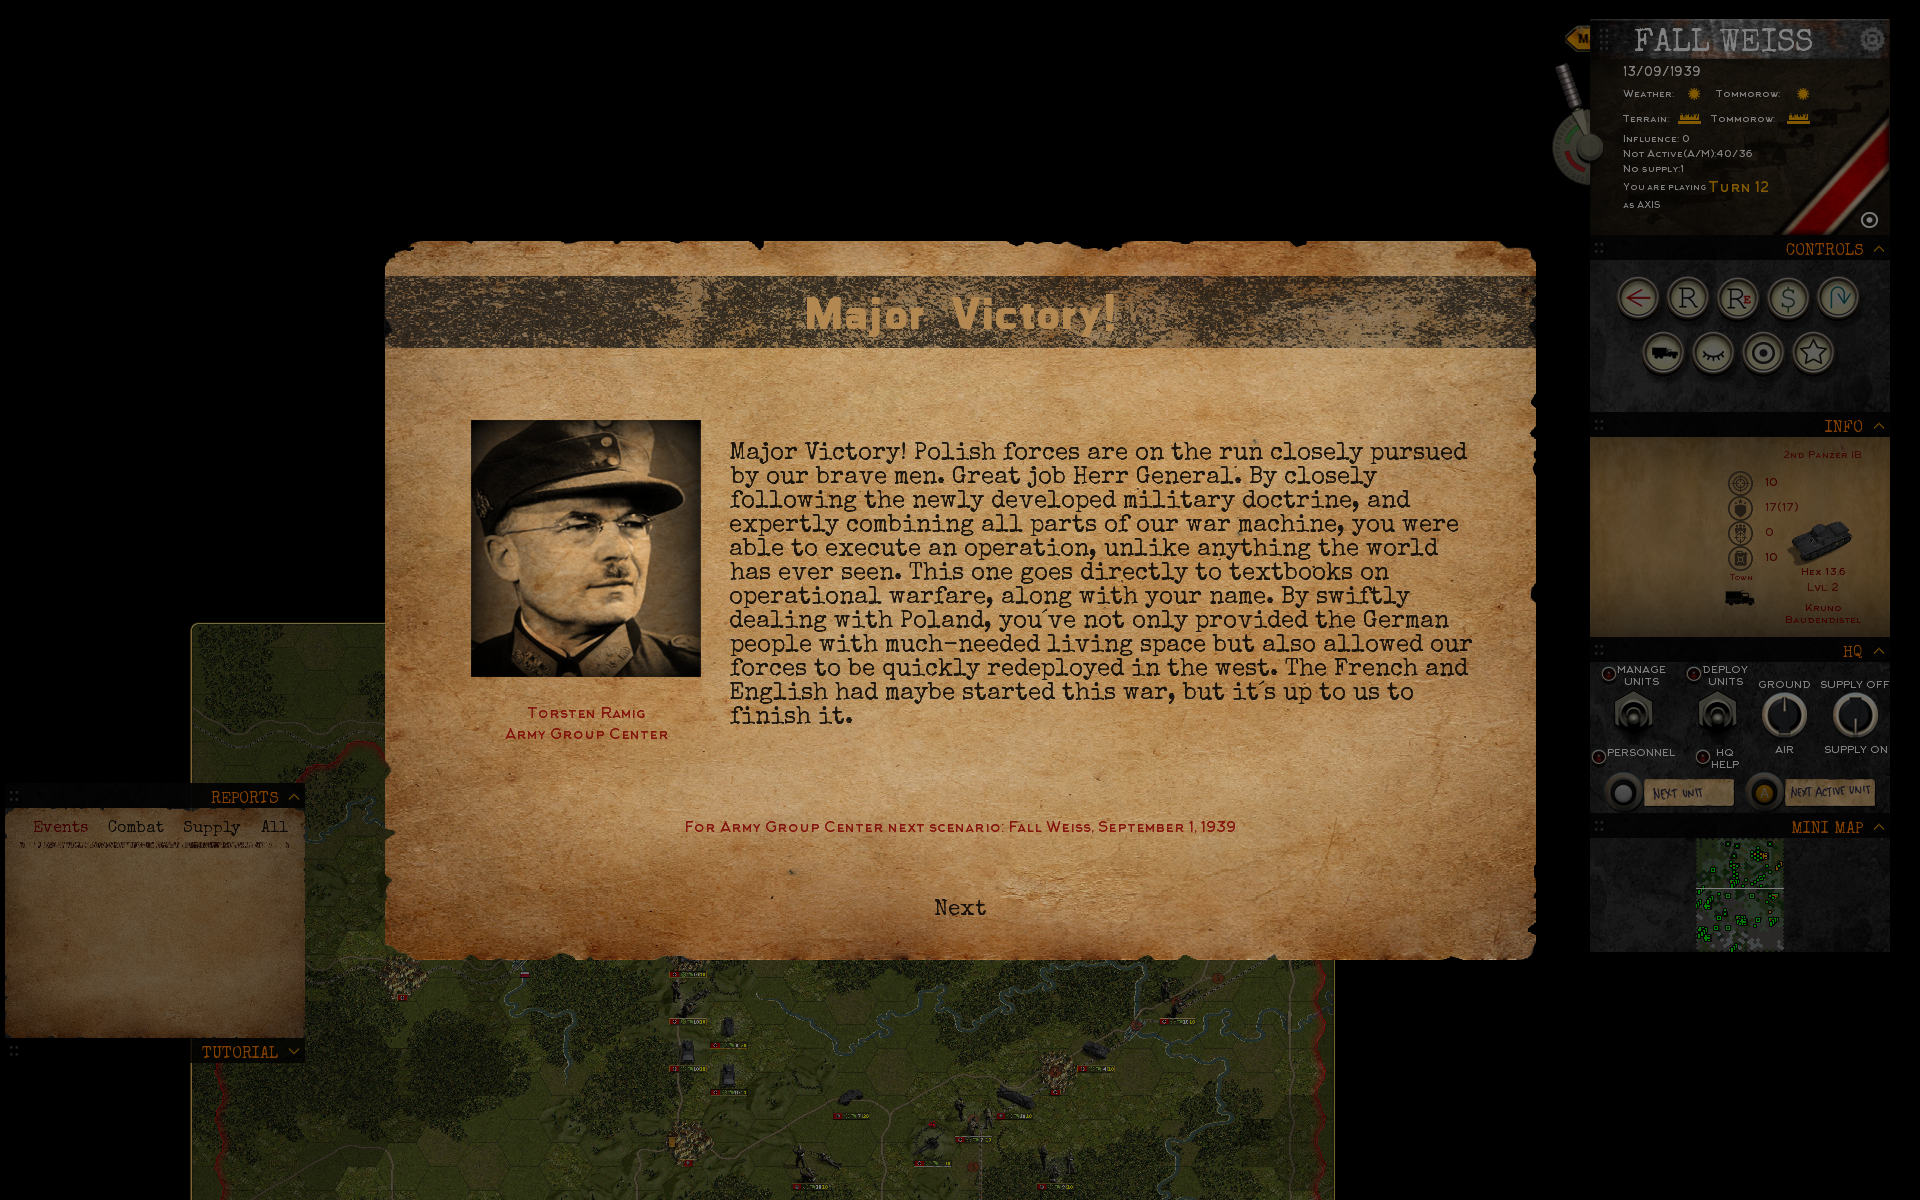
18. Fall Weiss
19. Felix (An Axis-led Spain attacks Gibraltar in March 1941; the British land in Portugal, and France holds out in Morocco!)
20. Fortress Germany (November 1943 - An early Allied attempt to capture the Ruhr.)
21. France (the historical battle in 1940)
22. Gazala
23. Germany 1945 (the attack on Berlin by the Allies in the West and Russians in the East.)
24. Italy (September 1943)
25. Javelin (June 1944 - The Allies land in southern France)
26. Kiev (1941)
27. Kursk
28. Libya (March 1941 German Offensive)
29. Low Countries (May 1940)
30. Middle East '41 (Afrika Korps attacks)
31. Middle East '42 (El-Alamein)
32. Moscow '42 (September, with a Soviet counterattack)
33. Moscow Summer (August 1941, Army Group Center attacks)
34. Moscow Winter (October 1941)
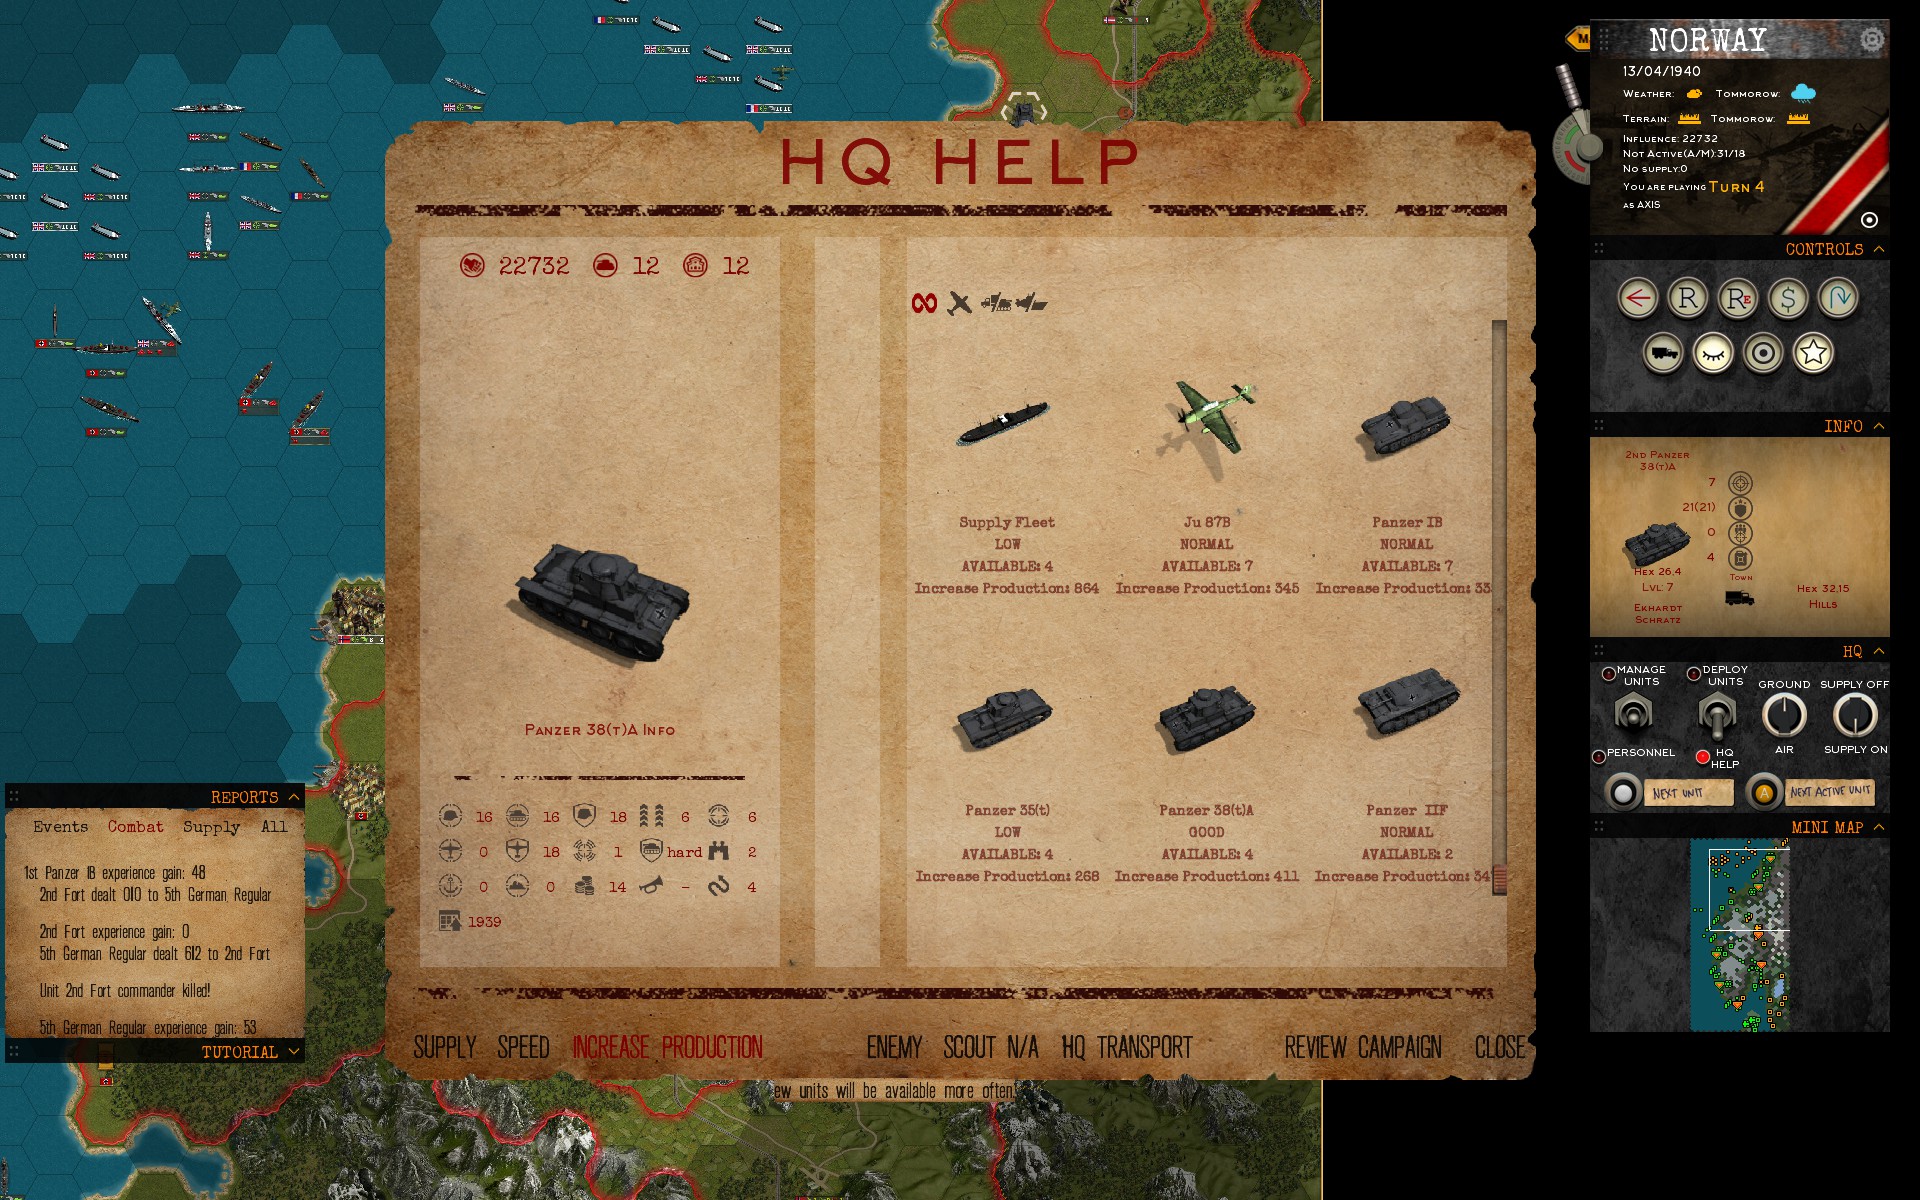
35. Norway (April 1940)
36. Operation Rurik (August 1943 - a what-if "final" German assault on Moscow)
37. Operation Solstice (February 1945 - Germans attempt to cut off a Soviet bulge outside Berlin)
38. Operation Tannenbaum (August 1940 - German and Italian forces attack Switzerland)
39. Ostwall (May 1943 - Luring the Russians out of their Kursk defenses)
40. Overlord
41. R4 (April 1940 - Britain and France intervene in Norway)
42. Romania (August 1944)
43. Romanian Bridgehead (The Wehrmacht purses the defeated Polish army in 1939)
44. Roundup (April 1943 - Overlord kicks off early)
45. Sealion
46. Sicily
47. Siegfried Line (September 1939 - The British and French attack Germany's vulnerable Western Front at the start of the Polish campaign.)
48. Spring Awakening (March 1945 - German counterattacks in Hungary)
49. Stalin Line South (May 1942)
50. Stalin Line (May 1942 - larger version)
51. Stalin's Gambit (March 1942 - No Barbarossa, Soviets attack through Poland, hypothetical)
52. Steppenwind (May 1943 - Axis offensive into the Crimea)
53. Teutoburger (July 1943 - German counteroffensive to retake Paris)
54. The Fall of France (June 1940)
55. Toledo (July 1936 - The Spanish Civil War)
56. Ukraine '42
57. Ukraine (June 1941 - Barbarossa South)
58. USA (May 1945 - Germany and Italy win Europe and invade the U.S. East Coast!)
59. Wacht am Rhein
60. Wall on Dniepr (August 1943 - Soviet offensive across the Dniepr)
61. Waltz on Volga (August 1943 - Axis offensive into the Urals, hypothetical)
62. Western Defense (August 1944 - Falaise)
63. Winter Offensive (December 1941 - Moscow has fallen; the Guards counterattack)
64. Winter Storm (December 1942 - Attempted relief of Stalingrad pocket and Soviet offensives)
65. Desert Dash ( This scenario is out of alpha order, and features a strong Axis attack toward Egypt in May 1941)
The game is played in campaign mode, following one nation from
scenario to scenario, or standalone mode where the player can choose
either side.
Although we have only scratched the surface of actual game play thus far, we should point out one significant difference between Klotzen! and Panzer Corp 2 before a potential purchase: The older game features standard Multiplayer and Coop modes, while this new game is single-player only at this writing but does include a hot-seat mode. It's important to remember, however, that most wargamers prefer to play against an AI, and the artificial opponent in Koltzen! is a decent one.
The Possibilities are (Nearly) Endless
As one can see from the alternative-history engagements included with the game, players can delay Barbarossa by one year to
deal with the UK; fight in Normandy in 1943; attack Norway with the UK
already landed there; win in Africa and attack the USSR from the Caucasus; and, quite a bit more.
The maps vary from 200 to more than 1,000 km in size, with hexes divided into 20 km chunks. Armies consist of a historical mix of more than 600 unit types, further divided
into 22 different unit classes. Included here are all types of infantry (militia, paratroops, SMG, etc.), tanks, armored cars, artillery,
fighters, bombers, submarines, battleships, and more.
As far as map size, Crete appears to be the largest at 6,000 hexes total; albeit, most are ocean terrain. The Eastern Front Wall on Dneipr offering is about the largest land battle at almost 5,000 hexes. With Overlord, one gets 3,600 squares and up to 130 different German units to deploy based on the purchase points available.
The full Battle of Kursk deployment screen in Klotzen! with no fog-of-war.
There are some rather lovely surprises included with this game, such as Operation Felix in January 1941, whereby Spain has joined the Axis and helps launch an attack on Gibraltar. Most of us have a few hundred wargames in stock, but would be challenged to find such a scenario ready for play. No less one with a huge, 83x43-hex map and the Spanish AB '41 armored car ready for deployment.
And while we won't get ahead of ourselves regarding the editors, all it takes is an adjustment of the "influence" points and unit caps inside an original (or saved-game) scenario text file, and the player is allowed to deploy a virtually limitless number of units on an existing map. Rest assured, attempting this process with Panzer Corps 2 is difficult at best, even when using the "cheat" codes available with that game.
Graphics, Sound and User Interface
As the screen shots may illustrate, this game resembles Panzer Corp 1 more than Panzer Corps 2. And this is a good thing in this writer's questionable opinion.
A zoomed-in view of Klotzen! shows that the game resembles Panzer Corp 1 much more than Panzer Corps 2.
While we are always hesitant to inject the reviewer's personal views into a game article, the fact remains that this wargamer has struggled to come to terms with Panzer Corps 2's graphic icons, as they relate to the game's approximate map scale.
For example, Panzer Corps 2's armored vehicles feature
a unit detail level almost akin to the Combat Mission series when zoomed all
the way in. And yet, when viewing an objective town/city occupied by an
infantry unit close up, one sees tiny buildings and fields with three huge
infantry figures sitting on them. It can affect the immersion for some people. In
contrast, Klotzen! has more of a Steel Panthers graphic vibe and may be closest to the excellent Panzer Corps 1 Modern Conflicts mod. However, this newest game allows one to zoom in much closer to the action than Panzer Corps 1.
The excellent Panzer Corps 1 Gold Edition Modern Conflicts mod resembles Klotzen! in some respects.
There is no doubt, however, that some of Panzer Corps 2's maps are quite beautiful. How they would look using NATO counters and proper company/battalion/regiment designations we will probably never know, as that's not what the game is all about.
As far as music and sound, Klotzen! could hardly be better. While it's easy enough to replace the vanilla .mp3 files with custom choices, it may not be worth the effort. In fact, the background tunes straight out-of-the-box are unobtrusive and perfectly set the mood. It's rare that "AAA" titles get this right, no less an indie effort like this one.
As far as the UI, once the player realizes that he/she needs to select textual prompts that highlight when moused-over to access the various game menus, it's smooth sailing for most wargamers.
The primary interface is the main map screen, which is fairly straightforward and neatly arranged. The large command panel on the right features scenario data, such as date, weather, turn number, and influence points. We should point out, however, that the end-turn "button" is actually a lever, with the main menu "M" button (load, save, etc.) directly above it.
This image shows the Klotzen! main map screen, with the user interface panel on the right.
Below the top-most panel are nine "control" buttons that conveniently feature informational tool-tips. However, only the commands possible at the moment light up. The selections include unit information, replacements and upgrades, sleep mode, an undo button - and, in the upper right - a bent blue-arrow signifying the embarkation command for airborne or naval transport modes.
The next panel down shows abbreviated unit information for the hex/unit highlighted on the map. It includes the formation name, a 3D graphic, unit level, leader name and other data. Four icons with tool-tips show attack, defense, scatter (distance from HQ) and supply source (usually Town-based). This allows one to access important unit information without consulting the dedicated unit information screen.
Another nice feature is the split-screen capability within this small panel. The left side shows information on the unit selected on the map, as previously discussed. The right side shows mouse-over information on another friendly or enemy unit or terrain data for an empty hex. This allows the player to quickly compare key data between any two units on the map by selecting one and mousing-over another one. Clearly, serious thought was involved in the design of the interface, although it will take the player a bit of experimentation to adjust.
Below the unit mini-panel is the HQ menu, which allows players to review/purchase/deploy units; switch between ground and air map modes; display the supply overlay; and, cycle between units.
Two other important functions are included here - specifically, the Personnel and HQ Help menus. The first item allows one to hire and fire unit commanders and top generals, while the second button controls special HQ functions relating to overall supply, production speed increases, scouting of the enemy, and the purchasing of transport vehicles, all of which require influence points to use.
The HQ screen in Klotzen! contains important functions that are generally not available in Panzer Corps 2.
The final/lowest panel in the command menu is the mini-map.
In addition, all of the aforementioned panels can be expanded or collapsed to reveal a larger portion of the game map. However, experience has shown that condensing the various panels is usually not necessary to get a good view of the battle areas.
Runs On a Potato
The game's demands on the average computer are very much on the light side. The game was reviewed using an Intel i7-4790 CPU @ 3.60GHz with 16 GB of RAM and a 64-bit operating system, coupled with an under-powered GeForce GTX 745 graphics card with 4 MB DDR3 of memory using a 1920x1200 native resolution.
Even using these laughable specs, the largest of scenarios only took a few milliseconds to load. In contrast, Panzer Corps 2 loaded scenarios quickly but lagged heavily when it came to inputting "cheat" codes using the game's chat menu or multi-tasking.This was due to the fact that Panzer Corps 2 fully maxed out the GPU function on this reviewer's lower-end test machine.
It's likely that most players with modern hardware won't have a problem with either game, but Klotzen! is a much safer bet for those with weaker graphics cards.
Panzer Corps 2's UI does an excellent job of exploring terrain effects using a simple mouse-over mechanic.
Got Stats?
Panzer Corps 2 has unit stats - 23 of them. Klotzen! also has unit stats - around 21, unless we counted wrong. Panzer Corps 1 has far fewer (12), and the screen display for them is much less attractive than the two newer game systems. In fact, Panzer Corps 1's stat page isn't even worthy of a screen shot. Okay, we're kidding here - almost.
Klotzen! shows off its stats. (Quick reference screen courtesy of our friend Diarrhea Cactus on Steam.)
One significant difference between Panzer Corps 2 and Klotzen! is that the latter game relies on graphics icons and a tool-tip display, whereas Panzer Corps 2 spells everything out for the player. It's also important to note that in the screen shots, we are comparing the Panzer Corps 2 stat page (displayed using the "i" keyboard shortcut) versus Klotzen!'s unit purchase screen in order to make a direct comparison a bit easier. Panzer Corps 2's dedicated purchase screen is a bit less detailed.
Comparing the two newest games' unit stats also shows that several of the parameters are different. This is where the games' manuals come in handy, but we'll look at a couple of differences here. Panzer Corps 2's "close defense" stat seems important, but what it actually means depends on who you ask. Both games feature a "ground defense" stat, which simply means a unit's defense capability versus ground units.
Klotzen! has a rather odd unit stat called "aim." This is probably equivalent to Panzer Corps 2's "accuracy" stat, which is displayed as a percentage - 50% for infantry in the screen shot below - while Klotzen!'s aim stat is displayed as a numeral - or a "2" for German Regulars in 1940. In this case, Panzer Corps 2's accuracy stat is easier to understand at-a-glance.
Panzer Corps 2's unit display also features two full columns of stats for units which are embarked on a transport plane or landing craft. In the latter case, the attributes for "ferried" infantry can be seen in the screen shot below.
The Panzer Corps 2 unit stats page is accessed using the "i" keyboard shortcut.
Klotzen! also has a few attributes that actually change color (the text is highlighted in green) to show a potential stat increase if the player decides to upgrade the unit.
Comparing the two games will also illustrate several other differences when it comes to unit stats, but both products appear to have the most important attributes well covered.
The Air War
This is one of a few aspects of the Klotzen! game engine that may offer players a breath of fresh air when it comes to Panzer Corps 2-type air combat resolution. In fact, on-map fighter and tactical bomber units move the game from a turn-based to a WEGO-style approach during combat resolution.
Rather than spoil the fun for first-time Klotzen! players, let's just say the AI has an uncanny - and excellently programmed - ability to stop your units dead in their tracks when moving them during a turn. Enemy air units will automatically intercept your forces as they move, with the Western Allies being particularly adept at disrupting friendly panzer formations.
A free JU-188A courtesy of an in-game event that should help prosecute the air war in Klotzen!.
The odds of air/ground intercepts appear to be realistically simulated in Klotzen! based on weather conditions, and yet it can be quite disconcerting (in a good way) for the player who is used to the Panzer General/Panzer Corp version of the air war.
When it's the AI's turn to play, turn resolution moves very quickly - even on slower computers - and most players will find it necessary to dial-back the speed of AI movement and combat using the Settings menu.
Klotzen!'s combat resolution is modest - at best - but quite sufficient. A smallish window is available to track every engagement in textual format. Let's assume a friendly Tiger I unit is ordered to attack an adjacent Soviet T-34/43 formation (in the Bagration 6/24/1944 scenario).
First, any enemy artillery - in this case a supporting enemy Katyusha artillery battery - fires first; it gains some experience but causes no measurable losses to the Tigers. The Tigers than attack their intended target, causing some losses to the T-34s and gaining experience. In addition, any commander/general skills are used in this phase to good effect and documented in the text box. The Tigers use the "Once more into the Breach" skill and attack the T-34s a second time. The T-34s are then wiped off the map and their commander killed, with the Tiger unit gaining additional experience. (The Tigers were defending in a minefield, hence they did not move forward and occupy the hex previously held by the T-34s.)
And then we have Panzer Corps 2's turn resolution phase. No WEGO air combat here, but a nice surprise: With only 30 hours playing the game, this inexperienced writer was unaware of the power of the "L" (log) key (lower-case) during and after the combat phase. Each battle is documented in a scrolling window in excruciating, grognard-level detail. Suffice it to say that Panzer Corps 2 will never be the same now that this hot-key function has been discovered.
Leadership Matters
This
writer has always felt that on-release, Panzer Corps 2 was rather stingy when doling out
leaders (Heroes) during the game, and this tended to minimize their affects on
overall strategy. The latest Panzer Corps 2 DLC (Axis Operations 1943 East) ups the ante when it comes to the number and affects of commanders in the game, which can also be adjusted in the Settings menu.
In
contrast, Klotzen! has a dedicated leader (and portrait) attached to
every unit in the game. And there are hundreds of them. Coupled with the myriad of attributes available to
each commander, this indie effort has greatly enhanced the leadership
portion of the product.
An elite unit commander, who has managed to achieve Level 8, along with his associates, in Klotzen!.
Matrix/Slitherine's
recent Decisive Campaigns: Ardennes Offensive digital wargame https://www.awargamersneedfulthings.co.uk/2022/01/blog-post.html put a
larger emphasis on both command and leadership, with historical
commanders possessing a variety of skills.
Klotzen!
doesn't directly address battlefield command-and-control per se (supply serves
admirably in that role), but there isn't a digital wargame in recent
memory that includes both the variety and flavor of each unit
commander's skill set. There are also more than 1,300 sepia-toned
portraits of the 23 nations represented in the game, from Australia to
Yugoslavia, included to represent each leader. Their names, however, are
fictitious.
The game's designers' have included a plethora of skills, traits and flaws for each unit commander that are, at the same time, both creative and impactful.
Here's a sample of traits discovered in one play-through, each with it's own little on-screen tool-tip:
Audacious
- "Overcoming fears is the first step in becoming the better commander.
This commander has learned that taking the bold action will land a
quick victory in most cases. And only rarely kill most of the men under
his command."
Mentor - "You're good at defending, but I'm good at attacking, so I can help you achieve perfection."
Press
Friends - "Who cares who took the town, if you are in the first
picture? 30% more influence per level when taking the objective."
Studious
Preparations - "Plan everything up to the smallest details, and it
can't fail. Too bad no plan survives first contact with the enemy.
7%/level less losses when attacking."
Closed
Terrain Specialist - "If 300 Spartans held Persians for three days in a
mountain pass, imagine what you can do with modern weapons. Never mind
the end result of that battle. 5%/level to initiative, attack and defense (rounded up) in closed terrain."
And
then there's the naval attribute "Pattern Evasion," described as "(A)
better chance of not ending like Titanic. 10% level increase in evade
chance." The whit exhibited in documenting these skills in this game is
the cardinal rule, rather than the exception.
A unit commander "levels up" in Klotzen!.
Much
like a recent Matrix/Slitherine favorite, Campaign Series: Vietnam
(https://www.awargamersneedfulthings.co.uk/2022/02/campaign-series-vietnam-indepth-review.html),
this game exudes a loving attention to detail that will not be lost on
wargamers.
Would-be
strategists also need to pay attention to the skills and traits they
choose for each formation. One must assume that certain attributes favor
certain unit types, and the game program filters in or out these
skills/traits accordingly.
For
example, while all units (ground, air or naval) can benefit from the
"Audacious" trait, the "Acrobatics" skill (avoiding a successful enemy
intercept) seems tailor-made for friendly bombers. OTOH, my Ju-87b
boasts the "Marksmanship Level 3" skill, which features a
bonus-to-attack during air intercepts - a role one would not anticipate a tactical bomber playing.
Rather
than belaboring this point, let's just say the game contains a huge
variety of tactical nuances and unit customization values - far beyond
the scope of Panzer Corps 1 or 2. And let's also remember that this is
the first effort from an indie wargame developer. For those of us who
appreciate this level of detail, our hat's are off in salute.
Panzer Corps 2's leader screen is arguably more attractive, but the number of traits, skills and attributes available to each unit commander pales in comparison with Klotzen!.
The Generals
Separate
from unit commanders, Generals are included in the game to lead various
army groups. Obviously, there are only a few in action at any one time,
and the variety of their attributes are more focused on
personality-type skills than the tactical or operational combat-oriented
talents earned by field commanders.
"Generals with unique personalities and traits (are available) that can reduce
the cost of reinforcements, speed up unit introduction, or give you
that extra turn needed to win." This quote comes directly from the Steam-page game description.
Generals
can be created, replaced, renamed and leveled-up based mostly on the
victory level achieved during each scenario within a campaign.
Each General in Klotzen! commands an Army Group and can be leveled up just like unit commanders.
The game
designers have also included a variety of interesting personality
"flaws," and all of these details are well-documented in the manual. One
favorite is the "Cautious" flaw: "There is a fine line between caution
and cowardice, and you are crossing it." -1 to Initiative.
Besides the unit Commander and Army Group (General) promotions, the units themselves increase in experience levels over time,
It's
also worth noting that units are penalized if they are manually fed "green"
reinforcements by the player and become over-strength (above 10).
According to the developers, a unit strength of 14 requires a
fourth-level commander. There are also special commander skills that can
mitigate over-strength penalties. It's the details like these that
elevate the complexity of this game beyond what's found in the Panzer
General/Panzer Corps series of products.
The
use of minefields is another example of a fleshed-out game feature, and
we'll take the liberty of quoting a player who put up a Steam review of
the game on their use: "Minefields are done really well, and I love the
directional impact, and the way they deprive the enemy of an 'approach'
as they were (historically) intended to do. They take a significant
toll when employed liberally along with bunkers. But mostly, they just
slow you down and make the game more of a race against time."
And
for players who don't like playing "beat the clock" when it comes to
victory, one's saved game file can easily be edited to add or subtract
to the scenario's length. Few wargames offer players this level of
flexibility when customizing their in-game experience.
There's quite a bit more detail about how minefields work and how they can be removed, but that's what the game's manual is for.
The Supply System
While the developers' verbiage on the Steam product page describes the Klotzen! supply system as one that can "lead to epic triumphs…or catastrophic losses," this reviewer did not experience anything as dramatic when playing against the AI in his relatively short (45 hours) with the game.
This may well be due to the specific scenario and difficulty levels chosen when testing the product. However, the game does force players to pay some attention to supply ramifications.
The player always starts with at least one supply source, which is usually a rail hex from one's home country. However, the supply hex(es) can also be represented as a port or a supply fleet; the latter of which can be destroyed by the enemy. If you are defending your home country, than the supply source(s) are usually major cities.
The supply modeled in the game can spread over railroads indefinitely - or at least until an aggressive enemy unit blocks the route. So, for a supplied town, the goods can extend for up to 24 hexes, but less in rough terrain or over rivers. Keeping rail and road hexes open is then vitally important to unimpeded supply.
It's also important to note that there are no "permanently" blocked hexes. Supply can be reestablished by having a unit regain control of the supply hexes in question. The supply situation can be immediately and clearly accessed (graphically on the map) by using the Supply toggle on the main UI menu.
Axis supply is clearly shown in Klotzen!'s Siegfried Line (9-12-39) what-if scenario against French and British "invaders."
How's the AI?
An in-depth assessment of the capabilities of the AI opponent in Klotzen! would almost certainly require more than 100 hours of game play.
And honestly, this isn't a cop-out; the large number of scenarios, each with widely varying objectives (and playable by both sides), would require a dedicated beta-tester to fully sort out. The good news is there are 10 levels of difficulty (Panzer Corps 2 "only" features five), which should be more than enough for players to tailor the challenge to their skill levels.
The Klotzen! difficulty-level 5 is generally equivalent to Panzer Corps 1 Gold Edition Modern Conflicts Mod (http://www.slitherine.com/forum/viewtopic.php?t=72062) median level three (Colonel level) or the Panzer Corps 2 vanilla game level-four Field Marshal setting.
In fact, all of the campaigns/scenarios used for this review were played at difficulty-level 5, and all showcased a rather formidable AI opponent. It is hard to imagine most players blowing through the campaigns at a significantly-higher level of challenge. (Axis players tackling Norway (1940) should hang onto their helmets).
It's March 26, 1945, and Germany is ready to deploy its forces in defense of the Reich via Klotzen!.
With that said, the AI occasionally vacated an objective hex or two to get at its enemy's throat and wasn't always capable of making grand/sweeping maneuvers to cut off the human player's supply. But it's likely that scenario hasn't been played yet.
And that's where the single-player, bang-for-the-buck aspect of this product comes in. If one is comfortable with the UI and general game play of this release, the content available with the base game - assuming there will be no immediate need for a DLC - is satisfyingly deep.
Although we're not yet on the subject of the game's editor, another way to quickly fine-tune the difficulty level in Klotzen! is to slightly ramp-up - or down - the amount of "influence" or purchase points and/or core slots available to the player and the AI.
The most expedient way to accomplish this is through simple text editing of an existing scenario or save-game file. This process is much quicker than delving into the powerful and arguably more complex Panzer Corps 1 and 2 game editors and offers the flexibility of customizing saved games on-the-fly. Of course, the ever-handy Panzer Corps "cheat" codes serve pretty much the same functions.
Another commendable feature of Klotzen! is the ability for newbie modders to simply open up the game's "unitTypes.json" file (located in the SteamLibrary/steamapps/common/Klotzen! Panzer Battles/resources/worldData folder), and after backing up the original, begin to modify unit data to one's heart's content. Amazingly, these modifications can be safely made in the midst of a campaign scenario.
Editing the stats of the illustrious JagdPanther V using the ubiquitous Notepad++ text editor.
The Official Klotzen! Game Editor
We've opened the Operation Overlord Allied invasion of Normandy scenario using the Klotzen! game editor in the screen shot below. All of the editing functions can be found in the upper right-hand corner of the screen, but we've found only limited need for them thus far.
The Klotzen! game editor is quite powerful but for most purposes text-editing of scenarios/save games works equally well.
For more than 90% of game players, the text-editing functions described above should suffice when tweaking a scenario to their specifications. Otherwise, the editor buttons in the official Klotzen! scenario editor are generally self-explanatory.
There are two things to keep in mind, however. First, immediately back-up the Scenarios folder (C:/SteamLibrary/steamapps/common/Klotzen! Panzer Battles/resources/Scenarios), which is only about 117 megs of data. This is because when using the game editor, any saves will immediately overwrite the original scenarios. There is no "save as" function here, and the game will warn you of that fact. Beyond that, knock yourself out. The intricacies of this game's editor are far beyond the scope of this humble review.
The Killing of Bugs
The
extermination of these little buggers is moving along quickly, thanks
to the determination of the developers and several devoted players, who
are logging onto the Steam Discussions page with their findings. A
couple of the more serious roadblocks, which prevented the continuation
of campaigns, were dealt with swiftly by the developers, in as little as
a few days.
There
were also a few hiccups with wide-screen support, but those issues
apparently have been addressed. We say "apparently," as this reviewer
was not able to test the game using higher resolutions. Of course, any
serious hardware problems players may have had with the game are covered
under Steam's generous refund policy: If it's broke, you get your money
back until it's fixed.
It's Only Money
And now we come to the often delicate topic of value for one's gaming dollars. Board wargamers already have a high tolerance to the often-hefty "price of admittance" for a favorite physical game. After all, there are all those detailed cardboard (not to mention, plastic) unit counters to fondle, and a lovingly crafted historical map on which to place them.
The Eastern Ukraine in March 1944, with Kiev in the upper-right corner, using the Klotzen! game engine. The image is a sad reminder of the conflict raging in that country at press time.
Unlike board wargames, which are rarely on-sale, digital media are often heavily discounted. Unfortunately, the tactile feel is completely lost, and the PDF rule book adds insult to injury.
All of this may mean that for the average AWNT reader, computer wargames are the ultimate example of discretionary purchases. If that holds true, than the choice of picking up Panzer Corps 2 and its DLC as part of a discounted bundle, or opting for the 65-scenario Klotzen! base game, becomes a question of serious financial import.
There's no arguing that some of the custom maps available with Panzer Corps 2 are simply lovely to behold.
Assuming that both games weigh equally heavy on readers' wallets, we would be negligent not to mention the availability of a wide range of professional-grade modifications available free-of-charge for the Panzer Corps 1 and 2 game engines. We must also credit Matrix/Slitherine and developer Flashback Games for allowing players to download, for example, a comprehensive Spanish Civil War (SCW) modded campaign without actually buying the official SCW DLC.
The truth is that the choice between purchasing Klotzen! or Panzer Corps 2 shouldn't really be a choice at all. Both games stand out in their own right: Klotzen! shining in its myriad of what-if battles and easy modification, while Panzer Corps 2 offers some unique historical mods and more modern graphics. AWNT board wargamers should derive some pleasure from both of these games.
Victory in Poland, September 1939, in our first Klotzen! campaign.
A victory on the Eastern Front using the recently released Panzer Corps 2: Axis Operations - 1943 DLC.


.png)


Follow Us