Strategic Command: American Civil War
From Matrix/Slitherine and Fury Software
(Also available on the Steam Platform)
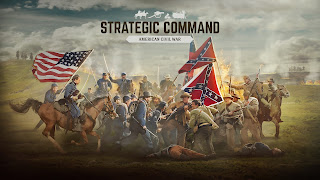
Strategic Command: American Civil War (SC:ACW) is a fully-evolved design effort that also celebrates the 20th anniversary of this popular game series.
Fury Software's lead developer Hubert Cater's first game, "Strategic Command: European Theater" (WW2) was published under the Battlefront.com label and released on July 16, 2002 - almost 20 years to-the-day from the July 14th, 2022 debut of SC:ACW on Steam.
Whether this is a coincidence or not only Cater himself can say. And he did graciously respond to a Steam discussion post that he had "lost track" of the release date of his first game effort, and the debut date of SC:ACW was entirely coincidental.
This response reveals both the inherent humility of this veteran game designer, as well as his commitment to move forward - and not look back - when it comes to his team's latest wargaming effort.
The latest computer game in the venerable Strategic Command series covers the American Civil War from start to finish.
The Bottom Line, Up-Front
Of course, AWNT's readers are looking for more than just nostalgia in this game review. So, here are our up-front, bottom-line recommendations:
1. Owners of Cater's three most recent Strategic Command offerings available at Matrix/Slitherine https://www.matrixgames.com (SC: War in Europe, SC: World at War and SC: World War I) have most likely put more hours into SC:ACW than this reviewer.
Germany launches its great Spring offensive in a division-level campaign from Fury Software's previous game,
Strategic Command: WWI available at the Matrix/Slitherine web site.
2. Board wargamers, of which AWNT has more than a few, should both welcome and be imminently comfortable playing with this wargame design.
3. American Civil War (ACW) aficionados, in general, will find that nothing in the digital gaming arena compares with this product when simulating the strategic level of the conflict.
4. ACW historians - both amateur and experienced - who are interested in playing out an unlimited number of "what-if" scenarios, will find a treasure-trove of possibilities when firing up the game's easy-to-use campaign editor.
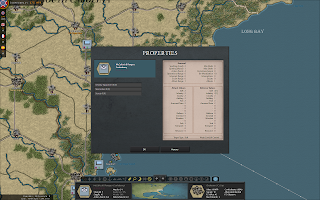
The detailed properties of a Confederate "Ranger" unit are available from the main map screen.
All of these unit variables can be changed when using the Game Editor.
It's a Tough Job, but Someone Has to Do It
The reviewing of wargames has become infinitely more challenging since the days of two-page, print reviews for the long-defunct Computer Gaming World magazine. The internet is now full of reasonably accurate game reviews and you-tube videos from truly dedicated providers. And the fact that this is an ACW game opens this particular review up to a much wider audience than, say, a niche wargame on the Eastern Front's Korsun-Cherkassy pocket.
For this reason, we have enlisted some extra help in the form of links to some detailed and deep forum comments, as well as field dispatches from a true grognard with more than 1,500 hours in another ACW game currently available on Steam: Grand Tactician: The Civil War (1861-1865) or "GT" for short.
GT is an incredibly ambitious project developed by Oliver Keppelmuller and released on the Steam platform on Sept. 24, 2021. And it is primarily because Matrix/Slitherine has made its SC:ACW product available on Steam that it would be negligent of us not to give some coverage to this amazing, but still-evolving, tactical/operational/grand strategic game on the American Civil War.
It may be October 31, 1861, but it's unlikely the Union Army is celebrating Halloween: A screen shot from the highly ambitious Grand Tactician: The Civil War (1861-1865) courtesy of the Old War Dog.
SC:ACW Highlights
First, let's list some of the outstanding characteristics of Fury Software's SC:ACW game engine.
A) This is a proven game system that has evolved over more than 20 years of simulation design. The overt "bugs" that are entirely expected from a breakthrough game like GT are notably absent from SC:ACW.
B) SC:ACW features Matrix/Slitherine's excellent PBEM++ multiplayer game system. At this writing, the monitoring of multiplayer activity on the game's forums shows robust head-to-head activity that appears to be surpassing single-player-oriented posts on social media. Matrix also kicked off a tournament program soon after the game's release on Steam.
C) And yet, the single-player experience appears solid, thanks to an aggressive and relatively intelligent AI that has been massaged over the years. One proof of this statement is the AI's ability to effectively handle transport and amphibious operations - a talent that took Paradox's developers a couple of years to effectively incorporate into their excellent Hearts of Iron IV game offering.
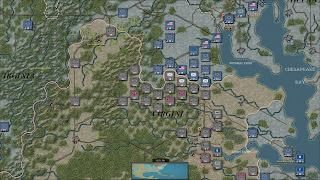
D) The inclusion of a hugely-expansive, 292 x 223-hex game map covering most of North America, the Caribbean, Mexico, and the Native American territories. At 10 miles-per-hex, this works out to 6,578,500 square miles of simulated space. Admittedly, not all of the map is fully used in the vanilla campaigns. But the map does allow modders to recreate some peripheral aspects of the ACW, including a full-on Mexican War circa 1861-1865, as well as various conflicts that include French, British and Spanish force structures.
E) Tremendous flexibility in terms of starting game options, including the ability to change sides mid-game and adjust hundreds of scripts to the player's liking.
F) A fully de-bugged and easy-to-use campaign editor that offers historians unprecedented power in both modifying existing scenarios and creating an unlimited number of "what-if" game situations. Although game play is very much strategic in scope, the editor allows gamers to drill-down into the very depths of the game engine and modify an almost limitless number of simulation and unit variables.
G) Close to 40 individual units types represented in-game - from infantry brigades to submarines - and each one has up to 16 distinct attack and defense values assigned versus every other (logical) combat unit in the roster. Each unit also has a variety of general combat characteristics, including spotting range, action points, attack range, entrenchment, demoralization, attacks per turn, and the chance of loss-evasion when attacking and defending. And, of course, all of these variables can be quickly and easily modified inside the Game Editor.
Editing the myriad of characteristics of a Union infantry brigade in the SC:ACW game editor.
H) Two years of of researching and testing to develop, with a brand-new and highly detailed, 66,000-hex map, along with new rules governing riverine warfare.
I) More than 450 pages of PDF documentation, including the main game manual, the tutorial manual, and six (6) must-read "strategy" guides for each vanilla campaign.
Welcome to the Team
In addition to Fury Software veterans Bill Macon and Bill Runacre, the company wisely sought the expertise of ACW historian Ryan O'Shea for help with campaign/scenario design and the writing of the hefty manual and strategy guides.
What does come as a surprise is that O'Shea was also responsible for programming the AI for the various campaigns. This seems like quite a bit to ask a "newcomer" like O'Shea, especially as Cater himself led the charge in programming the AI in all the previous SC game releases. (More on the AI later in the article.)
Finally, O'Shea also serves as a frequent contributor on the various game forums and appears always ready to answer questions regarding in-game strategy and the thought processes behind some of the developers' design decisions.
The game ships with six different campaign scenarios that altogether do an admirable job of covering the length and breadth of the ACW:
- "1861 Blue and Gray" - The marquee campaign, featuring an April 12, 1861 scenario start
- "1861
Manassas to Appomattox" - A later, summer of 1861 game-start just three
months after Fort Sumter and beginning at the time of the First Battle
of Bull Run.
- "1862 (General Winfield) Scott's Great Snake" - A representation of the Union's Anaconda Plan
that kicks off in the early Spring of 1862 with the Yankees poised to
amphibiously-attack its most ambitious target yet - New Orleans.
- "1862
Trent War" - A "what-if" campaign that simulates an alternative history
of the ACW, in which the "Trent" diplomatic incident in November 1861
triggers Great Britain's entry into the war on the side of the
Confederate States.
- "1863 Lee Rides North - The climactic phase
of the ACW, which features an aggressive Confederate General Robert E.
Lee conducting an energetic counter offensive against the Union's Army
of the Potomac (under the command of General Hooker) in late April 1863.
- "1864
Make Georgia Howl" - Union General M.T. Sherman's famous quote comes to
life at the beginning of 1864, with that general's bold march through
Confederate-held Georgia.
It's important to note that each of the above campaigns is fully playable from either side of the conflict in single-player (versus the AI), multiplayer (PBEM++), and hot-seat game modes.
Like the other titles in the SC series, customization is a key feature when it comes to setting the game's difficulty levels and general player options. Besides toggling on-or-off literally hundreds of vanilla game scripts and enabling various mods, one can choose to directly control only the nations that one wishes to play.
For example, when playing as the Confederates, one can delegate British, French and Spanish forces to AI control - when, and if, they become active in the game. One can also give the computer opponent various bonuses to spotting, experience and military production points (MMPs). In general, experienced SC game players would do well to assign the Rebel AI opponent a "veteran" status. When playing as the Confederates versus a Union AI, it's advisable to scale the difficulty level down to the "intermediate" level of play.
What's Not to Like?
We did find a single Matrix forums poster at press time, who was a veteran of the SC series but did not enjoy this latest iteration. These players appear to be in the minority at this writing, however.
One potentially significant issue with all the SC-series of games is that they do not feature unit stacking. This may or may not be an issue for some AWNT gamers. Matrix/Slitherine forum poster and SC beta tester "JWW" addresses this issue better than this writer ever could, and it's a mouse-click away at:
https://www.matrixgames.com/forums/viewtopic.php?f=11908&t=385538
We also have a link to another Matrix forum thread started by an SC game veteran, who is not quite in love with the latest iteration of this venerable game series. His opinions may hold some weight with owners of the previous games, who are considering a purchase of the ACW offering. The responses to the OP's opening comments by other players should also be of some value:
https://www.matrixgames.com/forums/viewtopic.php?f=11908&t=386783
In general, combat resolution is reminiscent of the Panzer General/Panzer Corps series of games: It's quite abstracted, with a "wham-bam that's the combat, madam" type of feel, as each single unit in a hex - whether corps, division, regiment or brigade - attacks or defends against another single unit at anywhere from 5-10+ formation strength, losing a few hit points here and there. However, SC:ACW does feature a more fluid retreat model than the Panzer Corp engine, and it's highly recommended that the "retreat" option stays in place when playing the game.
The bottom-line is that battles like Gettysburg, Antietam or Shiloh will only take place inside of the players' imaginations and within one, 10-mile hex between single units of various sizes. Here's what one forum poster said about this issue:
"I do think the game (SC:ACW) does a good job of representing the strategic military and political decision-making of the time, but the operational scale is 'off' when it comes to the map and units. In the Western theater, there are wider spaces between towns, and a player can maneuver units and get a feel for operational Civil War tactics. Naval operations seem to work out well, as do amphibious operations to seize Confederate ports. But the Eastern campaign tends to bog down into a WWI-style defensive line running from the Shenandoah Valley to the Potomac River, with very little maneuver possible, other than swapping out units to try to punch a hole in the enemy's lines."
So, there it is, although the Eastern theater is not quite as congested as the previous quote suggests. The potentially short, but continuous fronts near Washington, D.C. and the Shenandoah are vulnerable to breakthroughs early in the game, and Cavalry units with up to six action points can wreak some havoc behind the lines.
In general, the game does a good job of recreating the strategic war of movement in the West, and the strategic stalemate in the East.
The end result is that gamers who can't handle SC:ACW's level of abstraction (or a view from 20,000 feet up) can try another ACW game on Steam: the Ultimate General: Civil War real-time strategy and tactics game, or the ambitious GT in its current, less-than-perfect state.
Another important issue is that the artillery guns represented in SC:ACW are "integrated" within each formation. Field artillery and siege guns can be created as stand-alone units, but only when using the Game Editor.
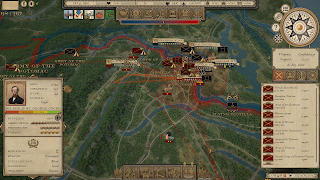
This does not mean that SC:ACW is devoid of tactics. In fact, the game is overflowing with tactical-level unit data everywhere one looks, and we will expand on the game's generous use of the nitty-gritty, grognard-style level of unit detail a bit later on. Let's just say that by the end of 1862 in most campaigns, the Union is pushing around more than 110 land units alone, so micro-management is certainly a thing here.
The Production Screen shows future unit deployments.
Another minor quibble is that, like the other games in the SC series, various Military Events are displayed at the start of the players' turns - such as the destruction of enemy units and capture of various objectives - but, clicking on the Event being displayed does not localize the Event on the map. So, one must use one's good memory and imagination when interpreting these start-of-turn updates.
The Reports tab gives a quick overview regarding active formations and unit losses.
The Main 'Events'
Much like Fury Software's most recent WW2 titles (World at War and War in Europe), as well as the latest Strategic Command - World War I game, players will be asked to make strategic decisions, called Decision Events - usually with a simple "yes" or "no."
Stephen Mallory, secretary of the navy for the Confederate States, queries the player regarding one of more than 160 rich, historical and what-if Events programmed into the game.
More information on the events themselves are contained in the Strategy Guides for each campaign scenario, and these excellent documents are conveniently accessed by push a command button at the top right-hand-corner of the game screen. One can also study the game map and return to the decision screen at one's leisure.
There are also specific Notes that come with each decision (available by selecting the "Notes" button). These Notes give players detailed descriptions of the background and the current consequences of every "yes" or "no" choice.
For this game, there are more than 160 specific Decision Events, not including several hundred - perhaps more than 1,000? - general event scripts included with SC:ACW. The latter non-decision events announce themselves at the start of a new turn, but do not require a decision to be made on the part of the active player.
The marriage of George Armstrong Custer is duly celebrated in this in-game "flavor" Event.
The fact that all of these events and AI scripts can be easily edited inside the Game Editor using the player's default text editor, which automatically pops up when a script is opened, offers levels of customization which are quite staggering. And if English isn't one's native tongue, the game actually supports more than 650 different languages for modding purposes.
Each of the scripts are generously "commented" within the files themselves, which offer would-be programmers a chance to get in some practice. The effort required by the developers to make all this available to the player is somewhere North of extraordinary. But that's just how the latest SC game releases are built.
Multiplayer Gaming
The topic that's taken up the most bandwidth on the games' forums thus far is multiplayer balance. In that regard, the developers have already pushed out a couple of patches addressing play balance between two human opponents. Our view is that's what the game editor is for: simply make some adjustments between two consenting adults and have at it! Meanwhile, here's the latest on multiplayer game balance based on two informative forum posts:
https://www.matrixgames.com/forums/viewtopic.php?f=11908&t=386205
and
https://www.matrixgames.com/forums/viewtopic.php?f=11908&t=385748
We also have a detailed quote on game balance from SC Assistant Programmer Bill Macon:
"There may be some confusion as to 'being able to simulate historical events' with wanting to replicate exact historical results. But this shouldn't be the case at all. Good wargames should demonstrate that if you follow historical strategies, then you should achieve relatively similar results. But that's not the point. If you have some confidence in the wargame being realistic and historically accurate, then you should have some confidence that following ahistorical strategies should produce believable results.
"The Strategic Command series does a pretty good job of doing that, improving and expanding as it has over the years," continues Macon. "If you play ahistorical to win, your victory or loss should be believable. In that sense, we should be on the same spectrum. And there should be an addictive replayability effect to try again with different ahistorical strategies."
The fact is that the Civil War in the East did not consist of a continuous line of units, but the battles played out that way. So, one point for Macon. Also, this was a period in warfare when the defender was favored, and wave attacks against the weapons of the time were suicidal. Even Lee, when he marched North and encountered the Union at Gettysburg, found that attacking on terrain favorable to the enemy was sheer madness.
So, the War in the East eventually did take on a WWI-style of attrition warfare, with the North having to accept high losses in order to destroy the Army of Northern Virginia.
According to another knowledgeable poster, "...the map only offers a limited number of hexes depicting Maryland and Pennsylvania. And as a result, there is no representation of mountain areas, such as South Mountain. So, the Cumberland Valley doesn't exist in the game, and that alone cancels out some crucial operational decisions." (Italics ours)
And so, we remind ourselves once again that this is not an operational-level game to begin with. We only belabor the point here because it may be a deal-breaker for certain gamers.
Our other observation related to multiplayer thus far is that, while Matrix/Slitherine's PBEM++ system is quite functional, gamers should expect only a limited amount of activity on the servers. This means that almost all multiplayer games available are locked-out as "private," and those searching for opponents are best directed to the Matrix/Slitherine forums to get connected.
The 'Intelligence' of the Artificial Opponent
It's high time to give some credit where it's due. Whether it's O'Shea, Cater, Macon or Runacre, or most likely a team programming effort, the AI in this game is imminently credible. It's likely that only veteran-to-expert SC players (and those familiar with the most detailed levels of ACW grand strategy) will find any glaring faults here.
And here's some proof: When playing a custom 1861 game-start as the Confederates against a "veteran" Union AI opponent - with the French controlled by the AI but immediately active on the Rebel side with a generous portion of MMPs - the artificial opponent conducted itself quite admirably.
Specifically, our French allies under AI control both purchased units and conducted its land and naval operations better than this intermediate player could hope to do. (Of course, this isn't saying much.) On the Union side, the AI was bull-dog efficient in identifying, surrounding, and eliminating vulnerable Rebel forces, while credibly reinforcing its own formations.
Coming off some play-time with the ever-popular, strategic-level Unity of Command II game series on Steam, this writer was struck by the manifold internal AI decisions required of SC:ACW compared with the aforementioned game. Let's just say that the perceived effort required to program an excellent single-player game like Unity of Command II cannot be compared with the challenges presented - and mostly overcome - by the SC:ACW artificial opponent.
And, the AI isn't programmed to cheat, either. It uses the same supply, combat, spotting, income, research and other rules and formulas as the human player. However, by increasing the difficulty level in the Options menu (from Green, to Intermediate, to Veteran and onto Expert), the AI can be assigned spotting, experience, and/or MPP bonuses. The Experience bonus may give the AI an edge in certain combat situations, while the MMP bonus allows the AI to reinforce, upgrade and purchase more units over time than the human player.
Players can further customize the difficulty level versus the AI by disabling a number of AI bonus unit events in the Options/Advanced/Scripts screen during game set-up. These AI unit bonuses are typically found on the last few pages of the Unit Events menu and specifically labeled "for AI use only."
Hundreds of AI and Event scripts can be activated or de-activated at the start of the game.
One example is "AI Union: Division - Boston 3/63 Lv2," which translates into a Union AI-only event at the intermediate difficulty level or higher, whereby the AI will received a Division unit in Boston in March 1863.
The designers admit that the AI plays pretty well tactically, but "has difficulty matching the big-picture awareness of a human player." So, giving the artificial opponent a few more units helps it with grand strategy.
In addition, the AI bonus unit events are said to "smooth out" game play in general and avoid a snowball effect, where the AI begins to lose badly, resulting in an abrupt and unsatisfying finish to the game for the human player.
A number of advanced AI scripts are also present, which actually force the programmed opponent to conduct various research and diplomacy investments, whether it has the income to do so or not. These events were included to optimize the game experience for the player, but like most scripts, they can be turned off if desired.
Finally, when playing against the AI, the turn resolution phase in the SC:ACW game reviewed here is relatively lightning-quick, thanks in large part to a system that has been proven over more than 20 years of designer effort. And that's when testing the game on a sub-par, i7 3.6 ghz machine with a lowly GeForce GTX 745 video card at a screen resolution of 1900x1200.
A Rousing Welcome for the 'Old War Dog'
It may be the right time in this narrative to welcome a special guest: the Old War Dog. With 30 years of professional military experience as a U.S Army/USMC officer - and an astounding 1,500 hours playing GT (you remember that GT is short for Steam's Grand Tactics: The American Civil War, don't you?), the Old War Dog oozes the kind of real-world credibility that this writer sorely lacks.
Major General William Tecumseh Sherman
Let's quote General William T. Sherman here: "War is cruelty, and there is no point in reforming it..."
And the Old War Dog responds: "Well, war has gotten 'reformed' very dramatically, and it is still being made the more terrible."
Like many military veterans who play wargames, the Old War Dog revels in designs that feature in-depth historical immersion, including a detailed treatment of unit headquarters, their personalities, and their functions. The Old War Dog notes that the shorter command ranges of HQ units in this version of SC makes their strategic placement "pure gold," but he mourns the limited number of historical leaders available to both sides during the game.
Now, we'll go into a bit more detail on the available HQ units and the strategies behind their optimal use in this SC game offering:
Like Fury's previous games, HQs can be set in one of three modes: Auto, Auto-Assist and Manual. The full-on Auto function allows the friendly AI to fill all the command slots, while Auto-Assist lets players intervene and manually assign formations to HQs as an option. Manual mode requires that gamers manually assign each unit to a HQ.
The Old War Dog notes that the AI doesn't always select the optimal HQ for each unit when on full Auto. On the other hand, Manual requires a good deal of micro-management to avoid leaving a command slot wide open. In this regard, Auto-Assist appears to be the best setting for HQs.
When using Auto-Assist mode, formations within command range are color coded on the map: A "blue" tint indicates a unit is not in command, and said formation will likely perform poorly in battle. A "green" tint indicates the unit is commanded by the selected HQ, while "red" shows that the selected formation is part of a different HQ than the one chosen. While all of this sounds complicated when being spelled out, it's relatively straight-forward in practice.
Van Dorn's Confederate HQ is responsible for several brigades (highlighted in 'green') when accessing the game's HQ mode. Also in use here is the "1861: The Blue and the Grey Mod" (alternate turns), which features custom unit graphics and a number of other features (link below).
https://www.matrixgames.com/forums/viewtopic.php?f=11920&t=387378
When accessing the game's HQ mode, one strategy is to focus on the "blue" highlighted units and determine if each one really needs to be commanded by a HQ during that game turn - for example, if that particular formation is going to be involved in a key battle or is likely to be attacked during the next enemy turn. If a critical battle is coming up, it's wise to assign the units in question to the highest-rated and most experienced HQs.
If that is the case, the player can right-click on that important unit and attach it to the selected HQ. If the "attach" function appears faded-out, that means the current HQ is devoid of command slots, and another unit must be detached to make room for the key formation.
The various HQ functions cannot be used if a unit has been moved, has attacked, or has been upgraded. Therefore, it's important to finish all the HQ assignments before one starts shuffling units around. When one deploys a new HQ unit - and there won't be many of them in a vanilla campaign - that HQ cannot move but can be assigned subordinate units within its command range.
The Naval Game
There's quite a bit that's new when it comes to naval warfare in the game, and even the most experienced SC players have come up against a moderate learning curve when exploring the nuances of riverine warfare in SC:ACW. There are no less than 15 individual naval vessels modeled in this game.
Ironclad ships (including river ironclad and monitor-type vessels) are most useful in destroying wooden ships (mainly gunboats). And there is a meaningful distinction between all types of naval units, from battleships to amphibious transports.
Monitors are less effective than ironclads when battling the latter ships, but they are potent weapons when faced with wooden ships and also cost a bit less in MMPs and can be built quicker than ironclads.
The Confederate player is advised to build at least a few river ironclads and monitors to challenge the Union and avoid having the enemy destroy Rebel convoys and drain its economy. On "normal" difficulty level, one can do significant damage with ironclads in order to open up Confederate trade lanes and gimp the Union's ability to amphibious assault. And new players should be warned that the Union player seems to be able to conduct landing operations anywhere and everywhere it so chooses.
The latest build of the game gives gunboats the "special" ability to kill land units on an all-to-frequent basis. "They make field and railroad guns look like peashooters in comparison," says the Old War Dog, although certain land features appear to mitigate their effectiveness. The use of several gunboats can be used by human players like a surgical tool to inflict "1" or "2" strength points of damage to land units per attack. While Union General U.S. Grant used these weapons to great effect when sailing down the Ole Mississippi, at press time gunboats appear to be overpowered when attacking land formations. As such, the building and deploying of large groups of gunboats are currently a known "exploit" for Union players.
In any event, researching naval weapons is a good idea in order to improve the offensive capability of one's ships when playing as the Confederates. The Union player is graced with a preponderance of ships active in coastal areas of the game map. However, players will still need to prioritize three key techs - infantry equipment, corps organization and infantry tactics - over and above naval considerations.
SC:ACW's research screen allows player to follow their own strategies when allocating precious Military Production Points to the various technologies that may be unlocked during the game. This particular screen belongs to a "modified" campaign featuring extra research points.
The Old War Dog strongly suggests that players consult the individual Strategy Guides written for each scenario for further hints on research and general game tactics. However, the research paths chosen are typically dependent on the player's overall strategy, so there is no perfect formula for devoting MMPs to various technologies within the game. Besides the infantry techs, bonuses to field telegraph, leadership, spying-and-intelligence, and fort modernization should all be considered right up-front.
Directly below is an informative thread on Union naval strategy regarding the blocking of Confederate ports, which is what the AI will certainly use against the player:
https://www.matrixgames.com/forums/viewtopic.php?f=11921&t=385745
And here's another helpful thread on the use of amphibious landings in the game:
https://www.matrixgames.com/forums/viewtopic.php?f=11908&t=386389
Finally, we offer one more tip on SC:ACW naval strategy:
https://www.matrixgames.com/forums/viewtopic.php?f=11908&t=386877
More On Strategy
With more than 1,500 hours playing GT, the Old War Dog rates the complexity level of SC:ACW as a "3," with GT's challenge rated at an "8 and rising," with the latest updates. That steep of a learning curve, as well as a fleshed-out "civilian" component, makes the strategic, operational and tactical aspects of GT time consuming and demanding compared with the high-level and relatively streamlined personality of our latest SC game.
A quick study of this game screen pulled from Grand Tactician: The Civil War (1861-1865) shows the depth of detail inherent in this breakthrough game design.
"SC may be a great game for 19th and 20th Century large-scale wargaming," says the Old War Dog. "I have noticed with Fury's latest iteration a unique AI compared to the previous games that teaches history while guiding the player through the scenarios. At the tactical level, the AI component is competent but relies more on the player making the decisions than in GT's tactical game module.
Grand Tactician: The Civil War (1861-1865) features strategic, operational, and tactical game play that can challenge the most experienced AWNT wargamers.
"The GT AI is continually evaluating and becoming stronger at holding the lines and less resistant to flanking attacks," the Old War Dog continues. "Of course, the competency of the AI has varied quite a bit from patch to patch with GT. The SC AI seems to adjust well to the player's decisions: going back to the War in Europe game, it you decide not to execute Operation Sealion, the SC's AI does a good job of re-adjusting Britain's home defense priorities."
Also, please find a link below on the strategic uses of regiments, brigades, cavalry divisions and other units from some expert SC game players:
https://www.matrixgames.com/forums/viewtopic.php?f=11908&t=386837
The International Scene
The inclusion of Britain, France, Spain and Mexico in the stock campaigns is intriguing indeed. But, as was historically the case, wargamers should generally not expect the major nations to play a key role in the vanilla scenarios.
In this campaign, the British Empire enters the fray in the American Civil War on the Confederate side of the conflict, attacking from the Canadian territories.
O'Shea admits that France's intervention in Mexico is not included in the game as a separate scenario. Instead, the designer has built this interaction into the main campaigns. When the French seize control of the Veracruz Customs House in Dec. 1861 (you remember that from North American History 101, right?), a new faction will appear in that city - the Mexican Empire (not Mexico proper) - and every so often after that an event will pop up telling the player about recent events in Mexico.
Of course, all of this changes if and when France enters the war...
In this modified campaign scenario, The French Republic has gone over to the Confederate side. Several French units can be seen in the Southwest corner of the game's strategic map.
When Napoleon III jumps into the fray, both Mexico (on the Union side) and the Mexican Empire (on the Confederate side) will both activate, with their forces positioned in accordance with their historical deployments at that time.
For example, if France joins the ACW in the Summer of 1862, one will find General Lorencez licking his wounds after the Cinco de Mayo. And if France appears a year later, Marshal Forey will be victorious in Mexico City.
The French send 163 Military Production Points to the Rebels via the Convoy system.
At this point, both the Union and Confederacy will also be able to send forces to Mexico; and, in the Union's case, MMPs via a convoy, provided that the Yankees control both El Paso and New Mexico. As such, it's important that players balance out their military commitments between the battles in Mexico and the U.S. if they are to have a chance of winning the much wider war.
Editing Power in the Player's Hands
We are happy to report that the developers did not "wimp out" and promise the editor in a future patch: The standard SC game editor, which is extremely powerful and very easy to operate, is included and entirely functional in the release-version of the game.
Previous owners of one of the SC series of games know exactly what they are getting here. For newcomers, expect to be pleasantly surprised by the scope of editing possibilities offered by this utility - without ever reading the editor's documentation. The editor both reveals all the detailed data behind the game's design and hands it all to the player on a silver platter. In fact, we recommend that players boot up the game's editor just to see the wealth of statistics that back up the vanilla campaigns' designs.
And this is where all the "unused" space on the generous game map of the Northern Hemisphere in the vanilla scenarios can be leveraged to create entirely new global wars. Even for first-time users, one of the beauties of this editor is the ability to profoundly change the character of any of the stock campaigns with just a few keystrokes - and no error messages!
Unfortunately, there are few players who will make use of the editor's power in campaigns for public consumption. Two months after the game's initial release on Matrix/Slitherine, and we don't have even one customized battle scenario (data-wise, not just graphics-wise) available for download. The dearth of custom campaigns on public forums has generally held true for the previous SC releases, but that does not stop would-be designers from creating their own diversions.
However, this sad state of affairs is in no way a reflection on SC:ACW or its editor. Matrix/Slitherine's War in the East 2 sports a phenomenal, if somewhat more complex, editor than the SC series, and one can count the number of custom scenarios available on the game's forums on less than half of one's hand. It appears that, in general, most digital wargamers are looking for a very historical version of history to be served up with their campaigns. There are exceptions to this rule in the Matrix product catalog, with the Operational Art of War IV and Advanced Tactics Gold being primary contenders.
SC:ACW is still ripe for mods, of course. Certainly, the enduring attraction of replaying the American Civil War on the computer should also captivate the imaginations of creative game players looking to explore what-if scenarios. The conflict inspired a whole series of novels and "Lee Rides Again" fantasy excursions in book format, so there's little stopping players from diving in.
Even in its purely historical guise, SC:ACW is a game that should not be missed by those looking for a relatively rare, strategic-level simulation of this far-reaching and monumental conflict.

.png)
.png)
.png)
.png)



_(cropped).jpg)
.png)
.png)




Follow Us