

Decisive Campaigns: Ardennes Offensive
From Matrix/Slitherine Games and Developer VR Design
Well, digital wargamers can rejoice because VR Design's latest offering, Decisive Campaigns: Ardennes Offensive (AO for short) includes more "column shifts" than the average grognard would have thought possible in a strategy game. And all of this is courtesy of a simulation that takes maximum advantage of the number-crunching capabilities of modern computers.
When one includes these features with a UI that's easy to navigate without ever opening the 110-page manual, and strategy gamers have a product that offers (almost) immediate gratification, as well as a respectable measure of historical accuracy.
What's clear after 50 hours of playing time on the smaller scenarios alone is that, from almost every angle, the game has been polished to a brilliant shine.
"It's really just a counter-pusher and nothing more than that," writes developer Victor (Vic) Reijkersz in the game's manual. However, what he adds next perfectly sums up VR Design's creative efforts: "By really focusing on making it do what it does well, I think we have delivered a fun and realistic game."
In that respect, and in our humble opinion, VR Design has accomplished its primary mission.

The 'Screaming Eagles' defend Bastogne
But before we continue with the accolades, we need to conduct a few reality checks:
1. The game was released on November 18, 2021 on matrixgames.com while this review was still being written. This means that a large portion of the existing Matrix/Slitherine customer base interested in the game before release probably owns it by now. And that may include you.
2. The remaining buyers of the game who are still on the fence have several good-to-excellent youtube.com video reviews to sit through if they have the patience.
3. The much wider Steam audience will be introduced to the game when it is available on that platform in a few months. Our guess is that only a few of these customers are regular visitors to AWNT's web site. And yes, we forgive them.
4. Nevertheless, AWNT will still lasso a significant number of potential buyers post-release who are searching the web for reviews of this game. So this article may be helpful if that is you.
5. And finally, we come to this review's primary raison d'etre: To introduce board wargamers to a digital product they may have otherwise missed.
In fact, there are several reasons why AWNT's audience might be keenly interested in this game, while those who enjoy lighter-weight titles like Matrix Games Panzer Corps 2 might want to give it a pass.
The first of these reasons was touched on at the beginning of this article: the countless algorithms used for sighting, terrain affects, weather, movement, command-and-control, supply, morale, and most especially - combat - are deliciously detailed and skillfully displayed for the player. In addition, the game map has the looks and quality of a modern board game release, although different heights can be difficult to discern.
The Bottom-line
For those of you in a rush to get to the bottom-line, there's no need to search further for a summation: It's all right here:
For computer wargamers looking for a medium-complexity, battalion-level simulation (1 km per hex) with a comprehensive suite of editors, this game is the literal "critic's choice," and the $40 U.S. asking price is a mere pittance for the content one will receive. And, most importantly, for board game players who have thus far resisted the urge to purchase a digital wargame? Well, this is the product you really want to consider.

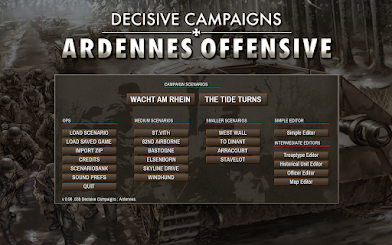
The scenarios included with the game include four "smaller" engagements (West Wall, To Dinant, Arracourt, and Stavelot); six "medium-size" scenarios (St. Vith, 82nd Airborne, Bastogne, Elsenborn Ridge, Skyline Drive and Windhund (116th Panzer Division)); and, two huge campaign games (Wacht Am Rhein, and the Allied counterattack, The Tide Turns).
Several weeks after release, some of the more experienced wargamers on the Matrix/Slitherine forums are still embroiled with the smaller stuff; And Stavelot, arguably the simplest of the offerings, is challenging some of the best and brightest. These players are finding that there's always a way to win the introductory scenarios, but it's going to take a few tries and several different strategies. Kudos to Reijkersz's partner in VR Design's latest effort - Davide Gambina - who is responsible for scenario design and the significant amount of historical research required to publish a game of this depth.
What experienced gamers may be surprised to find in a product depicting an impressive level of tactical detail in an operational-level wargame is just how easy the game is to play. The challenge is in beating the pants off the AI. PBEM is accomplished the old-fashioned way - via file transfer - with no dedicated server available yet. But the AI is aggressive on the attack and stubborn on the defense. With an artificial opponent like this, who needs friends anyway? However, head-to-head mode is likely to be extremely intense for players looking for the ultimate challenge.
Players can also expect history to repeat itself in terms of Axis fuel shortages and Allied air superiority. However, in the warm-up scenarios at least, these historical realities don't come across as too heavy-handed.
The engagements seem nicely balanced but do require the Axis side to take risks to achieve the ahistorical victories that eluded the Wehrmacht. This means blowing past the more immediate victory locations and stretching German troop movements to the limit in a December 1944 version of the blitzkrieg.
Playing the aggressor against an equally competent human opponent is going to be tough. Likewise, when defending against an AI attacker, experienced players may want to adjust the difficulty level from "normal" (the easiest setting) to "challenging." Fortunately, with scenarios like West Wall and The Tide Turns campaign, both sides get to play as the attacker in a game that realistically favors defensive operations.

In a game as calculation-centric as AO, it's a marvel the engine doesn't bog down. Even when playing the big campaign scenarios against the AI, the initial turn preparation phase never exceeds more than several seconds. Game phases for the smaller scenarios are processed with lightning-quick speed.
Even better, the mouse feels like a scalpel under this new Decisive Battles series UI, with the most important actions falling readily to-hand. We have all fussed with wargame interfaces that remind us of what a Trabant must have been like to drive in Eastern Europe during the Cold War. The switch-gear in this game, however, is both tactile and intuitive - the BMW M5 sports sedan of wargame interfaces.
A big part of the success of this newest Decisive Battles interface is that there are tool tips for nearly everything. And "everything" means much more detailed information in the tool tips than most WW2 grognards could ever wish for.
The combat routines are immersive, detailed and immensely satisfying, while also managing to move the battles along at a brisk pace. When tested on a i7, 3.6 ghz system with a lowly GeForce GTX 745 graphics card, the game phases for the largest scenarios advance in less than 15 seconds, and the quality of the 1900x1200 desktop resolution used to run the game was better than average. Higher screen resolutions will most likely result in more razor-sharp images.
In this game, troops are modeled per squad of 10 men or a single vehicle, with new rules for LOS, traffic jams, height levels, and much more. Six different ground states are displayed on the map, three of which are for aesthetic purposes.
It all begins with the intuitive MOVE mode: a simple "left-click" to select a unit and a "right-click" to move and/or attack.
An attack brings up the all-important combat set-up screen, which is masterfully well-designed. In the center is a zoomed-in map view showing the immediate area of the combat, reminiscent of Strategic Studies Group's "Kharkov - Disaster on the Donets" combat screen. Except here we have a high-res view of the counters and terrain, with the combat odds and attack options properly put forward.
In fact, this may well be the best combat strategy screen ever created for a wargame. It's simply amazing how uncluttered this screen is when considering the reams of data available to the player when planning an attack.

The small- and medium-size scenarios included with this game are rewarding enough, but there are two marquee battles that really define the title. The first is Wacht Am Rhein (Dec. 16-31, 1944), which will be easier to play as the Allied defender simply because there are fewer units to manage compared with the Axis attacker.
The second campaign game, The Tide Turns (Jan. 1-16, 1945) will be the more innovative choice, and starting on Turn 1, players will find a huge number of Allied counters waiting for orders. Fortunately, they can be moved by group as well as individually. Managing the defense for the Axis forces in this large campaign will also be an appealing challenge, with fewer units to micromanage.
In terms of raw data, VR Design's previous effort, Decisive Campaigns Barbarossa (DCB) features only one campaign (and no scenarios) and takes up 583 mb of hard drive space. AO requires 900 mb, and that's still quite tidy considering the greater emphasis on graphics for the new title, not to mention 10 scenarios and two large campaign games. There's more content for one's money here compared with the developer's last game. Oh, and the previous title featured a significantly smaller (and graphically much simpler) terrain map at 98x74 hexes.

One thing VR Design hasn't done is rest on its laurels: DCB (the third game in the DC series) was released six years ago and was most recently updated in March of 2020; and, based on popular reviews, Shadow Empire, a turn-based 4X role-playing strategy/wargame, has been a runaway success for the developer since its release by Matrix/Slitherine. It is also available on Steam.
New Features
The new game represents units at the battalion (operational) level, but there is still a tactical feel to the proceedings. LOS is now a "thing" in this game and is governed by several factors, including terrain type and height, weather, unit types, and the recon point value of each hex. All this information together can result in either full, partial or fully-blocked LOS. As wargamers might expect, building up a high recon point value through probes, etc., gives players more accurate information on enemy units, while no recon at all invites an ambush.
While the designer uses a full page of the manual and a detailed chart to explain recon in the game, let's just say one of its best features is that it makes sense to actually use small scouting forces - and especially reconnaissance-trained troops - for recon-only missions.
Recon levels are shown directly on the map using an "eye" icon that is shaded green for strong recon or red for the opposite. Considering there's a lot going on graphically in the map display, the recon function is well designed and doesn't contribute to map clutter. The recon value is also displayed numerically on the combat set-up screen.

Another new factor to consider with this game is "intercept fire." Your units may be fired upon when moving and will obviously take more potential damage if in "march" mode. Friendly forces also conduct intercept fire on enemy units automatically, which gives the game a slightly more WEGO turn resolution feel when playing.
Of course, like most aspects of the game, intercept fire mode can be modified by selecting the "trigger happy," "regular," "conservative" and "never" standing orders for each unit. As an example, when using the "conservative" setting, your units will only attempt intercept fire if they have a 66% chance (or more) of hitting the enemy.
With all there is to do in the game, this writer was content to leave the settings at "regular" to avoid excessive micromanagement. However, in certain tactical situations it probably pays to "get one's hands dirty" and experiment with the settings. Enemy intercept fire never appeared overly deadly in terms of friendly casualties but was able to stop a unit in its tracks, which was often a worse outcome than taking a few losses.
The new Uncertainty rule is a feature that's rarely, if ever, seen in digital wargames and adds more suspense and randomness to combat and formation quality on a unit-wide basis. It took the designer a full page of the manual to explain just how the "dice" modify things when using this rule. Let's just say that you won't be able to discover the true quality of a unit until after it has participated in multiple combats. Under rare circumstances, the rule can actually quadruple the performance of a troop based on modified attack and hit points.
Another feature not present in most wargames is that when Fog of War is disabled, the player can see all the units on the map, but the combat calculations still consider only what your units and the enemy's can actually see.
Designing Your Own Kampfgruppe
A significant new game feature is that units in the same hex can now be transferred from one formation to another using a similar, but more highly polished and detailed mechanism first seen in VR Design's classic, and still popular Advanced Tactics Gold wargame. New battlegroups can be created on-the-fly, with the program providing an appropriate name for the new formation, such as KG (kampfgruppe) Gutmann or Battlegroup Smith.
This feature is more than just an enjoyable new piece of chrome, as it allows strategists to create task-specific formations for upcoming duties. And it's also a heck of a lot of fun to use.
For example, rather than being stuck with an overly large regiment consisting of mixed battalions and companies for a critical attack, the transfer feature allows one to create an artillery-heavy battalion to soften up the enemy; a veteran group of panzer grenadiers and engineers for the assault; and, a pure armored formation for the breakthrough. Of course, custom units formed using this utility cannot more or attack in the same turn they are created.
In the same way, a defensive-oriented unit made up of "fortress" infantry and anti-tank guns can be whipped up quickly and assigned to defend the hex, rather than using (and possibly wasting) the services of a larger battalion or regiment. A situation like this can be doubly important when attacking with a large vanilla unit, as an "overkill" penalty in combat triggers various penalties and useless losses.

It's also important to note that while newly formed units are temporarily "disorganized," the penalty is far from crippling. The bottom line is the player has the ability (and the responsibility) to ensure there are no awkward or inappropriate formations in his or her army.
In this latest version of the Decisive Campaigns series, the variety of Action Cards has been greatly and generously expanded to fit the operational level of the game. The card's in VR Design's previous strategic-level DCB game seem quite skimpy in comparison.
For example, a survey of available action cards in AO scenarios number as many as 15 for the Axis, separated into four categories: Combat Units, Rear Area, Air Support, and Depots. Naturally, the Air Support category is minimal for the Germans and more plentiful for the Allies - depending on the weather. Like so many other aspects of the game, the decision of how and where to spend one's precious Political Points on Action Cards in a given situation can be immensely rewarding for the player.

Command Points differ from Political Points in that the former are used to activate a variety of different Action Cards that are shown for each officer, and also to create new kampfgruppes/battlegroups, among other things. These command points are generated by the Command Rating of the various personnel in one's officer corps. In addition, each personality is rated in five areas, such as Audacity (think Gen. Patton), Determination (Patton again), Charisma (Rommel (yes, he lurks in the editor)), as well as Intuition and Organization.
Simulating the Bulge: Comparing Panzer Campaigns with Decisive Battles
The game scale used in the late John Tiller's Panzer Campaigns Bulge '44 Gold edition (patch circa 12/09/18) matches AO's closely at 1 km per hex with each counter representing a roughly battalion-size unit. The southwest corner of Tiller's Bulge game is anchored by the four-hex (4 km) city of Charleville. AO's map is pretty close, with that city about five hexes from the western map edge and seven hexes from the bottom.
Likewise, the large, Allied-held city of Verviers sits at the top (northern) edge of the Bulge map, where strategists tackling VR Design's game get seven extra km of maneuvering space north of that city.
AO's campaign map (155x116) is a few 'clicks larger overall than the Panzer Campaigns map (169x98) for a total of 17,980 square km vs. 16,562 square km, respectively.

We could go on with our comparison, but a close study of the many cities and towns included in both games shows creative choices were used by the designers of both products, making it crystal clear that Gamina did not borrow from Tiller when creating AO's campaign map.
Mr. Tiller's original Wach Am Rhein campaign game weighs in at a hefty 164 turns, vs. AO's relatively brief 64 tries, albeit with up to 10 combat rounds simulated per turn. However, these rounds can be resolved in a flash if the player so wishes.
In terms of unit placement, the U.S. 102nd Cavalry Group is located exactly where it "should be" in both games - about two 'clicks north of Monschau.
In general, there's only a few natural map and unit variations between the two excellent game designs, and the differences make each a true "original."
For example, Tiller's team chose to highlight the town of St. Vith as a one-hex, 1,000 point objective, whereas Gambina spreads things out by using four separate objective hexes to mark the town.
It should be noted that Tiller's research and scenario design team included Panzer Campaigns veterans Greg Smith, Glenn Saunders and the late Dave "Blackie" Blackburn, while Gambina handled all the OOB and scenario design work himself.
In fact, the fidelity of both games is such that players of AO may want to seriously consider picking up Bulge '44 Gold at https://wargamed.com/collections/panzer-campaigns/products/bulge-44.

The Counters Explained
While the standard NATO counters are both informative and relatively readable (even when some screen displays considerably reduce their size), the Silhouette counter option can be deeply gratifying.
However, not all the symbology on the counters will be clear at first glance. Fortunately, there is an excellent tutorial video on the topic (https://www.youtube.com/watch?v=GG5EL6OJ93A) that will cost you 11 minutes of your life. So, it may be quicker to just do the reading below. The following screen shot comes directly from the game manual:

The 'key' to the counters.
- The Regime icon is either the vintage-look German Cross shown in the counter above, or a green-colored star for the Allies.
- The Name (162. here) is where players may find some inconsistencies with OOB naming and labeling that can make units of the same formation a bit more difficult to identify. (These names can be changed in the program's Simple Editor, and at least one modder on the Matrix.com forums is hard at work attempting to clarify these situations.)
- The tiny Supplies Received square is colored green, yellow, blue or red, showing a progressively decreasing access to supplies. Black means the unit is out-of-supply.
- The shield or symbol of the unit's HQ is displayed next; there are a plethora of colorful (and historically-accurate) icons available for HQs of both sides.
- The color of the vertical readiness/integrity bar below the shield goes from green/yellow/blue/red, with the latter color showing readiness below 25. One does not want to attack using units with low readiness.
- The green crate icon in the lower right corner of the counter shows supply reserves using the same color coding for increasingly lower stocks. The larger numeral to its left is quite handy and depicts the abstract strength of a unit compared with others on the game board.
- The number within the circle is the unit's Action Points; the highlighted circle is white if the formation is in March mode and black for units in Combat mode.
- The "oil drum" in the lower left corner of the counter shows fuel reserves from green (full) to red (low).
- Last and largest is the actual unit silhouette in the center of the counter, which shows the most prevalent troop type in the formation and its means of transport, if any. The unit in the screen shot above is shown as mechanized infantry (notice the halftrack icon), while other icons include horse-drawn transport or nothing at all for foot sloggers.
The screen shot show below shows a close-up of several British formations surrounding the city of Huy at the start of the Wacht Am Rhein campaign scenario. One notices that the rather nicely drawn British roundels and the vertical (green) readiness/integrity bars have been shifted from the right to the left edge of the counters to further differentiate Allied from Axis units.

One notices the HQ of the 152nd Infantry Brigade (sporting the large British roundel) on the left side of the screenie. Its HQ is the 51st Infantry Division "Highland" off map to the southwest. The "2SH" (2nd Seaforth Highlanders) is positioned directly northeast of 152 Infantry Brigade HQ, while the 127th Royal Field Artillery is a bit further northeast and features the "HD" roundel atop its readiness bar signifying it as a member of the Highland (HD) Division.
In this microcosm of an OOB, the naming, labeling and shading is quite well done. But one can imagine things can get a bit sticky at times. In the release version of the game, there may be inconsistencies with the historical designations of the units on several of the 200+ counters created for the game.
Combat Planning In-Depth
How much data does the player have at his/her disposal in the combat set-up screen alone? Below is a sampling using the screen shot we posted previously:

Directly below the Eligible Forces is the box containing the "estimation of offensive mods" table, which includes the affects of the landscape, rivers, concentric attack modifiers (if any); readiness and unit experience modifiers; an attack saturation modifier (if too much power is being used on too small a target); a HQ/Staff/Officer bonus modifier; a high-ground modifier; two "offensive power" modifiers; and, last but not least, a "cumulative modifier" that multiplies all the estimated modifiers with one another.
On the opposite side of the main combat set-up window is a table showing the same detailed combat modifiers for the defending forces. The units of both sides involved in the combat are also shown in the bottom left and right corners of the screen.
Obviously, calculating all these modifiers by hand in a board game would be a stiff challenge, but it's a breeze for today's modern CPUs.
Four attack options (Probe, Recon in Force, Attack, and All-Out Attack) are shown as brownish buttons at the bottom center of the display, and all feature tool tips on what they do. Just above these buttons is the large, green-colored combat odds box (i.e., Odds 4:1, as shown in the screen above).
Above the Odds box is the map or "porthole" view, showing each attacking counter with the defending unit(s) in the center. The player can also add or remove an attacking counter from the combat by clicking directly on the unit in the map view.
Finally, the Combat Totals are shown numerically in the upper right-hand table, including individual Infantry, Guns, Motorized, and Tank units committed to the assault, as well as the attacker's and defender's Stack and Recon points.
And, of course, all of this information is updated instantly every time the player adds or removes a unit counter to or from the attack.
Once the player confirms the chosen attack type by pushing its button, the full map is shown briefly (centered in the combat location) with an "explosion" icon over the targeted hex.
There are three combat resolution screens available: Graphic, Textual, and Detail views, similar to the previous Decisive Campaigns games.
The graphic view shows tiny unit counters on each side of the screen (attacker and defender, respectively), with equally tiny graphic icons of the units themselves in the center (infantry, bazookas, trucks, jeeps, tanks, etc.). A number is shown in white below each icon and turns red when losses occur.
The player can choose to resolve each of 10 or more rounds of combat all at once by selecting the "auto-play" button or show the results of each round manually by pressing the space bar or "next round" button.
The "textual" combat resolution option shows a spreadsheet-type view of each combat round in numerical format, with unit types, losses, and various other stats updating with each round of combat.
The "detail" combat resolution screen is just that: more details, with a screen full of data showing individual combat losses each round, as well as a variety of other reports.
In this writer's opinion, the textual combat report is the easiest to absorb, but the player has the ability to change the resolution screens on-the-fly for every round of combat.
Ranged Combat
The screen shot below illustrates the Ranged Attack planning window, with the indirect fire bonus modifier tool tip enabled in the center. The Eligible Forces available to fire are included in the upper-left corner, and in this example, the sole German unit selected is shooting from 2 km (two hex) range.

Let's savor some of the details depicted on this screen for a moment. This particular shot is from a modified version of the Stavelot scenario - the smallest battle included with the game. The single formation highlighted under Attacking Forces is shown in the bottom-left box and ready to shoot with its three 81mm mortars, as part of an editor-modified and enhanced 11th VolksSturm Battalion.
In this case, full LOS, height affects and several other modifiers matter in what is otherwise a tiny firing mission. Experienced users are split on whether the player should highlight and attack with every ranged unit individually for maximum effect, or instead, avoid micromanagement and fire with all the available units listed in the Attacking forces box. In this case, the result of our three-tube mortar mission is masked because the fog-of-war setting is on.
Nevertheless, this is a battalion-level game with the granularity approaching a squad-based title. The possible outcomes of every combat are nearly limitless.
And besides the combat resolutions, there is the amazing amount of data tracked when accessing the Stats tab at the top of the main screen. More than 165 unit types are listed alphabetically, from the 105mm Howitzer to the German Wirbelwind. Losses and kills can be tracked for each type of infantry squad, artillery piece or armored vehicle in the game using an easy-to-read graph.
The Stats screen also gives commanders a quick way to access the equipment being used in the game by unit type, as well as its effectiveness. In terms of numbers tracked, this game arguable drills as deep as Matrix Games' legendary War in the East series, except the information is generally easier to digest.

The Editorial Suite
And oh, how sweet it is. Most players won't even touch the Simple Editor, as well as the Troop-Type, Historical Unit, Officer, and Map editors. And the primary reason is the legitimate desire to be chained by historicity. And we respect that.
Nevertheless, this writer is now officially off-the-leash. It's Patton's Third Armored Division against the Wehrmacht's finest panzer troops untouched by bad weather and previous casualties in a colossal meeting engagement with Bastogne as the prize. This imaginary scenario is easier to set up than one might think.
The editors give players the ability to change nearly everything about the forces involved in a scenario, as illustrated by one of the many available editing tools shown in the screen shot below:

One can also use some restraint and just give the Axis some extra fuel, or political and command points, to see if it can accomplish what turned out to be a near-impossible historical mission. All it takes is a few key strokes.
Using the Table function in the Simple Editor also makes it easy to scroll down a long list of scenario-specific modifications. Want to swap out a particular division's Panthers for Tiger IIs? It literally takes a few seconds. In fact, most budding scenario designers can stick to the "Simple" Editor and modify a vast number of game parameters.
For example, by selecting Map and then Units from the upper tab in the Simple Editor, one can quickly remove, relocate or chose from a satisfyingly-long list of new combat formations and historical leaders to include in an edited scenario.
The screen shot below shows a partial list of historical Wehrmacht leaders included with the game, along with their statistics. American, British and SS officers are included in separate files.

As of this writing, the official documentation for the editors can be found here:
https://www.vrdesigns.net/dc/doku.php
Other than graphics mods, all the important files one will be editing, overwriting or renaming are all located in the "ardennesscenarios" folder in the main game directory. This makes it easy for modders to back up the original files and save their modified works-in-progress, as only one folder needs to be protected from unintentional overwriting.
The modding of game files at this stage of the release using the Simple Editor is easy enough, but few players typically take advantage of the power inside this utility. What experimentation with the basic editor does show is just how robust the AI appears to be: Even when modding the small West Wall scenario into a mammoth slug-fest, the computer opponent somehow refuses to be confused with all the tinkering. So one can imagine just how well the AI handles the stock scenarios. And PBEM as the Axis may well be the greatest and most enjoyable challenge board wargamers have yet to face in the digital game arena.\
And that is by far the strongest "must buy" recommendation we can currently offer.
Decisive Campaigns: Ardennes Offensive
From matrixgames.com


Follow Us