second chance games

Search This Website of delight

Showing posts with label WWII. Show all posts

 VON MANSTEIN'S TRIUMPH FROM NAC WARGAMES Initially, I was drawn to Von Manstein's Triumph purely by the bold dynamic box art.  It ...

VON MANSTEIN'S TRIUMPH VON MANSTEIN'S TRIUMPH

For your Wargamer, Toy soldier collector, MiniFig collector, military history nut. Reviews, interviews, Model Making, AARs and books!

WWII

 VON MANSTEIN'S TRIUMPH

FROM

NAC WARGAMES


Initially, I was drawn to Von Manstein's Triumph purely by the bold dynamic box art.  It may be good advice not to judge a book by its cover, but I'm more than glad that this striking picture caught my attention and made me explore further! 
The game is published by NAC Wargames, itself a branch of the Spanish Publisher, Ediciones MasQueOca.  Up to now, the latter company's focus has been on providing Spanish and Portuguese language versions of well-known designs. The company's avowed intent now is to focus on historical wargames that relate to the history of Spain.  
Though Von Manstein's Triumph may geographically and in terms of nationality lie outside this intent, I can only express my delight that this superb design from Francisco Ronco has been one of their choices.  It's also warm thanks to NAC and Ediciones MasQueOca for providing this copy for me to review.
First of all, its components live up to the extremely high standards of the company's past publications and secondly, the design brings a series of new twists both to the field of block units, area movement and card-driven games.
Though Manstein features in the title of a fair number of wargames, including at least two that cover the siege of Sevastopol, all those that I am aware of utilise the standard hex and counter system that is the basis of much wargaming design.
Starting with the components, every item ticks the box for excellence.  The map is a deluxe mounted version sporting a Spanish text version on one side and an English version on the other.

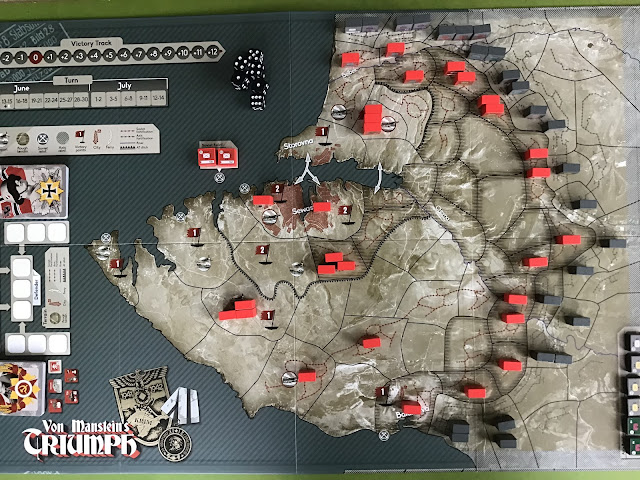
This direct, overhead view picks out clearly the sombre relief, the trench defences, clearly marked VP flags, ferry points and heavy soviet shore batteries, along with all necessary charts and a simple combat display for transferring your units to.  Your forces are wooden blocks of first-rate smoothness.  I mention this because of the tendency of several more recently purchased block games I possess to have slightly ribbed or striated surfaces - not as good for sticking power. 
An additional point in this attention to quality is the inside of the sturdy box, which instead of the usual plain white cardboard is printed with similar details to those on the Playbook.

A touch of box quality
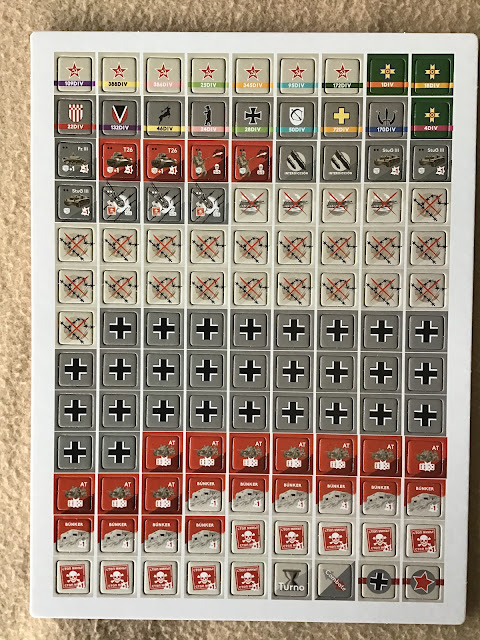
 As usual there is the familiar set of adhesive labels to apply, though as the photo shows this is a relatively low block count - so not an onerous task.  The units are based on divisions that possess from 2 to 4 individual blocks identified by colour-coding and a number of  independent units identified by white colouring.  It is this colour coding which brings my single criticism of the presentation.  First, the typical black dots that indicate the strength of a unit are very small and hard to make out against the generally dark background of the labels. but the major problem lies in distinguishing the colour-coding of the divisions when playing under artificial lighting.
Having initially played in normal daylight, they were perfectly identifiable and attractive, but later play on a wintery evening revealed the problem of clearly differentiating units, especially as divisions begin to intermingle.
On the other hand, praise goes out for the sheet of counter stickers containing two identical sets.  Although I've never had a problem with ones peeling off other games, this is always a nice sign of a company's careful attention to potential player needs.
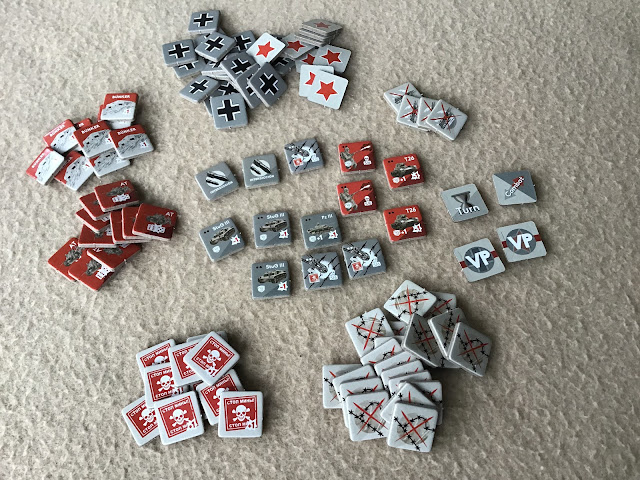
Next up is a single sheet of cardboard markers, ranging from the obvious turn marker to a colourful range of assets, including bunkers, anti-tank guns, armour and pioneers, as well as minefields, area control markers for the German player, and trench destroyed markers.

They all punch out perfectly with the much appreciated, rounded corners that are becoming a more familiar item from many companies.


At the heart of game play are the two decks of cards, one for each nationality.  I find the backs of the cards particularly appealing, with their strong feel of wartime propaganda posters.  

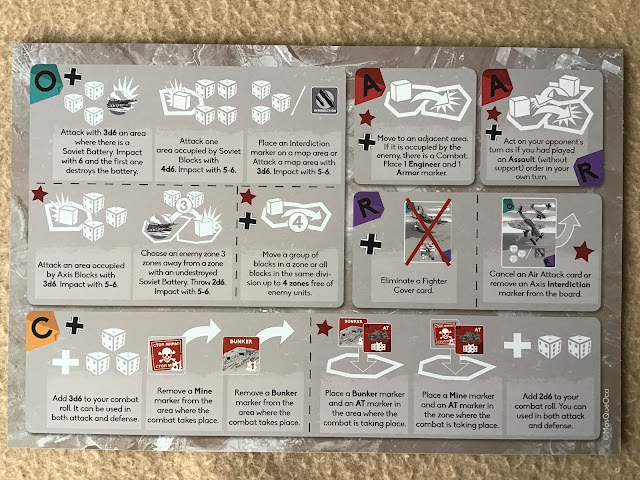
Included with them are similar-sized cards giving each player's card manifest, terrain effects, counter and marker effects, a very useful short-hand list of modifiers to the number of dice thrown in combat and finally the Sequence of Play.  All these and the larger Play Aids, one for each player that summarise the usage of all the different cards in the Player Decks, are helpfully printed in Spanish on one side and English on the other. 
Play Aid detailing usage of cards in the Player Decks
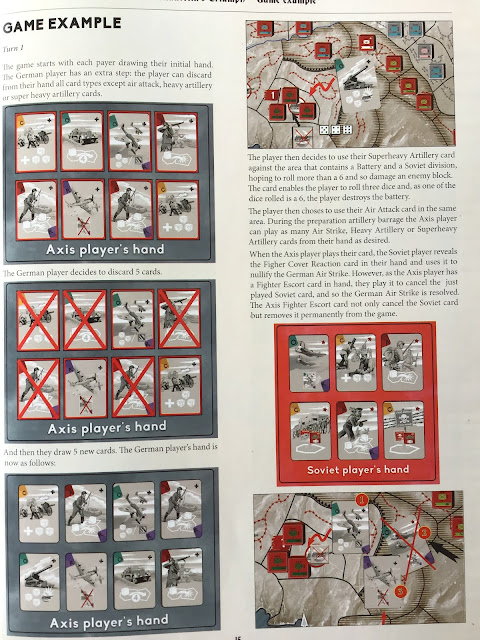
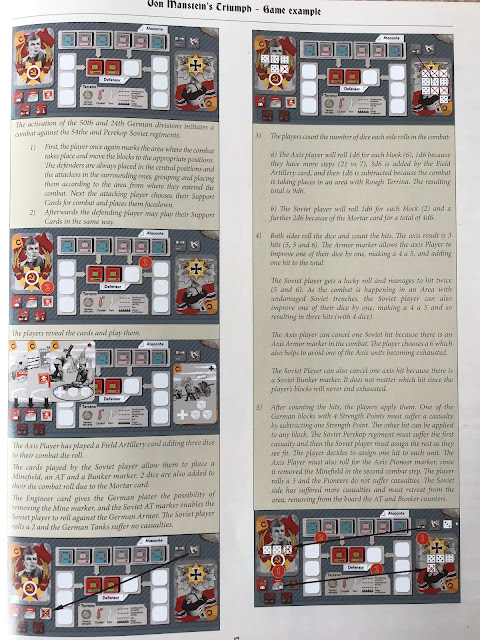
All in all, an admirable package, completed by what's becoming almost the norm in board wargames, a separate rulebook and playbook.  Both are very glossy products with an abundance of illustrations.  The Playbook starts with 5 pages of photographs that show the Set-Up map section by map section; a very useful asset indeed.  Next is a page and a half of Design Notes and slightly more than a page of Player Notes, followed by six pages of Historical Commentary.  All this is rounded off by a five-page example that takes you through the first turn of the game - once more a feature that is always welcome, however easy to understand the rules are.

These two photos show the consistently high level of illustration used throughout.


The Rulebook is supported to the same degree with pictorial examples and, basically, the Sequence of Play is ultra-simple.  Apart from a preliminary German Bombardment on Turn 1, each Turn follows two identical Phases; the German Action Phase and the Soviet Action Phase.  Each Player's Deck of cards contains four different types: Assault, Reaction, Order and Combat Support.  Though essentially simple, play is by no means simplistic and what might, at first, seem an igo-ugo system has a degree of back and forth play that means that both players are totally involved and engaged.
Another distinctive feature that helps the game to shine is the asymetrical design of the decks.  Both players have a core element of Assault cards, but even here there are distinct differences, as the German player has far more of these that are dual action allowing them to interrupt the Soviet Action Phase.  In the same way both the Order and Combat Support cards include a mix of near identical cards and those specific only to one player. By these means the decks create the appropriate emphasis between the attacking besieger and the defensive besieged. [Here I would love to see the system adapted for ancient or medieval siege warfare.]  A final point to make about the cards is that both players draw to full hand size at the end of each Player Phase rather than at the end of a complete Turn.  This adds greatly to keeping both players constantly absorbed in the game play
Player Aid summarising the effects of all the different cards
As the cards are the very heart of the system, I can think of few games that go to such lengths to make sure that you both understand them and then can use them with the minimal amount of effort and rule checking.   First of all, they are introduced in detail, step-by-step early in the rule book and then a three-page section at the end of the rulebook summarises each one.  As shown above, each player has a player aid that sums up the use of both his cards and his opponents, as well as most of the counters used in the game.

One of three pages summarising each card's usage

Oddly there are one or two German counters not included on the large player aid, though they are all clearly explained in the rule book and covered by the three small playing-card sized aids that cover Terrain effects, Counters and Markers and Combat dice.  Finally, each card in your Action Deck pictorially shows how to use it.  Consequently, after a few games, you'll find yourself playing smoothly with each card's use easily fixed in your head.  

Front cover of the Playbook

So, how does the game play out.  Being the besieger, the drive and onus of the action is naturally on the German player.  They have certain advantages, the most obvious being hand-size which is 8 cards as against the Soviet player's 6 cards.  They also have more cards that can inflict hits as opposed to the Soviet ability to place bunkers and minefields and, though both sides start in defensible trench areas, predominantly it's going to be the German player who's leaving their own protection behind to advance into the Soviet trenches.   As mentioned earlier, the German player also has more double-use cards that allow an immediate reaction during the Soviet player Phase.
Generally, the German player will be seeking to soften up areas with air strikes and heavy or superheavy artillery in order to weaken Soviet blocks and destroy the fixed coastal batteries printed on the map.  The Soviet player for their part has field artillery and the power of those coastal batteries, as well as the ability to place bunkers and minefields.  Other abilities from card play cover ATs, Stugs, fighter cover and fighter escorts and mortars, while the map itself includes those powerful coastal batteries that are so important for the German player to destroy, ferry crossing points an anti-tank ditch and a plethora of trench lines.
It is, like any siege, a difficult grind forward for the attacker, but the variety of action and play and counter-play of cards, all so simply, but effectively introduced whether as Actions, Orders or Combat Support, makes the experience a continually dynamic and tension filled one.   Whichever side you play, you'll find yourself fully engaged and immersed the whole of the game.
 

 V-SABOTAGE MINIATURE PACK FROM TRITON-NOIR As promised a few days ago, here is  more a gallery tour of the visual and physical delights of ...

V-SABOTAGE: MINIATURE PACK V-SABOTAGE: MINIATURE PACK

For your Wargamer, Toy soldier collector, MiniFig collector, military history nut. Reviews, interviews, Model Making, AARs and books!

WWII

 V-SABOTAGE

MINIATURE PACK

FROM

TRITON-NOIR
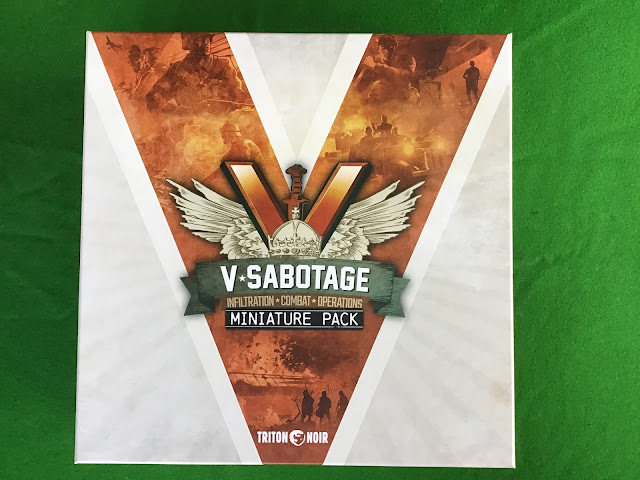
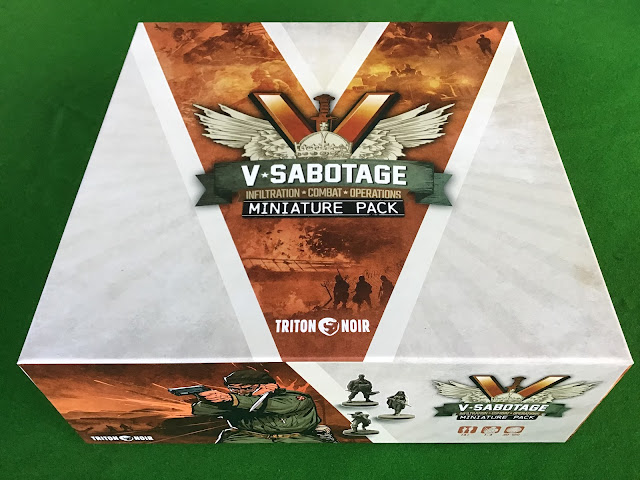
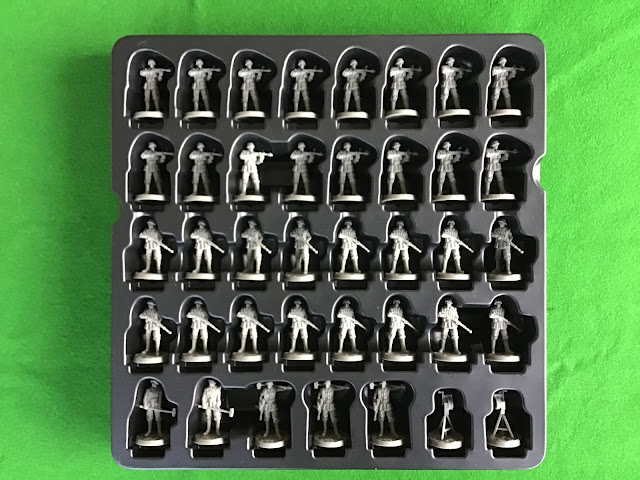
As promised a few days ago, here is more a gallery tour of the visual and physical delights of this latest expansion as the photos mainly speak for themselves.  So does the depth of the box which can better be appreciated from this angle.

Because of its contents including two trays of miniatures, this is not just the largest expansion, but substantially larger than the core game box. Also, because the fact that the heart of this package is the 65 miniatures, I feel I need to quote my original comment on the game in 2017:

"Certainly, the very good quality, circular, cardboard discs that represent the many single-man figures in the game are high on that list.  I had imagined buying and painting some commando figures [of which there are many fine products on the market], but soon decided that I much preferred what you see here."

I confess that I still rate the Commando counters very highly for their size, solidity and vibrant colours, but with what I can show you now I'm not going to be letting these miniatures sit idle in their perfect moulded containers.

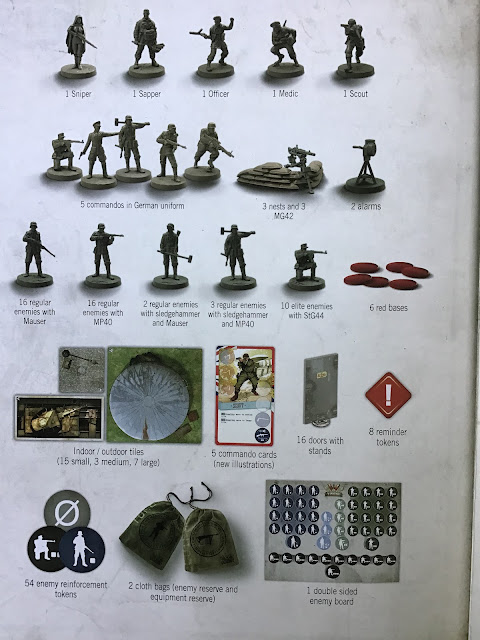
This first set contains all your relentless enemies in four different poses, plus 2 alarm units.  I particularly like these models of hand-cranked alarms that immediately have my ears resounding to their imagined wail!

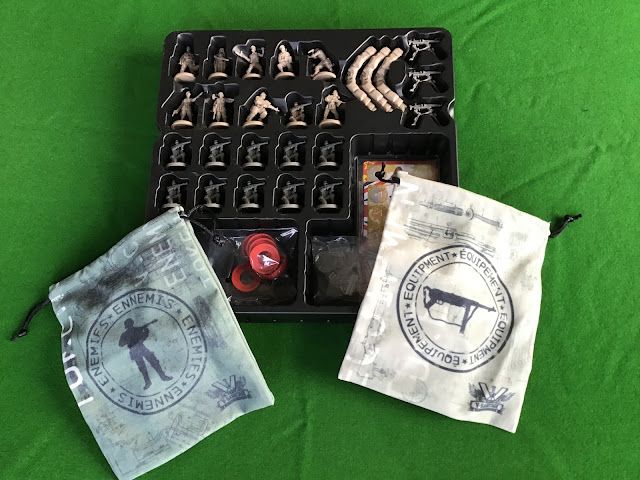
The second container holds five very individualised Commando figures, plus a further five figures representing the Commandos when disguised in German uniforms.  In addition, there are ten models of elite German troops armed with StG44s and three sandbag machine gun nests with separate MG42s.
Also visible in my photo are two good quality cloth bags to hold enemy reserve and equipment reserve and, just about visible, are the red plastic base rings that are attached to a Commando when he/she becomes visible and removed when the Commando returns to stealthy status.
Though the figures are the major draw of this expansion, there is considerably more to the box's contents than plastic.  There's plenty to satisfy my liking for cardboard. There are 54 enemy reinforcement tokens and a double-sided enemy board and, even more to gain my applause, a total of 25 new indoor/outdoor tiles, comprising 15 small, 3 medium sized and a superb 7 large tiles. 

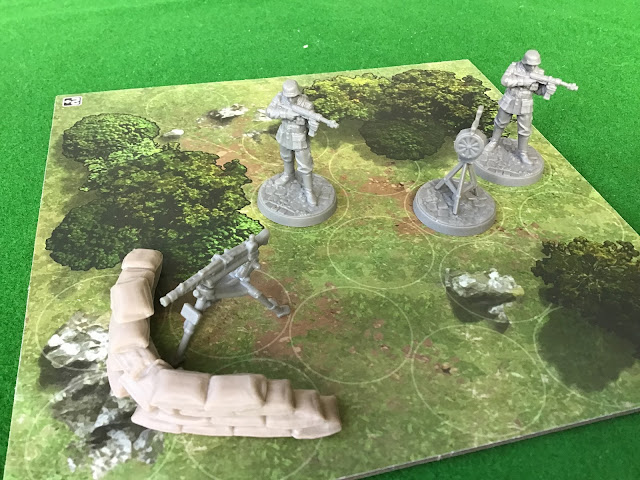
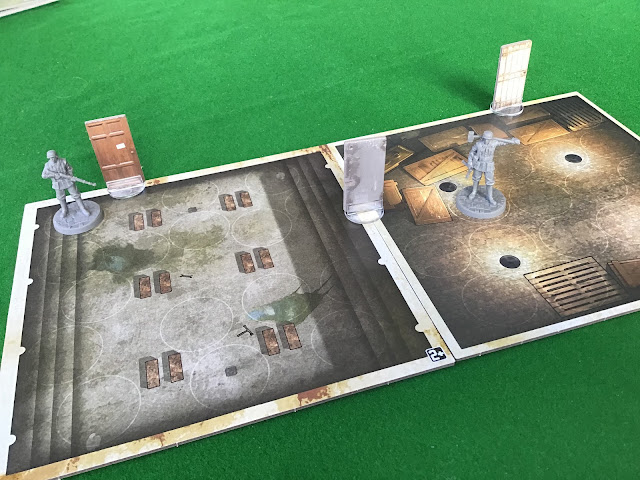
To illustrate just one of the large tiles on its outdoor side, I've included a couple of German soldiers, along with an alarm machine and a machine gun nest.  While the next shot presents two large tiles on their indoor side, plus two of the different German soldier poses and the three types of doors.

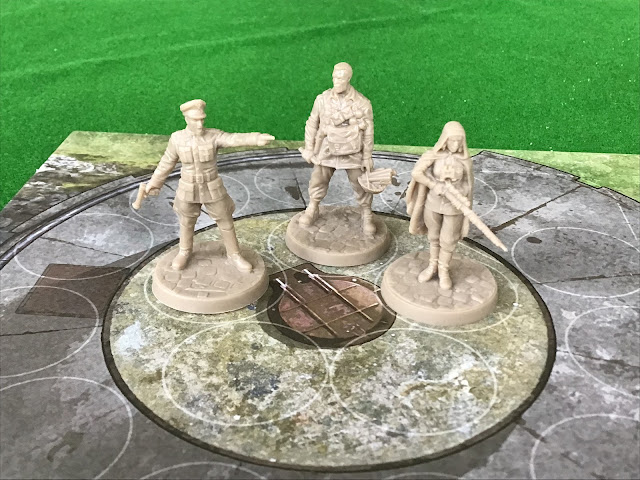
And finally, what I hope you've been waiting for, a glimpse of the Commando figures: the first one on the left is in German officer disguise, while the other two are only too obviously undisguised!

Another very impressive large tile helps to provide a dramatic background to two more Commandos facing off against two German troopers.


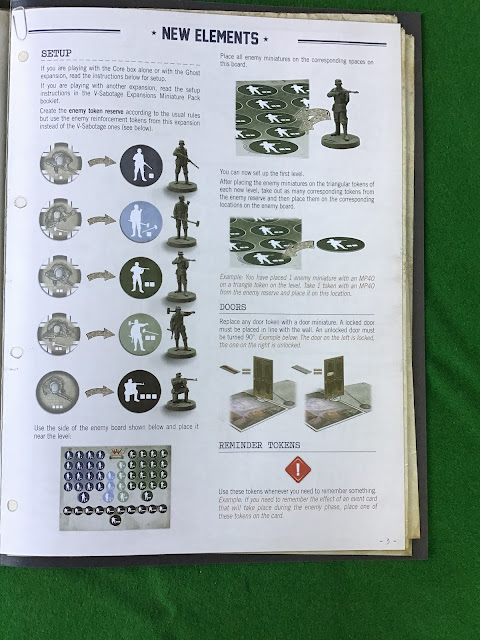
The last item in the box is the rulebook, though not quite what you might be expecting.  It's a mere 4 pages, of which one page is the front cover and the second page [which really, really does not do justice to what is in this package] shows the contents of the box.


And the final two pages explain how to utilise specific aspects of the figures and tokens.


This Expansion is the icing on the cake with the cherry on the top and will be very, very hard to resist and so, it is with an extra big thanks to Triton-Noir for sending me a copy to review and I hope that my photos have given you an appetite for a more personal acquaintance with this addition.


V-SABOTAGE:GHOST EXPANSION   from TRITON NOIR If this series is new to you, I'd strongly recommend a read of my earlier review of the co...

V-SABOTAGE: GHOST EXPANSION V-SABOTAGE: GHOST EXPANSION

For your Wargamer, Toy soldier collector, MiniFig collector, military history nut. Reviews, interviews, Model Making, AARs and books!

WWII

V-SABOTAGE:GHOST EXPANSION 
from
TRITON NOIR
If this series is new to you, I'd strongly recommend a read of my earlier review of the core game, V-Commandos [note, too, the change of name to V-Sabotage] to understand the basics on which all subsequent expansions build.  It goes without saying that the core game is essential for the play of any expansion, including this one.

So, what does this latest expansion add.  Well, once more, quite a lot!  More cards, more tokens, more commando operatives, more terrain tiles, more missions, more dice and more rules.  For once, I'm going to start with the rules, as I think these are the most cogent reason for buying this expansion.  Why?  Because they offer three modes for playing: XP Mode, Lone Wolf Mode and Campaign Mode. 
XP MODE
This allows your commandos to gain new abilities [XP = experience].  These are provided in the form of two decks of Experience cards.  As you complete 1 objective of a Level card, one of your commandos draws a card from each deck and keeps one of them.  Apart from the cards, another new component are 18 double-sided commando display sheets. Each commando can possess only a maximum of 3 cards, but can always draw two new ones, choose one and discard one of the those already on his/her display sheet.  A neat counterbalance to the benefits of XP Mode is that you also randomly draw a Danger Token - definitely not a benefit!
I don't think most of you will find it too difficult to know which film and actor influenced this Commando Display Sheet! [Just in case, the answer is at the end of my review*].
If you're playing cooperatively, you will need to decide an acceptable method for deciding whose Commando gets to draw and keep the card.  Randomly with the roll of a die is one obvious solution, the Commando whose action actually completes the objective is another, though this may affect game play and introduce a note of competition.  I'd never really contemplated this before, as I'd always seen cooperative play as involving the players spending some time discussing how they would proceed.
LONE WOLF MODE
As I often play solitaire, running two or three Commandos, those new Commando Display Sheets are a nice addition for keeping track of items.  However, Lone Wolf provides just my cup of tea... all you are allowed is one Commando [plus, if you wish, a trusty dog called Gander!] for the mission, whether it be a single level, an operation or a campaign.  

One trusty dog, as mentioned!

What to do is covered, whether you're playing with the core box or one of the previous two expansions and you must always incorporate XP mode rules.  Do I need to say that this part of the expansion is definitely for the experienced player!
Even better, among the several new Operations, one is a special Operation, entitled Operation One-Eyed Ghost from which the expansion gets its name.


Based as always on an historical background, there is an excellent one-page outline of the war time career of Leo Major, whose story steps straight out of any book entitled Amazing Tales! Enjoy, if you dare.  Too tough for your liking, well you can always add in some extra commandos for back up.

CAMPAIGN MODE
This really is very simply the sequencing of several Operations, making sure that you maintain the same number of commandos and accumulating all that you acquire as you move from Operation to Operation.  In itself nothing greatly original in the idea, until combined with the final section of this Expansion's rule book: Challenges and Medals.
The Challenges are divided into six categories: Combat, Equipment, Game Modifiers, Levels & Operations, Commandos and finally Stealth.  Each Challenge successfully completed has an accompanying number.  These are ticked off on the Medals chart working your way up from King's Recommendation for Brave Conduct to the ultimate Victoria Cross.  There is even a set of stickers to apply as you gain a medal!  And if you don't want to spoil your rule book, you can always download a copy of the medals page from Triton-Noir's site and, in case one sticker set of medals isn't enough, the game provides three.  


It's these little touches of completion and thought for gamers that I really like about Triton-Noir's production levels.  It goes without saying that every aspect of this Expansion adheres to the first-class production quality of the original core game.  The striking monochromatic artwork is reflected in the pairs of new Operation cards, Level cards, Event cards and XP cards.  


The many new tokens are as large, solid and colourful as ever, especially those for the Bonus Commandos and SS Enemies.  Similarly, the additional double-sided tiles for creating the terrain for the Levels are top notch; especially this large tank one below.


.... and if this Expansion isn't enough for you, just wait for my next review featuring the next addition to the series - Expansion: Miniatures Pack!

As always, a big thank you to all at Triton-Noir for providing this review copy.
-------------------------

*Commando Display Answer: Clint Eastwood in Where Eagles Dare
 
And just in case, you need more cinematic reminders of that excellent film, one of the new Level cards just happens to be ... 
the Cable-Car!

  Monte Cassino A German View by Rudolf Bohmer   This is an older book that was published in German in 1956. This translation is exactly wha...

Monte Cassino: A German View by Rudolf Bohmer Monte Cassino: A German View by Rudolf Bohmer

For your Wargamer, Toy soldier collector, MiniFig collector, military history nut. Reviews, interviews, Model Making, AARs and books!

WWII


 Monte Cassino


A German View


by Rudolf Bohmer


  This is an older book that was published in German in 1956. This translation is exactly what a reader who is interested in the Italian Campaign and the Battle of Monte Cassino is looking for. Despite the name of the book, the author goes into the entire Italian Campaign from the invasion of Sicily to fighting for the heights of Monte Cassino. The author was actually a German officer during the campaign. So he has first hand knowledge of a lot of the battles for Italy. 


 He starts the book with the choices that the Allies had in 1943. Whether to attack Italy proper, Sicily, Corsica and Sardinia, or the Balkans. Churchill fought long and hard for an invasion of the Balkans, but the American brass would have none of it. The author shows how the Germans were confused by the tentativeness of the Allies, and how they helped the Germans repeatedly to fight the battle for Italy on their terms.


 Monte Cassino was one of the linchpins of the Germans' 'Gustav Line' of defense across the width of Italy. The tenacious German defense, and offensive at Salerno, allowed the Germans to build a series of defensive lines, each tougher than the last. 


 Even though he was a German officer, the author has nothing but praise for the individual Allied Units. In the Italian Campaign the Allies had a polyglot group of Units from across the globe. According the the writer, the French North African troops came very close to capturing Monte Cassino on their very first attack. Unfortunately, they had far outrun any of their supports on either flank. This meant that the battle became a hell on earth for the common soldier for the next few months. 


 The next part of the battle that he goes into is the very controversial, even at the time, Allied decision to bomb the monastery at the top of Monte Cassino. The author quotes scripture and verse about how the Germans helped the monks move everything valuable out of the monastery and turned it over to the Vatican. All this, in the middle of a battle. The truth of the Germans helping with the removal, and the fact that there were never any Germans inside the monastery until after the bombing, has been proved factual after the war. The bombing of the monastery was actually one of the few propaganda coups that the Western Allies handed the Germans during the war.


 This is for the reader who wants to know the intimate details of the Allied and German strategical choices and plans about the Italian campaign. If someone wants to read about the minute details of the tactical battle for Monte Cassino, this is also the book. The author has an uncanny way of moving from large overviews about the campaign to boots on the ground without skipping the proverbial beat. To refer this book to anyone interested in either parts of the campaign is a no-brainer. This is a very well written and detailed look at it. Thank you very much Casemate Publishers for letting me review it.


Robert

Book: Monte Cassino: A German View

Author: Rudolf Bohmer

Publisher: Pen & Sword

Distributor: Casemate Publishers


 COMPANY OF HEROES FROM BAD CROW GAMES To quote from the post on BGG: "Bad Crow Games is a consortium of game designers and publishers ...

COMPANY OF HEROES COMPANY OF HEROES

For your Wargamer, Toy soldier collector, MiniFig collector, military history nut. Reviews, interviews, Model Making, AARs and books!

WWII

 COMPANY OF HEROES

FROM

BAD CROW GAMES


To quote from the post on BGG: "Bad Crow Games is a consortium of game designers and publishers from Utah. The staff comprises multiple entrepreneurs and game designers that have previously published their own titles.
The group has come together to design games off of their new real time strategy mechanic that allows players the experience of RTS action video games in a board game format."
As a player of computer games who actively seeks out turn-based military games that recreate on the PC the hex and counter experience I love in board wargames, I may not be the best to comment on this reverse process.
What I can say is that Company of Heroes hits all my sweet spots and it's a great round of thanks to Bad Crow Games for providing me with this review copy. This is their second game to be published and what a choice and what a publication!
The immediate visual factor bowled me over.  This is the incredible stack that emerged from one of, if not the heaviest game parcels I've ever received.  For this review I'm going to focus on the massive core box, but hope to explore later the additional Cooperative/Solo expansion that was one of the generous bonuses included from Bad Crow Games

What emerges as these boxes are unpacked is astonishing, what's even more amazing is that the contents in the core box that I'm going to show you all repack in a way that I wouldn't have believed possible.


This is nearly everything, just from the core box which is one of the deepest I've come across.  First of all, that stack of maps contains four, each 30" x 20" and double-sided.  Each pair combines to form a 30" x 40" map: Stalingrad, Monastery, Trois Ponts and Hill 331.  The first three have clear historical origins from the Siege of Stalingrad, Monte Cassino and the Battle of the Bulge, while the last comes from the COH2 PC version, though the board game map itself doesn't seem to mirror the computer version as far as I could see..

They are all stunning to look at with large 3" hexes; Stalingrad [seen below] and Trois Ponts being my personal favourites.


The Mission Booklet provides  a wide range of scenarios from small ones using half of a single map to massive 4 mappers.  My only disappointment is that most of these Huge Scenarios demand maps from two copies of the game!  [That said, I'm lucky that a close friend and fellow gamer has his own Kickstarter copy,  so somewhere down the line everything is possible - just need a huge table now!] 

Next up comes the four sets of units for the four nationalities:  British, American, German and Russian.  Each is perfectly accommodated in its own separate plastic storage box.


Above is the German box.  Notice the tray on the right that houses each soldier perfectly making both storage and game play so smooth.  Just lift out what you need as required and slot back in as a unit is destroyed!  Incredibly compact, it helps to keep the fairly large footprint of this game down to a reasonably manageable size!

Apart from appreciating this major benefit,  I was stunned by two things: the variety of vehicles offered for each nationality and the quality of their casting.  Not only do they look great, they are of a weighty heft that I have not found even in many models designed purely for figure gaming!

Equally impressive is Terrain Pack 1 which was part of the amazing package Bad Crow Games sent me.  I had expected mainly good cardboard overlays, but instead we're treated to nine two story buildings in plastic.  Each has a removable section of wall to allow placement of infantry units inside to add an element of FOW [fog of war].  If you don't want to add in that advanced rule, the unit just sits neatly on the roof.


In addition you can see an assortment of barbed wire, sandbags and tank obstacles.  The strange central items are a key factor in the resource/victory point management element of the game - more about those later.

Returning to the core box itself, you'll find the next tray contains a fascinating array of mainly specialised dice and coloured cubes, along with a set of clear transparent bases for your various vehicles and infantry units.  The plastic bags contain figure markers to add to infantry bases to show machine gun and mortar units and notice the two sand timers.  Quality and storage are again first class - though here I have virtually my only concern about the contents... please supply more of the transparent bases, particularly those for vehicles.  I know that they are not as necessary for vehicles, but they are a great addition to the game.

As COH unfortunately wasn't available other than by Kickstarter, I shall have to wait until the upcoming Kickstarter COH 1.5 where, I've been assured, the popular demand for more will be satisfied.  Thanks Bad Crow to listening to your fans.


On top of all this are two sheets of cardboard items which when punched out look like this...


... and neatly fill the remaining empty spaces in the previous tray.


Finally rounding out all this hardware are four HQ boards, one for each nationality, 12 Building Cards and 20 Commander Cards, which I'll explain in more detail when I look at the game's system and rules.

These come in three handsome booklets providing Basic Rules, Advanced Rules and Missions.  All three mirror the game's component quality being printed on thick glossy paper, with even more substantial card quality outer covers.  The rules themselves are abundantly illustrated throughout and follow the easy to understand chronology of the sequence of play.  This is a game that can please and be enjoyed and understood by 
 both newbies and grognards.

Looking beyond the deluxe quality, we come to what sets Company of Heroes as much more than what might place it as a super rival to Memoir 44 or Tide of Iron.  The game's system is built on a familiar basic format.

ROUND
Manoeuvre Phase;
Turn 1
Turn 2
Turn 3
Damage Phase
Supply Phase

A very familiar outline, but each Phase introduces novel elements and successful developments.  Also, it is important to note the use of "Round" for the more familiar word "turn" [which has a different use to divide up the stages of the Manoeuvre Phase, as will be explained further in the next paragraph].

First of all, Manoeuvre springs an immediate surprise - each Player begins a Round with nine Command Points to be spent on moving in the Manoeuvre Phase.  These points are spent over those 3 turns with a maximum of 3 pts spent per turn.  You cannot hold back points to spend in a subsequent turn - so, for example, no spending 2 pts in turn 1 and then 4 pts in turn 2 and then 3 pts in turn 3.  Nor can any individual unit, with a few special exceptions, spend more than 3 pts of movement over the whole Round.
Here an M10 Wolverine has used its maximum 3 pts of movement in a Round and falls just short of being able to enter and take control of a Munitions control point.
Each player spends his/her parcel of 3 pts alternately.  I've already found this produces a new and enjoyable tactical element to moving, as players jockey for position.  Do you counter your opponent's direction of movement?  Do you pursue your own separate goal?  Can you deceive your opponent as to your main goal or are you being lured astray by your opponent?  A great sense of interaction is easily and effectively developed with minimum effort and very simple rules.  

Closely allied to these movement rules and adding a further influence on where you may decide to move are the rules for the third Phase of a Round: namely the Supply Phase.  Being used to the conventional and while nigh universal concept of supply in board wargames being trace back to a supply point or suffer some penalties either in movement and/or combat, COH's approach reflects both its computer origins and a strong dose of Eurogame influence.

Here's where those strange looking objects shown earlier come in.


They mark in 3D where various types of supply are located; the range includes Manpower, Fuel, Munitions and Victory Points.  Also, when you capture a supply hex, you place a coloured flag to indicate control.  All the mapboards have such locations' symbols printed on them and these are the default locations.  However, many of the scenarios introduce different locations and provide a cardboard marker to show the type of supply.
This feature of the game is a great illustration of Bad Crow's willingness to go the extra mile to try to cater for and satisfy individual player's preferences and can be exemplified in the photo below, taken from a close up of the Stalingrad board.


At top right you see the printed supply location of a hex that contains both Fuel and Victory Point symbols.  To the left is a location with a marker showing Munition Supply and the 3D flag pole, plus a red flag showing which Player controls it.  Finally, on the far left, you see the Manpower marker [the fist on an olive green background] and for those who might find the 3D marker not to their taste, you have the alternative of a cardboard control marker.  
This striving for different types of supply is for me a crucial and rewarding aspect of the game, as these locations and fighting for them directs and fuels the major thrust of the game.  It also influences and drives other key decisions made in the Supply Phase. Each Round you adjust the different types of Supply Income according to what you already control and what you have newly captured.  Inevitably, a Supply Point captured from the enemy increases your Income by one, but also decreases your opponent's by one.  These points are then added to your stockpile and used to buy a wide range of items.


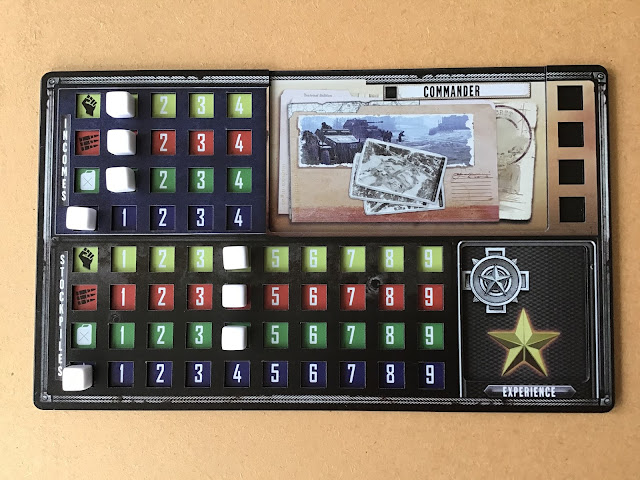
This is where the well designed HQ Board, shown in the photo above,  plays its part.  The white cubes mark your Income in the upper part of the display and your Stockpiles in the lower section.  Default starting points for scenarios are as seen.  Again Bad Crow Games have produced the perfect model by using recessed boards and good cardstock mounted on plastic bases. 

So, fighting for Supply has been made an important and rewarding part of the game, providing not only a narrative drive, but opening up a new dimension in subsequent game play.  The wide range of choices and how the designers have factored them in are another major reason for my rating this game so highly.  This brings me to the next original element: the Building Boards.


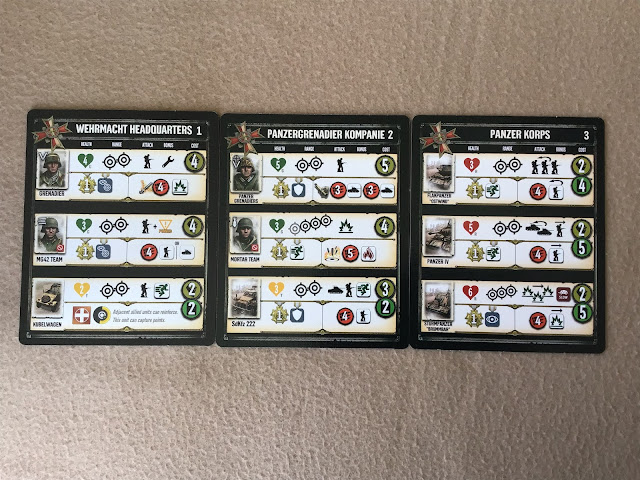
Each nationality has three each and at the start of a Scenario, you have access only to the first Building Board.  In the photo, this is Wermacht Headquarters.  These give you all the information you need about each of your type of units that are currently available.  The default starting units for scenarios are any two infantry type units.  Reading along the top line, you start with the unit strength, its range for fire, its type of attack, any special ability and cost to buy.  The second line divides into two sections: on the left, upgrades that can be built with Experience points [this is an advanced game rule] and on the right, basic rule upgrades bought with Munition points.

New units don't just appear according to some preordained scenario schedule, but have to be bought from combinations of different types of Supply.  Showing its PC origins, the terminology used in the rules  for producing your reinforcements and where they appear which is actually printed on the Mission booklet maps is the word ... SPAWN!  [Urrh! Sorry, guys, but this just conjures up sinister eggs, face-huggers and aliens!  Please this is WWII.]
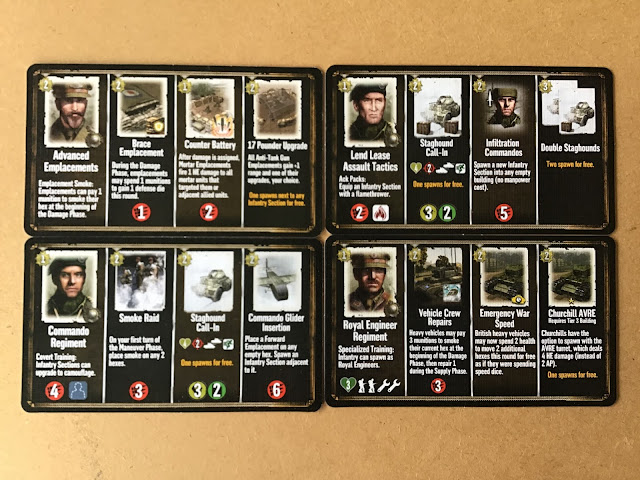
Anyway that's what the Supply Phase is all about - logging your current Supply income, adding it to your stockpiles, buying reinforcements and buying their available upgrades. There are two final vital actions that can be performed in the Supply Phase.  One is to unlock your 2nd and 3rd Building Cards which will provide a wider and stronger range of units to buy.  The other action is introduced in what can best be described as a coda to the Basic Rules.  This involves Experience Points that are gained by damaging and eliminating units and can be spent either to unlock further unit upgrades or to buy abilities from the last component in the core game: Commander Cards.  Each nationality possesses several of these, but only one can be chosen for any scenario.


It is very much these Building Cards and Commander Cards that give each nationality its individuality, flavour and variations.  Again, this is a major plus for the quality and scope of COH.  Should this not be enough for you, the core box rounds off with a slim Advanced Rules booklet that adds mainly minor refinements to rules for some some units, such as arcs of fire, retreat for infantry in addition to manoeuvre, refined pinning, slow units and turrets. The two new introductions are damage to buildings and the ability to build battlefield defences like sand bags and razor-wire.  
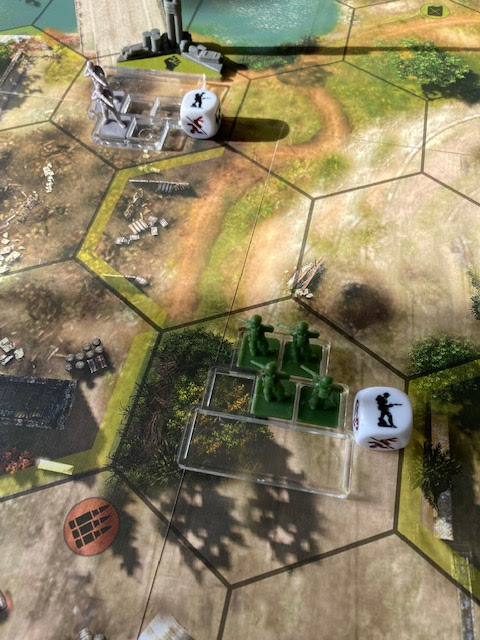
Having skipped from Phase 1 Manoeuvre straight to Phase 3 Supply, to complete my exploration we need to return to Phase 2 Damage.  In other words, what's normally titled Combat.  In keeping with the originality seen at every step so far, Damage has plenty of newness to offer.  No CRTs [Combat Results Tables], no conventional six sided dice, no attack nor defence strengths.  Instead both sides place their Damage dice in the Damage Phase into the hexes of those units they can and want to attack, with the appropriate Damage symbol uppermost. There are just 4 types of damage: Anti-Infantry, Armour-Piercing, High Explosive and Flame.  A display shows what a particular type of unit can attempt to defend against and what it must automatically take a hit from.  As there are only four types of unit: Infantry, Light Vehicle, Heavy Vehicle and Emplacement, this results in an ultra-simple 4x4 matrix to work with.  Placing damage dice and rolling for saves is simultaneous.  This not only replicates the real-time play of the original computer game, but also is perhaps a more realistic representation of combat. Below is a typical example of infantry combat, where both sides inflict an automatic hit.  Obviously this is an aspect of the game that will draw support from some and disapproval from others.  Personally, this balance of automatic and hits and those that might be saved is an effective and successful approach.


Consequently, the Damage Phase is remarkably swift and easy to execute.  Roll all the dice that can attempt to avoid damage and then take the hits that remain.  This Phase is very easy, very visual and very satisfying and I particularly like the fact that some of those potential upgrades I've discussed earlier include the ability to add defence shielding dice and increase damage abilities.  A great idea, illustrated below with an American infantry stand that has been given a shield upgrade.


Oh, one last item - the sand timers.  If you want to recreate a flash of the hectic play of the original realtime computer game, then these can be used to hasten play along.  Never having had lightning reflexes, this is not a factor for me and would detract from the pleasure of move and countermove that the game so satisfyingly creates.  But the choice is there, which is one of the many strengths of this design.  Though COH is primarily a game of tactical warfare, it also has the flexibility of a superb sandbox to create your own scenarios with designated supply provision, reinforcement entry, specific goals and much more.
At the moment, however, I'm still happily exploring the Mission booklet and learning the strengths and weaknesses of the different nationalities and the different forces each can field. 
Unfortunately, the one and only draw back is that this was not produced for retail sale.  On the other hand the good news is that a Kickstarter for COH 1.5 is in hand.  I shall certainly be exploring some of the expansions and getting some more of those promised additional excellent figure trays.  If you haven't yet bought into this system, I would strongly recommend it as high on any list to consider for its superb quality, accessibility, scope and innovation and sheer pleasure to play.  


 CARENTAN Great Battles of Small Units from STRATEGEMATA This is the most recent game from Strategemata in this splendid series of small sca...

CARENTAN CARENTAN

For your Wargamer, Toy soldier collector, MiniFig collector, military history nut. Reviews, interviews, Model Making, AARs and books!

WWII

 CARENTAN

Great Battles of Small Units

from

STRATEGEMATA


This is the most recent game from Strategemata in this splendid series of small scale engagements from WWII.  Previous games in this series featured Polish units[a link to my review exploring the system can be found at the end of this review], but inevitably Carentan is exclusively an American affair.  Even more than the first two, the focus homes in on an even smaller geographical area, resulting in a map that I find particularly interesting. 

In physical terms, the components remain the same adequate, but modest quality that I have commented on in my previous review of this series.  They are functional, but lack the gloss and glamour of the major companies.  Only the move to full colour box art and an artistic depiction of action and drama adds a brighter touch.

The contents are identical in every way - an approximately folio size map of predominantly green background, a brief eight page, plain paper rule book, including a substantial number of simple, minimal-looking, illustrative examples and  small thin counters.  Once again unit I.D. is in very small print and the important colour coding unfortunately uses too many similar shades of blue.  

At set up, these start out reasonably clear because of physical grouping, but as units become intermingled in the course of play I found that a good degree of care was needed to make sure that I didn't inadvertently activate the odd misassigned unit.
Plain eight page rule book

One of two counter sheets

Perhaps the strongest of the components are the card-based player aids, in particular the double-sided set-up display for the two scenarios.
 

The set-up display and turn track for the main scenario

I'd strongly recommend a look at my previous review of this system with its innovative elements - a link to which can be found here Black Cavalry.   If you do, you may wish to pass over the next section where I'll briefly recap the key features of the system and their defining originality.  

Most notable is the lack of any dice.  Instead you'll need to supply for yourself a standard pack of cards which are either drawn from the deck or played from your hand to resolve the various game functions.

Each player starts the game with a set number of cards in their hand and there will be very limited opportunities to replenish or exchange these cards as the game progresses.  I like this slight ability to control the outcome of a limited number of your chosen actions and the awkward decisions of which choices and when to take them.  

However, possibly the most important of your choices will be how many formations you decide to try to activate when you have the initiative. A single formation can be automatically activated for free, but a single formation rarely provides many units.  More than one formation means you'll have to pay for all, including the first one.  Activation costs also cover Artillery and Air Strikes.  

So, add up all your costs and draw a card - here's where a nice powerful 10 pt card in your hand may well tempt prompt use!
Fail to get a draw high enough to cover all your costs and you get none of them.  Push your luck takes on a whole new meaning.

This is one of my favourite features of this novel game system and it closely interacts with the next novel element.  In fact, this combination is the single strongest reason that I enjoy and value the game. Only the player with the current Initiative actively undertakes the turn.  The other player can only react.  This may happen in two ways.  

Initially, the first time an active unit moves into line of sight and fire range of an inactive unit, the player without the initiative may draw a card [no playing a card from your hand] to determine Defensive Fire.  The result from 0 - 3 will allow you to place a marker that shows how many fire attacks the unit may make this turn. Alternatively you may forego Defensive Fire and choose to wait until an enemy unit moves adjacent so that you can retreat one hex. 

The third major feature is the handling of Initiative, using the four card-suits, Hearts, Clubs, Diamonds and Spades and a chit for each suit, with the German and American flag on opposite sides.  An initial pre-game card draw, usually of 3 cards at the beginning of the game establishes a starting set.  In Carentan, the Allied side of each Initiative marker will be uppermost depending on which cards are drawn. So if the 3 cards drawn showed a club and two hearts cards, the Club and Heart markers would be set with the Allied flag uppermost and the Spade and Diamond markers would be set with the German flag uppermost.  

As the game progresses, whatever card is drawn at the beginning of a turn to determine who has the Initiative, its marker is flipped to the reverse side.  Following our example from above, if a Heart was drawn, the Allied player would have the Initiative for the turn and the Heart marker would be turned over to show the German flag. As a result, on the next turn the four markers would now show only the  Club's marker for the American player and the other three suits' markers would all show the German flag and so the initiative draw would be much more likely to favour the German player.

For the rest of this review, I shall concentrate on the specifics of the situation in Carentan.  The major scenario is named Purple Heart Lane and covers 10th - 12th June 1944. Obviously the first consideration is the particular geography of the battle, which can be seen below.

 This is a very different situation from those covered in previous games in the series and a two page historical sketch gives an excellent summation.  It covers the importance for both the Allies and the Germans, the geography of the area and the course of the battle for the town. To the north extensive marshland and canals  made approach extremely difficult and slow.  From the east, the avenue of attack is still limited, though less so.  The map scale is much smaller and in the very centre lies the objective of Carentan, with a damaged railway embankment running from west to east.

Defending the town and area is the best German unit available in that area, the 6th Fallschirmjager Regiment commanded by Friedrich von der Heydte [a name immediately familiar to anyone who has played any of the many games that cover the Battle of the Bulge!].

The very restricted terrain means that there is little room for manoeuvre, so each play-through offers little opportunity for variety of options.  It is a good, old-fashioned slugfest.  The Allies have to batter their way into Carentan and artillery is likely to play a more significant role than in previous games.  

The scenario plays out over 24 turns and I should also add that the American units that you can see are only the at-start units and the reinforcements that enter over the middle turns will more than double their final number.  Whereas this is all the Germans have to defend with, unless you add in the optional variant that may bring in up to 6 additional German units late in the game on turn 20!  It comes as no surprise that the Allied victory condition is to control all hexes of Carentan.  

However, the German victory condition isn't simply to prevent the American player from achieving their goal.  Specifically, the German player must control the road from Auverville on the south edge of the map to either of the two hexes where it enters into Carentan at 1111 or 1112.  I understand the historical logic of this, as it would have served the Germans little to hang on to a small portion of Carentan and not have a supply line/retreat avenue south.  However, it does make the German player's task even harder and makes me feel that at best the German might achieve a draw, which is the result if neither side manages to achieve their victory condition. 

For those who want a shorter playing experience, there is a scenario of 12 turns that covers the German counter attack.  The title for this one is Battle of Bloody Gulch [must admit this conjured up images of a John Wayne or Clint Eastwood Western shoot-out rather than a WWII battle!].  Here the Germans are on the attack with slightly fewer units than the Americans who also gain another six units very early in the scenario.  The layout can be seen below.

The only advantage the German player initially enjoys is that all the American units at the start of the this scenario are single step counters or on their last step.

Overall, though I miss the additional two, very brief scenarios of Black Cavalry, I really enjoyed the intensity of this head-on collision.  Counter density is slightly higher, but by comparison with the majority of hex and counter games, this is still a small game and this is emphasised by the essential design feature of activation which means that only a limited number of units will come into play in a given turn.  Above all, I recommend this fresh and innovative approach that is easy to learn and apply.  I certainly hope that further great  battles of small units will continue to appear.

Once more my thanks to Strategemata for their providing this review copy and their friendly commitment and support. 


hpssims.com