

Campaign Series: Vietnam
From Matrix/Slitherine Games and Developer Campaign Series Legion

The newly released digital wargame, Campaign Series: Vietnam (CSVN), comes complete with a storied pedigree: Originally coded by the legendary John Tiller 25 years ago, the latest iteration of the game engine evokes the "Vietnam Experience" like no other turn-based, tactical strategy game in recent memory.
Although CSVN sticks to its root at a scale of approximately 250 meters per hex, the game's developers have added many new tactical and operational layers to their labor of love. And yet, the UI in this latest version remains instantly recognizable, albeit easier-to-navigate than Tiller's first game released in 1997.
The painstakingly-crafted scenarios in the latest version of the Campaign Series (CS) match the rich history of the game's design and development. From the struggle of the French to re-establish their position in Indochina beginning with Vietnam in 1948, to U.S. involvement starting in the early 1960s and ending prior to the communist Tet Offensive in 1968, the 100-plus scenarios shipping with the game offer wargamers a playground with an unprecedented level of detail.

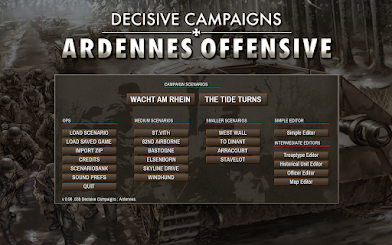
The familiar Campaign Series scenario selection screen: There are more than 100 detailed missions included with CSVN so far.
Add to this a wide variety of combat units with unique capabilities, including combat and transport helicopters, riverine assets, tunnel "rats," civilians, and supply units, and even the most hard-core Campaign Series veterans may have their hands full tackling the new tactical realities. These include, among many other challenges, flight limitations, no-go zones, IEDs, hidden minefields, and other combat elements specific to unconventional, asynchronous warfare.
What's more CSVN isn't some kind of half-baked, early access wargame debuting on Steam, for example.
To the contrary, the game engine has been expanded, enhanced, tweaked and improved based on input from experienced players for more than two decades since its first iteration - TalonSoft's East Front II - was released.
Is it perfect, yet? Well, not quite. But for the type of game it's designed to be, it's currently pretty close to ideal and getting better with every update.
As of this writing, there's also a few After-Action Reports (AARs) ready for viewing and just a mouse-click away at https://www.matrixgames.com/forums/tt.asp?forumid=1907
If these AARs aren't enough to convince newcomers that the asking price ($40 U.S.) is a worthwhile investment, then players new to the CS series are advised to read on.
However, for those who have enjoyed the previous versions of the series, the purchase of this installment is a no-brainer, provided that players are prepared to meet a dastardly difficult-to-beat AI opponent and are comfortable with the Southeast Asian theatre of operations.
Why Is This Game Special?
There are several reasons why this game is unique among wargames, including the enhanced Lua programming functions and related Campaign Series Event Engine (CSEE). We'll touch on these features right up front, with more details to follow later.
First, the even deeper efforts devoted to the internal Lua programming compared with the developers' 2017 Matrix/Slitherine release, Campaign Series: Middle East (CSME), means there is a stronger emphasis (and resultant quality) for those who enjoy solo game play versus the AI.
In this writer's opinion, too many strategy games today are designed for multiplayer action, with a barely passable artificial opponent tacked on toward the end of the development cycle. The primary reason for this is that the featuring of a decent AI opponent takes a lot of work and beta testing, as well as top-notch programming skill, and most development teams simply can't afford to invest the time and effort required and still get the product released within a reasonable time frame.
Well, the CSVN design team has spent several years investing in the AI programming and scenario creation aspects and has introduced a number of new paradigms with this game.
And this leads to the second major upgrade included with the product, which is the new SMEAC briefing phase. The acronym stands for Situation, Mission, Execution, Administration and Control, and it's directly tied to the scenarios' internal CSEE programming. It's imperative that players study the new SMEAC briefings, as they include the critical information necessary to succeed in the various missions.

The new SMEAC briefings are an important element of this new Campaign Series game.
Simply put, winning the game is no longer as highly focused on terrain objectives as the older CS releases were. A greater emphasis on minimizing friendly losses and civilian casualties are just some of the new factors players need to take into consideration, and the four "Boot Camp" tutorial scenarios are included to help familiarize wargamers with these new concepts.
Let's Get Started
The game begins with a dedication to the late John Tiller; a rock-and-roll guitar solo; and a moving three-minute video in newsreel format.
Many will recognize the images that flash by the screen as the same ones that filled America's living rooms as the Vietnam war dragged on. Several are quite disturbing, and the brass at Matrix/Slitherine deserves credit for not "sanitizing" the video, while Christopher Osterlund gets the accolades for putting it all together.

One of many iconic images featured during the game's start-up sequence.
In the release version of the game, instead of hitting the ESC key, the player needs to close the screen window manually to get to the classic Campaign Series placard-type start-up box. Once there, one can choose to play or edit an existing scenario, as well as edit a map or OOB.
Using an i7 3.6 GHz machine with a GeForce GTX 745 graphics card, scenario data takes several seconds to load, but the good news is there is more data: the game occupies a significant 8.83 gigs of disk space for a hex-and-counter wargame, which is more than double the developers' previous CSME offering. There will be more on that game later.
Let's start with the "Boot Camp 1 - Learning the Ropes" scenario. This is the first of a total of four tutorial missions included with the game.

This 3D Zoom-In View focuses on the Dak To Special Forces Camp in 1962. Even the game's first tutorial features a map that cannot be considered "small."
At scenario start, it's advisable that players first consult the Options drop-down, Windows-style menu and choose Scrolling/Smooth and then either Window Edge or Screen Edge scrolling for smooth map movement. There are lots of options "buried" in these menus, and thankfully the player's choices are "remembered" by the program on start-up.
There are a total of nine "zoom" settings that display instantaneously by rolling one's middle mouse button up or down. In this writer's opinion, the zoomed-in 2D counter display is of greatest value; the graphic icon view with unit bases is not quite as sharp. But to each his own...options are good, and the more choices, the better.

This image illustrates the same Boot Camp 1 situation, as in the screen shot above, but using the 2D Zoom-In view. The U.S. Battalion HQ (Airborne) is highlighted here, with unit details displayed CS-style in the upper-right corner of the screen.
And this game is not shy of options, with several of them significantly impacting the player's experience/enjoyment of the game's scenarios.
Specifically, there are 11 Optional Rules for the player to select or de-select before the scenario starts. These are described starting on page 98 of the game's 325-page manual that's available as a free download from here: https://www.dropbox.com/s/koubi0k371cixrr/CSVN_Manual.pdf?dl=0

There are a wealth of options included in CSVN, and all of them add increased depth, challenge and realism to game play.
The scenarios included with the game are designed to have all the options activated, with the exception of Variable Visibility. All of them impact game realism, and some will make the simulation "harder" for new players. This writer humbly suggests that novices consider turning "off" the Enhanced Fog-of-War and Enhanced Spotting options to ease the learning curve for brand-new players. However, the developers recommend that all options be turned on, even when playing the tutorial scenarios.
Before we begin to play the game in earnest, those new to the Campaign Series need to be aware of a few things before tackling their first CSVN scenario.
Firstly, this is not a run-and-gun type of hex-and-counter wargame, and this is doubly true of the latest CS offering. It is true that there are a wide variety of missions available within the game, including fire base defense; helicopter air assaults; meeting engagements; trench defenses; armored breakthroughs; battles of attrition; mobile defenses; search-and-destroy tasks; and, a few more.
Nevertheless, this iteration of the CS series demands a more methodical approach if one hopes to score a Major Victory in a scenario. In this game, there is a reason why the player gets an overview of the mission (a scenario introduction) when selecting a battle, and then the detailed and aforementioned SMEAC Scenario Briefing before play begins. This latter briefing phase is new to the Campaign Series.
While the scenario introductions included with the previous CSME game were generally brief and mostly functional, the separate SMEAC briefing phase included with CSVN demands the player's full attention. This is Vietnam, after all, with an armed IED, half-buried mine, or an ambush waiting around (almost) every corner. Thankfully, the briefings are detailed and well-written, and they add plenty of extra flavor to the game.

The classic French Dien Bien Phu battle at its climax on March 30, 1954. For those who simply cannot get enough of this engagement, visit https://wargameds.com/products/dien-bien-phu
Basic Training
The latest Campaign Series offering retains the intuitive, drop-down menu choices of the previous games. The UI also features a row of icons at the bottom of the screen with tool tips that identify their use. For oldsters like this writer - or for newcomers - either of these functionalities should be more than enough to get players started.

Even the "Boot Camp" tutorials are steeped in historical accuracy, and the familiar Windows drop-down main menus will be welcome to newcomers and veterans alike.
At its simplest level, the familiar double-left-click to select a unit and right-click to move and/or assault come naturally. CTRL-left clicking on an enemy unit brings up an on-map crosshair, and this is the quickest way to fire on one's opponent.
Helicopters are not new to the CS series of products, but they are obviously more prevalent in a game covering the Vietnam conflict. And it's here where the UI becomes a bit more challenging. Choppers move through the air at one of three flight levels and need to transition in or out of them for take-offs and landings. Managing a large heliborne assault will take some practice, but it's unlikely to deter the more detail-oriented players that this game caters to.
Getting back to the more general menu items, directly above the icon commands at the bottom of the screen are nine new Tool Bar buttons that "filter" the myriad of graphical icons below: All, Common, Combat, Air, Engineer, Highlights, Map, Units and Info.
These functions are new and quite welcome with the latest release of the Campaign Series. Hitting the "All" button to display two long rows of command icons is a bit intimidating, but it hints at the complexity and richness of the options available to the player.
Wargamers will most likely need to refer to the Scenario Briefing a few times during a mission, and this can easily be accomplished by selecting the Status drop-down menu option and choosing Scenario Information.
Ready for Boot Camp
As the game manual does a stellar job of guiding the player step-by-step through the first four Boot Camp tutorial missions, it would be foolish to repeat these instructions here. Instead, please turn to page 109 of the manual to get started.
For now, we'll hit on some high points.
There's a lot to digest in the 36 pages devoted to the four Boot Camps, but a careful reading will give most players all they need to know to begin enjoying the game, as well as pointing out many of the new features added to the latest product in the CS series.
In fact, for those who find themselves sitting on-the-fence when considering a purchase, a quick read-through of the Boot Camp instructions from the manual will give potential board and digital wargamers a good idea of what they will be dealing with when actually playing the game. However, it's important to remember that the Boot Camps are instruction-intensive learning tools, and the standard scenarios are generally not as heavily scripted and potentially tedious as the tutorials.
What may be encouraging to wargamers new to the CS series is that while this writer has been playing on-and-off (mostly "off") since the first game (TalonSoft's East Front II) was released in 1997, his skills have barely breached the intermediate level. And yet, he has had great fun playing a few of the stock scenarios and designing his own. The point is that one doesn't need to master every aspect of the game to be able to squeeze some good pleasure out of the system.
Nevertheless, it's instructional to point out the lessons contained in the four Boot Camps, if only to give readers some idea of how deeply this game drills down into tactical (and operational) strategy:
- Boot Camp 1: The player is introduced to the User Interface, In-game Messaging, Movement, Double Timing, Variable Objectives, Firing, Assaulting, and assigning Opportunity Fire. Admittedly, this first lesson is relatively intense in terms of player commitment, and we're only on Boot Camp 1.
- Boot Camp 2: The player practices unit loading and unloading; the accepting of reinforcements; and, engineering tasks, including the building of a fire base.
- Boot Camp 3: A tutorial on helicopter operations: Landing Zones, Refueling; Following orders from higher HQ; Tunneling operations; and, handling larger engagements.
- Boot Camp 4: An introduction to Event Points, On-Map Aircraft, and Riverine Units.
New and Improved
CS veterans will find that this latest game is by far the most demanding when shooting for an all-out victory against an artificial (AI) opponent. The primary reason for this is that scenario designers Jason Petho and David Galster have created some satisfyingly deep and intricate missions. The fact that Petho (along with Robert "Berto" Osterlund and Petri Nieminen) are masters at AI scripting makes each scenario a one-of-a-kind adventure that is just icing on this game's cake.
Veterans of CSME will immediately notice some dramatic differences in the game's scenarios. In the prior release, the large mission set generously provided by contributor Arnold R. Arvold represented a significant portion of the scenarios available for play.
While Arvold's work is much appreciated for its historical accuracy, the missions included in the latest game go much deeper because the scenario designers are also expert in coding the program's enhanced AI and event engine, among other things. The result is a variety of battles that are more robust than those included in CSME.
The use of scripted in-game events, such as the awarding of Event Points during a scenario, significantly increase the player's involvement in a mission. In fact, some of CSME's scenarios seem rather dry and straightforward in comparison.
In this release, the designers have made much greater use of special message pop-ups and all manner of in-game events. It's a complex process for most, but modders are free to create or edit a scenario's Lua files to change almost every aspect of the mission at hand.

A partial screen shot of a complexity-level 10 scenario generously included in the previous CSME game by Arnold R. Arvold. Israeli forces are shown in "blue" at the beginning of the Battle of Rafah Junction 1967 scenario.
Veteran players will also find that the new CSVN scenarios are more difficult to win against the AI, but the designers have not resorted to creating obscure "puzzles" for the player to solve. Winning requires a full understanding of the mission goals and assets available, as well as a solid grasp of the tactics required based on the time period simulated. The game rules reward good tactics, and the player is given all of the tools - and most of the information - necessary to succeed. But victory will not come easy in scenarios designed by Petho and Galster, and that's as it should be. And we're talking about the first four tutorial games, no less.
One early poster on the Matrix forums said a mouthful on this topic: "Following orders is definitely key in this iteration, and sometimes VPs (victory point locations) can be a distraction."
In fact, there are few conflicts in modern warfare where the definition of "winning" an engagement was more ambiguous than in Vietnam, and this game follows that script to the letter.
Unlike so many hard-core, role-playing strategy games, however, the difference between a "minor" and "major" victory in this wargame is purely semantics. The player is not prevented from moving onto the next scenario by his or her failure in a previous mission. Thus, the potential for frustration is limited.
Gamers are free to replay a scenario using a wide variety of options to achieve the level of victory desired, or even edit an existing mission to one's heart's content. Freedom is the name of this game, and the possible scenario modifications are nearly endless.
Or, as another forum poster has suggested, one can rigidly follow the path of the "Vietnam Experience" from the French perspective starting in 1948 to the American involvement right through 1967 by playing the scenarios in chronological order.
While this fascinating method of game play was theoretically possible in CSME from 1948-1985 in the Middle East, the significantly greater efforts put into the scenario and AI programming in this release takes CSVN to a new level.
Also worth mentioning is the new "Enhanced Fog of War" option that takes CSME's "Extreme Fog of War" setting to a level appropriate to simulate the cat-and-mouse tactics typical of the Vietnam War. Once again, greater granularity and realism is the name of this game.
In addition to the 325-page manual, there are also several excellent (and unique) PDF documents included in the game's "Additional Resources" folder (to be found beneath the Manual folder) courtesy of Galster.
PBEM Play
Wargamers who favor multiplayer matches are in for a real treat with this game. While PBEM is conducted the old-fashioned way - through file transfer - there is a large and dedicated fan base on various internet sites that actively engage in online battles using the CS series of products. The Blitzkrieg Wargaming Club ( https://www.theblitz.club/ ) is among the most active.
The online scenario database for the CS series "ladder" includes 10 unique games dating as far bar as the Matrix Games version of East Front II. In fact, the Campaign Series Vietnam 1948-1967 ladder ( https://www.theblitz.club/scenarios/campaign-series-vietnam-1948-1967/b-15.htm?action=scenarios&game=222) became active almost to the day that the game was released. Board wargamers especially should feel right at home when frequenting "The Blitz" and other sites catering to the serious multiplayer wargame enthusiast.
The Stock Scenarios
After completing the four recommended Boot Camp scenarios, players should have more than enough experience to wade deeper into the solo and head-to-head (H2H) missions the game as to offer.
And for those who have yet to purchase the product, the downloadable game manual features an in-depth preview of exactly what CSVN has to offer in the form of a full 62 pages of scenario descriptions and maps for the stock missions included in the release version.
And oh, the maps...Let's take the average-sized "Assimilation - The Battle for Saigon" scenario depicting a 1955 clash between the private army of Binh Xuen and the Vietnamese National Army that researchers will be hard-pressed to find in the history books.
The map itself is an exquisitely-detailed representation of Saigon (obviously) taking up almost 4,000 hexes of mostly urban terrain. That Petho hand-crafted this map (and more than 100 others) is difficult to believe. And let's not even consider the OOBs for this one!

"Assimilation - The Battle for Saigon": Please notice the Saigon International Airport, MACV HQ, U.S. Embassy (and other historical locations colored in "red" type) that appear on this incredibly detailed map.
And then there's the truly large scenario - "Street Without Joy - Operation Camargue," - which is a more familiar engagement between the French invaders and the Viet Minh defenders centered at the province of Vin Tranh, covering more than 40,000 hexes, or 10 million square meters. Are you up for that?

A small portion of the enormous "Street Without Joy" scenario designed by Jason Petho is a good example of the depth and detail available in this game using a 1953 historical engagement.
Our guess is that many digital and board game players will be up to the tactical (and operational) tasks presented in this game. After all, the map of the Gulf of Tonkin landing sites for the French attackers in this Street Without Joy scenario is "compact" compared with the scope of the hypothetical battles that come to this writer's mind in John Tiller's recent Japan '45 and Japan '46 Panzer Campaigns monster games.
Those playing as the French in this CSVN scenario also get to maneuver a large number of land-based forces moving up from the south in the Thon Vinh Nguyen area of the map.
Sorting Through The Scenarios
Like the previous release of the Campaign Series, one can sort through the voluminous number of stock scenarios in order of appearance in CSVN based on a variety of parameters in the scenario selection screen. The most important criterion to select is probably the "Play Mode," where H2H and solo missions are identified.
Keep in mind that the special, "A Week in..." series of scenarios have players commanding a variety of formations over the course of one week. This means seven days and seven nights are being simulated, with different missions presented for each day cycle. It also means quite a few more counters to virtually push around than most standard scenarios, with game lengths of up to 420 turns.
Many of the maps included with the game scenarios are quite large, as are the hundreds of historical locations identified on-map for the player. Let's just say that Petho and company have more than answered any "concerns" brought forward by hard-core players anxiously awaiting the release of true campaign games.
The map for the "A Week In...Binh Long (June 1, 1966)" is almost 9,000 hexes, and it won't be for everyone. But it's an excellent example of the efforts that went into creating a game that retails for about as much money as a decent Vietnam-era history book. In fact, CSVN arguably offers more intrinsic value than the equivalent of a graduate-level study of the various conflicts.

The largest scenario included with CSVN on release, "A Week In...Binh Long," is not only long, it features a wide variety of units and missions that need to be completed by the famous U.S. 1st Infantry Division's battalions over the course of one week. The screen shot here represents only a small portion of the scenario's area of operations.
Scouting The Terrain
The individual hexes gracing the various scenarios in CSVN appear more richly illustrated - and somewhat more varied - than the CSME desert terrain in the previous release. In the new game, one sees at least 60 terrain types (and their affects), including Forest, Orchard, Tall Grass, Flooded Paddy, Meadow, Light and Heavy Jungle, Scrub, Marsh, and much more; not to mention all the Trails, Roads, Villages, Towns, LZs, Trenches, Improved Positions, Rubble, Bunkers, Pill Boxes, Low Stone Walls, Hedges and other landscape representations, along with various height elevations. Not that CSME is a slouch, with 56 terrain types included in the latest (2.0) version of that game.
What's truly amazing is that the designers have somehow kept the maps from appearing too "busy" when all of the terrain modifications are arrayed using the nine different zoom levels available to the player.
Then, one must also consider all the algorithmic functions (movement, supply, command-and-control, LOS, combat, disruption, and many more interactions) that are almost instantaneously going on between the literally thousands of individual platoon types from 11 nations and numerous eras depicted in the game. In effect, the simulation's depth can be a bit mind-boggling.
Fortunately, most of this data is neatly handed underneath the "hood" of the game's engine. Still, one wonders how programmer Robert "Berto" Osterlund has managed it all, not to mention the advanced AI work put into this release. And, with nary a "crash" after many hours of game play and scenario modification by this ham-fisted reviewer.
It is so far astounding that in a game of this complexity covering a (very) unconventional war, there are surprisingly few, if any, glaring bugs reported by the determined players who have purchased the game over the past few weeks.
One minor issue (for this writer) is that in some scenarios the rivers are the color of mud - and they probably were historically - but on the map they look more like major roads than waterways. It will take a bit of time to adjust.
Or, one can simply use the JSGME utility that's lurking in the game's main directory, and load up the "Blue Water" modification that's included with the CSVN install. It seems the developers have thought of nearly everything, and this is only the release version.
And let's not forget the tens of thousands of words describing all the weapons and equipment modeled in the game, which can be studied using the product's Unit Viewer (accessed by selecting the F2 key with a formation highlighted). Petho, once again, outdid himself with this release. Here are some examples:
In the first screen shot below, we have Matrix/Slitherine's excellent "John Tiller's Campaign Series" (JTCS) WW2 compilation game (https://www.matrixgames.com/game/john-tillers-campaign-series), with patch circa May 10, 2014) showing equipment data for the M4A2 Sherman medium tank.

An equipment screen courtesy of the Unit Viewer from Matrix/Slitherine's classic "John Tiller's Campaign Series."
Next up is Petho's own data submitted for CSME's Super Sherman tank as part of an Israeli armored formation in a 1956 scenario included with that game.

The data panel for CSME's Super Sherman tank for the game released in 2017.
Finally, we have the data for the M48A3 Patton tank included in an August 17, 1966 action in Vietnam's Quang Tri Province conducted by the heroic 3rd Marine Division in the latest CSVN game. Both the clarity and the detail describing the equipment in the current version of the Campaign Series is obvious in the screen shot below.

The equipment panel for the Patton tank included in CSVN - the latest version of the Campaign Series of games.
When confronted with the scope, as well as the minutia, of CSVN - not to mention the major steps forward in the AI and scenario design departments - it's difficult for this writer not to gush.
For example, here are the listed "capabilities" of the U.S. Grant medium tank (historically available from 1948-1956) that many wargamers will be intimately familiar with, as displayed in the in-game Unit Handbook/Viewer (F2 key, again): Tracked, Not Light Bridge capable, Can Carry Rider, Hard Target, FireHardAI (?), Assault, Offensive Anti-tank, Defensive Anti-tank, Infantry Support capable, can't Fire On Helo. This just scratches the surface of the combat properties simulated for each unit in the game.
And for those who relish studying the intricate combat results, one merely needs to set the main Reports drop-down menu to Detailed and Persistent in order to (potentially) study the effects of each weapon firing on the enemy.
Of course, with the new Enhanced Fog-of-War and Enhanced Reporting options active at the beginning of the scenario, the details available to the player will be severely limited. Use of these settings are automatically activated at game-start and are highly recommended. The Enhanced Fog-of-War options will have friendly units literally "going in blind" in most scenarios, and these settings accurately depict conditions during much of the Vietnam war.
A comparison of the Extreme Fog-of-War setting available with the previous CSME game is nowhere near as "extreme" as the Enhanced setting in the new game, and that's as it should be. Apart from a rare sandstorm, sighting conditions in the Middle Eastern conflict were much better.
For those who prefer a God's-eye view of the action, the Enhanced settings in CSVN can be turned off - but not in mid-game. However, doing this tends to reveal hidden units and spoils most scenarios; it feels tantamount to "cheating." However, in this game players can have it their way.
Another measure of the game's increased depth is the aforementioned 325-page manual, which easily overshadows the JTCS tome by 190 pages!
However, it's also possible that wargamers who fall short of grognard status will find their eyes tending to glaze over, especially when it comes to the increased complexity and role-playing aspects of CSVN, not to mention the micromanagement often necessary to "win" a scenario.
Fortunately, the game does not force players to follow a single-minded method of play that results in total victory or ignominious defeat. Even in ultra-competitive H2H mode, gamers are free to choose the skill level of their PBEM opponents.
The wealth of game play rules and options, plus the ease of using the editors to modify the difficulty of solo play, allow gamers as weakly-gifted as this writer (in both operational and tactical skills) to find a perfect middle ground. Like many of Matrix/Slitherine's best wargames, the open-ended features of the game's design and the included editors greatly expand the possibilities for creative players. So, any frustration experienced with this game is entirely self-inflicted.
In fact, there's a menu tool that has been included in most of Tiller's games since East Front II that may be especially valuable to newcomers. It's located under the "AI" drop-down menu and allows players to temporarily revert control to a "friendly" artificial opponent in the middle of a solo turn.
This option let's the AI instantly resolve the moving and firing tasks of allied units in order to potentially ease the burden of command on players who may not want to micromanage each unit.
While the AI may conduct less-than-ideal tactical moves and attacks - and this may especially be the case in a game as detailed as CSVN - the function can come in handy when solo players may want to "move things along" in a complex scenario.
The 'Adaptive AI' and CSEE
The customizable AI included with CSVN is unique among wargames and includes more than 200 AI routines that are programmable by side, nation and scenario, and open to the scenario designer's tweaks.
Even the more sophisticated CSEE (Campaign Series Event Engine) first introduced with CSME adapts in real-time to changing game play situations (events), according to the developers.
The good news for most players is that the game designers have done the heavy lifting for each stock scenario included with the game. Player modifications of the AI and CSEE routines are possible through Lua programming, but several years after release, there have been few user mods available for CSME in the public domain. So, the CSVN player base shouldn't expect too much in terms of innovative mods powered by Lua programming and freely available from the community at-large. Of course, we may be wrong here.
The bottom line is that the potential for custom-created content is a distinct reality, and developer efforts are pretty much guaranteed, making future creative content for CSVN and its promised add-ons a sure bet.
What's more, according to the developers, the AI in CSVN now has two or more operational battle plans currently baking into the release-version of most of the scenarios, and it chooses specific strategies based partly on a die roll for increased replay value.
With the Lua-based Event Engine available to provide the computer side with an increased level of operational awareness (versus tactical acumen), the CSVN scenarios are now significantly enhanced in terms of big-picture solo play. In fact, CSME owners can look forward to these increased AI "skills" being imported into the previous game with the free release of Version 3.0 of that product toward the end of 2022.
In general, anyone familiar with how the larger CSME scenarios play will see an immediate and positive change in AI behaviors when tackling some of the CSVN missions. Experienced Matrix/Slitherine forum members have already commented on how well CSVN (and its AI) mirror the historical experience of the various combatants from 1948-1967.
The Scenario, OOB and Map Editor
The fact is that most players will never touch these awesome utilities, so we'll keep our coverage of these features brief. In summary, those familiar with the previous Campaign Series editors will feel right at home with what CSVN has to offer.

CSVN's Organization Editor allows one to build custom OOBs from the forces of 11 nations over a period of almost 20 years.
However, for those looking to dip their digital toes into the deep and primeval waters of these powerful game editors, we offer some introductory tips for newcomers:
1. The easiest way to experiment with these utilities is to make small changes to a stock scenario. Keep in mind that there are three original files that need to be backed up before proceeding with a custom endeavor, and they are all found in the Campaign Series Vietnam/Scenarios folder.
2. Let's choose the "tiny" Giong Dinh mission as an example. First, we need to backup these three files: IC_480810_Giong_Dinh.scn, IC_480810_Giong_Dinh.org, and IC_480810_Giong_Dinh.map.
3. Start the game and choose "Edit Scenario" from the main menu. Next, sort the scenario files that show up by "Size," and one will see the "IC_480810_Giong Dinh.scn item toward the top of the list. Double-click on the file name to load it up.
4. Next, do a "Save As..." command from the Windows drop-down menu at the top of the screen and label it "XYZ" or another file name that will be easy to identify later. Then, select the "Scenario" and then the "Header" drop-down menu, and one will see the original "Title" of the scenario automatically highlighted. In this case, it is "From the Sky - Battle of Giong Dinh." Change the title to "XYZ1" or something similar.
(Dealing with these file management chores right up front will allow beginners to quickly identify their custom scenario files, as well as choosing the main scenario (.scn) file when starting a New Game and searching through the Scenario Selection Screen.)
5. Now, load up your renamed "XYZ" scenario and enter the Scenario Editor main screen. From here, one can select from a plethora of customized scenario settings, move unit around on the map, add Improved Positions, and oh, so much more. There are hundreds of scenario variations that can easily be accomplished by using the main Scenario Editor functions alone.
6. Now, let's go back to the game's main screen. If you're anything like this writer, you are probably aching to add a few additional units to your Giong Binh custom scenario.
7. If you're looking to play the Viet Minh in the Giong Binh mission we're editing, you're in luck: the scenario designer (that's Mr. Petho) has included an entire D111 Viet Minh Battalion in the Forces Dialog box that has yet to be placed in the battle and is ready for you to plop down by highlighting the individual formations in the existing OOB and right-clicking on the map.
8. But what if one has an "a-historical" streak and wants to command the French side in this scenario reinforced with the Australian Army's 1st Armored Regiment (circa 1965)? Well, almost anything is possible using the editors that come with the CS games.
9. Making fictional changes to the OOBs does require you to return to the main menu and select "Edit Order of Battle." This loads the Organization Editor. From there, simply choose the File/Open drop-down menu item and load the "IC_480810_Giong_Dinh.org" OOB that shows up toward the top of the selection window after sorting the OOBs based on size.
10. From here, one can customize one's OOB by adding a huge variety of formations and then saving the customized "org" (OOB) file and restarting the scenario editor and loading your custom scenario. Your greatly enhanced French OOB will now include the new formations you added - ready for placement on the game map.
(Here's another OOB design tip: One can load any existing OOB from any nation or era, choose the elements one wants, and then paste them into your custom OOB.)
While this scenario editing process seems horribly complex to spell-out here, it is relatively easy to accomplish with some practice. It also opens up a lifetime's worth of custom scenarios ready for creation by ardent mission designers.
What's Next For CSVN?
The developers have already made additions to the game's "living" manual and a few small updates, and they promise new units, scenarios, campaigns and countries to play as well.
The addition of a campaign game with linked scenarios was beyond the designers' capabilities at launch time, but this feature is planned in a future update. CSME only contains one campaign game to date, and it appears this feature has not been sorely missed by the player base thus far.
In a truly magnanimous move, the developers are planning to update CSME to CSVN standards with a large "3.0" update before the end of the year. Considering the effort involved, this is welcome news for many who have thoroughly enjoyed playing the Middle East version of CS, and will hopefully spark renewed interest in that game.
The often huge and iconic battles and other tense engagements that erupted all over South Vietnam during the North Vietnamese Tet Offensive (January - July 1968), will be included as part of a planned add-on module. This DLC, and perhaps a few others, may stretch the coverage of this mid-20th Century Southeast Asian wargame as far forward as 1985, with a Korean War offering as another possibility. The Campaign Series Legion team (https://cslegion.com/games/vietnam/) responsible for CSVN is nothing, if not ambitious, when it comes to this game series.
"All of us on the design team would like to offer a huge 'thank-you' to everyone who has supported us in our development of the game," says Petho. "It has been a long journey in developing an engine that works with the asymmetrical nature of the Vietnam War. We appreciate player feedback, and we always take it to heart!"
For board and digital wargamers alike, there is simply nothing out there with the depth, historicity and role-playing elements of CSVN. All of us at AWNT are hoping that readers "vote" with their hearts, minds and dollars and support the continued development of this excellent wargame.


Follow Us