second chance games

Search This Website of delight

Part One   THEATER OF OPERATIONS: The Game I would like to introduce you to Theater of Operations (ToO) . On the surface it appe...

Theater of Operations: The Game (Pt 1) Theater of Operations: The Game  (Pt 1)

For your Wargamer, Toy soldier collector, MiniFig collector, military history nut. Reviews, interviews, Model Making, AARs and books!

Part One
 
THEATER OF OPERATIONS: The Game


I would like to introduce you to Theater of Operations (ToO). On the surface it appears to be like most WWII operational level wargames, but it doesn’t take long to realize this title has a number of unique qualities that set it apart from others in this genre. Players take control of either the Axis or Allied forces as they battle in 1944 through the hedgerows of France, the Soviet steppes, or the mountains of central Italy. In each scenario you will direct the forces under your command to crush your foes.

But what sets it apart? To start with ToO will allow multiplayer (up to 8 players) to be assigned various command roles in each scenario. Next ToO will allow players to fight out tactical engagements “manually” using however they wish, and input the battle results back in to ToO. These aspects are discussed in far more detail below. First I will go over the core game features. A comprehensive video can be viewed here:


Core Features

* Operational level combat as the Allies or Axis in the European Theater of Operations in 1944
 
* PC/Mac (mobile platforms planned for future release)

* We-go style of turn based play (explained below)

* A detailed combat resolution system

* Scenarios can be small (a few kilometres of land) to huge (thousands of kilometres of land)

* Scenario editor to allow user created scenarios

* Typical unit size: battalion, some company-sized

* Accurately depicted units based on actual tables of organization

* Players can organize powerful battle groups of units to perform assigned tasks

* Artillery units can perform missions to interdict enemy units and movement, counter-battery, and battlefield support

* Engineer units can bridge rivers, lay mines, clear mines, and fortify units

* Limitations due to command and control (or lack thereof)

* Fatigue, casualty levels, unit cohesion, supply levels, equipment levels, and more are tracked for every unit

* Detailed supply system to create real life limitations to commanders

* Various terrain and weather impacts

* Fog of war

Unique Features

 ToO will allow up to 8 total players to be assigned command roles. If a given side has more than 1 commander, then additional players are assigned command roles as subordinate commanders. For example, if a player is commanding a corps sized force that contains two divisions of troops, then additional players may be assigned roles as division commanders, and/or regimental commanders. Subordinate commanders are only responsible for the troops under their command. There is no hard limit to the number of roles a given player may be assigned. There will also be flexibility to allow role reassignment after the game has started. This can add lots of exciting possibilities for your war gaming experience! You can watch our video on command roles for a more thorough explanation


The other major unique feature is that  players may opt for battles to be played out using other tactical level games instead of using the in-game battle resolution system in ToO. ToO will produce battle data to players (we call it an order of battle) to allow them to manually resolve tactical battles whenever they wish. Players may use whatever game system they want (other computer games, miniature battles, board games). Once the tactical battle is complete, players can input the battle results back into ToO. This means that ToO can act as a dynamic campaign layer for players who enjoy tactical level games. This aspect also creates lots of gaming opportunities, just use your imagination! You can watch our video on tactical battle resolution for a more thorough explanation


Game Scope

 The base game will contain scenarios in Normandy, Italy, and Eastern Front in the summer of 1944. The game scope will be expanded by DLC to different areas and time periods. I hear the groans now about DLC, but if you don’t want to play in North Africa of 1942 then simply avoid this DLC. Only buy the area and time periods that interest you!

Game Play

 Players take command of Axis or Allied forces (primarily but not limited to German, US, British and Commonwealth, and Soviet troops) and re-write history. A great amount of detail and analysis has been included to help simulate military operations. Players are rewarded for carefully planning their actions and taking calculated risks. Players will have to deal with real life limiting factors such as terrain, weather, fatigue, supply, time and space planning factors, and random SNAFU’s to name just a few. 

 Play will be scenario based with each side attempting to meet their assigned victory conditions. Scenarios can range in size from a small regimental engagement all the way to commanding multiple corps of troops and everything in between. Scenarios can last a few hours to weeks covering a few kilometres or thousands of kilometres of land. Game map granularity will be 100 meter “tiles” which will allow dynamic unit movement and placement at the operational level. The game will include a scenario editor that will allow players to create their own scenarios.

 Players can issue various orders to the units under their command, and units will attempt to carry them out to the best of their ability. Many unit types can be split apart and organized with other units to create a hybrid unit called ‘battle group’. It can be a combined arms force that is issued orders like any other unit and sent in to combat.

What is “We-go” style gameplay?

We-go style means there are 2 phases to each turn: Orders Phase and Action Phase. During the Orders Phase, players simultaneously issue new orders to their units while the game action is paused. Once all players have completed issuing orders the Action Phase commences. During the Action Phase players may only watch as units attempt to execute their orders until the turn ends and a new Orders Phase begins. Staff reports will be provided to help summarize key events during the previous Action Phase.

Where the Project Stands Today

In short we are early in the development process. The game concept and design is advanced and is ready for formal beta testing, however the actual computer coding is not very far along at all. I will explain in greater detail at a later time, but the level of complexity with the project means we need to acquire a funding source to dedicate full-time programming. We are always interested in talking to people that are eager to help that have any sort of computer development related skills (programming, art or sound), or people with lots of money looking to donate to the cause! ;)

Future Plans

Once the base game is ready for public sale and enough DLC is prepared to go with the initial release, providing greater amounts of DLC will be the initial priority. We will also look at getting mobile development underway just as soon as possible. If ToO sells well enough, Steve at Battlefront.com has indicated on their forum that they are willing to join forces in an effort to allow their Combat Mission series of games to interface directly with Theater of Operations. See for yourselves on the BFC forums: http://community.battlefront.com/topic/109632-operational-level-game-announcement/page-3#entry1444644

As ToO matures additional titles can be prepared. Some examples would be a companion game covering the air war in WWII, and different time periods for Theater of Operations (perhaps Cold War).

By 

Matt McCoppin  (In Part 2 I'll talk in detail about the development journey so far. Coming soon)

ToO Website Link

Part 2 published


ASL AAR by Ian Willey         Being without a computer set up for VASL has meant no ASL for the last few weeks so when James wa...

ASL AAR by Ian Willey ASL AAR by Ian Willey

For your Wargamer, Toy soldier collector, MiniFig collector, military history nut. Reviews, interviews, Model Making, AARs and books!

ASL AAR by Ian Willey


Being without a computer set up for VASL has meant no ASL for the last few weeks so when James was available for a FTF game I was hardly going to turn it down was I? What to play was as easy really as both James and myself have copies of PiF and with so many to choose from I went towards the back of the pack picking out BFP-140 Iron Greeting.

Heroes in Blackpool is less than two weeks away so I wanted something that included AFV's so as to help clean off the rust as James has had less play than I of late. This scenario has the Russians defending against a Polish counter attack starting with seven squads and a 37L ATG. James by comparison had thirteen squads and six tanks (my six come on as reinforcements with a further four squads). The boards are both new, BFP R & Q with Q sporting the new stone and wood mixed material buildings we had playtested way back.

I took one look at James set up and knew I was in trouble. He was set to punch straight through my forward defence and I had little behind it to stop him. I would have to scramble the rest of my troops from the flank to try and slow him down. Turn three reinforcements seemed to be a long way off.

I was fortunate that James kept his prep relatively light, though I had a forward 447 squad broken. He then ran two half squads into real squads which he had expected to be dummies and this slowed him down a little. I defensive fired with quite good results and started to relax. Big mistake, James advance fire broke another squad on the main defence and another on my right flank.

My turn 1 was all about moving units to try and occupy the last of the victory building locations and keep out of Polish LOS. Where I did stand and fight though I did break a couple of stacked squads. 

James turn two saw him use a platoon of three tanks to cut off rout paths costing me a squad and DM'ing another. He was to do this on turn three as well! I expected him to move faster but he was content in cutting off another unit in the expectation of breaking it later. Again I started to relax when my defensive fire broke yet more Poles but again I paid the price. By the start of Polish turn 3 I had lost two squads, a third was ripe for the taking and another had suffered ELR and become conscript.

James to cover his broken stack on his left flank kept a pair of squads back, this was smart thinking as I would have happily sent a squad or leader off to keep them DM but it did even the odds a little in the front line. He made the mistake of leaving one three tank platoon in motion and the other was operating in effect behind my lines. He was now mopping up the first of the three VC buildings and had troops ready to take the second during close combat which they did with ease.

My turn three saw a key Polish unit break to prep which allowed me to get three of the four reinforcing squads into the edge of the village. My tanks having 22MP's meant I was able to come round behind his motion platoon and set up for a turkey shoot. The other three ran into the village and blocked the open route into the last VC building. At last I was starting to apply my will on the game.

James quickly took out a tank that I had allowed him a shot at. The only compensation was that it meant his platoon was staying in position. A move round the flank and freezing a squad or two was what I had feared. The three ambushed tanks scuttled off surviving all my fire much to my annoyance. But James had paused in his attack, I would get troops into the last victory building in force before he could attack it. 

The ambushed platoon had positioned itself such that one tank of his could still fire on mine but I was to fire first. My next shot was a CH burning his tank out and with the smoke generated reduced the effectiveness of his kill stack. I packed the building with troops and awaiting his next turn.

James attacked heavily in turn five but half his attacking troops were broken. The tanks mostly ignored each other going after infantry but just as it seemed the Poles would get into the building a lucky sniper broke the lead squad.

My fifth turn failed to break any of James units, here we go I thought as the defensive fire phase came round. I suffered the one broken squad which was replaced in the advance phase. I had the building loaded with troops adjacent for a last turn counter attack if required. With troops upstairs as well as down I was in an extremely strong position going into the Poles last turn.


James prep failed to break any of my troops, it was his turn to try and survive defensive fire but without the +3 cover. As you would expect he suffered a few breaks and enough pins that meant he could not advance into the two ground level hexes to try and break me in my last turn. It was now mathematically impossible to win and James conceded.

So how did it play? Well I thought I was on the losing side from the moment I came back in the room post James set up. Through the first two turns I went from your losing to just maybe you can do it. Turn three actually had me thinking I had a better chance of winning if James did not attack hard. In the end it kind of worked for me that he did try for the building rather than trying to isolate it. My tanks simply put him off. Turns 5 and 6 I finally felt in control as his infantry were slow at rallying.

As for Poland in Flames as a product? Well I have playtested a fair few so I already know it has some excellent scenarios in it and whilst I don't think this is a future classic it does allow both sides to mix up attack and defence so it should get some solid play and it's small enough to get played through in an evening. I would be happy to play it again and it's always good to have a scenario where the Poles are attacking.

Ians Blog

Editor: Hopefully the first of many ASL AARs from Ian:)
 Be sure to check his blog


Let's Play: Graviteam Tactics, Shilovo 1942 DLC, Part 001 POCKET SLAUGHT... Let's Play: Graviteam Tactics, Shilovo 1942 DLC, Part 001 POCKET SLAUGHT...

For your Wargamer, Toy soldier collector, MiniFig collector, military history nut. Reviews, interviews, Model Making, AARs and books!


V-COMMANDOS from Triton Noir A solo/cooperative game of small unit commando actions drawn from historical situations. Hopef...

V-COMMANDOS V-COMMANDOS

For your Wargamer, Toy soldier collector, MiniFig collector, military history nut. Reviews, interviews, Model Making, AARs and books!

V-COMMANDOS

from Triton Noir


A solo/cooperative game of small unit commando actions drawn from historical situations.


Hopefully you've seen the appetiser for the game and the linked contest to win a canvas picture of one of the stunning pieces of artwork from the game. Stunning sums up many aspects of V-Commandos.  The box art, which like many games is replicated on the rule book cover, sets the mood and game flavour admirably.  The comic book element inevitably took me back to childhood copies of the paperback series of Commando comic books and even W.E.Johns' Gimlet series, which featured one that I read entitled King of The Commandos.

Like Heroes of Normandie by Devil Pig Games, this is certainly Hollywood's version of WWII, but I'm glad to say that Triton Noir, the publishers of V-Commandos, have not gone the whole hog [no pun intended] for the total cigar-chomping cartoon style that Devil Pig opted for.  In fact much of the card artwork makes me think that the Noir from this company's name has had the stronger influence.


These Tarot-size cards could so easily have just been plain backed, but the choice to go with these scenic pictures adds substantially as always to the atmosphere of the game.  Equally effective are the many tiles that are used to build up the terrain for each scenario.


Here are two of the sheets of tiles [in this case, small and medium size] that you'll use to build up the terrain.  At this point, it's worth explaining the meaning of the word "terrain" in this game.  Terrain is a geographical playing area made up of several tiles - in some scenarios, the whole playing area may constitute as many as five terrains.  

In some cases, you will find your commandos having to split up in order to achieve objectives on different terrains; in others, you may have to work your way through a sequence of terrains achieving your objectives as you move from terrain to terrain.

Here is, chronologically, the first scenario, Operation Time Pencil.  The name on the map card of Bruneval and accompanying historical photo of the radar station easily identifies this first scenario as based on the Bruneval Raid in February 1942.

 The playing area is made up of three terrains: the Forest, the Radar Station and the Villa.  As you can see, each terrain has specific instructions relating to it, for this individual scenario.


Below are the cards for each of the three terrains, showing you how to lay out the tiles.  The darker panels with black edging are room tiles and the pale panels with faint grey edging are open tiles.


The next picture shows how you might build up the tiles to create the Radar Station.  The two lorry markers show were German reinforcements arrive and the two blue triangles indicate the location of the Commandos' Objectives explained in the Scenario cards.


In creating the terrain, you're free to use whichever tiles you wish, provided that they are appropriately open tiles or building tiles.  The one aspect that has drawn some criticism is that there are scenarios that involve as the terrain such areas as a battleship, a shipyard and dock, and bridges.  None of the tiles remotely resemble these and so you do have to employ what the old "willing suspension of belief ".  In other words, you've got to pretend that the tiles in front of you are a battleship etc. 

I can understand the limitations of the tiles might not be able to recreate some of those, but I would have thought at least a range of tiles could have been produced that would at least include enough to build a credible bridge!  Frankly, though, that is the only detail that doesn't match the otherwise excellent features of this game.

So, on to considering some more of these excellent features.  Certainly, the very good quality, circular, cardboard discs that represent the many single-man figures in the game are high on that list.  I had imagined buying and painting some commando figures [of which there are many fine products on the market], but soon decided that I much preferred what you see here.


These are your five commandos, drawn from different nationalities and with different attributes.  This base set comprises a scout, an officer, a sniper, a sapper and a medic.  My immediate reaction was to lament the absence of the French Resistance and hoped that Triton Noir would soon produce an expansion to remedy that lack.

You can guess my delight to find that just such an expansion is already available.  [I have yet to discover whether it might also contain some tiles that make a bridge!]

Equally effective are the many German soldier counters.  Here are the ordinary regular infantry, nicely done in different poses, some with helmets or caps and even a few bare-headed.  Small attention to varied detail like this is a big plus for me, instead of just churning out a generic image.


Added to these are a few regulars with sledgehammers [oh yeah!] and some special guys [identified by the black edge to the counter] and a few dummies.  Note that the number of white cube markings show the number of dice rolled when these units fire at your commandos.


Among the many other smaller tokens are equipment for the commandos, spotted tokens, 20 doors [open on side/closed on the other], the lorry tokens mentioned already that indicate where German reinforcements enter, objectives and alarms [crucial to all scenarios] and open/closed trapdoors.

Before we come to the reading material - the rules - there remain the 5 large cards, one for each of your commandos


and a handsome deck of Event Cards.


What amazed me was that the game contains dual sets of all the large cards and Event cards along with separate rule and training books in both English and French!

There isn't a single item that falls short of the highest standards of production and the rule book is no exception.  The 24 pages are more like glossy, thin card with a very durable and substantial feel.  They are easy to read and follow with plenty of illustrated examples and accompanying artwork. 

It's very well organised, taking you through the three Phases of the game: Event, Commando and German.  These are followed by information on Commando Selection and Commando Health - no, they don't have to have travel injections, it's about getting injured, critical condition and, gulp, elimination!  The good news [especially if you are playing a cooperative game] is that, if your commando dies, another commando is drawn from your reserves to rejoin the scenario.  Your new commando will have some initial limitations [like, no equipment], but you know how resourceful you are!

There are also sections on Equipment and Escorting a Character that occurs in some scenarios and one of the longest sections, called Play An Operation is on the process of setting up an Operation [i.e. scenario]

The rules pause at three points to direct you to the training manual that provides three mini-scenarios to help fix in your head the section you've just gone through.  Though very simple, I would strongly recommend following the format, as I found them very effective in achieving their intended goal of consolidating learning the rules.

At the very heart is the concept of STEALTH.  A commando counter will automatically be flipped to its stealthy side when entering a small tile where there are no German units and commandos may always enter a medium sized tile in stealth mode by using up two of their three Action pts.  However, commandos must always flip to their visible side when entering a large tile.

Whenever a commando in stealth mode enters a tile with enemy units on or vice versa, each commando must roll one die per enemy unit to see if they are spotted.  Roll 1 or 2 and you're spotted.  Though not wholly necessary, it's a nice touch that the twelve dice provided are customised with a partial eye symbol on the 1 and 2 faces.


Attention to small details like the dice all add to the sense that care has gone into producing a quality game.  Attention to detail is also a prominent factor in the rule book.  As I read rules, I have a bad habit of thinking, "... but what if?"  I failed to break this bad habit, as I went through the rules for V-Commando and each time the answer to my "What if?" was a few paragraphs later or clear in an example.  It was an object lesson in being more patient in my reading and testimony to just how good these rules are.  They are thorough, without being burdensomely lengthy, and easy to follow.

I mentioned earlier the value of using the three training scenarios, but that value is in helping you fix the rules in your head so that you have minimal reference to the rule book later, not because you need them to understand the rules, as is often the case with some rules sets.  What impressed me most was the section on the German A.I. that runs the Enemy Phase of the game.  Moving and shooting in games where your opponent is A.I. determined are often hyper complex and encyclopaedic in length.  In part, this is because the rules in V-Commando are well pared down. 

Remember stealth, well if your commando is in stealth mode, he can't be seen or shot at.  If visible, he is seen and able to be shot at, if he's on the same tile as the German unit or an open adjacent tile or a room tile that has an open door.   No arguments about line of site.   Movement is governed by equally straightforward rules that depend on only two factors: if any commandos are visible, then German units move one tile towards them by the shortest route - if all commandos are stealthy, then German units move one tile in the compass direction displayed on the Event card currently drawn for that terrain for this turn.

Perhaps this random factor may not suit some people, but, hey, this is the movies, haven't you seen the Germans in films from The Guns of Navarone or The Dirty Dozen to the more recent Inglourius Bastards rushing around while the good ole Brits or Americans sneak about, just out of sight from them?

Finally, the rules take us to Play An Operation.  In all other games that I own or have played, this would form part of a separate booklet that would also contain all the Scenarios.  Triton Noir have decided to go with the novel idea of providing the nine scenarios in the form of pairs of high quality, double-sided, cards.  This decision has added enormously to the already very satisfying ambiance of the game.

The first of each pair of cards names the Operation with an accompanying map and, on the reverse of the card, a background to and the objectives of the Operation.


The second card in each pair shows the terrain to be set up for the Op on one side and, on the other side, any Special rules that apply to a specific terrain and/or the initial Set-Up.   So to continue with the example of Operation Time Pencil, three terrain will be needed and each terrain has its Special rules, but in this case there are no Special rules relating to initial Set-Up.


Finally, the necessary terrain cards are placed out on your gaming table and the requisite tiles chosen to build up each terrain.


As you can imagine, with the biggest Operations involving five separate terrains, there aren't enough tiles to lay out all the terrains at one go.  The format for handling all the Operations is that the tiles for each terrain in the left most column are laid out.  Then, when the objectives have been completed on each of these terrains, the terrain card is flipped over to show completion and the terrain tiles are removed and the next column's terrains are built from the necessary tiles.

This whole process is, as far as I'm aware, wholly original.  The combination of the two pairs of cards for each Operation allows for great variety as, for example, though you may be operating in forest terrain in several Operations, the differing Special rules and objectives created for that forest terrain imbues the scenario with its own qualities. 

The cards are also a fantastic design feature for those who will soon want to create their own favourite Operations.  My own personal wish immediately turns towards Holland as, though a couple of the Operations included in the game involve bridges, neither are influenced by that epic bridge at Arnhem.  For others who like bridge scenarios, their goals might take them instead to Remagen. 

However, that's just a dream for the moment, as the nine provided in V-Commando will certainly task your skills.  Each terrain of an Operation forms its own mini-puzzle to be solved with the vagaries of the dice ready to throw a spanner in the works.  Just in case you turn out to be a prodigy of success, all the Operations contain one Veteran Special rule.  Once you have played Operations with the Standard set of Special rules, you can add in the Veteran Special rule which adds additional difficulty and always increases the number of German reinforcements you will have to face!

As a game that can be played cooperatively, it has a good RPG feel and, especially gaming with friends, it can be great to discuss what actions each commando will take and what order they'll activate in.  Outcomes and die rolls all become that bit more tense.  But, by preference [and perhaps sheer greed], I can't help saying that solo play is my favourite.  I just want to be the guy organising my team of commandos.

So, by now, I doubt that you need to be told that for me V-Commandos is an out and out winner in every category. And, please, if you need to ask the question [as has been asked on at least one game site] what does the V stand for in the game's title, just think Winston Churchill!  In fact, if you do need to ask the question, perhaps running a commando might not be your best choice yet!

Good luck and keep Stealthy!!!!


The American Revolution by Decision games       The American Revolution is a bit of a strange du...

The American Revolution by Decision Games The American Revolution by Decision Games

For your Wargamer, Toy soldier collector, MiniFig collector, military history nut. Reviews, interviews, Model Making, AARs and books!


by


 The American Revolution is a bit of a strange duck when it comes to wargames concerning it. In the computer world it is hardly represented at all, however in the chit world it is well represented in both tactical and strategic games. 

 This game of the American Revolution is actually a reprint of the game that appeared in Strategy&Tactics #270. The map has been revised, and the rules have been redone. It also has had some optional rules added for more flavor. There is also an addition of a new scenario. The game now comes with a play-through and designer FAQ. The game rules are thirty-two pages long. It comes in the form of a zip-lock game from Decision Games. The map is a large one coming in at 34"x 22", and the game has 228 counters. The map is a mixture of point-to-point and area movement. The map is 75 miles to the inch. It is functional instead of a work of art. To be honest, it really doesn't matter if the components are beautiful or not if the game play isn't there. The pages of BoardGameGeek are bursting with beauties that are unplayable, and plain janes that are played so much that gamers are on their second copy, as the chits or map has been rubbed away. The map is large enough to accommodate the eastern part of the U.S., Canada, the Caribbean, and Atlantic Ocean areas. The size of the area represented adds a lot to the strategic flavor of the game, especially if France and Spain enter the war. It is a two player game with the American player controlling the French and Spanish forces. Among the available forces available to each side are:

Naval Forces
Continental Army
Militia
Tories
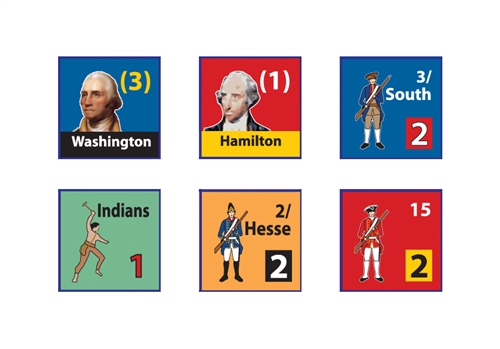
Indians
German mercenaries


 Historically, the British won almost all of the large battles without ever coming close to winning the war. The American forces kept rising up like a Phoenix to force the British to play a losing game of whack-a-mole. In reality, because of the time period and the length of time and mileage, the British could never really win. Their only hope was for a negotiated peace based upon political incentives to bring the colonies back to the fold. I, for one, believe that General Howe and others thought that a few hard whacks would make the colonists see reason.When this didn't happen, they were at a loss of how to actually win. But I digress; back to the game. 

 The British player is presented with the most strategic choices. He can go for broke and try to subdue the colonies all at once, or like Clinton and Burgoyne, use the British anaconda to swallow one piece of them at a time. The American player is really only represented with the choice of attacking Canada other than that he mostly reacts to the British players' moves. The British player, at first or until France and Spain get involved, with his naval power can decide when and where he will descend on the colonies. He can bring overwhelming force to any point on the map he chooses at the beginning of the war.


 So what is the game play like?  

 Sequence of play:

 On the first turn the American player has the initiative; after that the player who commits the higher number of campaign markers has the initiative. On turn one, the British player also pays twice the normal amounts for mobilization and campaign markers.

 The second phase is the 'Political Phase'. Both sides add up their political points for the areas they occupy.

 The third phase is the 'Mobilization Phase'. The first player uses his political points from the last phase to build units or buy campaign markers, then it is the second players turn.

 The fourth phase is the 'Rabble Rousing' phase. Here you can commit markers to the three 'rabble rousing' tables: American revolutionary progress, colonial loyalty, and European balance of power.

 The fifth phase is the 'Campaign' phase. The campaign phase is in turn split into three parts: first, second, and third. The first phase is used for normal movement and then combat. The second and third phases are used for forced march movement and the combat that results from it.

 The six phase is the 'Supply' phase. This is split into two parts: forage and enlistment. In the forage phase the player that has the initiative checks his units for supply, and then rolls a die for each unit that cannot be supplied. On a roll of one to three the unit is eliminated. On a roll of four to six the unit survives.

 The seventh phase is the 'Victory' phase. You check for a sudden death victory, and if neither side gets one you continue to the next game turn.

 This is just a synopsis. There are rules for: militia expeditions, overrun, frontier warfare, massacre etc. The game turns are yearly so it is a fairly fast paced game, although each side does have many choices available for each turn. You can choose to play with the optional rules which would include the use of fortress, siege, and partisan markers.The game play is pretty free-wheeling, meaning that it is fairly easy to lose points and areas with a little bad luck. Your plan may make it look like you are on the verge of victory, and the next minute everything blows up in your face like an over charged musket. 


First turn setup


 As is stated in the 'designer's notes', the core of the game is the campaign markers. The random picking of the campaign markers means that you, as the player, might have to drop the plan you had in place, and rethink this year's turn all over. You also lose half of your campaign markers at the end of each turn. Again, as is stated, you may actually pull a campaign marker that can only be used by your opponent. You can choose these markers to be one of the ones you let go at the end of the turn, or you can keep it in order not to let your opponent use it. The campaign markers come in three flavors: action, rabble rousing, or tactics. 


 As I stated, it is a fast paced game, especially with its one year turns. The counter mix is small, so other than the map size the game's footprint isn't large. The game plays out quickly, and with the sudden death rules it could be over even quicker. The best bet, playing as the Americans, is to just remain alive and to work toward European intervention. The added troops and navies of the French and Spanish forces help to really put the British in the skillet with no idea of where to jump. The British player is naturally going to go for the opposite, and try and keep the other countries out of what he considers as his business. The plan for the British to slowly engulf the colonies bit by bit hasn't really been seen to be that effective. The game plays like a boxing match between a heavyweight and a middleweight. The middleweight can strike hard and often, but has to remember that one punch from the heavyweight can end it all. As the game goes on, the middleweight gains muscle and increases in size, and can also call two friends in to help him fell the giant.


Robert

Game: The American revolution
Publisher: Decision Games


Plutarch's Lives of The Noble Greeks and Romans by Guess Who: Plutarch  I wasn't going to advocate for...

Book of the Week Plutarch's Lives Book of the Week Plutarch's Lives

For your Wargamer, Toy soldier collector, MiniFig collector, military history nut. Reviews, interviews, Model Making, AARs and books!

Plutarch's Lives of The Noble Greeks and Romans


by


Guess Who: Plutarch


 I wasn't going to advocate for any particular version of his work, but this one from Amazon looks pretty good, and has many good reviews. It is:

 Another thing it has going for it is that it is only $1.99 for the Kindle edition.

 The volume that I have is from when books were built like tanks. I paid more for it, but it has lasted more than forty years. It is not meant to be a straight biography of all these great, and not so great, men. It is meant by the author to show his own morals and how these men stacked up to them. The very great part about his books is that they are really the only biographies from anyone near the actual time they lived. Plutarch does get his moralizing in, but for the most part you also get the full biographies of his subjects in it.

 To those of us who are into Ancient history maybe you can relate. I was reading this book when my first child was being born. This was after the husband couldn't be in the room, and before we had to take classes to be in the room (I am still confused about the classes, because my role was pretty secondary to the action going on). The birth was imminent and my wife was surrounded by nurses and doctors. This birth was the only one during the daylight, so we had a lot of hands on deck. It was so crowded around my wife's bed that I couldn't even see her if I wanted to. So I stayed on the couch and read page after page of Plutarch. That is until a nurse came to me and said "Mr. Peterson you may want to see this". She was both right and wrong. Some of it was glorious to see, and some not so much. Anyway, the book has been with me during all of the most important times when I have had to wait around. I hope you find as much enjoyment out of it that I have.


Robert


If you want to start at the beginning, here's  Part 1 A brief recap: I have succeeded in my first objective of supplying an existing F...

Early Access Preview: Afghanistan '11 - Part 2 Early Access Preview: Afghanistan '11 - Part 2

For your Wargamer, Toy soldier collector, MiniFig collector, military history nut. Reviews, interviews, Model Making, AARs and books!

If you want to start at the beginning, here's Part 1

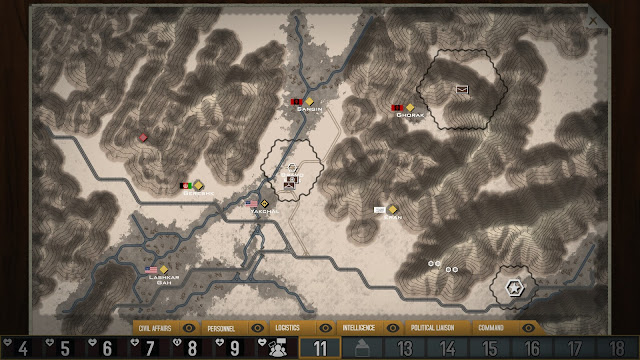
A brief recap: I have succeeded in my first objective of supplying an existing FOB with two truckloads of supplies. I now need to push up my Hearts and Minds score while defending the FOB.

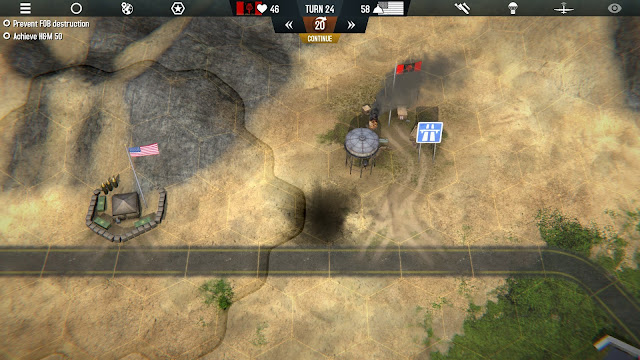
The FOB is loaded with troops and supplies, but is still quite isolated from HQ.
After taking a few dings in recent turns, I'm in the negative on Political Points (PP) and can't do much. I figure I will slow things down for a few turns and try to consolidate my position.


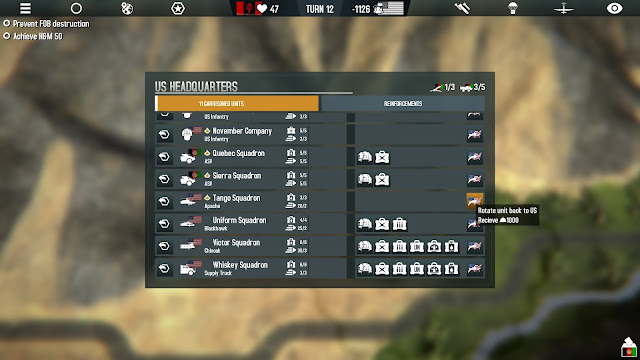
Units can be sent back home to regain some PP.
I'm forced to send home an Apache attack helicopter to shed some of my PP debt. I need to get back in the positive quickly in case an emergency crops up, and I have need of the special abilities like airstrikes or supply drops.


Some good news!

The coalition supported candidate wins the Afghan national elections, this means we get a few bonuses like reducing the number of Taliban missions. As you will see, this reduction was hardly felt...

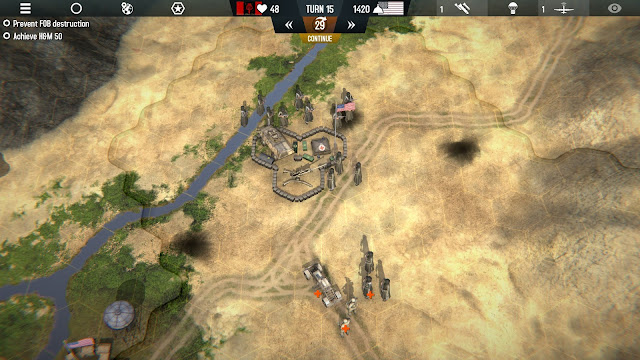
Sending vehicles ahead without mine sweeper support is dangerous.

I send a transport loaded with some ANA soldiers down south to visit the friendly village there. Since it is far from the mountains, I decide to risk sending it racing ahead without mine sweeping operations going first. My Husky minesweeper was already damaged by some roaming Taliban. Unfortunately, the ANA troops hit an IED, which ruins their whole day. Now I have two vehicles damaged and exposed.

Heavy enemy presence detected!
I can't risk sending the Husky back to base without scouting the area, so I launch my recon drone. It's not a pretty picture, a total of FIVE Taliban units are hanging around in the area. 

Taliban sent packing.
 I hit the Taliban with artillery, airstrikes, an Apache, and mechanized infantry. My ground forces take a couple of hits, but the Taliban are either destroyed or on the run. Now to get everyone back to base to recover.

Uh-oh, that was just the beginning.
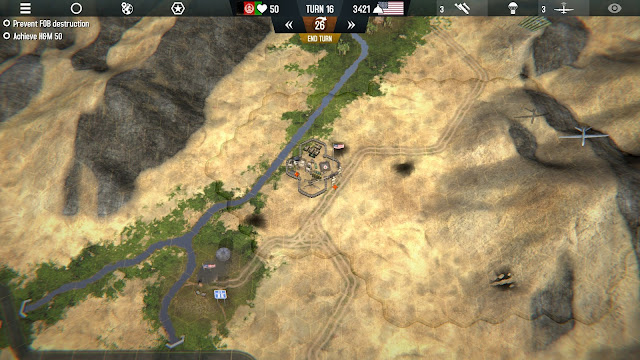
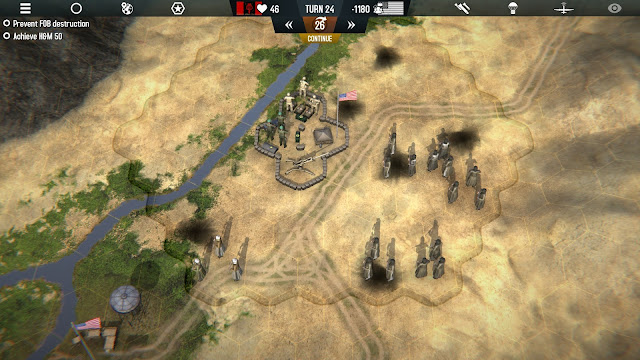
Before my forces can get back inside the FOB, another swarm of Taliban units appear and surround the base. Artillery hits them again, and more coalition ground forces join the fight to hold the FOB.

Taliban defeated, but we have many wounded.
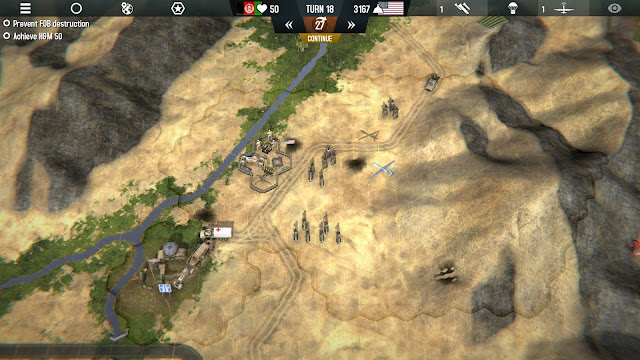
I'm able to push the Taliban back again, but I have a lot of wounded soldiers. I use the engineers on hand to add a field hospital to the FOB so that my infantry can be healed up to full strength.

Here we go again.
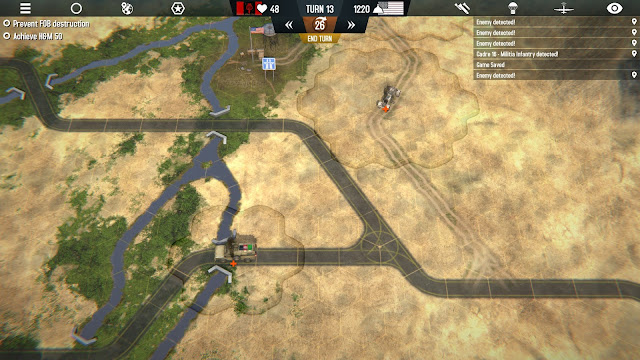
On the next turn I organize and dispatch a small convoy to head west across the river and build a new FOB. They leave just as another wave of Taliban fighters moves against the FOB. 

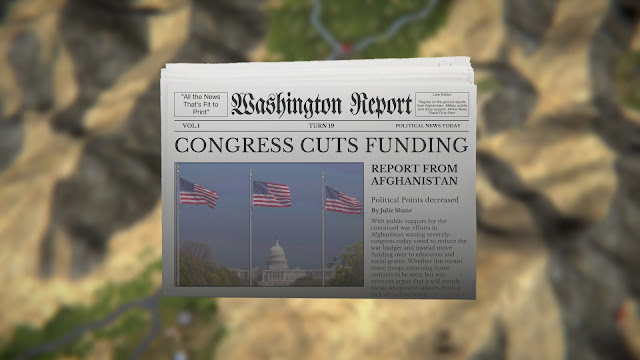
Oh, come on. Right now?
Congress, in its infinite wisdom, decides to cut off funds even as the fighting rages here on the front lines.


The area around the FOB is looking pretty scorched after constant battle.
Once again, my forces are able to beat back the Taliban. My convoy sent west encounters no resistance and manages to set up a new FOB. Things are looking good!

I spoke too soon...

The enemy gives me a few turns of relative peace, and I use the opening to deploy some troops to the nearby villages, knock out a couple of opium fields, and fly in additional artillery ammo to the FOB.  However, the relief does not last long, another large wave of Taliban insurgents appears around the FOB.

What a mess.

Although things had been going quite well at the western FOB, somehow an enemy group slipped in and planted an IED just outside the line-of-sight of my FOB. An already wounded infantry unit sent on a routine trip to the village was hit and destroyed.

When it rains, it pours.
My recon drones will now be more expensive to deploy. I did not have much luck with events during this scenario.

The western FOB is now threatened as well.

Attacks on the central FOB continue, I lose another helicopter to RPG's, and now my western FOB is surrounded and has no infantry available to defend it. I also ran into several annoying bugs that I did not encounter during the first portion of this AAR. 

As my score begins to slip further and further from reach, I decide to call it quits for now. I conceded defeat.

The final game state.

I look forward to playing a more updated version of this game, and will give it an in depth review on or right after the March 23rd release. There are a lot of good things going on here, but as you can see, the very first scenario out the gate is quite difficult to even survive, much less win. The balance currently feels a bit off. I was hesitant to ever send my regular US infantry into combat with Taliban fighters, since they had an almost even chance of losing. The ANA infantry had even worse odds. This meant I only had a few options for attacking the enemy, and there were a LOT of enemies around. I'm still very much a novice at the game, so maybe the balance is fine and I'm just not approaching things correctly.

There were also more than a couple of bugs, but that's to be expected at this point. I imagine most have already been ironed out and will be patched soon. My favorite was a Taliban unit that survived being shot at by an Apache, ran around the perimeter of my FOB, shot an RPG at the helicopter, then teleported a half-dozen hexes away, turned and fired back at the FOB, blowing up a supply truck, then disappeared into the fog of war. Those guys were just a little over-powered, I have to say! 

I anxiously await the final version of the game, and look forward to giving it a full review sometime next week. Although this match ended in a frustrating way, it still did a great job of capturing the frustrations of the real conflict. There is a constant struggle to achieve multiple goals at the same time with limited resources.

The Ultimate Piston Fighters of The Luftwaffe by Justo Miranda   The Ultimate Piston Fighters of The Luftwaffe i...

The Ultimate Piston Fighters of The Luftwaffe by Justo Miranda The Ultimate Piston Fighters of The Luftwaffe by Justo Miranda

For your Wargamer, Toy soldier collector, MiniFig collector, military history nut. Reviews, interviews, Model Making, AARs and books!


by


 The Ultimate Piston Fighters of The Luftwaffe is not the book I thought it would be. I thought it was going to be a book about the possible 1946 air war, and all of the (some outlandish) propeller planes that Germany might have flown. Instead, it is an encyclopedia of all the different propeller fighters that were on the drawing board for pretty much the entire war. 

 The introduction discusses the effects of  'compressibility buffering' and how advanced the Germans were in understanding it. Then it goes on to list all of their major aeronautic testing sites, especially the wind tunnels that were state of the art, for the time. It also examines the effect that the blockade had on German industry, and their attempts to come up with ersatz solutions for the missing pieces, such as high octane fuel, oil, and rubber. One of the things the Germans could do nothing about was the lack of metals like chromium and molybdenum that were used in hardening steel. Without these, their jet engines would always be prone to breakdowns, meltdowns, and have a generally short life. The Jumo 004 jet engines sometimes had a span of only thirty hours between overhauls.


 The German airplane industry worked hard to develop the best piston engine fighters they possibly could. The book is not a compendium of crackpot last minute war winning schemes. It is a treasure trove of actual designs for the continued development of in use aircraft (BF 109, FW 190 etc.), and some advanced aircraft and weapons that we were lucky to not have to face. 


 The book has more than a few plans for for dual contra-rotating  propeller planes. This then segues into the development of the ejector seat, these being needed to escape instant and horrible pilot death by the pusher props.


 The book continues with plans for large caliber weapons, and then goes on to show the many rocket projectile plans. There are also some plans based on the 'Schrage Musik' weapons. These were weapons that were pointed at an angle coming out of the top of the airplane, to allow night fighters to fire into the bombers' bellies from below. There are also some designs that were based on the photo sensitive rocket/shells that were actually used on some ME 163s. The shadow of the bomber going over the aircraft would set them off. At least one Allied bomber was lost to this weapon.

  Each plane and weapon is accompanied by scale drawings of them. The planes have listed their weapons, speed, and ceiling based upon wind tunnel experiments, etc. The descriptions are filled with the aircrafts' uses, and what specifications from the Luftwaffe they were meant to fill. 

 The book is the ultimate for German prop plane junkies. Hopefully Mr. Miranda is working on more books about the other Axis and Allied countries' designs.


A big announcement from Slitherine/Matrix Games today! They are working on Panzer Corps 2, and expect it to be released some time...

Panzer Corps 2 Announced Panzer Corps 2 Announced

For your Wargamer, Toy soldier collector, MiniFig collector, military history nut. Reviews, interviews, Model Making, AARs and books!


A big announcement from Slitherine/Matrix Games today! They are working on Panzer Corps 2, and expect it to be released some time next year. The game will use Unreal Engine 4 and feature full 3D graphics. We look forward to seeing what other changes and improvements will be included in the sequel. I reviewed the original Panzer Corps and gave it high marks. This will certainly be one to watch!

See below for the announcement trailer and official press release:


Panzer Corps 2 is in the making
A sequel to genre-defining game will hit the stores next year

The Panzer Corps series has built an impressive following over recent years and allowed many players, old and new, to experience a type of wargame that was equally approachable and challenging. It managed to reinvent a format while keeping it true to its origins.

The release of Panzer Corps also marked the return of a long-neglected gaming formula, which still had a large and loyal following. Its spectacular success brought an almost forgotten genre back into fashion, it inspired multiple clones and literally gave new life to an entire market.

After over five years of expansions, mods, challenges and tournaments, a brand-new instalment of the franchise is ready to take the strategy gaming segment by storm again. This time, with even bigger ambitions.

Panzer Corps 2 is currently in development using Unreal Engine 4, to allow an impressive leap forward in both technological capabilities and visual impact. Hundreds of World War 2 units will be shown with a level of quality and detail never seen before in a wargame.

The move to a fully 3D engine is a natural evolution of the game, but the core gameplay will always remain true to its roots: pay tribute to the classic gameplay of a distant golden age of strategy gaming, refine it, perfect it and use the most recent technologies to enhance these experiences and bring them to a new generation of gamers. In other words, strike the perfect balance between tradition and innovation, both in visuals and gameplay.

Players can follow development on the [official forum] and on the [Flashback Games site] and they are welcome to give ideas and suggestions towards what their dream Panzer Corps sequel would look and play like.


- Joe Beard
hpssims.com