second chance games

Search This Website of delight

Grant's Gamble By Worthington Publishing  Worthington Publishing has graciously sent me a few of their games ...

Grant's Gamble a game by Worthington Games Grant's Gamble a game by Worthington Games

For your Wargamer, Toy soldier collector, MiniFig collector, military history nut. Reviews, interviews, Model Making, AARs and books!


By


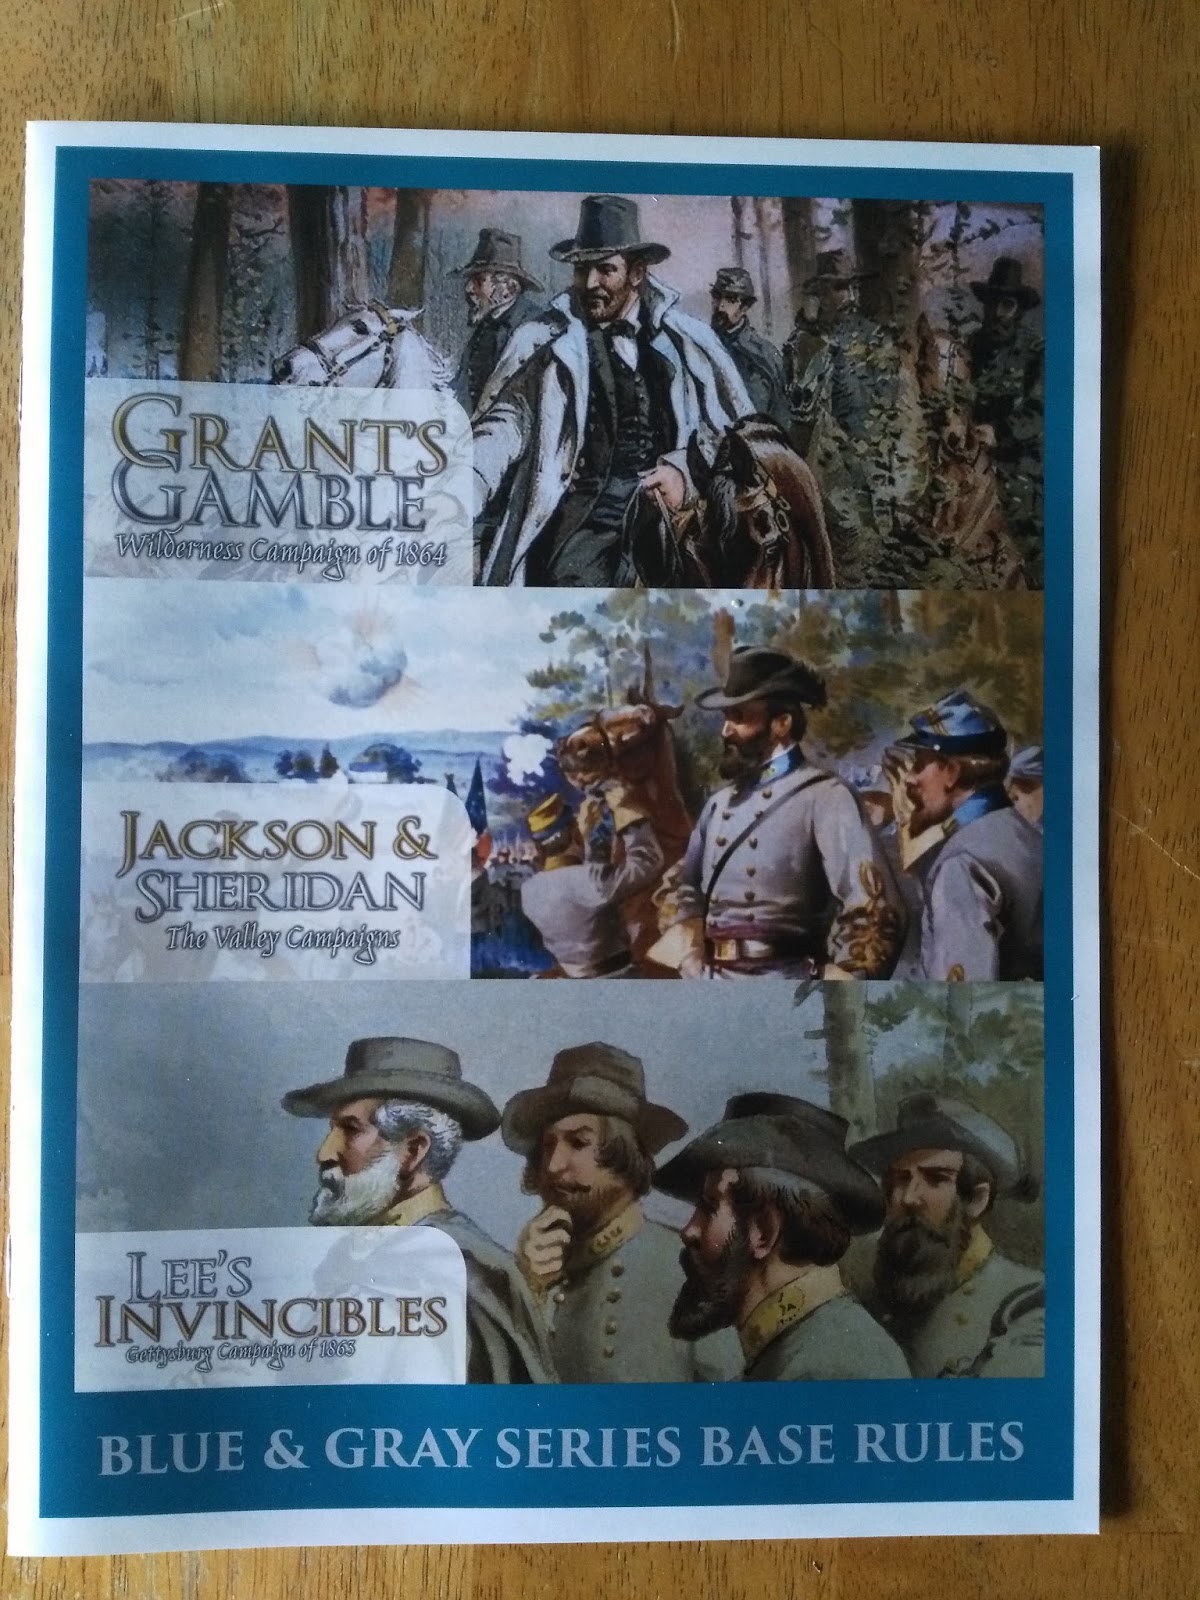
 Worthington Publishing has graciously sent me a few of their games to review. I will start with the game Grant's Gamble. I picked this game because I have read everything I could find on the campaign, and have walked a lot of its battlefields. 


 After opening the box, I am pleasantly surprised. The game also comes with the units and an extra map piece to allow you to play McClellan's 1862 campaign. 


 The game uses small plastic blocks for the units. I have seen reviews about block games, but have never played one. The blocks need to have the stickers that represent the units attached to one of their sides. When seeing pictures of any block games before I couldn't help but think of 'Stratego'. I see now how this is just a simple and elegant way to simulate the 'fog of war'.


 The map is hardbound. It is not ablaze with colors or features, but at the scale we are playing it works just fine. The map is mostly of the state of Virginia with a bit of Maryland at the top. The game uses point to point movement to simulate the campaign. All of the components strike me as utilitarian instead of games where the developer tries to make  it a piece of artwork. There is nothing wrong with the artwork approach, but I have been playing games long enough to know it is the mechanics and rules that make a game and not the visuals. If the game is beautiful but sits on the shelf what good is it?


 After attaching all the stickers to the blocks, one thing becomes very clear. The Army of Northern Virginia and the other Confederate units are awash in a sea of blue units. I have played a good number of games about the 1864 Overland Campaign, but I do not remember the paucity of Confederate units being so visually brought home. It is probably because of the scale, which is for the most part Corps.


 The goal of the game is just as it was in history. For the Union, take Richmond or cut the railways to it. Richmond is worth ten victory points and Petersburg is worth five for both sides. The union player gets two victory points per turn if he can cut the railroad to both cities. For the Confederates, you must delay or as Lee said, 'strike them a blow'. Per Lee, if the campaign is turned into a siege of Richmond it is just a matter of time before the manpower and material of the Union wins.


 The rule book for the series is just eight pages long. The separate game rules for this game are just two pages. Worthington wanted the games in the series to be played, and not have the players debating the rules.

 The sequence of play is:

Weather roll

Check for replacements

Cap roll

First player movement

First player initiates battle

Check for victory for the second player

Second player movement

Second player initiates battle

Check for victory for the first player

End turn

 The weather roll sees if it is clear or rainy for this turn. If it is rainy all movement is reduced by one, unless it is the second rainy turn in a row, then movement is reduced by two.

 Supply in the game is rather abstract. When a unit is activated, it must trace a line to one of two points on the map without going through an enemy infantry or garrison unit for it to be in supply. Units that are out of supply lose one movement point, and may not receive replacement points. I think that cavalry should be able to block supply also. In actual fact raiding did not have a great impact in the eastern theater of war, but it did with the greater area of the western campaigns. When I am comfortable enough with the game system, I will look into supply a bit more.


The game setup for play

 Both the Confederate and union player receive one replacement point per turn.

 CAP (Command Action points)) are both at a three for each side normally. Both Grant and Lee are listed as having a command rating of seven. Using two die, if you roll a seven or above during the CAP roll you will receive one extra CAP point for your side. it takes one CAP to move a unit one point.

 Battles happen if both sides occupy a location. Battles take place on a battle board. Fortifications, mountains, and river crossings affect the odds in battle. There is a 'cavalry screening action' rule to simulate each sides cavalry ability to stop or slow enemy movement.

 There is an automatic victory rule for both sides. For the Union, it is if they occupy Richmond and Petersburg, or if the Confederate infantry strength points fall below fourteen. For the Confederates, it is if the Union infantry points fall below twenty-eight.

 Both leaders have a special ability in the game. Lee's is a reaction movement; any units stacked with the Lee piece can move to one adjacent location. Grant's ability is for the Union player to re-roll any one failed morale check during each round of battle.

 The Union player can also move one unit per turn, for two CAP points, from one friendly port to another. Thus, you can try McClellan's 1862 approach in the 1864 campaign. For the Confederates, there is a rail movement of two units per turn, at a price of two CAP points per unit. There is no rail movement allowed for the Union.

 The first battle has Grant and three corps (II,V,VI) attacking Lee in Chancellorsville with the Confederate III corps and a trench marker.


 The defender rolls six die, the number of rolls for attack are in the upper right hand corner of the unit. In this case a five, and one more die roll for the trench marker. Hits are achieved on a roll of six on each separate die. The three Union corps roll four die each (five normally, but one is subtracted for attacking across a river). The Confederates roll one six for a hit on the Union II corps, while the Union rolls two sixes for two hits on the Confederate III corps.

 After all hits are applied, the units involved must pass a morale check. You pass/fail the morale check by rolling one die per unit. If you roll a higher number than the number in the star in the upper left of the unit, you fail the check. The attacker checks his units first. In this case both sides' units all pass the checks. You can either voluntarily retreat from battle or be forced to. In this case, neither side wants to back down so we begin battle round two. The players then are able to roll two die to see if any reinforcements are available. The reinforcements can come from one movement point away. Two die are rolled and if they equal or are greater than the commander's rating, the unit can reinforce the battle. The Union player has no units near, and unfortunately for the Confederates both fail their reinforcement check rolls. The next battle has the Confederates rolling for two hits and the Union player for none. 

 After this round neither side retreats, and the Confederate II corps passes its reinforcement roll. The next battle round the Confederates make one hit roll and the Union three. On the subsequent morale check the Confederate II corps fails. 


  The Confederate player elects to retreat from battle. The side staying on the battlefield gets to roll one die for each of its units to see if they get a hit on the retreating forces. As it is during the battle rounds, you have to roll a six to get a hit. The retreating side can move one point away from the battle. If it were a forced retreat, the retreating force has to move two movement points.


 This is the situation after the Confederate move on turn one. The Confederate 1st corps has beat a retreat to be near Lee and the other two corps. If Grant attacks the isolated 1st corps, Lee's reaction move can bring the other two corps with him to the rescue. The only problem being is that because of the long movement of the 1st corps, and the retreat from battle of the other two, none of the Confederate corps are now in trenches. 

  To me, the game rules  make it feel like you are in Grant's or Lee's shoes. You want to do so much each turn, but are really hobbled by the amount of troops you can move, and actions you can take each turn. As the Union, you really want to get your corps fighting Lee's right away. On the other hand, you also want your other forces to start to put the squeeze on Richmond. As Lee you have to really pray your opponent makes a mistake that you can capitalize on. This game is a player's game. It is one that will sit on your table for a while with you playing game after game to try different strategies, and that is only the 1864 Campaign. After you are done with that campaign, you still have the 1862 one to try out. 


Robert

WARFIGHTER: WWII from DVG Warfighter: The Tactical Special Forces Card Game  was DVG 's first introduction to modern day ...

WARFIGHTER: WWII WARFIGHTER: WWII

For your Wargamer, Toy soldier collector, MiniFig collector, military history nut. Reviews, interviews, Model Making, AARs and books!


WARFIGHTER: WWII

from

DVG


Warfighter: The Tactical Special Forces Card Game was DVG's first introduction to modern day tactical combat and the engrossing system created to simulate it.  It doesn't take much guess work looking at the title at the top of the page to know where their second foray into their system is taking us and so, if you are new to this system then I'd strongly recommend that you have a look first at my earlier review of Warfighter [for short].  This will give you a detailed idea of the basic game system and, as this move back to WWII makes few departures from the original, my goal today is three-fold.  These are [1] to comment on the quality and presentation of the basic game,  [2] to sketch in the minor additions and improvements to the basic game product and [3] to look at the expansions package in its entirety. 

For a small company DVG has a very high reputation and deservedly so.  By the time Warfighter appeared, card and counter quality were second to none.  Only the substantial game board came in for some criticism, not through lack of quality, but because [despite its impressive size] it wasn't really large enough to accommodate all the Hostile cards that were likely to end up displayed on the board.  A revamped board in the mighty Footlocker expansion went some way to improving this situation. But honestly to produce a board that would perfectly hold all the necessary Hostile cards would be massive and prohibitively expensive!


The WWII board


In Warfighter WWII, they've supplied a variant on this upgraded board that is clearer, sharper and even more user friendly.  I've certainly had no problems with any of my games about being sure which locations all my Hostiles were located in.  Despite this you'll still read moans from some players claiming that they never use the board or that placing the several decks of cards in their allocated place covers up the design work!  If you think playing on a plain table top creating your own layout is preferable, then that's your choice.
The host of quality counters before being pressed out.
... and just a sample after pressing out


All the counters [four sheets of them] are the magnificent circular or rounded corner variety that press out with ease and not a single dog-ear in sight when you've finished.  The cards, and once again so many of them, are a delight.  The illustrations for all the Soldier, Hostile and Action cards look like genuine black and white/sepia or late war colour quality reproductions.  If any are modern mock-ups, they're a damned fine job.
Just a few of your soldiers 

However, be warned you will find diametrically opposed views to mine, one of the strongest being "unattractive .. atrocious graphic design: there are few icons .. they are a chore to read."  The commentator in question would have preferred graphically created soldiers [such as the image on the box front] and scenes instead of the use of actual historical material.  I like the cards for exactly the reason that they use actual historical material; I wouldn't want some artist's drawing instead.  So, who's right?  I mention this because I don't think there is a game where the same element won't be praised by someone and decried by someone else.  What worries me is that opinion, as in this instance, is so often presented as fact.  Of even more concern is that this comment was given in reply to a request for advice from someone as yet undecided on whether to buy the game.

The comment about lack of icons, however, seems just to want icons without considering whether they are appropriate or an improvement.  The information on many cards is of two types - a table to roll to see whether you or a Hostile has scored a miss/wound and instructions.  Can't do anything about getting rid of the numbers and would icons help to convey a miss/wound better than the words themselves? Any other words on the cards are explanations that simply couldn't be conveyed in any other way.
Do you think this information could be conveyed by icons?
Or what about using icons for these instructions?

The one change to the cards is from one reticule for each individual Hostile on a card to a single reticule with the number of Hostiles inside it.  At first, I missed this detail, but as the KIA and Suppressed markers rarely stayed in place on top of each reticule, so that you often had to check how many reticules there were underneath, I soon began to appreciate just having the number in view all the time.

But for me the single major outstanding upgrade is the rule book - nearly 20 pages longer.  For those looking for lots of new rules, there may be a disappointment.  There are only a few new rules.  Instead, you get a far better layout.  Comparing the front cover of the rule books for Warfighter and Warfighter WWII spells out the change.  The former is taken up for three quarters of the page with a lovely picture and for a quarter with the index, the latter has no lovely picture, just a full page index.
The front of the new rule book may not be as attractive,
but it sure is more useful

This index has ten side headings with 70 subsections.  If you need to find a rule, it couldn't be easier.  Inside, the same improved layout for ease of access and use continues.  Following much the same order of information as in the first game, there is an increase of white space that adds to making reading easier and swifter.  Each major section has each page boldly edged in distinguishing colours and labeled in large block capital letters. 


There is a much more helpful inclusion of subheadings, which results in many smaller rules being properly spelt out at the right point and consequently not being overlooked.  In this respect, Covert and Support Action cards stand out as a typical example.  In the original Warfighter, they were only too easy to overlook and difficult to find when needed - now they get proper prominent explanation.  Despite all these features, there are still comments out there about confusing rules, poor organisation or hard to find rules and taking repeated games to get things working smoothly.  All I can say is that wasn't my experience.   

W
hen it comes down to what's in the content of the rules, there are no major changes.  Partly, I think this is because the original set for the modern world were so thorough and that when you are dealing with the tactical level, many concepts remain much the same and only the nature and quality of the weapons may change.  Perhaps, some may feel that the stats of some WWII weapons as compared to modern day weapons don't differ sufficiently.  Personally, as a gamer of the old John Hill variety, where effect is more important than hard statistical data, Warfighter WWII provides just as many tense nerve-shredding moments as is needed to keep me happy.

With the wide, wide range of Action cards and the sheer multiplicity of interactions between them and the soldiers you have on the Mission... and their different weapons ... and their equipment... and their varying skills and abilities, there is more than enough to handle and totally engross me in the unfolding narrative.

Only three new elements stand out.  The first is an extension of the area of hand to hand combat, with Melee, Unarmed and Thrown included.  The second is the introduction of Event cards that are drawn and occur when a Hostile card is drawn that contains the Event keyword.  Again, I loved this way of bringing random events into the game.  The basic game provides only American Soldiers against German Hostiles and even here I deliberately avoided looking at any of the Event cards so that each turn of the card was a fresh experience.   Each Event is different and I look forward to discovering new ones as I explore the different Nationality expansions in the future.  Sadly, a quick glance shows that the expansions provide very few additional Event cards. 

The last new introduction is Service Record cards; besides adding  a note of historical colour, I think their effect can best be described as adding a further riff on top of the use of Skill cards.  Interesting without being anything exceptional.

As always in the rulebook, at the end there is an excellent 6 page play through of a complete sample Mission that helps illustrate the rules so effectively and root them firmly in your head.  Finally, everything is rounded off with a 4 page player aid on stout glossy card alphabetically listing all the Keywords. 


I hope by now I've convinced you of the quality and value of the basic game and just to entice you further, in a few weeks' time, I shall be writing up "A Country Stroll", a detailed AAR of a typical Mission, which uses purely the components that come in the basic game.

So ...from the essential game to the expansions ... twelve in all.  Briefly:-
Expansion 1    US  #1
Expansion 2    UK #1
Expansion 3    German #1
Expansion 4    Gear
Expansion 5    Ammo Box
Expansion 6    US #2
Expansion 7    UK #2
Expansion 8    German #2
Expansion 9    Russian #1
Expansion 10  Russian #2
Expansion 11  Polish #1
Expansion 12  Polish #2


These have come in for a fair amount of criticism mainly on the grounds that they provide too much mixture in each, so that you are forced to buy both expansions of a single nationality.  The implication is usually that this is a way to force us to part with more money.  Having looked closely at what is offered and what each expansion contains, I'd like to offer a different analysis and explanation.  

As the basic game features purely US Soldiers v German Hostiles, the initial Expansions covering these two nations differ from all the additional nations covered in this first Wave of expansions.  With obvious logic, Expansion 1 US#1, predominantly contains US Hostiles divided between Frontline and Elite units [37 cards in total],while Expansion 3 German #1 holds mainly German Soldiers and German Weapons.  So far, so logical and I would consider totally what I'd expect and want these Expansions to contain.  Consequently, US #2 and German #2 are mainly what I'd call completist decks - i.e. you don't really need them, but you'll get them just to have everything! 

The other nations' expansions follow, at their core, a pattern that reflects the fact that nothing in the basic game contains their  nation.  So, first and foremost in each Expansion #1 comes a mix of Soldiers and Hostiles and then a spread of weapons, equipment and skills.  Again, I think, a logical decision.  However, variations reflect certain basic factors. 

[As a Brit, I inevitably turned to the British expansion pack first, but I can assure you that, if you never invest beyond the basic game, just playing as the American soldiers against German Hostiles will give you hours and hours of unfailing pleasure and excitement!]

So
, the United Kingdom Expansion #1 provides more Soldiers [17] and Hostiles [15 Frontline and 17 Elite] than other new nations, while adding in a few Action cards,  a few nationality specific weapons and a few Skill cards and Expansion #2 continues a similar pattern.   The logic for this is that there is no need to greatly add Location or Mission cards, as they largely mirror US cards.

However, the Russian Expansion #1 reduces the number of Soldier &  Hostile cards in order to accommodate the need for more Location and Weapon specific cards [and a few Objectives] to reflect the significantly changed terrain and weather.  Not, I would have thought,  unreasonable. 
Typically, rubble and heavy rubble make an appearance, as do such locations as a warehouse, snow tunnels and the tank factory in the cards featured below.  Apart from introducing these archetypal Russian locations, some of this Expansion cards are the first to introduce harsh Environments - in this case Cold!!  So, at last the use of Hardy Counters for your Soldiers to help counter these harsh environments become an important additional element in your planning.  When the 2nd Wave of Expansions appear, we'll be off to North Africa and Hot Locations too!


The final country to feature is Poland, with both expansions focusing heavily on Soldiers and Hostiles, though I was very pleased to see a number of very specific Service Record cards identifying this nation.  Some  of them you can see below.


As far as I can see, the only possible alternative approach to handling the Expansions would have been to make each Nation's Expansion #1 primarily a Soldier deck and Expansion #2 a Hostile deck.  This would have meant that to be able to play each new Nation as both Soldiers and Hostiles, both Expansions were essential.  With the choice that the company made, you can experience each Nation as both Soldier & Hostile by buying just a single Expansion.  For my money, that's a good decision and certainly not one designed to exploit.

The remaining two Expansions are Exp 4 entitled Gear which is misleading as 24 of the cards introduce more UK and German Hostiles.  In this case I really would have expected the focus to be purely on Equipment and Weapons.  This is probably the most easily omitted Expansion, if need be.  If you aren't the sort that absolutely must own every single Expansion, then buying each nation's #1 Expansion is a good compromise.  

Last, and by no means least if size matters, is the Ammo Box.  In some ways a disappointment considering its cost.  Cardwise, it's primarily a substantial number more US/UK/German/Russian Soldiers and Hostiles, plus German Service Record cards.  Nice, but are they the most worthwhile addition? 

However, for me, it is the box that carries the day.  Slightly larger than the Warfighter Footlocker, but once more a vast amount of space is there, if you have gone for the whole shebang and want to store it very neatly and thematically.  Cards, counters [whether stored in small zip-lock bags or a tray], the  large, mounted game board, rule book, play aid, dice  - oh and don't let me forget the little bag of metal [clips of bullets, a few very flat hand grenades and wound tokens, and XP stars] and still there's plenty of room for the next Wave of Expansions!
Don't be deceived by my poor camera angle and the way I've leant the Expansion boxes, there really is lots more space and large, thick, glossy dividers to separate out all your hundreds of different types of cards.


Not the best items!!
Metal v Card

Well, there you have it - another incredible product.  But once more just the basic game is the key to it all and Warfighter Tactical Combat, whether modern or WWII is for me the best of all my primarily solitaire games.  [...and dare I whisper, somewhere down the line is Warfighter Fantasy ...]


The U Boat War in the Atlantic Vol’s 1 to 3 from Pan & Sword Publishing is an interesting set of books to review. On one hand it fee...

The U-Boat War in the Atlantic Vols 1 to 3 The U-Boat War in the Atlantic Vols 1 to 3

For your Wargamer, Toy soldier collector, MiniFig collector, military history nut. Reviews, interviews, Model Making, AARs and books!


The U Boat War in the Atlantic Vol’s 1 to 3 from Pan & Sword Publishing is an interesting set of books to review. On one hand it feels like the most authoritative source I’ve ever read about U-boat operations in the Atlantic. On the other, I’m not sure I learnt anything from it. I’m not boasting about my knowledge of the Battle of the Atlantic rather the manner in which the information is presented. For some reason, it just didn’t sink in [ba  dum!]. I think these books would make excellent reference material and are not necessarily the easiest to read from cover to cover.
U-Boat rendevous
That’s not to say that there isn’t a wealth of knowledge about personnel, equipment, training and tactics. If I had a specific interest in a particular boat or convoy then I would refer to this work first. However, it’s just written in such an undiluted-stream-of-information that I found it difficult to comprehend fully. The author, Gunther Hessler, a former Kriegsmarine staff officer who personally commanded a U-boat from 1940-1941, has taken the source material and applied the most sparse level of commentary to make reading it a dry affair [ba-dum tisch!].
Vol 1 covers the years 1939-1941. This is the period in which the Allies are struggling to deal with the U-Boat threat, initially in the littoral waters of the North Sea but increasingly further out into the Atlantic. This growing threat to Allied shipping occurs because of increasing numbers of Type VIIs being produced and the nascent wolfpack tactics that were being developed throughout this book. 
Vol 2 covers the years 1942-1943. Obviously, the major event during this period is America entering the war. What was quite surprising is just how many U-Boat operations and the tactical variety of those operations just off the American coast. U-Boats engaged in mine laying, coastal agent-insertion, standard anti-merchant shipping attacks and for the first time anti-convoy wolfpacks. In an effort to mitigate the early-war U-boat threat the Allies introduce convoys during this period. After they make an appearance the rest of the book reads like a convoy-by-convoy account of the war, interspersed with U-boat strategic decisions from U-Boat command.
Vol 3 covers the years 1944-1945. Although the air-threat to the U-Boats is an ever-present menace, starting in the previous volume, it is only in this book that the losses to the -U-Boat fleet are really presented. After reading this book which presents the industrial squeeze Germany experienced and the increasingly successful Convoy patrols it is no wonder that nearly 80% of all U-Boat crews were lost. As the cover of this volume suggests this period really is the twilight of the U-Boats.

I would absolutely recommend these books if you wanted to find out why a particular operation was conducted or what the official Kriegsmarine record states for a particular U-Boat. If you're in that boat [uggh] then these are the books for you. If you’re fluent in German and have access to the German historical naval records then that may serve your purpose just as well as these books do. I doubt that’s an option for many of us and it is that niche that is best served by these books. As the perspective of all these books is from the German side the Allies are continually referred to as 'the enemy' which lent an air of authenticity of the source to all of the books. 


Before reading these three books I thought I was in that U-Boat niche: I’ve harboured a desire for a long time to, and will one day, construct a U-Boat Mk VII scale model; my very first solo wargame was Steel Wolves; I’ve visited St Nazaire U-Boat pens whilst holidaying in France (my family weren’t aware of our proximity); I’ve visited the U-Boat Story at Birkenhead; I am professionally familiar with the efforts of the RAF’s Coastal Command and WWII and modern Submarine tactics. However, even with those credentials proving I do have an interest in U-Boats, I’ve realised that I’m still not in that niche these books are targeting. There must be people out there with specific areas of research, either generic Battle of the Atlantic events or specific U-Boat operations that are in that niche and would do well to pick these up. As I said they are great reference books, not great reading books.


Unfortunately, I found numerous spelling or grammatical mistakes and it almost felt like I was reading a poorly edited self-published e-book. However, the aim of these series’ of books is to tell the war ‘from sources as close to the source as possible’ and in that it is very accomplished. Considering the source material and the targeted market I’m sure that those errors can be forgiven and I will cede the benefit of the doubt as this is my first experience with these series. I have no idea if the author decided to keep the errors from original source material or whether they are his or his editor's own.

Each book is available from Pen & Sword Publishing at the price of £12.99 and is also available in e-book format for £5.20.

Warbanners, developed by Crasleen Games, is the latest game in a sub-genre I've covered a few times already this year: the turn-b...

Warbanners Warbanners

For your Wargamer, Toy soldier collector, MiniFig collector, military history nut. Reviews, interviews, Model Making, AARs and books!


Warbanners, developed by Crasleen Games, is the latest game in a sub-genre I've covered a few times already this year: the turn-based tactical combat game in a medieval/fantasy setting. The game offers fast-paced, yet detailed combat with a very clear and responsive UI. Outside of the combat, there is a light layer of RPG elements and party management to give context to the battles. There is nothing here that you haven't seen before, but it is all handled so competently that I think it is worth your time if you are into this kind of game. Now, let's dive into each section of the game in a bit more depth.


 In the campaign, which consists of 42 linked scenarios (some optional),  you command a small company of mercenaries, setting out to slay monsters and make some coin in the world. Unlike Battle Brothers, which focused on a sandbox world in the style of Mount & Blade, there is a linear story here, featuring your avatar Roderick. The story is the typical stuff of fantasy lore, there are necromancers raising undead, a mysterious cult, a war against orcs, elves feuding with dwarves, and so on, but it makes for good fluff to link the various missions together. You will often be given some kind of choice at a decision point in the story, and what you choose can change the shape of a coming battle, or have you avoid fighting at all. Many of these decisions will increase or decrease your "karma", which goes up as you do nice things, and down if you are a baddie. This doesn't change the game dramatically, but does lock away some options for your party if your alignment is one way or the other. 

The story moves along at brisk pace, and before you know it you will be caught up in the war against the orcs, which of course goes poorly for the humans and throws your party into some bad situations in the aftermath. I've not finished the whole campaign yet, but I think I'm about halfway through and can safely say that there is a good variety of mission types which force you to use different kinds of strategies. There are sieges, ambushes, desperate defensive stands and all out large scale battles where you have many allies and foes.


Managing your company consists of buying potions, equipping gear as it becomes available, and leveling up your experienced troopers. At the start you only have basic swordsmen and archers, along with your leader, but soon you gain access to additional fantasy archetypes. Dancers (basically rogues), mages, healers, knights, and so on. As you add in these more interesting classes, their abilities add much more complexity to the battlefield since they all have multiple special abilities and traits. The dancer, for example, gets bonus to flanking attacks and ignores enemy zones-of-control when moving. She can zip behind the enemy line and stab them in the back, inflicting bleeding damage as she goes and even has a limited ranged attack when needed. However, in return for all those perks, she has less health and can't take many hits.

As units level up, you can choose one stat boost from among three random options, so no two swordsmen will be the same after a few outings. Units can also gain new perks and abilities at higher levels. Another way to make a unit special is to give it one of the unique pieces of gear that are awarded after some missions. There are boots which can make a swordsman move like a dancer, a bow that increases an archer's range, and an item that lets a character attack in a 3-tile arc with each swing. 


Tactics play an important role in winning battles without losing a lot of units. Long term success in the campaign is much more assured if you can avoid losing any of your units in a battle. If they die, they must either be replaced with a fresh, level one newbie, or resurrected at a higher cost. Spending a lot of your limited cash on resurrections means that you won't be able to buy many potions, which are very helpful in certain situations, or hire the "assistants" which are essentially permanent buffs of various types. These assistants are people you hire to augment your mercenary band, but who don't actually fight on the battlefield. They do things like boost morale, unlock additional classes, or even give you a game-changing catapult in every mission. They are expensive but quite useful and you want to accumulate as many as you can afford. There isn't any way to get extra cash outside of completing missions, so for the entire campaign you are working with a very finite budget.

As you might expect, your forces are often outnumbered, so you will need to use the terrain to your advantage, creating choke points and kill zones when possible. Most every mission has the ultimate goal of killing every single enemy on the map, but how you go about that can differ a great deal depending on the circumstance and how you have built your army. I often used a tactic of holding a defensive line in one section of the battle, while punching through somewhere else and getting behind the strongest part of the enemy line. Potions, as I mentioned before, are very useful in this game and can help turn the tide of a fight. There are about a dozen different types, besides just health and mana potions. You can stun enemies, poison them, freeze them, or use other potions to buff your own soldiers. These potions cost cash, so you can't use them willy-nilly, but you will absolutely need them at times. One particular case was when I went up against the "boss" orc in a large battle. He was unstoppable in a straight up fight, able to kill multiple units in one turn, but toss a few potions at him and you can hobble him long enough to get in some attacks and wear him down.  Attack an enemy enough times and you can exhaust their stamina, which means even the nastiest warrior can't do anything on their turn. Every unit also has a morale value which goes up and down depending on how the battle is going, and other factors. Get an enemy to rout and they will be easy pickings.


All of this is tied together with a clean and efficient UI. When a unit is selected, all the hexes it can move to are highlighted, when colored numbers showing whether a unit will still be able to attack after they reach that destination. Unit stats and special abilities appear on the sidebar, along with any consumable items like potions they are carrying. It's all very straightforward, but works well and quickly. 

I really enjoyed the time I spent with Warbanners, and fully plan on going back and finishing the campaign even after I write this review. It's simply a good crunchy tactical strategy game that doesn't demand too much of your time to have a satisfying play session. I fully recommend this game to anyone looking for a solid tactical combat game with a classic fantasy theme. 


Official Website - https://warbannersgame.wordpress.com/

Warbanners is available on Steam.


- Joe Beard


Fokker DVII The Lethal Weapon by Tomasz J. Kowalski Marek Rys   Peace treaties regularly have clauses about ...

Fokker DVII The Lethal Weapon by Tomasz J. Kowalski and Marek Rys Fokker DVII The Lethal Weapon by Tomasz J. Kowalski and Marek Rys

For your Wargamer, Toy soldier collector, MiniFig collector, military history nut. Reviews, interviews, Model Making, AARs and books!


by


 Peace treaties regularly have clauses about types or groups of weapons in them, be they tanks, chemical weapons, etc. To my knowledge, the Fokker DVII, in the 'Conditions of an Armistice With Germany', was the only single weapon ever mentioned in a treaty. For those who do not know, Germany was forced to hand over all of their Fokker DVIIs to the Entente powers, although in reality many were not. Thank you to a reader for showing me my error, it was not in the 'Treaty of Versailles', just the preliminary armistice conditions.

 There is a myth or fact, which we will get to, that the Fokker DVII could fly upward and actually hang on its propeller for a short moment.  The authors discount the tale. However, that is not the end of the story. In Rhinebeck, N.Y. in the U.S. there is an aerodrome right out of World War I. They have aerial shows and even dogfights between the old birds. Some pilots and onlookers swear that, yes in fact, the DVII can hang on its propeller. I can see where people would ask the relevance of this maneuver, and think it was only useful in acrobatic shows. In actual fact, this would be a tremendous plus for the DVII in combat. When being trailed by an enemy plane, to be able to fly vertically for even the smallest of time would force your opponent to break off his attack, or risk going into a stall, due to the loss of airflow over the wings. The DVII could then turn and follow the opponent. 

 The author, Tomasz J. Kowalski has written twenty-three books and 1500 articles on aviation. This is his ninth book published by Kagero. This edition is in the same format as others in Kagero's 'Legends of Aviation in 3D'. A history of the airplane. filled with World War I photographs, is followed by computerized 3D views of the entire plane. These views also show the plane without its fabric skin, much like a 3D view of the human body sans skin and muscle. There are four full pages of computerized views of the machine guns and ammo holders alone.

 As mentioned, many nations after World War I received Fokker DVIIs. In the history section, even these planes are written about on a country by country basis. 

 For the modeller, aviation historian, or technical spec lover these books by Kagero are the end all and be all, though this book is not only for them. The World War I or aviation history tyro will find this book easy to get into. One very interesting bit of history of World War I aviation that the book shows is that planes built in Germany during the war were not carbon copies. You can see very real differences in planes manufactured by different firms. This, along with all of the other parts of the book, shows that if you have any interest in World War I aviation, or just aviation history, it belongs on your shelf.


Robert

 Book: Fokker DVII The Lethal Weapon
Author: Tomasz J. Kowalski and Marek Rys
Publisher: Kagero
Distributor: Casemate Publishers 

  The Battle Of Kursk: Controversial and Neglected Aspects by Valeriy Zamulin translated by Stuart Britton ...

The Battle Of Kursk: Controversial and Neglected Aspects by Valeriy Zamulin and Translated by Stuart Britton The Battle Of Kursk: Controversial and Neglected Aspects by Valeriy Zamulin and Translated by Stuart Britton

For your Wargamer, Toy soldier collector, MiniFig collector, military history nut. Reviews, interviews, Model Making, AARs and books!


by


translated by


 Here we are at Kursk again with another great book by Valeriy Zamulin. He is the author of sixty books and other historical works, mostly about the battle of Kursk. This book about the controversial and neglected aspects, digs deep into some interesting questions. Among them are:

Could the Germans have won the battle of Kursk?
Did Vatutin err?
With what forces did Model begin the battle of Kursk?

 No sane military leader expects to win an attack against dug in troops with less than a three to one advantage in men and weapons. The Germans planned this attack knowing they did not even have a parity in forces, and in some cases were heavily outnumbered. So why did they think they could win? 

 Mr. Zamulin goes into all the details of Army Group Center and Army Group South in the attack. He considers all of the variables and comes to the conclusion that if 'Operation Citadel' was launched earlier in April or May the Germans would still have lost. I believe that he is probably correct, but the answer lies not in numbers or trenches, but in hubris. Until 1943, the Germans trounced the Russians whenever the weather was warm. On the German side, I believe that they thought they lost in 1941 and 1942 to 'General winter', and not exclusively to the Russians. With the Japanese in the Pacific, the term was coined 'Victory Disease'. I think the German plan for Kursk showed that they suffered from the same virus.

 This book is standard fare for a Helion & Company volume, meaning that it is an excellent work with eight pages of colored maps and many pictures from during the war. The author is as meticulous with his writing as with his figures and statistics. Anyone looking for what actually happened at Kursk without the legends and stories should look no further than this work and the author's 'Demolishing the Myth'. These books should be required reading for anyone who wants to know the real truth about the battle of Kursk. In 2018 he will be publishing a third book about Kursk, 'The Forgotten Battle of the Kursk Salient',  about Army Group Kempf's offensive.


Robert

Book: The Battle of Kursk: Controversial and Neglected Aspects
Author: Valeriy Zamulin
Translator: Stuart Britton
Publisher: Helion & Company
Distributor: Casemate Publishers

REVOLUTION ROAD This June, I spent one of the most memorable vacations of my life in the States, ending with five days in Boston.  O...

REVOLUTION ROAD REVOLUTION ROAD

For your Wargamer, Toy soldier collector, MiniFig collector, military history nut. Reviews, interviews, Model Making, AARs and books!


REVOLUTION ROAD


This June, I spent one of the most memorable vacations of my life in the States, ending with five days in Boston.  One of those outstanding moments was walking the Freedom Trail, which starts at one end from Bunker Hill, and spending well over an hour in the Bunker Hill museum taking in all the information and talking to an engaging and highly knowledgeable Ranger.

Consequently, there was no doubt why I just had to review this very recent product from Compass Games, especially as everything that I'd seen and read about Revolution Road made me want to own and play these games.  Notice that latter point, these games.  Unlike Mark's recent experience with Sovereign of The Seas, which has an eye-watering cost, Revolution Road contains two games in one box for what I consider a very reasonable price [$69 in the US and £59.99 in the UK being the best I've seen].
Value for money - no doubt about it.

I was also more fortunate when punching out the counters in that I didn't experience the problem of paper tearing, though the physical quality and thickness is definitely average.  The artwork too is what I would call serviceable rather than artistic.  However, that's not necessarily a bad thing, as there've been times when I've struggled with the artistic quality of counters designed to mirror Napoleonic uniforms, when just such clear, functional qualities would have been a blessing.

However, to return to the fact that there are two games here and not just two battles with different maps, using an identical system.  Each game has a different and distinctive rule book and, though there is substantial overlap in the  rules, the effect and gameplay are significantly different.  Bunker Hill is what I would call broad brush tactical, while Lexington to Concord is very much more at an operational level.   Though both are relatively low level in complexity, equally both repay careful reading and attention.  The latter, because it is fairly innovative and the former because it appears a very familiar type of system, but has its own specific individuality and idiosyncracies.

And it's Bunker Hill that I'm going to start with.  This is a battle little gamed other than in scenarios for generic type American War of Independence games, such as Worthington's Hold The Line.   The location of the battle is now a thoroughly tame, suburban area, but the Bunker Hill museum provides an engrossing wealth of detail with its dioramas and reproductions of paintings, some of which are used in the game's box and rules folders' art work.
One of the excellent images taken from paintings of the battle 

Regarding the map, I really like this presentation for several reasons.  First of all, the areas are very well defined and are both functional, clear and attractive.  The three crucial hills [from left to right Bunker Hill, Breeds Hill and Moulton Hill] stand out vividly, with the hill tops in dark brown and the slopes and the rare ridges in a lighter brown.  Most of the rest of the landscape is a pleasing green with the area of Charlestown in the bottom left easily identified. The areas of lighter blue water designate the potential Landing Zones for the British troops and the connected staging areas are clearly stated.


Despite most of the map being taken up by the playing area, there still remains plenty of space on the left to present all the necessary tracks for game functions without them either being crammed together or dominating the play area.  I particularly appreciated the display printed in the empty river area at top right that contains the chart of all the actions that both sides can take.  When combined with the separate play aid that explains all the actions, play is made very smooth. 

In this respect, I'd praise both games highly.  The rules are simple, clear and well explained and combined with the thoroughness and clarity of the play aids they make play very straightforward.  Too often you find games need the combination of the play aids and rules to work out the game in total.  Not here, the play aids really are just that: an excellent support to playing the game.  I'd go so far as saying that once you've read the rules and used the play aids a couple of times to play the game, you'll rarely need to use the rule book again other than to set up the pieces at the beginning of each game.
Just two of the quality double-sided play aids


It is moreover a swift game to play, as there is a maximum of ten turns and, during each turn, both players will be able to take at best only five Actions [give or take the occasional Reserve actions]. Each action can only be performed in a single area of the map and each area can contain only three units plus any number of leaders!  There are twelve different Actions in total and the British may chose from eleven of them and the Americans from nine of them.  

All the Actions bar one [namely Assault] are very quickly taken.  For example, Naval Move allows the British fleet marker to move from its current area to an adjacent one; Land Move allows units from one area to move up to three areas; Bombard allows you to fire the two artillery units, the fleet and the Copps Hill battery. 

Only Assault involves any degree of time and it is not an Action that you will undertake lightly or with any degree of success unless you can strike where the enemy is very weak or broken.  Move the units from one area into an adjacent enemy area.  The Attacker must have at least as many healthy units as the Defender has [don't forget the stacking is a maximum of three units per side in an area!].  If the Defender doesn't opt to retreat, if able to, he/she then gets in a free round of fire and, provided the Attacker still has as many healthy units as the Defender, rounds of simultaneous fire take place.  It's deadly!

Some of you may already be thinking that this is far too simple a game to suit them.  As I initially read the rules, that thought certainly started to form for me.  Be advised,  don't make any judgement until you've played the game and played it several times.

Though of low complexity, it is remarkably subtle and much of the subtlety comes from two details: [1] the fact that each unit can either move and later fire or fire and then later move and [2] the Reorganise the Line Action, whereby units in two adjacent areas that haven't yet moved can change places.  The interaction of these alone provide for surprising combinations. At its heart, Bunker Hill is a game of movement, fire and assault, as VPs largely come from eliminating units and leaders, with the values slightly favouring the Patriot player [i.e. the American revolutionaries]. 

In addition, the six hill-top areas provide 1 VP each for whoever holds them at the end of the game and finally the burning of areas in Charlestown produce 1 VP to the British player for every area above five.  Just this small detail adds a simple, but historical and effective side-show to the main military thrust with the potential, though uncertain, opportunity of the British gaining VPs at the risk of losing units to sniping.

Should you be short of an opponent or just fancying a quick solo session, solitaire scenarios are provided to play as either side against a bot.  As my only experience of bots so far has been in the celebrated COIN games, I was rather apprehensive, as I'd found them horribly complicated and time-consuming.  Not so here, like all the rest of this package, they are simplicity itself.  The only minor drawback is that the solitaire scenarios are shortened to Turns 5-10.

In just the same way, the second game too can be played equally effectively solitaire using bots and again with a shorter number of turns, namely Turns 8-12.  However From Boston to Concord presents an altogether different situation. The whole area that the Bunker Hill map represented now becomes one small area on the very eastern edge of this game's map which stretches the full length of the playing area, while various tracks and tables edge the top and bottom of the map.  However, my initial response to the map was less than favourable. The almost uniformly light brown terrain bordered by the dark brown background made for a very sombre and, I have to say, rather dismal prospect and, certainly for my eyes, not the easiest of reads for any informative writing on it!  

All I can say is that you shouldn't go by first impressions and that appearances can be deceiving.  Virtually all the information on the map is in icon form and very easy to identify.  Only the small letters "ha" [for Hidden Arms] and in some cases a number need a little care to find.  As I continued to play, even the initially dour colour grew more and more acceptable.  When I read so many comments about games that are based on a single play and can often be very dismissive, it's a reminder never to judge too quickly.   
However what surprised and pleased me most is that a rules set with significant overlap could yet produce such a different and distinctive game.  From Boston to Concord introduces a whole new dimension involving Night Riders, including the legendary Paul Revere, and the two key Patriot figures, John Hancock and Samuel Adams.  The latter sadly serve as little more than objectives for the British player to pursue, whereas the three Night Riders play a critical role in the game. 

Their task is to ride to the many on-map settlements where Gather Markers are placed and use a Call To Arms action to flip the marker to its Muster side which activates the types of unit printed on the map under the marker. 

The Night Riders can also perform this task by permanently exiting a map edge, on which they can then start to activate Alert markers which also bring in more units for the Patriot player.  This is just one of several elements that gives From Boston To Concord its originality, as it is this mustering of units that provide the Patriot player the units to fight the British player with.  But don't imagine that either side will ever have large forces to play with - another factor that helps to keep playing time down.  For instance the British player has only seven 2-strength Regular units at start and gets another eight on Turn 9 and don't forget it's only a 12 turn game! 


Not too surprisingly, Lexington [a fair ride from Boston] contains a series of important counters: a Muster marker - note the tankard icon, as taverns, such as Buckman's and Munroe's were gathering points [!!]; a Hidden Arms marker; a leader, Brewer, [is that really just a coincidence with tankards and taverns?] as well as one of the three Night Riders [Prescott] and the two key Sons of Liberty, Hancock and Adams; and finally a Minuteman unit [green oval with black figure] plus an untried Militia unit.  A juicy target, but highly likely not to be there by the time the British troops struggle across the map to Lexington.

Returning to those famous Night Riders, a neat corollary to their main task is that every time a Night Rider performs his Call To Arms action, he has to roll for possible capture.  If captured, this brings in a further potential action - attempting to escape.  The British player earns VPs for getting captives back to Boston

Add in the conventional elements of movement, attack, assault and charge, plus more original Actions such as Hindering Movement and Hindering Muster, Ambush, Sniping and one of the most important for the British player, the Search Action both for Hidden Arms and for the leaders and Night Riders already mentioned and you can quickly see, with the limited number of Actions that you get per Turn, how each player constantly feels the pressure of time and choice-making!
Each turn one of these cards is turned up. In this instance, the Patriot player would get 4 Actions, the British player only 3. 

For me the success of this game is not just in this variety of unusual actions, but also partly because of the range of objectives to be pursued along with the particularly conflicting nature of the British objectives.  They have the task of marching their troops the length of the map to Concord, while at the same time attempting to capture individual historical personages, search for the hidden arms cached by the Patriot and prevent mustering from happening.  The first task tends to need the player to march as quickly as possible along the roads, keeping troops mainly together, while all the other tasks demand that troops spread out more thinly to cover as many locations as possible.  When you've only got SEVEN units for a substantial part of the game, as mentioned earlier, that's no mean feat. 

To conclude, my original reason for wanting to review Revolution Road, as I explained at the very beginning, was to play Bunker Hill,  but I hope what I've described will help you to understand why From Boston to Concord has become my favourite out of the two excellent games in the one box.  I sincerely hope Compass Games will continue this new line of departure with swifter, simpler, smoother games to play!


RRP – £69.99
Online Retailer – 365games.co.uk


  My plate is a little full right now. It seems that Thanksgiving has already come. In the next week I will publish a review of Flying Pig...

Games and more games Games and more games

For your Wargamer, Toy soldier collector, MiniFig collector, military history nut. Reviews, interviews, Model Making, AARs and books!


 My plate is a little full right now. It seems that Thanksgiving has already come. In the next week I will publish a review of Flying Pig Games '65'. If you like to game the Vietnam war, pick it up. You won't be sorry.


 Minden games has sent me 'NavTac: Coronel and Falklands' to review for those of you who are into WWI naval games.


 I also received a huge care package from Worthington games. It was comprised of these games:

Holdfast: Eastfront
Grant's Gamble
Pemberton and Grant
Hold The Line: The American Revolution
Hold The Line: The French and Indian War


  Upcoming games will be:

 Flying Pigs Old School Tactical Volume II


 Lock and Load's 'A Wing and A Prayer' will also be landing.


 Turning Point Simulations has also agreed to let us start reviewing their games.
hpssims.com