second chance games

Search This Website of delight

  Wings of the Motherland The Air War Over Russia 1941-1945 by Clash of Arms Games  I knew of Clash of Arms...

Wings of the Motherland The Air War Over Russia 1941-1945 by Clash of Arms Games Wings of the Motherland The Air War Over Russia 1941-1945 by Clash of Arms Games

For your Wargamer, Toy soldier collector, MiniFig collector, military history nut. Reviews, interviews, Model Making, AARs and books!


 Wings of the Motherland

The Air War Over Russia 1941-1945

by

Clash of Arms Games


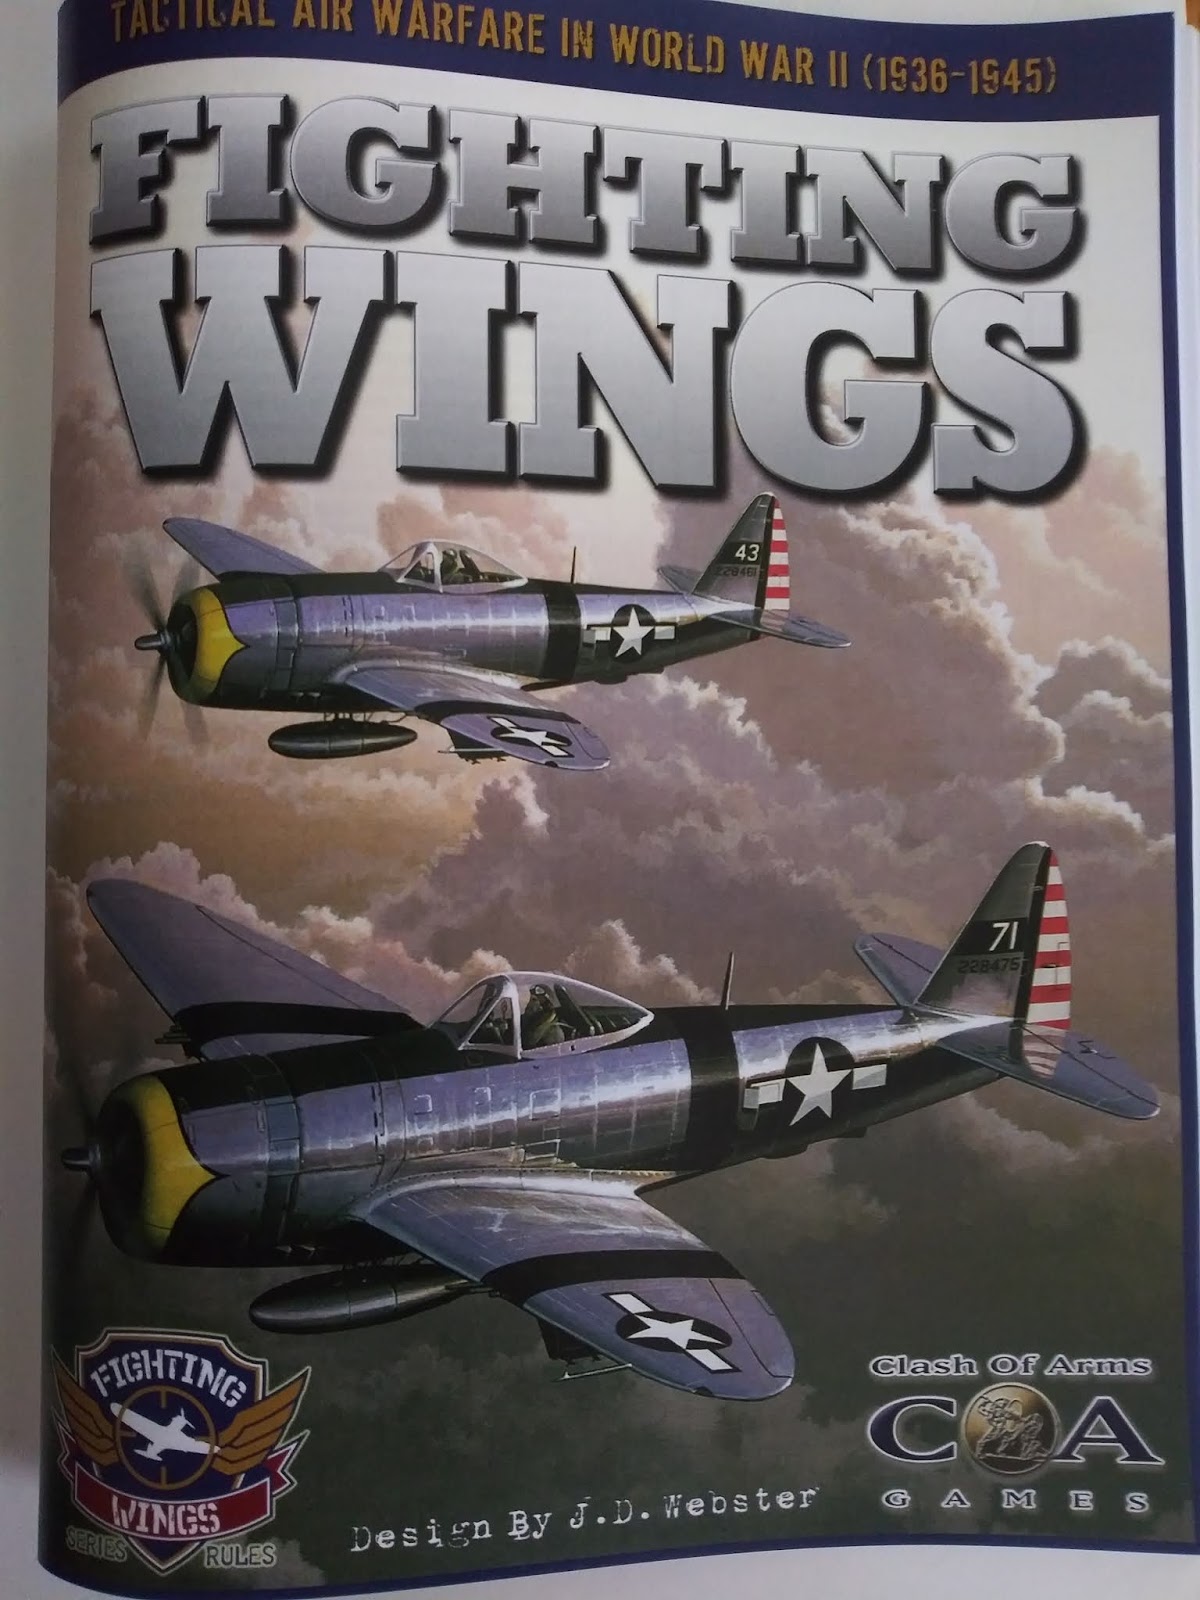
 I knew of Clash of Arms Games because of their exquisite Napoleonic games. I have ones from the Napoleonic Operational series, namely Jena and 1807: The Eagles Turn East. I also own a copy of la Bataille de Ligny from their Tactical Napoleonic series. They are also famous for their 'Battles From the Age of Reason' series. From the latter, I'm extremely fortunate to have gotten  a hold of The Battle of Fontenoy (one of my Holy Grail games). So, I was a little surprised at how little I knew about the rest of their stable of wargames. This is my first foray into a top down two-dimensional flight game since I played Dogfight in the 1960s. This review is about the fourth game from their 'Fighting Wings' series.  The other three would be:  

Over the Reich - 1994
Achtung Spitfire - 1995
Whistling Death - 2003


 There were also a few add-ons made. I had played the computer versions of Over the Reich and Achtung Spitfire (these were released by Avalon Hill), but never have I seen the boardgames. 


 This review has to be both an unboxing and a regular review, simply because of all that comes with the game. I usually do a list from the manufacturer of what comes with the game, and then do a write up about the different contents, but in this game there is so much that comes with it. I will do the list, but I will go through the items in greater depth than normal. This is what the box says you get:

280 Aircraft Counters (1/2" square)
280 Ground Unit Counters (1/2" square)
70 Ship and Play Aid counters (1/2"x 1")
2 Game Maps (34"x22", front and back printed (4 maps total)
1 Game Rules Book (80 pages)
1 Game Rules Supplement Booklet (16 pages with play examples)
1 Game Scenarios Book (120 pages)
1 Aircraft and Ship Data Card Book (60 pages)
1 Play Aids Booklet (32 pages)

 So if you have been keeping track, that is 308 pages of different books and booklets to peruse. That is simply mind boggling even for a deep wargame/simulation. The massive scenario book is much more than that. It starts out with a brief history of the War. Then it goes into the different aircraft the Soviets and Germans used during the war. There are no 'exotics' or planes that could have been listed here, The ones you are given are going to be the run of the mill planes that carried the air war on their backs. There are:

Soviet Fighters - 11
Soviet Bombers - 9
German Fighters - 5
German Bombers - 6
German Auxiliary Types  - 5

 There are no ME-262s or anything like that. You do not get to fly 190 Doras or ME 109 Kurfursts either. The amount of scenarios is pretty mind boggling. Here they are:

Training - 2
Introductory - 9
Standard level - 150!
Ground Attack Introductory - 10
Ground Attack Standard Level - 40
Ship Attack Introductory - 3
Ship Attack Standard Level - 20
Mission scale Scenarios - 6

 Once again, for those keeping track, that is 240 scenarios to play through. The Scenario Booklet itself is in black and white with a few pictures of planes throughout. The book is so large it actually has a normal book spine to it. At the back of the book is a few pages of designer notes and play tips. The information in it is incredible, and that is over and above the actual amount of scenarios in it. 


 The Rules Book, as they call it, is so large that it has a three page index. These are a few sentences from the beginning of the Rules Book, and they are worth printing:

"Read the basic Rules of each chapter first. Skip any advanced Rules and continue reading until instructed to play a solitaire 'Training Scenario'. When finished, return to where you left off and continue until you complete all Training Scenarios."
"Be Patient, Have Fun! Do not expect to learn everything in a single sitting. Take your time. This is a game, so enjoy yourself as you strive to master the techniques and tactics of World War II aerial combat. Good Luck and good hunting!"


 Even before you take to the skies in Training Scenario I you will learn about the following:

Counter Positions
Counter stacking Limits
Aircraft Collisions
Aircraft Movement
Fractional Value Table
Stalled Flight Procedure
Spin Procedure
Slatted Wings Effects
Wing Flap Effects


 Along with more than just a few more rules and information needed to take to the skies, the first Training Scenario has you flying both a MIG-3 and a Bf 109E-7U1. The Bf 109's moves are written out in the book, and your aim is to try to get and keep the MIG-3's gun arc trained on the Bf 109. The Rules Book is in black and white, but it does have a good number of play examples in it. By the end of the Rules Book you will be level bombing, firing rockets, and also taking on enemy Naval assets. It seems like the size of the Rules Book would overwhelm you, but just take the designer's advice and "Be Patient, Have Fun!' to heart. You will be going back to the book a lot to make sure you have everything right the first time you fly or try something new. After that, I promise it should become second nature to you. This game comes with the 3rd Edition Rules Set, by the way.


 The Play Aids Booklet is filled with table upon table, and also play examples to help you fight your way in the clouds. The two Rules Supplement Booklets are even more helpful for a fledgling pilot. Their play examples are also in 3D so that you can more easily visualize your aircraft and the enemies in a 3D world. 

 The Aircraft and Ship Data Card Book is exactly as it sounds. It is filled with the data the player needs to be able to fly his aircraft in a historical manner. Each plane, or different plane type, is given its own full page write up of its performance, firepower, and power/speed charts etc. The booklet also has the various ships', from battleship to sub chaser, information.


 The counters are small, but because there is nothing that needs to be read on them (all the information is on the data cards) their size is not a handicap to the player. On them are top down illustrations of each plane in question. For someone who has read a lot or played flight simulations the aircraft are easily discernable from each other. The various ground assets that you will try and destroy are also well represented on the counters. The tanks and some other counters do have information printed on them along with the top down view. They are a little small, but even I can read them, so that counts for something.


 The maps are extremely well done. They represent city, field, and also water on their four sides. The color is a bit muted and is mostly of a green and brown mixture. The size of them allows the players to have more than enough room to fight in any style. You can 'Boom and Zoom'; you are not forced to fight turning battles.

 This is the Sequence of Play, Combat scale:

Initiative Phase - Initiative Rolls
Tailing Friendly of Enemy Aircraft
Sighting & Blind Arcs
Movement Phase
Combat Phase Action Steps
Breaking Off From Combat

 This is a rule heavy game so to help you with different aspects there are a number of Logs in the Game Rules Book that can be copied. These are:

FW OP-Scale Mission Logs
Simple Movement A/C Flight Log
Ship Damage and Move Log
FW A/C Flight Log Sheet

 For anyone who questions the price tag put on the game, I believe the above statements should clear that up. Yes, it is worth it, and we haven't even discussed the gameplay itself. As with any Clash of Arms Games that I have purchased, the proof is in the detail and artwork of the components. You will find that here, along with a massive amount of  player information etc. No wonder the game took so long to actually get to the printer. 


 As I mentioned in another review, I was a late comer to the various 2D games that covered air war. I never really understood how a designer could give you the feeling of 3D flight in a 2D world. I am now totally convinced that I have cheated myself out of a lot of excellent game time by thinking that way. The designer of this series not only portrays it, but he takes you by the hand and only spoon feeds you what you will need at that moment to start to understand the system. I will say one thing, and that is that this system will only be worth it to someone who wants to take the time to learn it. You cannot, as a newbie, just set up the game and take to the skies to start shooting things down. Actually, I take that back. You could learn about just that part of the system in a short period, but you would be cheating yourself out of the whole ensemble of flight that COA has given you. So how is the game? C'est magnifique!. For an aviation junkie like myself it is an excellent experience in gaming. As far as its depth, if you can learn the intricacies of some Napoleonic games and tactical ground games of the Eastern Front you can learn this system. I am actively looking to get my hands on a copy of 'Whistling Death' to start enlarging my library of the Fighting Wings games.

 Thank you Clash of Arms Games for letting me review, once again, another excellent product. I have had a blast taking it through its paces. Please keep up the excellent work. For those of us Grognards who only know you by your Napoleonic games, take some time and peruse the rest of their games.

Clash of Arms Games:
https://www.clashofarms.com/
Clash of Arms Games Wings of the Motherland:
https://www.clashofarms.com/WingoftheMotherland.html
I couldn't resist adding this one:
https://www.clashofarms.com/LaBatLigny.html
Robert


Combat Infantry: EastFront 1941-43 by Columbia Games  Here we are on the Eastern front in World War II. Y...

Combat Infantry: EastFront 1941-43 Combat Infantry: EastFront 1941-43

For your Wargamer, Toy soldier collector, MiniFig collector, military history nut. Reviews, interviews, Model Making, AARs and books!


Combat Infantry:

EastFront 1941-43

by

Columbia Games


 Here we are on the Eastern front in World War II. You would think that this has been gamed to death. In a way you would be correct. That is, there are only so many battles that took place to do games about. However, each designer also  has a separate take on how to make a game more (fill in the blanks; playable, realistic, or historical) in our playthroughs. So, even though it looks gamed to death it really isn't, not when you add everyone's different vision of how to properly game/simulate it. We still read every, or almost every, book that comes out about Stalingrad etc. So why not have different games on the subject? Then we come to the different types of games that each designer brings to the table. These can be designed to be fast paced and light to deep simulations. We Grognards are a fickle bunch. One minute we will be praising a game for its depth and the next we will be castigating another game because we have to spend a lot of time reading the rulebook. Just because a game does not give historical outcomes does not mean it is not fun or stimulating to play. Now the Eastern Front diatribe is over on to Combat Infantry: EastFront 1941-43.


 This is the second in the series Combat Infantry. The first took place on the Western Front and had the Americans and Germans going at it in 1944-1945. That game is an excellent game of tactical combat on that front. Games, and more importantly their rules, either work or they don't. The Combat Infantry games are block wargames which means they are simple to set up with usually less rules that their cardboard cousins. Notice I did not say 'less deep', just simpler. Chess is about as simple as you can get for ease of setup and rules, but never say it isn't deep. With block wargames there is no need for writing down a unit's stat, it's right there for you to see. At one time I was a firm believer that block wargames were not as 'worthy' as my counter heavy collection. I thought that they were fine for playing with your kids or trying to get someone interested in the wargaming hobby. I could not have been more wrong. Block wargames have become some of my favorite ones to play. 


 So, Combat Infantry: EastFront 1941-43 is a tactical block wargame of the early years of the Russo-German war. its name is actually a misnomer because you do not just get to fight it out with infantry. Columbia Games has given you the whole gamut of tactical forces to try your luck with. As you can see by the list below, they have not left out anything. There is even Air Support included for your units.


 This is what comes with the game:

132 Wooden Blocks
22 Wooden Markers
1 Sheet of labels
2 Large Geomorphic Maps 16.5" x 22"
Rulebook
3 double-Sided Scenario Cards
4 Dice (D10)

 The game hexes are 100 meters wide and you get to play with units comprised of:

Leaders
Rifle Squads
Machine Guns
Mortars
Anti-Tank 
Tanks
Air Support


 The components of the game are what we have come to expect  from Columbia Games. The maps are very well done, especially if you like the color green or some of its shades. They have large hexes to accommodate the blocks. The labels are pretty simple, but the pictures on them, although small, are great looking little pieces of artwork. The blocks are, well, blocks. They are however completely uniform in shape. Yes, I have seen games where they were not. The rulebook is only twelve pages long. It is in full color and does have some examples of play. There are three double-sided scenario cards. These are of cardboard, not too thick, but pretty rugged. Now I can hear the howls: this game comes with six scenarios only! Yes, yes it does. However, do not let that be a stumbling block if you are looking to purchase it. The original game WestFront also came with limited premade scenarios. There were scenarios created for the game by players and the designer, and I assume for this one also. You do not have to wait for them. You can create your own with just a tiny bit of time and effort. The second to last page of the rulebook gives a breakdown of how to create scenarios for yourself. It also has a chart that gives unit values to each unit in the game. This allows you to make scenarios with X amount of points and then just choose them for each side.


 Normally, you will be the commander of either a Soviet or German battalion which is composed of three infantry companies. Then a company is broken down into three infantry platoons. Platoons are also broken down into three squads of infantry, and usually a heavy weapons platoon (mostly machine guns). The battalion can be made stronger by the addition of some extra assets such as tanks, artillery, and anti-tank guns. Leadership is very important in the game and you must keep your units in command range. If not, they must pass a morale die roll, and some assets cannot act at all outside of command range. The strength of your units is easily kept track of  by the block wargaming system. You usually start out with a unit at full strength and then turn the block to the next strength/step number if it suffers damage. Some of us gamers are very used to opportunity fire and suppression, among other things. These are among some of the other well known tactical rules in games that are not found here. I will list what is not in the game and why by the designer Tom Dalgliesh himself:

"Opportunity Fire
Opportunity fire is excessive in many tactical
games. WW2 Infantry and vehicles simply did
not move through open terrain without clinging
to every tiny bit of cover available, nor without
fire support to keep enemy heads down.
Defender first fire in Assault reflects opportunity
fire in close combat when it was most effective.
Suppression
Suppression fire is handled by the step reduction
system. Units that take hits have less firepower
and are partially suppressed until they Rally.
Facing
Guns and tanks would have no difficulty
turning to fire in any direction given a 10-30
minute interval. Tanks did have thinner armor
in the belly, flanks, top, and rear and this is
allowed for by making them more vulnerable to
bombardment (6.6) and assaults (9.65).
Hard & Soft Targets
The armor class system reduces firepower
against armored targets. This eliminates the
need for separate hard and soft firepowers.
Status Markers
Status markers should not be missed. Cluttering
maps and units with markers such as "Used",
"Suppressed", or "Final Fire" is not necessary.
Units are upright, face-up, or face-down
depending on their action."


 The nature of block wargames lends itself to Fog of War, and EastFront does this particularly well. The only caveat to this rule is tanks. "Tanks are the exception. Veteran infantry could determine the location and identity of tanks just from the sound of their engines. Hence, tanks are revealed when they fire or move." The scenario that you have picked will state which player goes first. After the first turn a die roll determines who goes first. The active player can then activate one headquarter per company; "When commanding multiple companies, HQs are activated and resolved one by one in any desired order." The gameplay is fast and furious because of the design decisions made in the rules. I think the game is a great tactical one that gives you a lot of bling, but does not wrap you up in a cocoon of rules to play it out. After your first or second game there really is no reason to be perusing the rulebook anymore, unless you are extremely forgetful. Thank you Columbia Games for letting me review this great addition to the Combat Infantry stable. I hope the games will spawn either different areas or years during World War II. That way we can play in the Pacific or use airborne troops etc. I will have the link to my Combat Infantry: WestFront 1944-1945 review along with some others below.

Columbia Games:
columbiagames.com/

Combat Infantry Series:


This is my review of Columbia Games Julius Caesar:
https://www.awargamersneedfulthings.co.uk/2018/11/julius-caesar-by-columbia-games.html
Robert


Wing Leader: Victories 1940-1942 by GMT Games  Fighting hardware; I am not sure why, but ever since I can...

Wing Leader: Victories 1940-1942 by GMT Games Wing Leader: Victories 1940-1942 by GMT Games

For your Wargamer, Toy soldier collector, MiniFig collector, military history nut. Reviews, interviews, Model Making, AARs and books!


Wing Leader: Victories 1940-1942

by

GMT Games


 Fighting hardware; I am not sure why, but ever since I can remember I have been mesmerized by military craft. Airplanes have always been a favorite of mine. Oh, I like the looks of some non-military aircraft, especially the oddities like BeeGee racers etc., but show me an aircraft with weapons and I am hooked. Strangely, if you follow the Blog, you will have noticed that I did a review of an add-on for the Wing Leader series before the actual game. The review I did was on Wing Leader: Eagles 1943-1945. This is an expansion to Wing Leader: Supremacy 1943-1945. So, now I get to review the game that started it all, Wing Leader: Victories 1940-1942. As I mentioned  in the Eagles 1943-1945 review, I am a late comer to the two-dimensional aircraft games. I am a rabid fan of any flight simulators (military) and have bought everyone that has ever been produced. However, I could never grasp how you could get an approximation of flight in a two-dimensional world. I am here to tell you that I was completely wrong and that the games I have played so far in the genre have been excellent. So, let us see first what you get in the package:

1 x Rulebook (UPDATED to living rules v2.2)
1 x Scenario Book (UPDATED with new scenarios and expanded by 8 pages)
2 x Air combat player aid (UPDATED - to v2.2)
1 x Bombing player aid (UPDATED - to v2.2)
2 x Wing Displays
1 x Map (UPDATED - this is the same art as the Supremacy map, but non-mounted)
5 x Aircraft data card sheets (UPDATED)
2 x Countersheets (140 counters, 1 x 0.5”)
1 x Countersheets (280 counters, 0.5 x 0.5”)
1 x NEW mixed sheet of aircraft data cards and counters (4 ADCs and over 40 counters)
1 x NEW Battle Board (Same battle board as appeared in Supremacy)

2 x 6-sided dice  


 The first thing you will notice about the game is the weight. I know enough about games to know that the weight really means nothing as far as gameplay. However, there has always been, since the soap box SPI days, something in my brain that lights up with a hefty game box. Call it nostalgia or whatever you want, but it is still there. The map is basically a big piece of graph paper with large squares on it. It is a pleasing shade of blue, but that is really all there is. At second glance, you will see that there is a tiny bit of terrain across the very bottom of the map. The weight of the box is from the 420 counters, and especially the five sheets of extremely well done Aircraft Data Cards. These are the crux of the game, and because of that reason GMT Games took a lot of care in their production values. The counters are not slouches either, and represent the usual GMT Games standard of excellence. They represent side views of the respective aircraft and are little works of art. The Players Aid Cards are also up to the usual GMT Games standards. They are both large and very easy to read and discern. Please keep in mind that this is a review of the Second Edition, so all of the pieces have been updated to Wing Leader: Supremacy 1943-1945 style. The rulebook is now updated to the Wing Leader living rules. The rulebook itself is printed in magazine fashion and is forty-seven pages long. It is fully colorized and is filled with pictures and examples of play. The scenario booklet is thirty-two pages long. These run the gamut from fighter interception to bombing runs on land and sea. You have MC.202 and SM.79-II (I love the Italian planes) to play with alongside so many others. From the steppes of Russia to the Pacific Ocean are the scenarios you are given to play.  So, the pieces that make up the game are all  extremely well done quality wise. However, we all know that does not mean that a game is worth its salt. Let us now look at the gameplay.
 The Wing Leader games deal with air battles on a larger than  normal size. The units in the game air squadrons or flights, and not individual aircraft. As mentioned, this is not a top down view of aerial warfare, but a side view one. It took me a little bit to get used to, but I am fine with it now. The one thing on the map that seems pretty innocuous, but in reality is very important is the placement of the sun in the upper left hand corner. The rules go into depth to help you realize the importance of the old adage 'beware of the Hun in the sun'. This is the sequence of play:

"Each turn is divided into a number of phases, which are played in order: Set-up Phase. Set up squadrons that enter play this turn in their entry square or on the map edge next to their entry square [5.3.1, 8.4.1]. Squadrons taking off set up in their airfield or carrier square [13.7]. Place a Vector marker for each intercept squadron entering play [9.2.4] (roll for height errors [13.1]).

Tally Phase.
 The raider player does the following in any order: squadrons attempt to tally enemies [7.2] (any squadron with a tally must drop that tally before rolling a new one [7.2.2]); unalerted squadrons become alerted if warned by radio [7.1, 9.4]; wing leaders issue orders [9.5.5]; fighter-bombers that tally must immediately jettison their bombs [15.2.4]. After the raider player has completed all tallying, alerting, and issuing orders, it is the defender player’s turn to tally, alert, and issue orders.

Movement Phase.
 Squadrons move [8.0] and, during movement, can jettison bomb loads and drop tanks [9.2.1.1, 13.2] and make bombing attacks [15.3]. Escorts react to enemies attempting to move into the same squares as bombers [10.4]. Resolve barrage fire flak attacks [14.2.3].

Combat Phase.
Resolve direct fire flak attacks [14.2.4]. Resolve bombing attacks [15.4], after which remove Bomb Load markers from targets. Resolve air combats in an order determined by the raider player [10.5]. Jettison bomb loads and drop tanks following combat [9.2.1.1, 13.2, 15.2.4].

Administration Phase.
Squadrons roll to escape [11.0]; the raider player rolls first, then the defender. Place or change vectors for squadrons under GCI control [9.2.4] (roll for height errors [13.1]). Place Escort mission markers on eligible squadrons [9.2.2.2]. Change escorts to sweep [9.2.2.2, 15.2.2]. Place/remove flak Barrage markers [14.2.2].

 End Turn.
The turn ends; move the Turn marker up one space. Proceed to the Set-up Phase of a new turn. Continue playing turns until the game ends [12.0].
 Having come to the game with no preconceived idea of how a two-dimensional air warfare game was supposed to work, I had no baggage to interrupt me in learning the game. For example, I have never seen how a rule about the sun is supposed to work in a game like this. It is really not that hard of a game to learn. When your planes are flying before contact the game buzzes right along at a swift pace. When the furballs start flying then you not only have a lot more to think about, but also keep track of. The scenarios are well written out and unambiguous. Your fighters have to intercept the bombers that are going to attack your ships etc. Then like a good little game you are left to your own devices, following the rules, of course, to bring this about. The sun is not the only natural barrier to your goal. Almost all of the scenarios have some cloud cover. These can be just one wispy layer of clouds to a dense cloud cover to hide your enemies. However, like in real life, both sides can use the clouds to their advantage. 
  The designer, Mr. Lee Brimmicombe-Wood, also goes out of his way to support his games. On his website link below, you will find all new scenarios and Aircraft Data Cards for all different aircraft that were not in the official releases as of yet. He also has a good number of new scenarios for the different years of the war. So how does it play? Very well; the rules do not lead you to endlessly flip through the rulebook or search for answers on the web. The fact that this is the second edition with other games and add-ons being released only helps the rules to be that much tighter. The slow pace of the game up until enemy contact only helps to build the anticipation. It seems like a complicated game, but when you break it down step by step it soon becomes very easy to get the hang of. The rules give you a very good historical feel of the actual capacity of the aircraft in both flying and fighting. Thank you GMT Games for allowing me to take this fighter bomber for a spin. I look forward to their add-on coming up that adds even older planes to the mix Wing Leader: Origins 1936-1942. I only hope that the series can be adapted to World War I air combat.

GMT Games:
https://www.gmtgames.com/

Wing Leader: Victories 1940-1942:
https://www.gmtgames.com/p-673-wing-leader-victories-1940-1942-2nd-ed.aspx

Wing Leader series:
https://www.gmtgames.com/xsearch?searchterm=wing+leader

The designers website:
www.airbattle.co.uk/w_downloads.html

Robert


Shenandoah Campaign by John Tiller Software & Wargame Design Studio  I am not really a student of ...

Shenandoah Campaign by John Tiller Software & Wargame Design Studio Shenandoah Campaign by John Tiller Software & Wargame Design Studio

For your Wargamer, Toy soldier collector, MiniFig collector, military history nut. Reviews, interviews, Model Making, AARs and books!


Shenandoah Campaign

by

John Tiller Software

&

Wargame Design Studio


 I am not really a student of 'Stonewall' Jackson's Valley Campaign at all. I have read some things about it, but was never really enthralled as I am with the history of the Army of Northern Virginia's Campaigns. I am also somewhat familiar with the 1864 Valley Campaign, but not enough to consider myself versed in it. Jackson himself remains an enigma to me and many others. His Valley Campaign of 1862 is considered the height of military science by some, even though he really did not face the cream of the crop as far as Union Generals and troops. The Union Generals during the campaign resemble the Three Stooges more than competent commanders. Jackson's subsequent almost uselessness during the Seven Days Battles has been excused by a lot of authors. Still, I do not know where he fits in the scheme of things. Was he the best of the Southern Generals or just great because of the opposition he faced? Sorry for the digression, now back to the pertinent subject.


 So, the game gives you two diverse campaigns separated by two years and thousands of dead on both sides. Both do have one striking similarity, and that is both were fought by Southern Generals to take pressure off the Army of Northern Virginia. In 1862, Jackson succeeded marvelously. In 1864, Jubal Early succeeded early (sorry) in the campaign, but was inevitably broken by the Union preponderance of strength in the end. Jubal Early is also an enigma as a commander. Quite possibly he lost Gettysburg for the South by whispering in Ewell's ear. Then again, in 1864 he was able to put a scare into Washington, which had a much greater effect than it should have. Early was described as his "bad old man" by Robert E. Lee even though he wasn't that old at all. His hair and stooped figure made him seem much older than he was. He was also the only person we know of that had a plate smashed over his head as a cadet at West Point. Brigadier General Lewis Armistead, of Gettysburg fame, was the plate wielder.


3D extreme zoom in of the Kernstown Scenario


 So what exactly is in this game. We know that it spans two different years of the Civil War, but what is behind door #2?
Here is the list:

"174 scenarios are included, and all can be played as either side, against the A/I or other human challengers.
Each major battle has three versions, 1) the standard, for playing head to head, especially PBEM and Hotseat. 2) Weather, for playing when Mother Nature is unpredictable, and 3) A/I, for playing against the computer. NOTE; all scenarios can be played against the A/I, but these scenarios are designed specifically for, and will provide a greater challenge for those familiar with this game system.
Most scenarios can be played against the A/I in a single day, yet others may take several days to complete, or even weeks. Just save, and continue later at your own pace.
For more fun, challenge another human, and play either face to face, or PBEM (Play by email)
Battles include: Kernstown, McDowell, Winchester, Cross Keys, Port Republic, New Market, Piedmont, Lynchburg, Monocacy, the siege of Fort Stevens, Cool Springs, Berryville, and the climactic battle of Cedar Creek.
4 campaigns are included. Each can be played with or without the added hardships of weather. Weather can be anything from a mild mist and fog, to muddy roads and torrential thunderstorms."


2D version of the same screen


 The games is classic John Tiller Software with a large dose of Wargame Design Studio mixed in. The visuals, like almost all of the John Tiller stable, are now much clearer and look nothing like when the other Campaign Games were released years ago. The speed at which they have been releasing games has now been put into overdrive. Where we used to wait all year for one or two releases we have seen four new games in the last few months. The enhanced games are still easy to get into if you haven't played one of the series for awhile. The amount of playtesting that goes into the games is probably the most for any computer game. The fact that now the AI is so much better than it was is also laudable. Some will argue that point, but most of us do not play one game to death so that we find all of the AIs weaknesses. I know I flitter through the games following whatever I am reading at the time. One thing that I have not mentioned is the excellent tie in the games have for reading history. For those books who have little to no maps on a battle, here it is in almost life size. You can follow along with the book through the different placement of troops and the important geographical points around the different battlefields. Because it is a game, you can then decide to try and do better than the historical Generals did when they had control. These are some of the enhancements that you get now-a-days from these games:

"A total graphics package:
3D hand drawn maps, 3D units, with individualized regimental flags.
Colorized leaders and unit files.
Traditional B/W unit, and leaders are also an option.
Improved 2D road graphics.
Scenario and Campaign editor: Build new, or improve existing battles and campaigns.
Many “What If” battles and maps, both large and small. Including the massive Shenandoah Master map.
Extreme Fog of War optional rule.
Objective hexes are now awarded points for each side. The number of points that can be earned are determined by length of time controlled, and its strategic importance for each combatant. Therefore, earned points are not equally distributed.
A true, large (4X) 2D map view."


Extreme zoom out of the same screen


 I will say that the opening paragraph notwithstanding, I have come to appreciate Jackson's ability in these battles somewhat differently. That leads me to another incredibly laudable point of the entire John Tiller stable. You can actually learn history, or at least grasp it that much more by playing these games. I have tried to play as many of the different scenarios as I could, but with 174 it is a lost cause. The Shenandoah Master Map is exactly as described: 'massive'. I will say that while I enjoy zooming in to the 3D to look at the graphics, I do spend most of my time playing on the 2D Map. I have done a fair number of reviews of the different Campaign Series games, and I am still impressed by the depth and sheer size of what you get for the price of a cheap dinner for two. I really cannot say enough about the gaming you will get for a mere $39.95. The Campaign/Scenario Editor is so large that you can get lost in it and never actually play the game. I will have some links at the bottom of other John Tiller Software/Wargame Design Studio games I have reviewed. I am sure I will have forgotten to mention some part of the game that you receive with your purchase, so the other reviews will help you to understand the breadth of just one of these games.

 So in recap, you get 174 scenarios, historical/and what if, that can all be played on either side against the AI. You also get at least one, sometimes a few, version(s) of each scenario that is meant to be played from the ground up against the AI. My favorite one so far is the Kernstown Battle from 1862. Thank you John Tiller Software/Wargame Design Studio for allowing me to review this, as usual, excellent package of history, posing itself as a game.

Campaign Shenandoah:
www.johntillersoftware.com/CivilWarBattles/CampaignShenandoah.html
Campaign Eylau-Friedland:
https://www.awargamersneedfulthings.co.uk/2019/04/campaign-eylau-friedland-by-john-tiller.html

Campaign Petersburg:
https://www.awargamersneedfulthings.co.uk/2019/03/petersburg-by-wargame-design-studio-and.html

Japan '46:
https://www.awargamersneedfulthings.co.uk/2020/01/japan-46-by-wargame-design-studio-and.html

Robert

I'll be honest, I've watched so much of Battlestar Galactica that I occasionally hear the sound of the DRADIS sca...

Battlestar Galactica Deadlock: Ghost Fleet Offensive Battlestar Galactica Deadlock: Ghost Fleet Offensive

For your Wargamer, Toy soldier collector, MiniFig collector, military history nut. Reviews, interviews, Model Making, AARs and books!


I'll be honest, I've watched so much of Battlestar Galactica that I occasionally hear the sound of the DRADIS scanning for Cylon contacts in my dreams. It's no surprise then that I can never get enough of content related to that show and universe, and BSG Deadlock continues to feed that hunger many years after the show has come and gone. Not only did Black Lab Games and Slitherine deliver a far better core product than I think anyone would have predicted, they have relentlessly updated and expanded the game for more than two years post release. The newest DLC, Ghost Fleet Offensive continues the second "season" of the game's story and content.


The 10 mission storyline continues the enjoyable blend of politics, intrigue, and warfare that you know and love from BSG. A brief amount of time has passed since the end of the last DLC "Resurrection" and you remain in command of the Galactica itself. Like in the previous campaign, this DLC uses a smaller version of the strategic map from the original game. This streamlines that portion of the game to the point of simplicity, which some may like and others not so much. The focus here is primarily on the story missions, with smaller side missions to gather extra funds and experience in between. You still need to manage resources, build ships, research tech, and keep the Cylon threat level under control, but there isn't the balancing act of defending a dozen worlds and spreading fleets across a large map. The story missions themselves are good fun and tell another piece of the Battlestar Galactica saga, the story of the Ghost Fleet, which was featured in the short Blood and Chrome series. Essentially, you'll be going on a deep strike behind Cylon lines, looking to strike a crippling blow to their war machine.


In addition to the new campaign, this add-on brings in several new ships, more toys for the toy box! For the colonials, there are two new ships. First, the Orion class frigate, which is able to use stealth tech to sneak in close for hit-and-run attacks. Second, the Defender support ship, which can send marines over to friendly ships to defeat boarding parties and boost their sub-systems. The Cylons also get a new ship, the Medusa, which can power up other Cylon ships around it and provide extra point defense cannons to take out your missiles and torpedoes. The Cylons are also packing some new heat in the form of virus mines that can disrupt your ships' systems, and cluster nukes that, well, you can imagine. Radiological Alarm! As with all the other DLC for Deadlock, more variety makes for more replayability and new tactical possibilities. 

Even if you don't pick up Ghost Fleet, you'll benefit from the continued development of Deadlock in the form of the free Fleet Admiral update. The most practical changes come in the form of UI tweaks and quality of life updates.  There is also the titular new Fleet Admiral difficulty level if you really want to challenge yourself. Some other nice enhancements are new portraits for your officers and the ability to choose the flagship of your fleet. 


For the price, Ghost Fleet offers a fair amount of new content, though it isn't game changing. There may be some players who aren't interested in the more linear campaign style here, and are waiting for some more of that open ended strategic gameplay from the core campaign. If you're like me though, you are deep enough into this game world that you'll want to pick this up just to keep up to date with the story and expand your ship roster even further. I give this DLC a solid recommendation and even more so recommend the core game if you have not picked it up yet. I think it continues to be a hidden gem mixing tactical space combat with an enjoyable strategic layer.

Ghost Fleet Offensive can be found on Steam and directly from Slitherine.


- Joe Beard 


Follow us Twitter @_AWNT_ or email me at beardjoe33@gmail.com


THE LAST VIKINGS from STRATEGEMATA You may be forgiven for experiencing the sort of confusion I had when matching the title o...

THE LAST VIKINGS THE LAST VIKINGS

For your Wargamer, Toy soldier collector, MiniFig collector, military history nut. Reviews, interviews, Model Making, AARs and books!


from

STRATEGEMATA

You may be forgiven for experiencing the sort of confusion I had when matching the title of this recent game from Strategemata with the picture on the box cover and the dates of the two battles. A thorough read of the extensive historical section of the Scenario book provides a description of the Swedish aggressors as "modern Vikings", though I feel the label fits a little loosely!

Still, what I have learnt, however, is that we're in the early days of the Great Northern War that marked the beginning of the C18th and embroiled Sweden, Denmark, Saxony, Poland, Lithuania and Russia for twenty years from roughly 1700 to 1720.  In other words, a period that many of us know very, very little about.  

The designer, Slawomir Lukasik, began this system by venturing into the slightly later period of the Wars of the Austrian Succession with a more familiar figure, Frederick the Great, and the game entitled, Bloody Fields of Mollwitz.  My own familiarity with the system stems from elements of it featuring in his game, Bloody Steppes of the Crimea, which took us on to the more familiar battles of the Crimean war in the 1850s. 

My review in August 2018 of the latter game raised some issues both of physical production and rules clarity.  I'm very pleased to say that, in the main, this new game has stepped up the quality all round.  The standard sized double-sided map, though only slightly thicker, is significantly better in appearance.  In part, this is mainly because of the removal of the heavily obtrusive hex numbering. Instead, set up is printed on the map so lightly that it is has no adverse impact at all during play.


The Battle of Kliszow - opening set up


As the main scenario, the battle of Kliszow, is a substantial and lengthy game to play, this may have a drawback in that it makes recording a game more difficult, if you cannot leave it set up.  Nevertheless, the trade off in visual appeal is well worth the minor inconvenience.  The package is greatly improved too by the inclusion of fine, full-colour set-up displays for this main battle.
 A similar display is provided for the very useful introductory Scenario, while the battle of Fraustadt, being much smaller in scale than the battle of Kliszow simply needs no more than the set up printed on its map.


The reverse of the box showing the map of the Fraustadt battle with the set-up unit displays printed directly on the map.  


On the reverse of two of the displays are separate copies of the charts for melee and fire combat that are also printed in the rule book.  Rather surprisingly the terrain chart is only printed on the back of the Scenario book, but a quick photocopy easily provides an extra substitute if needed.


Melee combat player aid

Regarding physical features alone, the unit counters and markers are a major step up in quality, both for thickness and visual appeal.  The colour identification for the three Wings of each army, along with in many cases their being only a single number on a unit, are also a great help to ease of play and the attractive presentation.

One of the excellent display cards for set-up

Finally, the Rule book and Scenario book too round off the overall improvements in quality.  Being still only simple printed black and white paper and stapled, they lack the big publishing companies flourish.  But the slight increase in text size has made a huge difference to the ease of reading them.  Overall the accuracy of the English translation is very good, occasionally prepositions still cause a few pauses to make sure you've grasped the intent correctly and only one sub-heading PERFORMING EVOLUTIONS stands out as missing the mark, in the rules about changing facing. REVOLUTION is presumably the preferred word and even that doesn't quite fit the bill.

As with previous games that use this system or modifications of it, the sequence of play is very interactive.  Both sides have one Activation marker for each of its Wings in the battle and the turn progresses with each player secretly choosing one of those markers.  An Initiative die roll, with appropriate modifiers, determines the Initiative player, who will decide whether he/she goes first or second.  If second, they can keep their choice secret until after the first player has moved and conducted any combat.
This interchange of paired initiative choices continues until all of both players formations have ben activated.

A sequence of Command chain for leaders and their related formations continues to be one of the strong elements that I like very much.  It is clearly explained and works smoothly in combination with the assignment of orders.  Both melee and fire combat are possible, but a unit may only ever engage in one of the two when activated and melee is only possible under Assault orders.

Combat remains the longest and most detailed section of the rules and once again takes careful reading and practice to ensure both understanding and accurate practice.  Of all the details of combat,  the one I find most intriguing is the importance of morale which is the main and, in many cases, the only number on a unit counter.  Not only does it play the predominant role in melee, but it is these factors that are lost by a unit whatever the type of combat and recorded by placing a morale strength marker under the unit.

Many factors affect morale so that units rapidly decline in their power to function effectively.   However, when activated a unit may recover some degree of morale depending on several factors including the current orders the Wing is under and position in relation to enemy units.  Appropriately, the more aggressive your orders the fewer morale points you are likely to recover.  So, a Defensive posture allows you recover a unit's starting morale level by staying in place and expending all its movement points. [thanks to Adam for pointing out the mistake in my original comment here.]

All units, except artillery, have two steps and a unit routing or losing 3 or more morale points in a single activation is flipped to its weakened side or eliminated if already on its weakened side.  Similarly, a unit whose morale is driven down to zero is also eliminated.  In specific circumstances, a unit may be eligible to be returned to the map at a level of 1 morale point.

As is to be expected for the period, facing is important for a number of familiar reasons: including determining ZOCs, whether a unit can fire or assault [orders too play a part] and the effects of flanking or being flanked.

In getting to grips with the rules, I'd strongly recommend the following sequence.  First of all skim the rules to get an overall idea of the concepts and then place a few units on the map while carrying out basic rules of Fire and Assault.  From there, proceed to the very short Introductory scenario which is played out on the Fraustadt map.  Next, play the full Fraustadt battle and finally [and by now I hope familiar with the system] move on to the major battle of Klitszow.

The Scenario book at first sight looks daunting because of its length, but I'm glad to say that this because16 pages of it is a detailed historical narrative. The specifics for each scenario are very manageable.  As I am not a great fan of scenarios that introduce a substantial number of extra rules, modifications or exceptions, it was a relief that even the largest scenario introduces only easily accommodated additions.

In conclusion, this is a detailed system which I would recommend to gamers familiar with the language of board gaming and especially those who have a taste for the musket and pike era.  Turns can be quite long once opponents get to grips in combat, but both players are actively involved in the interaction that ensues.  It is an attractive package that marks a good step forward in the quality of the components, especially the counters which are very attractive, colourful and easy to read.  On the maps they stand out well and the overall effect is visually complementary, as can be seen in this view of the battle of Fraustadt.


Once again, it's thanks to Strategemata for providing the review copy and for their success in opening up this period to us.

Average cost

USD 60

£57.95

"Paladins of the West Kingdom is set at a turbulent time of West Francia’s story, circa 900AD.  Despite recent efforts to develop ...

Paladins of the West Kingdom Paladins of the West Kingdom

For your Wargamer, Toy soldier collector, MiniFig collector, military history nut. Reviews, interviews, Model Making, AARs and books!


"Paladins of the West Kingdom is set at a turbulent time of West Francia’s story, circa 900AD.  Despite recent efforts to develop the city, outlying townships are still under threat from outsiders. Saracens scout the borders, while Vikings plunder wealth and livestock. Even the Byzantines from the east have shown their darker side. As noble men and women, players must gather workers from the city to defend against enemies, build fortifications and spread faith throughout the land.  Fortunately you are not alone. In his great wisdom the King has sent his finest knights to help aid in our efforts. So ready the horses and sharpen the swords. The Paladins are approaching."
Rule book introduction

Gameplay

Paladins of the West Kingdom is not your typical worker placement game. Normally you’re denying action spaces to other players on a shared board.  Paladins gives each player their own board on which to place their own supply of workers.  A criticism often levelled against worker-placement games is one of being multiplayer solitaire, and that is definitely the case here.  However, the game is that crunchy, that I feel increasing the interaction between players would actually lessen the overall game and I am happy that my opponents aren’t able to thwart my well-considered plans (too much).  

The game is played over seven rounds in which all players will be taking multiple actions with their supply of workers.  Each player will take as many actions as their workers permit and there are often clever ways to combine effects and abilities to increase the amount of workers during your round.  If you don’t mind a bit of analysis paralysis, then you will be able to work out an optimum round. However, this game continues to reward my impulsive play; I often realise possible combinations half-way through my turn and I have been able to exploit it immediately.


Player board at the start
Aside from the player boards, there is an elongated main board which holds a variety of King’s Orders and King’s Favour cards.  Each game will consist of 3 Orders and 6 Favours and there is twice this number provided in the box.  This means that the focus and overall objectives of each game will be different.  I have played this a number of times now and in each play, the different cards and sometimes order in which they’re revealed, significantly change the game and keep it feeling fresh.

Each player has their own deck of Paladin cards from which you’ll select one to be your Paladin for the round.  The selection mechanism is quite clever as you’ll know one of the Paladins which will be available in the next round (from a choice of 3).  I’ve tried to plan current turns to optimise my next turns’ Paladin but for some reason, either lack of brainpower, or just getting sidetracked by the number of options, I don’t think I’ve ever managed to exploit this.  However, I like the mechanism and look forward to trying again.


Main Board at the Start
There is also a shared pool of Tavern Cards which are chosen individually by each player.  These combine with the chosen Paladin card to give players the workers shown on both cards to use for the round.  This will normally be 6 workers of various colours unless you passed in the previous round and kept workers to use the next round; I have started a round with 9 workers. There are a few spaces on your board which only require one worker per action, but most require 2 or more workers.  You can feel like you’re burning through workers quite quickly, particularly at the beginning of the game.

One of the best aspects of this game is that you’re able to change the requirements for some spaces through the use of Workshops.  If you take the time to Develop your board you can reduce some 3-worker spaces down to 1-worker spaces.  This is crucial to stretching your turn and giving you more actions each round.  However, you won’t get very far by just building workshops, the most Victory Points come from focusing on the attribute tracks at the side of the player boards.


Green Workshops (being ignored)
Three attributes (Faith, Strength and Influence) are measured per player and drive the whole game.  Most spaces require a certain amount of one of these attributes in order to place a worker there, however, there is usually a reward in another attribute. For example, if you wanted to attack an Outsider I would need to have a specific amount of strength and I would be rewarded with Influence.  Although this is a pure-worker placement game, the game and its actions do make sense thematically, if it is a little loose.  I still can’t quite work out why, when I pay tax I am taking money from the Tax Supply.

Not only are there attribute requirements but there are also worker requirements, for example, a red space requires a red worker.  There are 6 different types of worker in the game and the right colour must be used on a coloured space.  An outlined space can take any colour worker. However, the purple worker (a criminal) breaks this rule and can go on any space, coloured or not (apropos yes?).  These colours are defined as red-fighter, black-cleric, green-scout, blue-merchant, purple-criminal and white which is a generic labourer.  These colours also are linked thematically to their corresponding action spaces, for example, the Pray action requires a cleric, (arguably the only space that you should definitely use each round).


Absolve, close-up 2 Clerics and a Merchant.
There is very little downtime for any player unless you’re the first player to pass early in a round and your opponents still have a handful of workers left.  If so, you’re likely doing something wrong and that is probably only your fault.  However, this downtime could only be 5 minutes at the absolute most.  Normally I would expect your turn in a four-player game to come round within a minute or two.  You will be involved and thinking about your turns or taking your turns right to the end of this game.   Your success and failures of the consequences of your actions alone and that is something which I like. 

The are several mechanisms through which you can affect other players games however none do so significantly.  You’re limited to just denying certain cards or spaces from your opponents, but there will usually be other cards (and spaces) still available.  I don’t think you would be competitive if you were playing to hurt your opponents instead of playing to benefit yourself.


End-game main board - there are still open spaces.
It is quite difficult to determine which player is ahead until the end-game scoring through which there is a veritable point salad available to players.  I found that games where I thought I was romping home and clearly ahead (in points) were actually much tighter.  Even if you think you’re well behind on scoring, I’ve found that the scores have been tight and I’ve not been able to deduce from glancing at all the player boards who the leader is.  Players score points from a wide variety of cards and board spaces which can really only be calculated at the end.   This keeps all players involved in the game right to the end.


Components

The art design throughout the game shares the same distinctive style used in Architects of the West Kingdom and the third game in this trilogy, Viscounts of the West Kingdom.  The wooden components are great and there are approximately 200 of them in six different sculpts and seven different colours. There are also approximately 100 cardboard components which weren’t just standard circles and squares and they all punched cleanly.


A perfect fit
Once you’re familiar with the rules and actions there was/is little need to refer back to the rulebook. The iconography on the board is intuitive and consistent throughout the game.  Each action space is sufficiently described on the board to allow new players to grasp the rules within about 20 minutes.

What is great (in terms of components) about this game is the box size.  I have seen negative comments about the box size and some people finding it difficult to get all the components back into the box.  When the game is all bagged there is literally no free space left in the box, to my mind that is a perfect box size. However, I can understand if you’ve sleeved your cards then you would struggle.


Criticisms

The biggest criticism I have is one of table space.  Although the box is deceptively small, what comes out of it is ravenous in terms of its appetite for tablespace.  The mainboard is long, (but thin) and around that there will be at least six different areas for card decks and tableaus.  Each player board is a more typical size of player board but again you’ll need space around the sides to place recruited Townsfolk cards, converted Outsiders and any successful attacks in their own face-down deck.  That's without storing your workers, provisions and money. I can’t recommend this game if you’re table is on the small side.


A deceptive table-hog.

Conclusion

This game ticks a lot of boxes for me; it’s fairly crunchy with lots of interactions between your own resources and attributes.  Affecting them in positive ways and the decision to focus your efforts on one over the other is a nice decision space.  Fortunately, other players aren’t really able to affect your own path to victory too much and in this game, that is a good thing.  It would be intensely frustrating to have your plans ruined by another player's actions purely by chance, and in this game, I feel that you’re not able to play to hurt your opponents; there’s too much going on, on your own board to be concerned with your opponents. 

There is very little downtime throughout the whole course of the game and after two hours you do feel as if you’re brain has had a good work out.  Of course, you could just go along for the ride and select actions with no clear purpose, just to see how the game works, but I guarantee that you’ll do terribly when it comes to scoring.  This game rewards, clever play and finding combinations to extend your turn, getting additional workers is critical for success. 


Set up takes about 10 minutes.
There are a finite number of components that will fit in any box and I’ll admit I’m amazed at how much they’ve managed to cram into this box.  But due to the King’s Orders and Favours changing each game, the tactics and strategy that were successful in your previous play won't necessarily be successful in your next.  After your first game, which will just be a learning game, you’ll have a wide array of tactics to consider each turn which will be different each game.  This game has high replay value. 

I’d like to thank Asmodee for sending this review copy.  Many local game stores will still have this in stock and you can use this link http://www.findyourgamestore.co.uk/ to support your FLGS or use their online shopping web store. 

Publisher: Garphill Games
BGG Page: https://boardgamegeek.com/boardgame/266810/paladins-west-kingdom/
Players: 1-4
Designer: Shem Phillips, S J Macdonald
Length: 90-120 minutes

Operation Crusader Tank Warfare in the Desert, Tobruk 1941 by Hermann Büschleb translated by David Dorondo ...

Operation Crusader: Tank Warfare in the Desert, Tobruk 1941 by Hermann Büschleb translated by David Dorondo Operation Crusader: Tank Warfare in the Desert, Tobruk 1941 by Hermann Büschleb translated by David Dorondo

For your Wargamer, Toy soldier collector, MiniFig collector, military history nut. Reviews, interviews, Model Making, AARs and books!


Operation Crusader

Tank Warfare in the Desert, Tobruk 1941

by

Hermann Büschleb

translated by

David Dorondo


  This is an extremely interesting, if short, book at less than 100 pages. Hermann Büschleb was a staff officer in the Germany Army during WWII. The book was apparently written for the United States Army. After WWII, Hermann Büschleb became a Major-General in the West German Bundeswehr. The jacket states:

"Writing in the 1960s, Büschleb framed his account of Crusader as a case study, almost an instruction manual for the leadership and command of armored and mechanized warfare. He intended it to be of practical use to contemporary military personnel, who expected to fight a similar type of warfare against the Warsaw Pact."

 The first thing you will notice when opening the book is that it comes with twenty-one maps of the action before and during Operation Crusader. The background and "Situation in Context" of the battle take up the first twenty-eight pages. The length of the German supply line, and the reduction in the ports available to the Italo-German were only the first two problems.  The active British intervention against their supply lines was the third and most dangerous threat to the Italo-German supply. With the amount that the author tells us of supplies that got through, it is amazing that the Italo-German forces were able to eat let alone fight. 

 The actual course of the battle takes up the next forty-seven pages. This gives an almost minute by minute breakdown for the engagements that took place. The majority of the action follows the Deutsches Afrikakorps, although the author also mentions some of the Italian actions. The author's three page "Conclusion", which is divided into "Historical Considerations" and "Tactical Considerations", are concise but right on target. 

 This book is probably the best German Officer written appraisal of a battle in WWII that I have read. Many that I have read are tough to slog through, but this is written as well as the better histories are. I am not sure if this is because of the translator making it slightly more appealing, or does it come across the same way in the original German. Whichever, it works superbly. Thank you Casemate Publishers in allowing me to read this concise, but well done appraisal of Operation Crusader.

BooK: Operation Crusader: Tank Warfare in the Desert Tobruk 1941
Author: Hermann Büschleb
Translator: David Dorondo
Publisher: Casemate Publishers

Robert
hpssims.com