second chance games

Search This Website of delight

Last year saw the release of Fantasy General II , the more than two decades overdue follow up to the 90's classic. Slitherine and de...

Fantasy General II: Onslaught Fantasy General II: Onslaught

For your Wargamer, Toy soldier collector, MiniFig collector, military history nut. Reviews, interviews, Model Making, AARs and books!


Last year saw the release of Fantasy General II, the more than two decades overdue follow up to the 90's classic. Slitherine and developer Owned by Gravity decided to revisit their iteration of the game just a little bit quicker. The Onslaught DLC brings two primary new features to the game. A significant of expansion of the air unit roster, and a new campaign that uses branching paths and procedural generation to offer a very replayable experience. There is also an extra mission slotted into the original campaign that will get you easier access to some of the new air units. 


While the air units are fun, and I'll discuss them later, the primary reason most players will want to pick up this add on is the new campaign. Taking place after the events of the main story, this new campaign is shorter overall, but is meant to be played more than once. There are three heroes from the original story to choose from, each with a very different style. One uses the standard units from the main campaign, one uses lots of not-so-cuddly animal units, and the last focuses on hiring mercenary units from mission to mission. Each hero also of course has their own style of fighting on the battlefield. In addition to choosing your hero, during this campaign you'll be constantly choosing between different branching mission paths. The different missions will give unique rewards and also shape the story to some extent. This means that you could play through several times before you see every mission, and use a different roster of units each time.

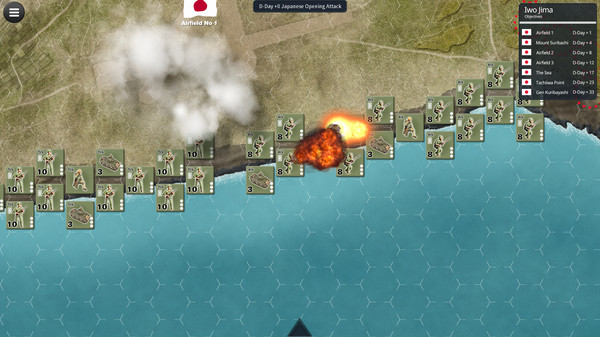
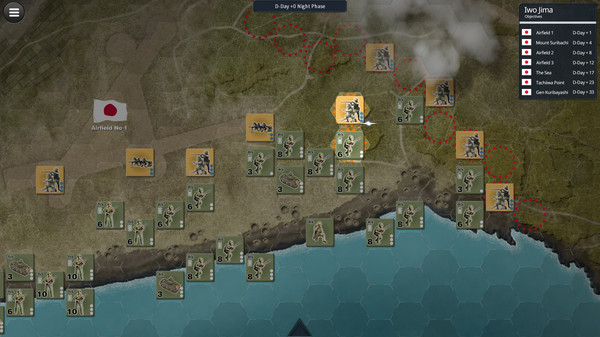
The game recommends playing on "Iron Maiden" mode. One save file, no quicksaving or restarting missions. And, as I learned the hard way, letting your hero take one too many hits and die is an instant game over, forcing you to start from scratch. I enjoyed playing using this mode, as the procedurally generated missions here tend to play much more quickly than the missions of the original campaign. This comes with the sharp trade-off of losing all of the in-mission storytelling and events, as well as the more complex mission objectives. Most missions here are simple affairs, like moving your hero across the map, or capturing a handful of objectives.  Even without any scripted surprises or side missions, the combat can still be unpredictable and interesting. The in-game world is in a state of chaos, with multiple factions fighting for control in the power vacuum left by the events of the main campaign. This is reflected by most maps in Onslaught having the potential for three-, and even four-way fights to break out between the various factions and neutral wildlife units wandering around the battlefield. 


The story itself is not nearly as deep as last time, but still has its moments. Essentially, your hero of choice is having vivid dreams, drawing them to seek out a powerful artifact in the war-torn lands of the Empire. This prompts you to go on a merry goose chase around the game world, seeking one item after another and fighting with a wide variety of enemies. The story is the same regardless of which hero you choose, but the way you go about it can be quite different each time you play. There's always a choice between two or three missions which each have different goals and rewards, and may send you down a separate path for a while. Ultimately, you'll always arrive at the same key story moments, and the overall story itself story doesn't change all that much regardless of your choices. The story does have a couple of charming moments and fun characters, but for the most part is just there to provide context for the procedurally generated missions.

Besides the new campaign, Onslaught also greatly expands the roster of aerial units in the fray. In the base game there are some air units, but they are limited to just a few choices. Now there's a wide variety of flying fighters, including many flavors of giant eagles. These various units can act as general purpose flyers, interceptors, or bombers. Although these additions don't radically change the game, they do open up some new tactical options, especially the bomber eagles, which can fly out, attack, and return to safety in one turn. You'll also need to be prepared to defend against such tactics.


At the end of the day, Onslaught is a nice addition to game if you enjoyed the main story and want a fresh experience. The missions play quickly, getting you straight to the action and on to the next challenge. There's a good amount of replayability between the three heroes and the numerous choices of missions along the way. While the story feels like more of a glorified side-quest than an epic tale, it serves its purpose. If you want some more Fantasy General II in your life, Onslaught is an easy recommendation. 


You can pick up Fantasy General II: Onslaught on Steam, GoG, or directly from Slitherine


- Joe Beard


France 1944 The Allied Crusade in Europe The Designer Signature edition by Compass Games This game was firs...

France 1944: The Allied Crusade In Europe: The Designer Signature Edition by Compass Games France 1944: The Allied Crusade In Europe: The Designer Signature Edition by Compass Games

For your Wargamer, Toy soldier collector, MiniFig collector, military history nut. Reviews, interviews, Model Making, AARs and books!


France 1944

The Allied Crusade in Europe

The Designer Signature edition

by

Compass Games


This game was first released by Victory Games (let us have a moment of silence for the departed). Mark Herman was/is the designer of this game and a lot of others that are on your shelf. The first thing you will notice about the game is that it commits a grievous sin. Please sit down for this; the game does not include D-Day in it. I will let that sink in: a European Crusade game that does not include at least a D-Day scenario. There is also another shocker when it comes to scenarios, there is technically no Bulge scenario. This one, while being surprising, shouldn't really be too shocking. von Rundstedt, and even Model the ardent Nazi, thought it was foolhardy. von Rundstedt said of the Bulge, "Old Moltke would roll in his grave". So, we have a European Crusade game that starts after D-Day has been accomplished, and does not have a Bulge scenario either. What exactly do we get with this odd game:

• One mounted game map 
• One close-up Normandy game map • Two sheets of 0.65” rounded counters 
• Rules booklet • Playbook with example of play and designer’s notes • Two Player Tracks Aid Cards (identical) • One Turn Procedure Card • Allied Setup and Reinforcement Displays • German Setup and Reinforcement Displays 
• Two double-sided player aid cards (identical) 
• Four 6-sided dice (includes two custom combat dice) 


Product Information:

Complexity: 6 out of 10
Solitaire Suitability: 9 out of 10 (no hidden information)
Time Scale: Monthly turns
Map Scale: 20 miles (32 kilometers) per hex
Unit Scale: army-level HQs, infantry corps, armored divisions
Players: one to two, best with two
Playing Time: two to seven hours


 The designer has a very pertinent and somewhat funny story about the physical weight of boardgames, and how we judge them on that instead on what is actually in them. I confess that I too have been a weight checker on my boardgames. It might go back to Christmas presents; who knows? He does say that this edition has been graced with a very heavy mounted map to help offset any weight issues. The Mounted Map has been extremely well made and I believe it will put up with years of use. It is also very tastefully colored and tries, and succeeds, to hit the midpoint between art and usability. There is also the smaller Normandy Map that is used in the beginning of the Campaign Scenario. This has very large hexes to deal with the congestion of the bridgehead. The two sheets of counters match the map as far as looks. They are easy to read and pop out of the cardboard effortlessly. The one thing you will notice about them is that they are based on infantry corps and armored divisions, so there will not be that many on the board at all. This is the actual breakdown:

260 Playing Pieces
15 Headquarter Pieces (7 Allied, 8 German)
100 are Combat Units (54 Allied, 46 German)
145 Informational Markers


 The Rules Booklet is in full color and is very sturdy. It is twenty-four pages in length. The type is large and easy to read, and the booklet is full of illustrations. The Playbook is twenty pages long and is filled with examples of play and the scenario setups. The last page and a half are Designer's Notes and 'Reflections'. Like my other games from Compass Games that I have bought, the production values are very high. Let us now look at the scenarios included:

Falaise Gap: This is the training scenario
Market Garden: This scenario is not exactly the Market Garden Operation. In actuality it is much larger and includes the fight for all of France. This scenario is 4 turns long.
West Wall: This is the fight to get through the Ardennes and Hurtgen forests and ends after 9 turns. The Allies need at least 8 bridgeheads across the Rhine to win.
Scenario 4: VE Day: This is the Campaign Scenario. It is 11 turns long. The Allies need to capture 2 hexes along with Pilsen.

 The original game was apparently Mr. Herman's first time using supply to activate the player's HQ's. Each turn the players place Initiative Chits equal to the value of the Supply Points Committed  Marker. You also place the Administrative Chit into your chosen receptacle along with the Initiative Chits. If the player pulls an Initiative Chit he can then activate one HQ with it. After the player with Initiative makes his choices, the other player can choose to use his Reaction Points (these are accumulated each turn like the Supply Points). After all of the chits have been pulled there is a German and then an Allied Final Reaction Phase. The players determine if either side has won, and if neither side has the next turn is played.

 Combat, along with movement, are very different from the strict IGO-UGO using a sequence of play. The easiest way to show this is by the Rules Booklet itself:

"Movement and combat in France 1944 do not follow the system used in many wargames in which units move in a movement phase and then fire in a combat phase.
Instead, both movement and combat are captured in a system where time is broken down into increments, so that a unit may intermix both tasks. Faster units will be able to attack more frequently. Slower units will not have the luxury of moving and then combining their attack factors into combat."

 One key idea to embrace is that you can cannot switch between actions once you have chosen your 'Increment Type', meaning if you have chosen to pick Movement, you cannot attack with some units and just move with others.

 We will use the Rule booklet to illustrate this further:

"The actual Movement Point Expenditure Track is displayed below. At the beginning of your Initiative or Reaction Phase, after designating which of your units are under command and after placing Administration Movement markers, place your Movement Point Expenditure marker in any top row Increment of the Movement Point Expenditure Track (Increments #1-5 in the previous example). The numbers in the space you select specify precisely what you can do in the current Increment. If the tan increment box is clear (no number), your units may ONLY move: combat is not allowed in that increment. When the Movement Point Expenditure marker is in a clear tan box (no number), flip it to the “M” side. If the tan increment box contains a number (2+, 3+, 4+, 6), you have the choice of declaring a movement increment OR an attack increment. If you declare a movement increment, the Movement Point Expenditure marker should be on the “M” side. If you declare an attack increment, flip the Movement Point Expenditure marker to the “A” side.


 This is the concise explanation on the increment system:

"The purpose of the increment is to simulate a certain amount of simultaneity on the battlefield. The Increment system essentially prohibits you from spending the entire Movement Point Allowance of a single unit without spending at least a portion of the Movement Point Allowance for every other commanded unit, even if those other units do nothing.
 Time has passed while one of your armored divisions moved up the road, and that passage of time is being applied to each of your units."


 The whole process seems much harder then it is in actuality. One of the things it forces the player to do is to really think through what he wants to do. The Rules Booklet gives an extra piece of advice "Acquaint yourself with this track!" I wholeheartedly agree. It is the cornerstone of the game. The litmus test of any rule in any rulebook is "does it work" and secondly, does it make the player play historically, or for want of a better term, correctly. Yes, the increment system does work. You can see that in the fact that this game has been rereleased after first seeing the light of day in 1986! The designer is Mark Herman; need we say more? The game was originally released by Victory Games, who to my knowledge and memory never released a bad or even mediocre game. 

 Combat is equally different than in other games. You do not deal with a straight CRT to determine victory or defeat. In this game you use a 'Combat Matrix'. This again looks to be tricky, but is pretty straight forward in its use.


 Apparently the designer changed the combat results from a normal CRT in the original game to what you see here. The game's original CRT caused a lot of gnashing of teeth on the internet. Mr. Herman does believe they worked correctly, but mainly wanted to streamline the combat results and incorporate his new ideas on the Combat Matrix. Once again, Compass Games has taken an older game and recast it into their mold, meaning that they have given the game the red carpet treatment. The game map and pieces etc. all reflect the normal Compass Games manufacturing of these items. The game was an excellent choice to bring back to the wargaming community in this great fashion. The image below is an early design of the map for the complimentary game Russia 1944. This will hook up with France 1944 and is scheduled for 2021.


This is the link for Compass Games:
https://www.compassgames.com/

This is the link to France 1944:
https://www.compassgames.com/france-1944-the-allied-crusade-in-europe-designer-signature-edition.html

 This errata was added to the box:
Since Mobile Combat is only possible in Clear Terrain, or a fortress or city on clear terrain when at least one of the units in that hex retreated into that hex, there is no terrain modifier for Mobile Combat. Terrain modifier applies only to Set-piece Combat. This clarification takes precedence over the rules.

Robert


Wolfpack by John Tiller Software  We as wargamers have had a number of boardgames released on the subject. However, ...

Wolfpack by John Tiller Software Wolfpack by John Tiller Software

For your Wargamer, Toy soldier collector, MiniFig collector, military history nut. Reviews, interviews, Model Making, AARs and books!


Wolfpack

by

John Tiller Software


 We as wargamers have had a number of boardgames released on the subject. However, the computer simulation player has had a good amount of games released on Uboats and other nations' submarines. There have also been a good number of games that are for the Cold War and beyond. These games are probably the easiest to start with for a computer gamer. Usually you are only handling one sub, and the gamer only has a handful of choices. It is still a cat and mouse game with some options. The gist of the game itself is to get close enough to the merchants, or capital ships, to fire a torpedo at it that has a chance of hitting said vessel. While doing this you have to avoid the escorts. Pretty simple on the scale of what do I do in this game scale. If a merchant is sailing alone it is usually a goner, unless it is a Q ship. Then you just surface and hit it a few times with your deck gun until it surrenders. The real test for you, as a submarine captain, is attacking a convoy with escorts. I also think that a sea battle with only twenty units all told is a lot easier to program the AI than a land battle with 100 to each side. I own, or used to, almost every single submarine game that was released for the PC. So, let us make sure the batteries are full and head underwater to take a look at this new John Tiller Software game/simulation. let us read about the features:

 "50 scenarios ranging from small single submarine actions to massed wolfpack attacks.
Scenarios also highlight the role of air power, both land and air based.
Two campaigns are included, one on the career of the legendary ace Gunther Prien, and the other highlighting the changes in the Battle of the Atlantic from 1940-45.
Wolfpack uses a real-time game engine that can be run from 1x to 10x real-time and has the ability to pause.
Players can play each scenario against the computer A/I or using network play.
The British player has access to the full ASW arsenal, including Depth Charges, Depth Charge Projectors and Hedgehogs, while the Germans have innovative equipment like Snorkels and Homing Torpedoes.
A powerful Scenario Editor and Order of Battle Editor are included so that players can design their own scenarios of historical or hypothetical situations.
Shore terrain is included for Scapa Flow, the Kola Inlet, Gibraltar, Aruba and the North Carolina Coast."


 The first thing you will notice is that the game comes with fifty scenarios. The second thing that will catch your eye is that you get to play either the hunter or the hunted. That is correct, in this game you also get to play the escorts. While submarine games have abounded, I can think of only one other game where you could take on the role of a submarine hunter. There are a few games where it is part of a larger naval war or battle, but not ones that are based on separate scenarios about it. You can also see that you get to simulate the entire war, not just the early war, in which it was much easier to survive as a Uboat. Then, in the middle of the war, being in a Uboat was pretty much a death trap.


 The first notion that you have to get in or out of your head is that this is not Red Storm Rising. This is the 1940s. While the Germans do have rudimentary homing torpedoes at the end of the war, most of your time is spent with mark one eyeball, and a lot of guesswork. Another thing to keep in mind is that torpedoes fail at an alarming rate and are slow to reload. This is actually quite factual and I believe the German torpedoes were not much better than the American ones in the early years of the war. A lot of the early success of the Uboats was because the convoy system was not started up again immediately after the war started. Seeing as how this defeated the Uboats in world War I, the absence of the convoy system was idiotic. Many times the Uboats were able to catch single merchant ships and use their deck guns to persuade them to abandon ship. Which leads us back to your torpedoes, treat them as golden fish. Use them only when you are guaranteed of a hit, if they would only work correctly. This is much more of a simulation than a game so all of the problems of reality are here. It is much safer to approach a convoy at night, however your ability to search for the enemy at periscope depth is heavily curtailed. The early anti-submarine efforts also work the same way. The earlier in the war it is, the harder it is for an escort to find a submarine and destroy it. For those of you who cannot sit still, please pick another game. You will have a lot of times where you are just searching for the enemy. I can only state, use the faster times of the game's speed with incredible caution. Many times you will only be aware of enemy vessels by the firing of their guns at you using the faster speeds.


Scapa Flow

 The game graphics are those needed for a simulation of submarine warfare in World War II. There is no glitz or 3D to be found here. This is not to knock the game, it is just to let you know what you are buying into. The absence of anything on the map at most times means that this game does not even approach the visuals of John Tiller Software land simulations. You are not going to be aware of, let alone worried about, the thermal layer; see above. It is a slightly more in depth version of a cat and mouse game. The only difference here is that at any moment you can go from being the cat to the mouse. The audio of the simulation is superb. It is just as good as any other submarine game. The upswing of this is that it becomes one of your biggest assets that the game gives you. With repeated play, you can actually tell by listening how close the other ships are. It will also tell your speed and whether your periscope is up or down without even needing to look at the game buttons. One more thing to be aware of is that this is a planning game. Torpedoes have an effective distance of about how far you can throw a rock. You need to be precisely where that enemy ship is to even think about firing a torpedo at it. The good, or bad, thing about the game is that it follows history to a tee. In the beginning years both sides have many disadvantages. In the middle years of the war the Allied escorts have it mostly their way. Then at the end of the war the German advances in torpedoes and snorkels etc., swing the pendulum back again.

 This is a write up from the 'Getting Started' help file:


"As soon as the enemy is spotted, dive to periscope depth, and continue your approach. As the convoy zig zags you may need to adjust your course. Notice that you get different background sounds when you are submerged. This helps remind you if you are currently surfaced or underwater.While you are submerged, the pale green lines represent sound bearings to enemy ships, while the
bright green ones represent the enemy active sonar. From here, you'll want to maneuver your submarine to get into position to get a good shot at the enemy convoy. The closer the better... however, the escorts are looking for you! Take your shots and see if you can destroy the cargo ships and maybe an escort to boot...and then dive deep and run for safety. But how do I shoot? With your u-boat selected press and hold the Ctrl key and then right click where
you want your torpedo to go. A “fish” will launch and begin it’s course. Remember, your target is moving, so you don’t want to shoot where it is now, but rather where you believe it will be.
In my action I got very lucky with my first torpedo salvo and sunk the K class Corvette and started flooding on one of the merchant ships. From there I was able to sink two more merchants and then
square off with the remaining Frigate escort. I ended by hunting down the lame merchant ship and sinking her with my deck gun. A very successful ambush, but I exhausted my torpedo supply, which

would then force me to seek re-supply. If this had been a larger convoy I could be in real trouble now.."


 In the above picture my Uboat is at the upper right of the map, in the middle of the white circle. The white circle shows how far I can see. This is at night and I am at periscope depth. The large blue arc at the bottom of the Uboat is the range of the deck gun. The small arc not far at all from the Uboat is the range of the torpedoes. Yes, you read that correctly. How any submariners survived the war is beyond me. The 'K' on the screen is an escort. The 'AK' are merchantmen. This is early in the war so the escort would have to be parked on top of me to find me in the dark. 


 Thank you John Tiller Software for allowing me to review this great, but sometimes maddening game (in a good way). I do not know how many times I have redone the same scenario to try something different this time. The feeling you get when your plan comes to fruition and your attack works to a tee is something to be savored.

Wolfpack by John Tiller Software:
www.johntillersoftware.com/NavalCampaigns/Wolfpack.html

Please take a look at their Midway and Jutland simulations:
www.johntillersoftware.com/NavalCampaigns/Midway.html
www.johntillersoftware.com/NavalCampaigns/Jutland.html


Robert


Antietam September 17, 1862 by Worthington Publishing  Antietam was the costliest day of fighting during ...

Antietam Septmber 17, 1862 by Worthington Publishing Antietam Septmber 17, 1862 by Worthington Publishing

For your Wargamer, Toy soldier collector, MiniFig collector, military history nut. Reviews, interviews, Model Making, AARs and books!


Antietam

September 17, 1862

by

Worthington Publishing


 Antietam was the costliest day of fighting during the entire American Civil War. The cover shows a picture of Burnside's Bridge. This is just one of many places in this small battlefield that were etched upon the soldiers' minds. The East and West Woods, and that terrible Millers Cornfield; I have walked this battlefield, and was simply amazed at the smallness of it. How so much death and destruction was wrought in this little area is hard to fathom. By the way, the Sunken Road is not what many people think it is. I always assumed that it was a sunken lane, and that the area in front of it was flat and offered the Confederates a sweeping field of fire. In reality the lane is sunken, but it is actuality much lower than where the Union attacks came from. The Irish and others attacked over a small hill right above the Sunken Lane. You would think that the Confederates would have occupied the crest of the hill. However, they were already the closest Confederate unit to the Union batteries on the other side of Antietam Creek. The heavy Union artillery would have wreaked havoc on them. From the crest to the Sunken Lane is probably only a few hundred feet, if that. The battle there was at the same close quarters as the Cornfield. The battlefield is very well kept up and if you get a chance, go and check it out. Now on to the game. This is one of Worthington Publishing's first games in their 'Civil War Brigade Battle Series'.


 The game comes with:

22 X 33 hard mounted game board
4 counter sheets
8 page Series rules
8 page Playbook
2 ten sided dice
1 6 sided morale die
1 box


 Instead of me rewriting it, here is information about the game from Worthington Publishing:

"The game is igo-ugo, brigade level with each strength point representing 100 men. Map scale is 250 yds per hex. An 8 page rule book will have you playing within an hour as many concepts will be familiar to war gamers. Ranged artillery fire, morale, melee, cavalry charges, and more will have you battling until the last turn to see if you can achieve victory. Step loss counters in 1 point increments."


 The map is big and beautiful with very large hexes. The terrain of each hex is easily identifiable. The counters are large, easy to read, and color coded for their division. They are also marked as far as what corps they belong to, come pre-rounded, and fall out of the cardboard sprue like they have been greased. The numbers on the strength point counters are large enough for me to see without my spectacles (bifocals). The overall appearance and manufacture of the game pieces is pretty darn good. 

 You get two rulebooks, one for the game and one for the series. They are both only eight pages long. The designers went for a game that will have you playing in under an hour. I think they have succeeded admirably in reaching that goal. The game comes with four scenarios. These are:

The Morning Attack
Bloody Lane -  (Sunken Lane)
Burnside Bridge - (Or how to waste the day)
The Battle of Antietam: The Full Battle


 The game comes with the usual rules for nineteenth century warfare. Cavalry can be either Mounted/Dismounted. Artillery are either Limbered/or Unlimbered, and can only move when Limbered. You do get a bonus for moving in column on road or clear hexes, as long as you are four hexes away from an enemy unit. The Player does not have to remember to put his units into and out of column. The rules assume that the general in charge would be able to take care of this detail. Unfortunately in history this was sometimes not the case. Leader units are extremely valuable. If a Leader is stacked with a unit that has to make a morale check, a -1 is added to the die roll. During the Command Phase if an infantry or cavalry unit is within four hexes they are in command. Leaders can be eliminated and then the counter is placed on its obverse side (replacement). A unit has to be within three hexes of a replacement leader to be in command. In the Rally Phase a unit has to be within Command Range of their Leader to attempt to Rally. Battle in the game is as bloody as it was in reality. You will be using a lot, if not all, of the strength point markers. The game rules allow the battle to swing back and forth just like it did in reality. The rules do a good job of giving you historical and plausible outcomes in your different playthroughs.

This is the sequence of play:

First Player Command Phase
First Player Organization Phase
First Player Offensive Artillery Phase
First Player Movement Phase
First player Combat Phase
   Second Player Defensive Fire 
   First Player Offensive Fire
First Player Rally Phase
Second Player has the same exact phases
The Turn Marker is advanced one turn


 The Victory Conditions are pretty straightforward. Each side scores one point for every casualty point the other side has accumulated. This is a list of the Victory Point hexes:

Dunker Church - Confederate Control 10VP - Union Control 25VP
Any Sunken Road Hex - Confederate Control of all of Them 10VP - Union Control of any of Them 25VP
Potomac Ford - Confederate Control 25VP - Union Control 50VP


 Antietam is a battle that only a general like McClellan could lose. Lee would not have forced this battle if he had not been the Union general. In actuality, the battle is only for the Union to lose or win. McClellan's timidity is shown in the rules by only allowing the Union player to activate only two corps each turn. This is the only way that the battle can be recreated, and show McClellan's timidity, and also not allow the Union to just crush Lee's Army of Northern Virginia. If the Union player does not use his two corps a turn better than McClellan, he will probably lose. If the Confederate Player does not use all of his units as fire brigades he will probably lose. The Confederate player must play like the 'Little Dutch Boy' and use all of his fingers and toes to dam up the dike. The game was designed by Mike and Grant Wylie. Grant 's suggestions for the Union are that you get Sumner's Corps and Porter's Corps across the middle bridge before doing anything on the Confederate left with Hooker's Corps. He also states that you have to get Mansfield's Corps in position with Hooker's Corps before attacking there. Grant's suggestions to the Confederate Player is to "Be like Lee". Meaning run about the board and deal with one disaster after another. The game is an excellent medium complexity game on the Battle of Antietam. It has just the right amount of rules and glitz to make it eminently playable and fun. Thank you Worthington Publishing for allowing me to review another great game of theirs. I cannot wait to see some more battles in their 'Civil War Brigade Battle Series', especially The Wilderness, Spotsylvania, or The Seven Days Battles.

Antietam website:
https://www.worthingtonpublishing.com/collection/antietam-1862
Robert


Tanaka 1587 Japan's Greatest Unknown Samurai Battle by Stephen Turnbull  This is a small book of 120 pag...

Tanaka 1587 Japan's Greatest Unknown Samurai Battle by Stephen Turnbull Tanaka 1587 Japan's Greatest Unknown Samurai Battle by Stephen Turnbull

For your Wargamer, Toy soldier collector, MiniFig collector, military history nut. Reviews, interviews, Model Making, AARs and books!


Tanaka 1587

Japan's Greatest Unknown Samurai Battle

by

Stephen Turnbull


 This is a small book of 120 pages that goes into what happened in Japan right after the death of Oda Nobunaga. The siege of Tanaka Castle took place right after Toyotomi Hideyoshi's conquest of Kyushu. The siege at Tanaka castle was the culmination of the Higo Rebellion. Hideyoshi had installed Sassa Narimasa as the overlord of Higo Province. He was very unpopular with the locals, so they revolted.


 Toyotomi Hideyoshi was the second of Japan's greatest warlords who tried to conquer all of Japan. Oda Nobunaga was well on his way to subduing all of Japan before he was brutally betrayed. Hideyoshi did manage to become the sole ruler of the land, but when he died he left as his heir a child. It was left to the third warlord Tokugawa Ieyasu to start a ruling family for the next 200+ years.

 To finally become master of all Japan, Hideyoshi needed to invade Kyushu and conquer it. He was able to divide and conquer the various lords of Kyushu and take control after the largest military campaign in Japanese history up until then. Sassa Narimasa was once described by the Japanese historian Tokutomi as a "dried sardine gnashing its teeth". Sassa Narimasa was actually a general underneath Oda Nobunaga, and he fought against Hideyoshi in the power struggle after Nobunaga's death. 

 The book goes into the archeological search for and the finding of the remains of Tanaka Castle. The Siege is also presented in the movie Kumamoto Monogatari in a highly fictionalized account. Some of the movie was shot on the actual site of the Castle. The siege was apparently unknown except by locals until 1987.

 The actual story of the siege is that the Castle was defended by 1000 troops against 10,000 led by Hideyoshi for 100 days. The sources have various glorious deaths or forget to mention what happened to each of the three Wani brothers who were defending the Castle. The story of the siege and rebellion etc. is just a microcosm of the history of Japan during and before the time the Castle fell. The heroism and the self sacrifice along with betrayal were unfortunately a well know theme during the Sengoku Period. The book does a very good job of showing how retainers and lords interacted at the time. Statues of the three Wani brothers now greet you at the parking lot.

Robert

Publisher: Helion & Company
Distributor: Casemate Publishers

Douglas C-47 Skytrain (Dakota) D-Day Edition by Cobi  The Douglas C-47 Skytrain, Dakota in English service, ...

Douglas C-47 Skytrain (Dakota) D-Day Edition by Cobi Douglas C-47 Skytrain (Dakota) D-Day Edition by Cobi

For your Wargamer, Toy soldier collector, MiniFig collector, military history nut. Reviews, interviews, Model Making, AARs and books!


Douglas C-47 Skytrain (Dakota)

D-Day Edition

by

Cobi


 The Douglas C-47 Skytrain, Dakota in English service, was based on the Douglas DC-3 Airliner. It seems amazing, but the DC-3 was first flown in 1936, and there are still ones being flown today in parts of the world as passenger or freight planes. The C-47 continued in the U.S. Air Force until the late 1960s. Its variants are too numerous to list. You might have heard of it being used as a gunship in Vietnam. It was nicknamed 'Spooky' or 'Puff the Magic Dragon'. It was armed with an array of weapons with which to rain havoc upon enemy soldiers. This model that we are building was modeled after ones used on D-Day in 1944.


 I think we will first delve into the fact that this is a Cobi block kit. Like addressing the elephant in the room. Yes, this is a block kit that in a slightly different form, most children would love, and often get on Christmas or their birthdays. Another yes would be that we are grown men building with Cobi blocks. I say who cares. To me the sense of accomplishment that comes with building a Cobi kit is the same as building a model. No, I take that back, it is better than building a model. Some of us are artists, but most of us are not. There are some people who have a lot of free time on their hands; again most of us do not. To build and craft and paint a model is a lot of time and work. Yes, some of them do look just like the real thing. I, and a lot of other people, cannot build a model to look like what you see in magazines. I do not have the time nor the skill sets needed for it. I can however, build a Cobi kit that looks amazing and have fun doing it. This part of our hobby is something that anyone can do and enjoy. First of all, building a Cobi kit is affordable. When you buy a Cobi kit you are not spending a car payment for the model. To be perfectly honest, I do not think that the finished block models that cost $300 and more look any better than a Cobi one. In fact, I think some are quite inferior. Please do not get me started on the cheap knock-offs. They look bad and are only slightly less expensive than a real Cobi model.


 This model of the Douglas C-47 Skytrain is exceedingly well done by Cobi. Their planes are looking less 'blocky' with each new one coming out. A tank is a lot easier to make out of blocks because of its shape. By their very nature, planes do not lend themselves to be made out of blocks. So the fact that Cobi can pull it off is even more amazing. I proudly put my Cobi sets on display next to the diecast models that I have bought. 


 So how is it to build one of these? In one word, enjoyable. You are not waiting for paint to dry, or have to get these two pieces together right now before the glue dries. If the phone rings, just answer it. If you want to get a cup of coffee go ahead. The blocks will be waiting right there where you left them. if you want to finish your entire model today or just put together ten pieces it is up to you. The directions stop at roughly each two to ten pieces for each separate piece of the construction. Have fun; that is why you bought it. You didn't buy it to think everything through and to worry about what about this part, do I have the right paint etc. You bought it to enjoy building it, alone or with someone. Then there is the absence of fear, what if I did the last pieces wrong. Just take the few pieces off and do it over. No fuss, no mess, and completely hassle free. 

 This build for me was very calming and I really wanted to see how good Cobi could make this plane look. I was astounded at how much better it looked than I thought it could in the end. The build itself was only 550 pieces so I knew roughly how long it would take. I spread it out over a few hours and two days, because, well because I could. There were no hiccups in the build other than one of my own making by not looking close enough at the directions. 


 I want to thank Cobi for allowing me to review this excellent addition to their air fleet. One thing I want to discuss is missing parts. I have built ten of the Cobi models so far and I always have extra pieces. The only time I have come up short is because I used the wrong part earlier in the build. I have seen some people posting that they have missing parts and for me I have never had that problem. 

Link to the Douglas C-47 Skytrain:
https://cobi.pl/en/small-army-ww2/aircrafts/douglas-c-47-skytrain-dakota-d-day-edition,art,11660.html


Robert 

In the wargaming space, it's particularly interesting to see a game that bends the norms of the genre to suit a particular war or ev...

Battle for Iwo Jima Battle for Iwo Jima

For your Wargamer, Toy soldier collector, MiniFig collector, military history nut. Reviews, interviews, Model Making, AARs and books!


In the wargaming space, it's particularly interesting to see a game that bends the norms of the genre to suit a particular war or even specific battle. That's the nature of Battle for Iwo Jima, the new title from one-man operation YoboWargames. As you might imagine this game focuses on just one battle, the brutal struggle for that tiny island in the Pacific. Battle for Iwo Jima takes a look at the conflict through the lens of simple, yet thoughtful game design where each side follows a different set of rules. 

This is a single player only title, where you can only play as the US Marines, and there is only one scenario. This might sound pretty limited in an age where we expect games to have unlimited content and options, but in this case it works in the favor of the game. By designing the entire game around playing this one battle from one direction, the focus is entirely on making that specific experience more interesting. At the same time, the game uses a straightforward and simple set of rules that are more reminiscent of a boardgame than anything else.


Play proceeds through a fixed set of phases. The player controls the US Marines from the initial beach landings to the bitter end of the battle. If you manage to get there! This is not an easy game and it's entirely possible to be relieved of duty after only a few turns if things go exceptionally poorly. Each turn progresses through a series of distinct phases as the player assigns limited support points to units of their choosing, and moves the Marines around (while the Japanese shoot at them), then the Japanese get to hit them with artillery, and attack Marines that are adjacent. Surviving Marine units then get a chance to attack the Japanese units. Afterwards there is a night phase where the Marines can be attacked again by the Japanese. Occasionally a suicidal Banzai charge will occur which is a high stakes affair for everyone involved, but often favors the player. 

You'll notice that the Japanese defenders get many opportunities to inflict casualties on the Marines, while the player's forces only get one attack per turn, if they manage to get into position and aren't so fatigued as to make the attack more risk than reward. The key advantage that the Marines have is that they are highly mobile, able to move as far as they want each turn, while the Japanese defenders are fixed in place and never move. The trouble is, the only way for the Marines to find and close the distance to the defenders is to take fire and hope for the best. Often, if you aren't careful, your Marines will wander into a killzone, taking fire from two or three Japanese units at once. This hazard is at times unavoidable, as the time constraints mixed with the physical constraints of the geography force you to choose between making a safer, yet limited attack, or rolling the dice and trying to overwhelm the enemy.


I will admit that this was a difficult game for me, and I have not managed to win the entire campaign yet. Repeated plays have given me a better sense of strategy and how to deal with the challenges the game deals out, but it's still rough going. The battle also changes as it goes through a couple of phases. Taking the airfield near the beaches isn't too hard, as the Japanese are mostly in the open and there is some room to get at them once you crack the line in a spot or two. The next item on the agenda is taking Mt. Suribachi, which limits the damage from the Japanese artillery and eliminates one front from your concerns. This is a bit harder, as the Japanese are dug in and there is little room to maneuver. After that, the real grind begins as the player must break through and defeat multiple fortified lines of defense to conquer the rest of the island. While the Marines do get several waves of new units and some reinforcement points, they never feel like quite enough for the task at hand. Fortunately, the game does come with a thorough manual that includes a strategy guide, which you will definitely want to read through. 

To make all of this a bit more complicated, Marine units can only fight when they are in range of their HQ, which must by necessity be kept right at the edge of dangerous territory if you want to keep with your timetable. It's very tempting to move them up closer, directly into danger, so that your flanking units are still in contact. You also get several tank units, which can attack directly but are best used to support the attacks of infantry. You have no choice but to send the tanks into harm's way if you want them to be of any use, but you can dedicate your "support" points to them each turn to give them a better chance. 


So that covers most of the gameplay mechanics. It is indeed a relatively simple game that you can learn how to play in a matter of minutes. To win, however, will require you to learn the nuances of the system and how best to approach the problem at hand. Thoughtlessly throwing your Marines at the Japanese defenders will quickly result in them being whittled down to nothing long before you have control of the island. Rather, you must consider the potential risks and benefits of each move, and exploit any seams that appear in the Japanese defenses. You must also accept up front that you will take considerable casualties no matter what. I found this to be a sobering aspect of commanding this particular battle. There is no tactic that allows you to completely avoid taking fire and the accompanying loss of men. You have to put your boys into harm's way in order to achieve your objectives.

Battle for Iwo Jima has relatively simple graphics to go along with its simple rule set. That said, the visuals do have quite a lot of charm to them. The occasional animations bring the boardgame-esque map to life, like when flares go up during the night attack phase, or the occasional flight of US Navy fighters cruises across the map. One clear benefit of the simplicity is that the game has extremely low system requirements and should run on practically anything.


For the very low asking price, this game is easy to recommend to anyone interested in the battle or in the market for a simple, if not easy, wargame. You will get an enjoyable experience for sure, though once you have beaten the game there might not be too much reason to return. Still, this is a nice one to add to your collection whether you are an experienced wargamer or someone looking for an entry point into the genre. 

Battle for Iwo Jima is available on Steam.


- Joe Beard


Contact me at beardjoe33@gmail.com or on Twitter @_AWNT_


hpssims.com