second chance games

Search This Website of delight

  TRACES OF WAR FROM VUCA SIMULATIONS Traces of War takes us back to the Eastern Front and its physical contents initially made me expect a...

TRACES OF WAR TRACES OF WAR

For your Wargamer, Toy soldier collector, MiniFig collector, military history nut. Reviews, interviews, Model Making, AARs and books!

 TRACES OF WAR

FROM

VUCA SIMULATIONS

Traces of War takes us back to the Eastern Front and its physical contents initially made me expect a welcome return to the system used in Crossing the Line and Across the Bug River.  The sheer quality of all its components certainly puts it in the same league.  However, a quick look at the designer's name, Tetsuya Nakamura, and the fact that this is a re-tread of the Japanese magazine issue, Manstein's Last Battle, made me realise that this was a very different and simpler system.  I had encountered his system in the MMP production of A Victory Lost and like many others had both enjoyed its simplicity and playability, but not the disappointing production values.  So it's with many thanks to Vuca Simulations for providing this review copy and opportunity to explore its qualities.

Vuca Simulations have established an excellent reputation for quality and the only feature in Traces of War that has raised some criticism is the two-part map.  There are those who, relishing the company's previous beautifully mounted maps, lamented that these are paper maps.  Others have complained of the slight imperfection in matching up the two maps, though some have qualified that their concern stems from their experience of Vuca Simulations' record for perfection!  What I do like about the maps is the almost linen-like feel to them.
 

Personally, I've not found the matching up of the two maps anything other than a minor imperfection, especially once the Soviets start advancing into that area of the map, though I would highly recommend plexi-glass sheets that are always useful, especially where you have two-map games.  
Other than that, all other components live up perfectly to the company's customary excellence.   The three sheets of familiar rounded-corner counters are some of the best you'll find.  


Smilarly, the four charts [two identical ones for each player - another highly commendable practice] are the very thick, rigid A4-sized cardstock that also has become an expected feature.  These double-sided cards will rapidly become all you need to play the game.  Player Aid A contains a detailed sequence of play and all the necessary charts, while Player Aid B outlines all the rules and critical information.


Frankly after a turn or two, all you will really need is the single side of charts, because the rules are very easy to remember.  This is partly because they are relatively short, a mere 13 pages, but mainly because of their absolute clarity and the rule book's admirable presentation.  The pages are glossy without being too shiny, with the text set out in double-columns with plentiful illustration and examples that couldn't be easier to read because of their size.

A typical page of the rulebook
Having looked carefully at the English rules translation for the original Japanese magazine edition, I can safely say that these in Traces of War have an organisation, flow and readability very much lacking in the original. 
Sequence of Play
Luftwaffe Reorganisation Phase
This is a simple random chit-pull of German aircraft tokens that give offensive or defensive column shifts in combat.  The increasing number drawn - and there are only a maximum of four - depends on how many crossing-points the Soviet has captured.  Therefore it will be several turns before any are available.
Command Chit Selection
Both players choose which activation chits they will include this turn.  Mainly these are HQs that can activate all units within a given radius, but there is a single supply chit that is always included and the German player potentially has 2 OKH chits from turn 2 onwards and the Soviets receive a single-use airborne chit and airborne unit and may have a Stavka chit available from turn 5 onwards.  I like chit-pull activation mechanics generally and the system in Traces of War is an admirable one that is crucial to creating both the differing abilities of both sides and a substantial amount of the tension this game generates.
Action Phase
As a chit is drawn, the player has the choice for all units within the drawn HQ's command radius of either a move-combat sequence or a combat-move sequence.  I like the flexibility of choice and the variation to pace this offers the players, though as the German I would have loved the option of a move-move choice!
Both Movement & Combat are swift and easy to carry out. It's a rare pleasure to be able to remember all the terrain modifiers and movement costs in my head and the Combat Table too is very user friendly.  Most results are either R or RR - i.e. one hex or two hex retreats.  If this sounds like a very bloodless chart, don't be fooled, because a lot of that retreating will be through an enemy ZOC, each of which causes a step loss.  Imagine what might be going to happen soon to those German units in the pocket forming around Kharkov.


In terms of Phases, that's it.  Unlike most games, Supply and Reinforcements are handled not as Phases each turn, but as part of the chit pull system.  In this eight turn game, the Soviet player has six batches of reinforcements.  When he/she chooses to include the Reinforcement chit in a turn, one of those batches in numerical order will be placed on the map.  I love this further element of choice, along with the uncertainty of when in the turn they will arrive.  The ability to position them just where you most want them may perhaps be rather too powerful.  However, it is balanced by the chance that they won't arrive until they are too late to be valuable this turn.
For the German player, the reinforcement element is even more unusual and more restricted.  Just as for the Soviet player, it does depend on the inclusion of a chit in the Activation Pool.  In this case, it is the inclusion of an OKH chit and the German player has two of these chits available to include from the beginning of turn 2.   This is not the powerful tool it sounds, because the OKH chit can fulfil three different functions [1] activate an HQ [2] activate a set number of units anywhere on the board [3] provide a number of Negotiation Points to be used either to buy reinforcements or remove a Supreme Command Order.  All of those choices are going to be vying for the German player's attention every turn.  It's one of the frustrations and delights of playing the German side and for me gives a very convincing feel of what a desperate situation being the supreme commander must have been like with his nightmare of conflicting demands.  
If you're wondering what a Supreme Command Order is, it is this game's way of incorporating a version of what, in other games, are called Hitler Directives.  The six major cities on the map each holds one of these markers representing Hitler's demand that they should be held at all cost.  Should the Soviet player succeed in controlling any one of these cities while the marker is still in place, he/she wins.
As some of these will eventually be captured, the German player must at some point use Negotiation Points to remove those markers from cities where the Soviet player looks likely to seize control.   It is another simple, but hugely successful rule to ratchet up the pressure on the German player and provide a neat series of quandaries.  The German player is constantly forced to think what's the key priority now.
Supply too is governed by a Supply Chit that goes in the draw bag/cup every turn and when it is pulled out both sides check supply.  Again, I like this, though the method of checking supply definitely shows its age.  All that's needed is a line of any length free of enemy ZOCs and a few other restrictions, such as not passing through an enemy city or an unbridged major river.  

[Couldn't resist showing my favourite chit-draw bag "borrowed" from the V-Commandos game]
An additional feature that characterises the carefully thought out double-edged nature of some of my favourite rules in the game is the rule about Crossing Points of which there are six on the map.  All are located on the Dniepr that bisects the centre of the map and along which the Germans will strive to form some sort of coherent defensive line.  Their capture by the Soviets greatly aids their advance, but the corollary is that all the German bonuses [such as Luftwaffe markers, Supreme Command Negotiation Points and the value of the OKH chits] increase depending on how many the Soviets control.  This is both a clever balancing help for the Germans and a dilemma for both sides.
Before I conclude, a word about the very high solitaire value [9] given on the back of the box.

The only solitaire element in the game is the Play Aid below, which reproduces the two player charts that are printed on the opposing map edges.  This is provided so that, when you play the game solitaire by playing both sides, everything is facing you and easy to use.  As those of you know who've read other of my reviews this is my preferred way of soloing a two-player game and so I'm very happy to have such a simple resource.  But for those who want/need solo rules/bots, this is not what this game provides.


My final question is that of play balance which is already being argued about on BoardGameGeek [Ok, what game's play balance doesn't get vehemently argued about on BGG?]  The Soviets are definitely going to be doing a large percentage of the attacking and the Germans the defending.  There are two scenarios in the game: a short play of the first 4 turns and I do think that for the Soviet to accrue the necessary VPs to win is a well-nigh impossible task. However, the full game of 8 turns is the important consideration.  It is a struggle for the German player first to survive losing to an automatic Soviet victory and secondly to prevent the Soviet player gaining enough VPs to win at the end of the full 8 turns.  However, the more I play this game the more that German victory seems achievable and the more rewarding the feeling when you do!

Not one of my best efforts, as Dnipropetrovsk falls early
 to give an automatic Soviet victory

To sum up this is above all a highly playable game with short, very accessible rules.  Its components are a pleasure just to see set out and play is a tense experience, fuelled by plenty of interesting decision making for both sides.  It's a game that I strongly recommend and one that will be staying in my collection.

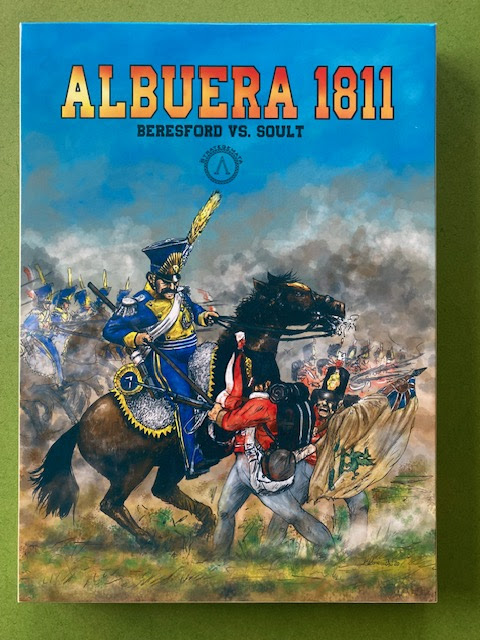
 ALBUERA 1811 BERESFORD vs SOULT FROM STRATEGEMATA The latest game that Strategemata kindly sent me a review copy of covers the battle of Al...

ALBUERA 1811 ALBUERA 1811

For your Wargamer, Toy soldier collector, MiniFig collector, military history nut. Reviews, interviews, Model Making, AARs and books!

 ALBUERA 1811

BERESFORD vs SOULT

FROM

STRATEGEMATA


The latest game that Strategemata kindly sent me a review copy of covers the battle of Albuera in the Peninsular War.  The historical battle was large in numbers and especially large in casualties, but led to no significant outcome for either side.

My first introduction to this battle in game terms was back in 1979, with the enjoyable, but fairly basic Albuera & Vittoria from 3W [World Wide Wargamers].    The most recent was White Dog Games Albuera 1811 with is original approach combining ideas from both the world of miniatures wargaming and Rachel [Bowen] Simmons innovative board game system for Napoleonic and ACW battles.
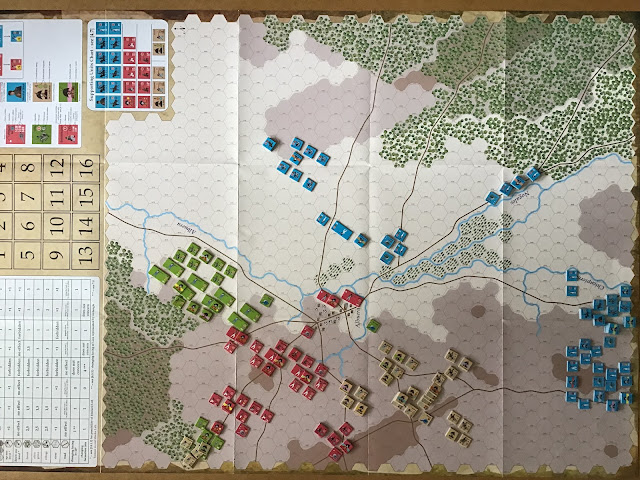
This game, Albuera 1811 Beresford v Soult, is a substantial traditional hex and counter production.  Like most of their games, it may lack the publishing polish of many larger companies.  The map is rather larger than standard size being slightly over 27 x 38 inches and has a rather retro look in its limited colour range.  However, once the units were set up, I was pleased with the impression created.


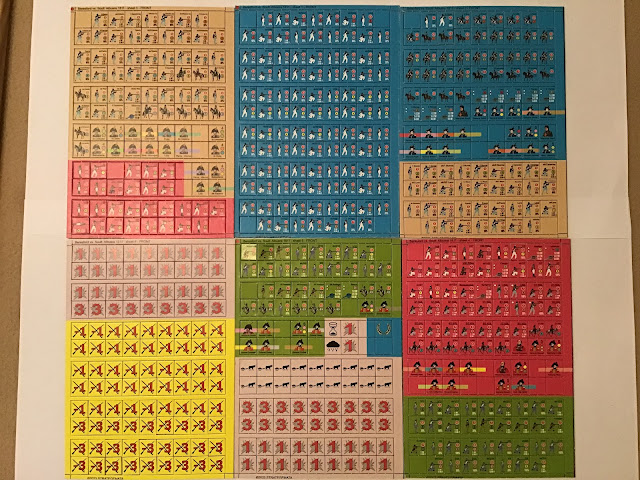
When I first unboxed the contents I was surprised by the large number of counters and a little bit daunted by the number that had fallen out of the six counter sheets.  It took some time to re-assemble them in order to take the picture seen below.  There was also a small zip-lock bag of 25 rectangular infantry counters that represent the largest formations in line order.

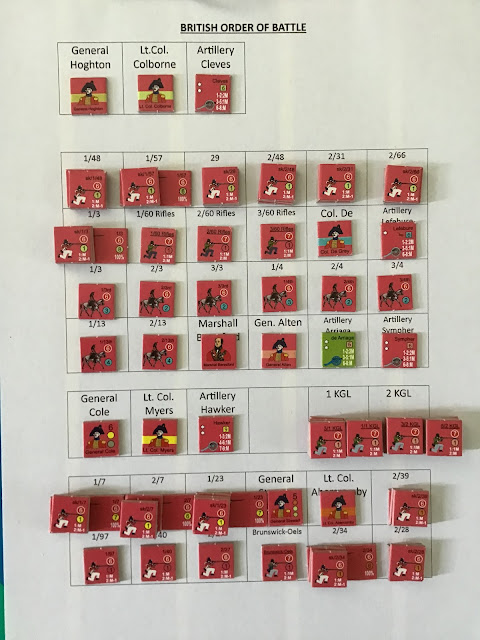
Though moderately large in unit numbers the reason for the many counters is that most infantry units are represented by three separate counters to cover skirmish, line and column formation.  I've got to say that sorting these was a chore because of the many that had fallen out of the sheets.  On top of that, the counters are small and the important unit designation on each is very small.  As I soon found out, when I realised that most units had at least three counters to represent different states, the need for a display chart became obvious.  It also became obvious that I would have to create them for myself.  Below is just the one for the British units,

Without some organisation of this sort, the game becomes a nightmare of "hunt the unit".  With it, it becomes manageable, but there are quite a number of other problems, as I've found.  After considerable improvements in the quality of the counters (along with mounted boards) for the last three Strategemata games I've reviewed, it was a disappointment to return to the thinner average quality ones here, though I suspect the much larger number of counters is the reason, as was the return to a paper map.
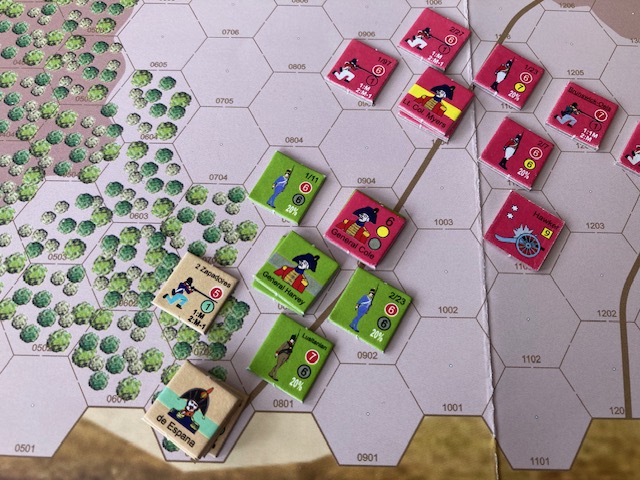
Despite this, as I began the game, I was enthusiastic about the overall look of the battle and the individual groupings, such as the one below.


Unfortunately, I soon realised that difficulties lay ahead.  All I can say is that manipulating the counters is a strain for the following reasons.  The stacking of small counters, the need to change counters in and out of play, the addition of numbered markers to show losses and others for morale states and finally any new unit entering a stack has to be placed on the bottom.  It's time consuming and leads to stacks that are very awkward to manage without tweezers and frequent confusion as stacks topple and affect what is often already a crowded group of units. 
Turning from these practical physical constraints, I hoped that the rulebook would prove an easier undertaking, but here too I encountered a number of difficulties.  A total of 12 pages seemed a modest number and I was expecting the sort of simple clarity that I'd found with many of the smaller scale Strategemata games.  Parts lived up to this expectation. In particular the command structure and the chit-pull activation system works well and give a realistic feel. With brigade, division and army commanders, there is a good deal of variety as to how you may choose to activate units.  Especially successful is the prospect that the greater the number of brigades you try to coordinate for action, the greater the risk grows of failure.  This nicely mirrors the problems of the period.  Also, as many of the command formations often contain only about six units, a highly interactive game ensues.  The distinction between line and column and the detaching of skirmishes too all worked to create the appropriate historical feel.
However, as I moved on to fire combat [musket fire for infantry and artillery fire] and clash [think melee] a range of problems became clear.  One was understanding some rules starting with the the initial heading Alternative Sequence of Fire Combat - I assume the word should be Alternating.  Much to my surprise the rule stated that the units opposed to the activated commander fired first and that any unit on the board could fire.  I assumed this meant only against those units currently moving or firing.
The next uncertainty came with the rule that every infantry unit could fire 4 times within a single turn.  There was nothing to indicate whether there are any restrictions on how many times a unit can fire during its own activation and how many during your opponent's activation.  With no rule preventing you, I've simply followed the practical view that you can fire whenever you have the opportunity until you've done so four times.  Much more of a problem is that it's another essential marker to add to your stack and one that's likely to frequently need replacing and this too inevitably adds to the length of a turn. 
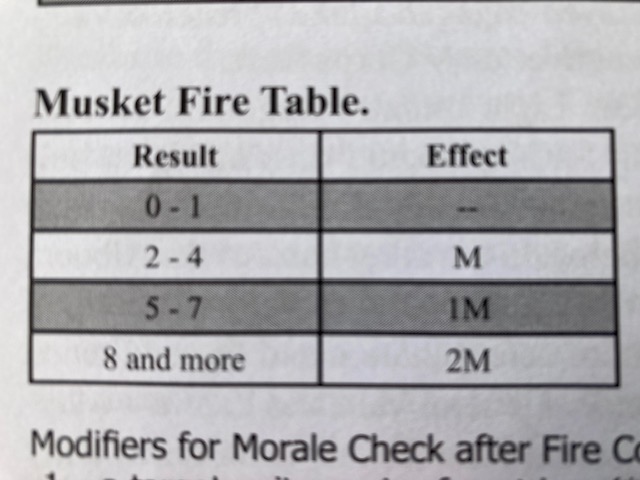
The musket fire system itself is a deceptive process.  The Musket Fire Table  has only four possible results, ranging from "no effect" to some form of morale check and these results are not dependent on a die roll. 


How easy that looks, but what a time-consuming exercise it turned out to be. First of all the unit with the highest firepower is your lead unit, but a unit's firepower is affected by whether it has lost strength and by what formation it's in.  The latter will determine whether it fires at 100% or 66%  or even 20% and if it's firing at range two it has to be halved Then each hex from which additional units are firing moves you one row down the table minus one and finally, the number of times the lead unit has previously fired gives positive or negative modifiers to the morale check die roll that the unit fired on has to make.   Suddenly what seemed such a good idea has turned into a much less appealing and much more time-consuming task.

After that we get to resolve the Clash Phase [i.e. Melee].   According to the rules, this occurs when a unit has entered an enemy occupied hex.  The first thing to realise is that physically doing this soon becomes impractical, except very early in the game.
In the picture below is the simplest occurrence of Clash.  A single French unit has engaged a single British unit and they are both in line formation.   Neither unit has any markers on them yet and most unusual there are no other units nearby to worry about jostling.


In other words this is an immaculate example rather than a realistic occurrence.  Much more likely is the scene in the next picture with the same two units.  It still looks workable, though I wouldn't really like to place the attacking unit in the defending hex.


Finally we see what might actually lie in each of those piles.  A defending British unit that has fired once and taken 2 losses is being attacked by a French unit that has fired twice and has taken one loss

Remember that a hex can stack up to four units, there might be a morale marker in the stack as well and there will usually be several other units adjacent.  I think you can see the problems.  I really like what the game is trying to convey, but I have found both the frequent need to compute numbers and lift up counters and markers to do so, while operating on a fairly crowded battle field has slowed the game significantly and felt more like I was fighting the system rather than the battle. The game also allows you to make Counterattacks and Charges during your opponent's Movement Phase which essentially means that Clashes will occur quite often and not just in the Clash Phase. 
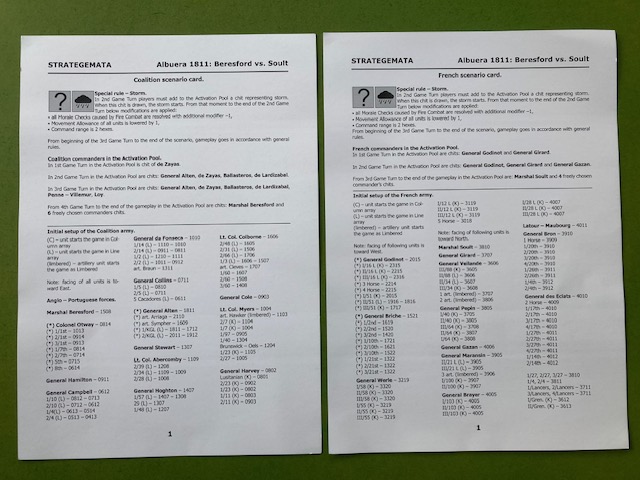
Scenario Cards

So, what makes the game workable.  First and foremost it is the command system and activation restrictions.  The Allied player has twenty formations many numbering between a mere 4 to 6 units, whereas the French have only nine formations of about 10 units and there are 16 turns.  The battle begins with three turns when a very limited number of leaders may be activated.  Most of these turns will involve mainly movement, some changing from column to line and a little musket and artillery fire and just possibly a few clashes.  As a result, you build up experience of the various systems in small steps.  

From turn 4 onwards, the Allies place Marshal Beresford their Senior Commander's chit and six Leader Activation chits into the cup and the French put Marshal Soult their Senior Commander's chit and four Leader chits into the cup.  Which chits you choose and the random order in which they are drawn will not only drive your battle plan, but at times serve to frustrate it.  It will mean that not all of each army will be active each turn, though some Leader's allow you to activate more than one formation.  This will also cause you satisfyingly realistic problems of whether to guarantee activation in small and less efficient increments or attempt larger coordinated formation actions at the risk of their failing to occur at all.  Finally there are automatic victory conditions to be checked in the last Phase [the Administrative Phase] of each turn.  If the VP marker has reached 8 VPs for the Allies they have won, whereas if it has reached 6 VPs for the French they have won.

To sum up, the game has a number of interesting systems that produce a realistic and tactical feel to the battle, but can suffer from cumbersome execution and a lack of clarity in some rules .  It will need a degree of initial organisation of the formations and the several counters to represent most units and, above all, it has an excellent command structure and activation system that brings a lot of realism and uncertainty to the outcome of the battle.


Rome to the Po River by Heinz Greiner Translated by Linden Lyons  This is another book in the 'Die Wehrmacht Im Kampf' series. This ...

Rome to the Po River by Heinz Greiner translated by Linden Lyons Rome to the Po River by Heinz Greiner translated by Linden Lyons

For your Wargamer, Toy soldier collector, MiniFig collector, military history nut. Reviews, interviews, Model Making, AARs and books!


Rome to the Po River


by


Heinz Greiner


Translated by Linden Lyons


 This is another book in the 'Die Wehrmacht Im Kampf' series. This series was originally published in German during the 1950s and 1960s. These books were written by Generals and Chiefs of Staff etc. and not by the German soldiers themselves. Much like the books that were written soon after the war, they glorify the German Army and its resistance to the Allies. They show a very clean war. There is no mention of atrocities or any other items that might tarnish the German Army. They are filled with the meticulous history of the different divisions and higher formations. These versions that are being released by Casemate Publishers are the first appearance of these books in English.

 This book tells the story of the 362nd Infantry Division during the last two years of the war in the Italian Campaign. The division was formed from the wreck of the 268th Infantry Division. The 268th division had fought in most of the German Army's campaigns since 1940. During the summer and fall of 1943 it had fought against the Russians and had suffered large casualties during the Russian offensives. Even while it was being constituted the 362nd division was responsible for over 320 km of the Italian coast.

 Heinz Grenier, the author, was a Generalleutnant in charge of the 268th division. He was also awarded the Knight's Cross and Oak Leaves for his command of both the 268th division and the 362nd. He tells us that the 362nd had to be reformed with both 17- and 18-year-olds. This is in October 1943, two years before the end of the war. Long before the division was ready, it was thrown into the fighting around the Allied invasion at Anzio. 

 The book goes through the various actions and the defensive battles for the Italian peninsula from the Anzio landing until the capitulation of the German forces in Italy in May 1945. It shows us a very different picture of the German forces than we usually see. The 362nd suffered a lack of material and men for its entire life span. The author does not hesitate to find fault for several of the defeats that the Germans suffered during this time. He especially seems rankled by the German loss of Rome to the Allies. 

 If you like reading about the day-to-day management of a division during a campaign, then this book is for you. Just like the other books in the series, this book shines when it comes to understanding the campaigns on a lower level than has normally shown us by authors. The book has numerous maps and other illustrations of the division breakdown etc. The only unfortunate thing about the maps is that they were apparently hand drawn. So, some of them are not as legible as the others. Thank you, Casemate Publishers, for allowing me to review another book in this fine series. 

Robert

Book: Rome to the Po River:

Author: Heinz Greiner:

Casemate Publishers:


  Nuclear Submarine 61505 by JMBricklayer   I have about twenty sets now from different companies who make brick models. It takes a lot for ...

Nuclear Submarine 61505 by JMBricklayer Nuclear Submarine 61505 by JMBricklayer

For your Wargamer, Toy soldier collector, MiniFig collector, military history nut. Reviews, interviews, Model Making, AARs and books!


 Nuclear Submarine 61505


by


JMBricklayer


 I have about twenty sets now from different companies who make brick models. It takes a lot for me to get a WOW! reaction because they have come so far in the last few years. Up until then a tank made by bricks looked like a box with some tracks thrown on it. In actual fact, you can still see some of those for sale. JMBricklayer popped up onto the scene just a short time ago and yet they are producing some of the finest brick models you can find. I reviewed their White Swan ship and their RC Tiger Tank (those links will be below). This huge submarine just blew me away with its detail.


 You can see just a small amount of the detail that comes with this submarine build. It is truly great to see what extras JMBricklayer was able to put into this brick model.


 It actually has about 100 less bricks than the White Swan ship but it seems much bigger than it. The inclusion of all of the different parts of a nuclear submarine are here. Just look at this list:

Nuclear Generator
Missile Silos
Command Center
Sleeping Quarters
Torpedo Control Room
The Different Array of Antennas


This is the Submarine starting to take shape.


You can plainly see the detail that went into modeling the nuclear reactor. Plus, you have the bunk beds from the sleeping quarters.


Here is a close-up of the reactor.


 It just amazes me to see how much thought was put into this build.


In this shot you can see the torpedo room.


 In the above shot you can see the command center with a desk and chairs. You also get to see the computer screens. The screens are from decals that come with the set.


Here you see the reactor again with the missile bay to the left.


  The finished product is really just amazing. I was afraid that the center of the submarine would be loose and have trouble staying together. I shouldn't have worried - it went together and held just fine. I did have some trouble with the long pieces that make up the bottom of the submarine. I believe it was my own impatience that caused most of the problems with the bottom. To make it go easier and faster I used a product called 'Le Glue'. It is a non-toxic water-soluble glue that washes away when put into hot water. All of the rest of the build I had no problem with. The brick tool that comes with this kit is an even better design than the previous one that came with the other kits I had built from JMBricklayer.


 Thank you JMBricklayer for allowing me to review this amazingly detailed Nuclear Submarine brick kit. I actually completed the kit much faster than I imagined. The detail and what I was seeing while building it made me want to just keep building to see what came up next in the build. It really is a great display brick model. Now it is the pride of my collection, which is very amazing because the White Swan is an amazing kit also.

Robert

 JMBricklayer, has graciously given some codes to use for a discount on the Nuclear Submarine:

For US Amazon, the website link https://www.amazon.com/dp/B0BYRW1PPV, the coupon code VIPARDE15 for US Amazon applies only to the non-discounted Nuclear Submarine 61505 and is valid for one month, offering a 15% discount. 

For UK Amazon, the website link https://www.amazon.co.uk/dp/B0BYRW1PPV, the coupon code VIPARDE15 for UK Amazon applies only to the non-discounted Nuclear Submarine 61505 and is valid for one month, offering a 15% discount. 

For an online store, the website link https://www.jmbricklayer.com/product/nuclear-submarine-61505/, the coupon code VIPARDE15 applies to all non-discounted products and offers a 15% discount. The code is valid until December 31, 2023. (Both the US/UK Amazon and the online store are free shipping and tax).

 This is a link to an article about the 10 best Chinese Lego Alternatives:

JMBricklayer:

My White Swan review:

My RC Tiger Tank review:

Storm Over Jerusalem The Roman Siege by Multi-Man Publishing  Jerusalem: for many people down through the ages it was, and is, considered th...

Storm Over Jerusalem: The Roman Siege by Multi-Man Publishing Storm Over Jerusalem: The Roman Siege by Multi-Man Publishing

For your Wargamer, Toy soldier collector, MiniFig collector, military history nut. Reviews, interviews, Model Making, AARs and books!


Storm Over Jerusalem


The Roman Siege


by


Multi-Man Publishing


 Jerusalem: for many people down through the ages it was, and is, considered the center of the world. The first Roman siege of Jerusalem was in 63 BCE. Pompey the Great had just finished the Third Mithridatic War. Mithridates of Pontus was finally dead, and Pompey was now making a leisurely stroll through the territories that had now become adjacent to Roman lands. That siege actually lasted three months before the entire city was taken. Now, we go forward more than 100 years to the Jewish Revolt of 66 CE. The Jewish freedom fighters had almost completely thrown out the Romans from the whole of Judea. Nero then gave the task of reconquering it to the future emperor Vespasian. We are very lucky in the fact that Vespasian captured a man called Josephus who proceeded to write down the history of the revolt and the following Roman campaign. Jerusalem has probably a greater history of sieges than any other point in the world. The sieges started pretty much right after King David made it his capitol and have continued down through the roughly 3000 years since. Assyrians, Babylonians, and so many others have tried to make the city theirs. This game deals with the siege that Vespasian started, and his son Titus continued, in 70 CE. Strangely, with so many sieges, there are not many games about them, ancient sieges that is. For some reason wargame designers do not think to develop too many actual siege games. 


 So, here we are in 70 A.D. and about to either try to take the city or defend it. This is what Multi-Man Publishing says about the game:

"By the year 70 of the Common Era (CE), the province of Judea had been in revolt against Rome for nearly 4 years. The protests and riots that began in 66 CE had quickly turned into open rebellion. The standard Roman punitive force under Syrian legate Cestius Gallus, having failed to capture Jerusalem, was wiped out at Beth Horon. General Vespasian was given command of the Roman army in the region and ordered to crush the rebellion and restore order. Turmoil in Rome, however, saw Vespasian recalled to become Emperor. In early 70 CE, Emperor Vespasian dispatched his son Titus (a future Emperor) along with four legions to end the rebellion in this important province. Titus arrived in Jerusalem in April to find the city still at war with itself. Throughout the rebellion, differing Judean factions had fought a bitter internecine war among themselves. The primary factions fighting each other in Jerusalem at this time were controlled by Simon bar Giora and John of Gischala. With the arrival of Titus and his legions, however, they were now faced with a common threat to their immediate survival.


The brutal siege of Jerusalem lasted nearly five months. During the siege, city walls were breached one-by-one, much of the city devastated, and the Temple—central to both the Jewish religion and the defense of the city—destroyed and burned. With the capture of Jerusalem, Titus had effectively ended the Judean revolt, with the last of the rebels finally cornered and eliminated in the legendary siege of Masada in 73 CE.

Storm Over Jerusalem is a card-assisted, area-movement game based on Multi-Man Publishing’s Storm Over series of games (Storm Over Stalingrad, Storm Over Dien Bien Phu, and Storm Over Normandy). Cards augment the game play and increase the tensions and choices faced by each player.

As the Judean player, you are outnumbered and surrounded; you must use your forces wisely to hold out as long as possible behind the Walls of Jerusalem. As the Roman player, you must breach the Walls to capture the city, eliminate the rebels, and end the Judean rebellion before time runs out."


 So, we see that the game's pedigree comes from the highly acclaimed games in the 'Storm Over' series. We also see that it is card assisted and has area movement. Let us take a look at the components. This is what comes with the game:

One 22"x34" full-color map
Two full sheets of counters (162 3/4" counters and 88 5/8" counters)
Full-color rulebook with examples
Two double-sided player aid cards
Card deck with 55 full-color cards
4 six-sided dice


 For those of us who have any knowledge of Jerusalem, be it secular or not, the map is an amazing piece of time travel. We get to see the city exactly as it was laid out at this time in history. Other than being completely historically accurate, the map was designed as a wargame map. It was not designed as a piece of art that you would hang on your wall. However, that does not detract one bit from it. The colors and illustrations are perfect for its use. The artist has truly given you the image of an oasis in the midst of desolation. The map paper comes with a coating that will help with its longevity. No, do not bring your different beverages around the game table to see if it endures; it will not. The counters are what my daughter used to call as a child "big huge". All of the Jewish and Roman units, along with a few of the gameplay ones, are 3/4" sized. They have a nice picture on them to denote their weaponry. The numbers on them that are needed for the game are very large. Their very physical and number size bring tears to an old grognard. There are two identical full-color Player Aids. They are made of light card stock. The writing on them is not large, but it is also not really small as some I have seen. The fact that some of the parts/tables are in different colors helps you find what you are looking for. The two decks come together in cellophane, but they are also in a cardboard holder. That is a nice touch so that you do not have to find something yourself to keep them from sliding around the box. The decks are different colors on the back; red and blue is the game's theme. The front of the cards is done in a gold coloring, and each has a very nice piece of artwork as the background. The cards' covering makes them pretty slick and they do try to get away from you. The information size is comparable to any others. The Rulebook is only twelve pages long. It is easy to read and understand. It comes in full color and has a great many examples of play. That is pretty great for only twelve pages. The components are very well done as a whole. 


The Sequence of Play is:

Each turn the following sequence is performed:
A. Draw Phase: The Roman and Judean players draw 
enough cards to fill their hands. If a player has more cards in 
hand than their hand size, they must discard down to their 
hand size. The Game Turn track indicates the hand size of 
cards each player has for that turn. Note that there is one value 
for the Roman player and another for the Judean player. Control of Area 19 (Tyropoeon South) or Area 30 (Lower City) with 
no enemy units in the area provides one additional card to the 
controlling player (see 5.1) for each area.
B. Impulse Phase: Both players perform alternating impulses (see 6.0). The Roman player takes the first impulse on each 
turn.
A player may pass if he does not wish to perform any actions 
for their impulse. If a player has no units that can perform 
actions and does not have any cards remaining in their hand, 
they automatically pass.
If the Roman player passes the turn enters the end phase, 
unless the Judean player immediately discards one of their 
tactical cards (the card is not played, just placed in the discard 
pile). Exception: Judean card #54 (Romani ite domum) can be 
immediately played after the Roman player has passed, it does 
not require another card to be discarded. If a card is discarded, the game turn continues normally, with the Judean player 
taking their impulse, and then the Roman player taking their 
impulse, and so on.
C. End Phase: Both players perform the following sequence 
listed below.
• Cards may be discarded (see 5.3), with the Roman player 
discarding first.
• Remove any Out of Supply markers from the map.
• If the Roman player controls areas 1 through 11, the Roman player rolls a die to see if the Judean Supply Restrictions will increase on this turn (13.3).
Then the Judean player must check the Judean Areas Unable to Refresh (13.3) to determine how many areas containing spent Judean units will not flip to their fresh side 
during this End Phase. The Judean player should mark 
the affected areas with an Out of Supply (OOS) marker. 
If there are not enough locations with spent Judean units, 
any excess OOS locations are ignored.
• Next, players should flip all spent units and siege towers 
to their face-up (“fresh”) side, other than the units in areas 
that the Judean player designated as OOS in the previous 
step.
• The Roman player may remove any Siege Towers from 
Roman controlled areas.
• The Roman player now receives up to 6 reinforcement 
units for the turn and places them on their fresh side in 
any area adjacent to their Reinforcement Zone (see 11.0). 
Roman reinforcements do not all have to come from the 
same Reinforcement Zone. If there are no units in any of 
the Reinforcement Zones, this step is skipped.
• If the Roman player controls both Area 22 (Temple Mount) 
and Area 27 (Herod’s Palace) the game ends with an automatic Roman victory. 
• Each player that controls Area 22 (Temple Mount) or Area 
27 (Herod’s Palace) gains 1 Victory Point for each area. If 
the Judean player controls all city areas (12-31), they gain 
1 VP.
• The Roman player gains 1 VP for each Judean Leader that 
was not placed on board this turn. After this, remove any 
Judean Leaders on board so they can be placed during the 
next turn.
• At this point the turn ends. If it is not turn 8, the turn 
marker is advanced one space on the Game Turn Track, 
and the sequence of play is repeated. If the current turn is 
turn 8 (or 7 if the Judean player played Judean card #54), 
the game ends. Both players must discard all cards and all 
Escape the Siege cards discarded at this time will trigger 
as an event.


 The gameplay is great. The game actually feels like a historical siege. One of my grail games is the Art of Siege by SPI. So, it shows that I find wargaming sieges as not only viable as a wargame but very entertaining as far as gaming. Each player is situated under his own Sword of Damocles. The Romans only have at most eight turns to take the city, or to accumulate enough victory points. The Roman player also has only so many options based on the cards and game length. He has to build Siege Towers and these cost both a card and an impulse. However, the walls of Jerusalem when undamaged give the defender a +4. The Roman player also has cards, Onager, Catapult, Battering Ram, and Siege Ramps, that will help him to breach the walls. Conversely, the Judean player can repair that wall using a card to do so. The Judean player has to decide when to attack or just wait for the Romans. The game makes counter attacking a really bloody part of the game at times. That is why the player has to really think about each attack. Because if it is a failure or does not really hurt the enemy, those attacking units are placed on the backside of the counter. These leave them extremely open to the other player's counterattack. 


 To add to the historical side of the game, the Judean player has to deal with having two leaders and their supporters. The Roman player has no leaders, but the Judean player has both a John and Simon counter. These represent Simon Bar Giora and John of Giscala. Historically before the siege started, and a little while after, there was serious fighting between the different factions in the city and even between the zealots themselves. A player has to use them wisely. They give both defense and attack bonuses to the Judean player. However, if they are eliminated in battle each of them is worth one point to the Roman player for every subsequent turn. 


  So, we have a game that historically feels like a siege and is also fun and nail biting to play. What more could a grognard ask for. The short and easy to understand Rulebook, coupled with simple but innovative rules help to make this game as great as it is. This has everything that I would want in a wargame. It is about ancients and features a siege. Kudos to Multi-Man Publishing for doing an ancients game and to Scott Blanton for designing it. 


Map close-up


 Thank you very much Multi-Man Publishing for allowing me to review this great game. It has been a long time since I played a 'Storm Over' game, and it looks like I will have to dig one or two of them out. This game is part of MMP's International Game Series. There are also Storm Over Stalingrad and Storm Over Dien Bien Phu available from MMP.

P.S. I have really warmed up to the map since I started playing. It is a piece of art that you would hang on your wall.

Robert 

Multi-Man Publishing:

Storm Over Jerusalem: The Roman Siege:


East Prussian Carnage: The Tannenberg Campaign 1914 by Three Crowns Games    The Second Battle of Tannenberg in 1914 is usually referred to ...

East Prussian Carnage: The Tannenberg Campaign 1914 by Three Crowns Games East Prussian Carnage: The Tannenberg Campaign 1914 by Three Crowns Games

For your Wargamer, Toy soldier collector, MiniFig collector, military history nut. Reviews, interviews, Model Making, AARs and books!


East Prussian Carnage: The Tannenberg Campaign 1914


by


Three Crowns Games


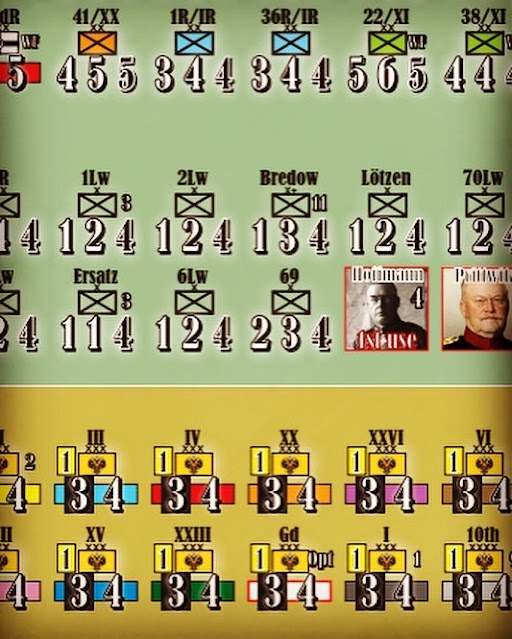
 The Second Battle of Tannenberg in 1914 is usually referred to as the first victory of the Hindenburg and Ludendorff duo. The actual truth is that the battle was won long before they stepped off the train in East Prussia. The Chief of Staff of the German Eighth Army was a man by the name of Carl Adolf Maximilian Hoffmann (usually just denoted as Max Hoffman). Hoffmann had devised the plan to attack both the Russian Armies that were invading East Prussia. The slowness of the Russians, the terrain, and the German railroad lines would allow the Germans to strike one Russian Army at a time. Unfortunately, Hoffmann was given no kudos, outside of the German Army, for his plan. Hindenburg and Ludendorff had become the heroes of Germany using Hoffmann's plan to virtually destroy the Russian forces.
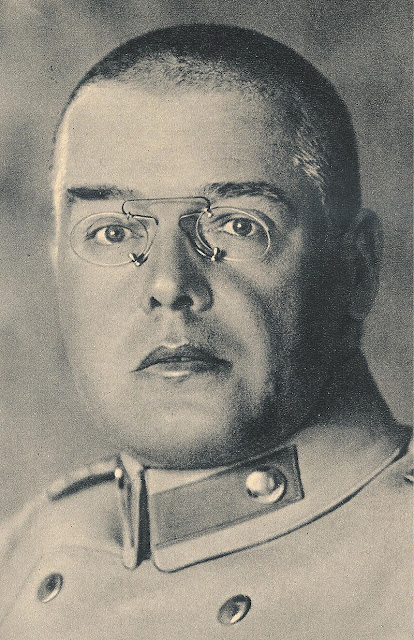


Max Hoffmann courtesy of Wikipedia


  The fear of the Russian hordes by Helmuth von Moltke the younger, the German Army's Chief of Staff, is usually credited with the failure of the German Army on the Western Front to defeat France because he sent reinforcements to the German Eighth Army from the German Western Army. In actuality, due to Hoffmann's plan and its success, the German Eighth Army was in no danger. However, the Schlieffen Plan, not a real plan just a thought exercise, against France was never going to work. The German Western Army was nowhere near strong enough, even without the missing troops, to actually complete its envisioned defeat of France.


 The next question is why it is called the Second Battle of Tannenberg when it didn't really take place near there? This was because the Teutonic Knights were effectively crushed in the first battle by an allied army of Lithuanians and Poles. The German psyche needed to try and wipe that stain away. All three, Hoffmann, Hindenburg, and Ludendorff took credit for naming the battle.    


 So, Three Crowns Games has given us a game about the 1914 Tannenberg Campaign. While the German forces are outnumbered, you can use the above-mentioned factors in the Germans' favor to offset this. This is what comes with the game:


- A full color A1 map

- 16 page rulebook

- 143 high quality, 15mm die cut counters

- Front and Back cover with game aids, charts and tables

- Sturdy 100my ZIP-lock bag


 This is what Three Crown Games says about the game:

"East Prussian Carnage is a two-player game that recreates the stunning German victory over Russia at the beginning of World War One. The Germans must use superior command control, interior lines, and the mobility provided by railroads to stop the large but lumbering Russian army. The Russians must try to pin the Germans down and bring their superior numbers to bear."
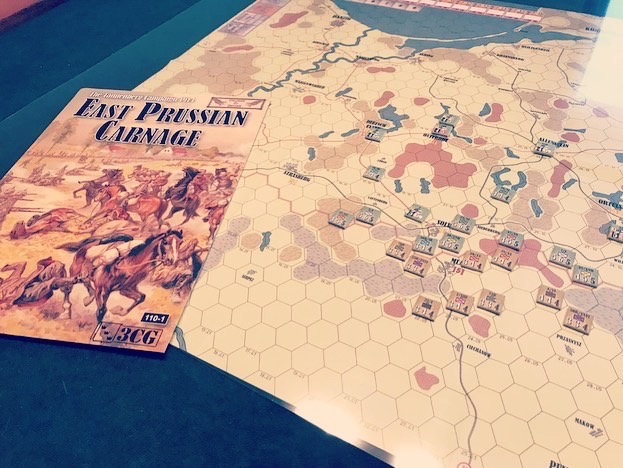


Part of the game being played.


 I have reviewed a few of Three Crowns Games, although some were published by different companies. I did review their 'Tolling of the Bell', and I will put a link to the review below. Their games come in ZIP-lock bags instead of boxes. However, this also means that the shipping costs from Sweden to other areas is cut down immensely. It does not take away anything from the actual games. Sometimes, a grognard just wants to play a smaller game and not have to reach over the table to move a stack or does not have the space at the moment for a large game. 

 The map is a little over 23" X 33" in size. The hexes are large in size. The map goes a little bit west of Thorn and Danzig on the western side to one hex east of Bialystok (The producers anyone?). The map colors are somewhat muted. The rivers also go along hex sides. The Turn Record Track and some other tracks are on the map. The counters are both thick and wide in size. They use the usual NATO markings on them. The numbers and the other information on them are nice and large. This is just what an old grognard wants to see. There are two Player Aid Cards. They are both one-sided and made of thick card stock. The Sequence of Play and any other chart or table you need are on them. They are also in full color and the writing is large enough to read without a problem. The Rulebook is sixteen pages in length. It is mostly in black & white with colored sections of Historical, Designer, and Game notes. The print is again of a nice easy to read size. The components are certainly up to snuff for a lower priced game. 


Some of the counter artwork.


 The game map represents 10km for each hex. The game is powered by a chit pull system for both the Russian and German Player. The Turn Track specifies how many German and Russian Command chits are used in each turn. There is also one German Special Command chit. The game uses Zones of Control in a pretty standard pattern. They block lines of supply, and you have to lose a step if forced to retreat in an enemy ZOC among other rules for them. The game also comes with a few optional rules. These mainly affect the German Player and his use of the Hoffmann counter. There are two scenarios in the game:

The Campaign Game of sixteen turns.

The Battle of the Masurian Lakes from turn twelve to sixteen.

 This is the third iteration of this game designed by Magnus Nordlöf. The game is the first one in Three Crowns Games Collison of Empire Series of games. These are to represent battles and campaigns from 1870 - 1920. 

 The first thing about the game you should know is it is no lightweight. It comes closer to a simulation than just a beer and pretzels wargame. The one thing that sticks out is its Random Events Table. Every single turn has different events that could happen. These even include a player getting points for taking a specified hex. This amount of randomness in both the chit pulls and the events means that the game does not get stale. Each time you play there are going to be differences compared to your last time. 

 I am just as impressed with this game as I have been with the other designs from them that I have played. Both the Russian and German player have a chance for victory. The German player must make use of his interior lines to deal with the Russian hordes. The Russian player must ponderously try and use his elephant to stomp the German lion into the ground. It is a good nail biter of a game.

 Thank you, Three Crowns Games, for letting me review East Prussian Carnage. I thoroughly enjoyed the game and the amount of history that was put into it. Please take a look at their game, but also the two that Revolution Games has published of theirs:

Konigsberg

Across the Narva

Robert

Three Crowns Games:

East Prussian Carnage: The Tannenberg Campaign 1914:

My review of Tolling of the Bell:


hpssims.com