second chance games

Search This Website of delight

From The Realm of a Dying Sun Volume 1 by Douglas E. Nash Sr.  This is an amazing book from cover to ...

From The Realm of a Dying Sun Volume 1 by Douglas E. Nash Sr. From The Realm of a Dying Sun Volume 1 by Douglas E. Nash Sr.

For your Wargamer, Toy soldier collector, MiniFig collector, military history nut. Reviews, interviews, Model Making, AARs and books!


From The Realm of a Dying Sun Volume 1

by

Douglas E. Nash Sr.


 This is an amazing book from cover to cover. The author not only shows you the IV SS-Panzerkorps from inception on August 5th 1943, to the end of the Battle of Modlin on November 25th 1944, he does it in spectacular fashion. You get to see the actual creation of the Panzerkorps from the ground up. From the paperwork that created the Panzerkorps, to the assigning of medical and all other staff, it is in this book. The first ninety pages are taken up by the organization and the actual officers who were to command the separate parts of the Panzerkorps. The rest of the book's 500 pages are taken up by the intensive fighting the Panzerkorps took part in on the Eastern Front. 

 The two Panzer Divisions that made up the Panzerkorps were the 3rd SS-Panzer Division Totenkopf, and the 5th SS-Panzer Division Wiking. Both of these divisions were already known for being in the thick of the battles on the Eastern Front. Their history after being coupled in the Panzerkorps only cemented their reputations. I think we should stop here to explain something. It is possible to read about the SS-Panzerkorps and be amazed at their level of battle-worthiness while fighting at extreme odds against the Soviets; however, you can still feel a revulsion at what the SS actually stood for. At this time of the war the reinforcements sent to the SS divisions were very rarely recruits, but ordinary Germans who had been drafted into the Armed Forces of Germany. This fact makes the actual exploits of the IV SS-Panzerkorps even more amazing. To be continually refilled with recruits and then able to give them the esprit de corps that the veterans had was pretty incredible.

 One of the more interesting claims by the author is that the Warsaw Rising did not really impact the German forces fighting off the Soviets that much. As a matter of fact, Field Marshal Model was actually using the IV SS-Panzerkorps at that moment to counterattack the Soviet forces attempting to capture Warsaw. 

 The book is an excellent overview of what it takes to start up an armored corps from scratch. If it showed only that, the book would be worth buying. Then the author goes on to show it fighting for its life in amazing detail. From the decisions taken at the highest levels to the actual stories of the men in the tanks and on the ground, it is an unparalleled work of military history. The book comes with a good amount of pictures of the officers and troops, along with some well done maps. It also comes with a glossary of German military terms. Thank you Casemate Publishers for letting me review this book, and I am anxiously awaiting Volume II. The fighting on the Eastern Front in 1944 is usually given the short shrift in books compared to the volumes written about the Western Front at the time.

Robert

Monty's Gamble: Market Garden by Multi-Man Publishing  The Wehrmacht had been rocked back on its heels sever...

Monty's Gamble: Market Garden by Multi-Man Publishing Monty's Gamble: Market Garden by Multi-Man Publishing

For your Wargamer, Toy soldier collector, MiniFig collector, military history nut. Reviews, interviews, Model Making, AARs and books!


Monty's Gamble: Market Garden

by

Multi-Man Publishing


 The Wehrmacht had been rocked back on its heels several times during World War II. In late 1941 the Russian winter and Soviet counterattacks had caused it to stumble backwards. In late 1942 the Soviet surrounding of Stalingrad brought it again to the brink of disaster. Now it is 1944, and the Allied invasion of Normandy, followed by the breakout and then the Falaise Gap, had caused it to almost cease to be a fighting force on the Western front. The Allies had them on the run and it did not look like it would stop until Berlin was taken. Most Allied intelligence had the Wehrmacht in the West as a spent force and that the war would be over by Christmas. The only thing that stopped the Allies were supply problems. The Allied Armies had to stop and take a breather right then at the most inopportune moment. They were poised on the Netherlands border, waiting for their precious supplies to catch up. At this same moment the German Field Marshal von Rundstedt was put back in charge of the German forces on the Western front. He was given the Herculean task of trying to make the streaming refugees that were now the German forces into a fighting machine once again. That he succeeded was a testament mostly to the average German soldier during the war. At the same time, 1st Viscount Montgomery of Alamein, Field Marshal Bernard Law Montgomery was in command of the northern area of the Allied Armies poised in Belgium. Montgomery, who was a master of the set piece battle, decided to break free of his mold and devise an uncharacteristically bold plan. He would drop three Allied Airborne Divisions in a line, described as a 'carpet', to capture bridges in the Netherlands, with the British First Airborne tasked with taking a bridge over the Rhine at Arnhem. The Rhine was the last natural barrier between the Allied Armies and Germany itself. The British First Airborne would be landed more than sixty miles behind enemy lines! The topography of the Netherlands, with it being mostly land reclaimed from the North Sea, made the task for the British land forces to connect with all of the Airborne troops that much more difficult. The stage is set for you to fight for 'Hell's Highway'. You are put in the shoes of von Rundstedt or Montgomery to refight this epic battle. 


 Multi-Man Publishing was founded in 1994 by four Avalon Hill playtesters and a graphics art designer. They originally tried to get the rights to Advanced Squad Leader from Avalon Hill, but it did not go through. Curt Shilling (yes that one, sorry I am a Yankee fan), also tried to buy the rights to ASL. He was put in touch with MMP and joined as a 1/3 partner in 1995. Once Avalon Hill was sold to Hasbro, Hasbro did allow MMP to license the ASL name for their products in 1999. In 2002 MMP acquired The Gamers, and increased their game line greatly. ASL continues to be a huge part of MMP's stable with many new and revamped modules sold every year. The games from the 'Great Campaigns of The American Civil War' series have been or are in the process of being reissued, with even more added content to the games I have looked at. So, there we have the history behind the game and the company, so let us head to Monty's Gamble: Market Garden.

Let us first see what comes with the game:

1 Unmounted Mapsheet
3 Countersheets
1 Rulebook
4 Setup Cards
4 Six-Sided die


 The game is an area movement one and is played in impulses. The scale of the map is approximately 1" = 1.5 miles. The map is divided into sixty-five numbered areas. The game also comes with a new addition for this printing. This would be a new scenario that was originally published in Operations Special Magazine #2. The scenario/full game is 'Fortress Holland', and deals with the German invasion of the Netherlands in 1940; more on this later. The rulebook for Monty's Gamble is thirty-four pages long with an additional ten for Fortress Holland. The rulebook is in full color and a good number of pages are dedicated to examples of play. The printing of the rules is in large size and can easily be read and more importantly understood. The rulebook comes with an index on the first page; that is always a nice touch. The map is also very well done with a good number of the player aids built into it. The map is marked for all three of the Allied Airborne Divisions' different Operational Sectors. The three divisions are, The British 1st Airborne Division and Polish Brigade, The American 82nd and 101st Airborne Divisions ( respectfully the Red Devils, All American, and Screaming Eagles). As the game deals with an airborne assault to take and hold bridges, most of the rules have to deal with airborne landing and bridge seizure or demolition. There are also rules dealing with playing the Extended Game, and a few interesting Optional Rules. One of these deals with Optional D-Day Landings for the airborne troops. The historical landing area for the British 1st Airborne was particularly far from the bridge that they were entrusted with.


 This is the sequence of play:

The game has four turns (there is an Extended Game you can choose to play). Each turn has four Phases and a variable amount of Impulses. Each Turn is comprised of:

1 - Dawn phase (place Reinforcements, reset markers, and make a Weather Die Roll if it is September 19th or 20th)
2 - Daylight Phase (players choose Assault, Bombardment, infiltration, or Pass Impulses)
3 - Refit Phase (Refit and place Supply Depots)
4 - Regroup Phase (move any units into adjacent Free Area)

 The Turn sequence for the first Turn is changed from the above and replaced with four special D-Day Phases:
1 - Air Bombardment Phase
2 - Artillery Bombardment Phase
3 - Airborne Landing Phase 
4 - XXX Corps Ground Assault Phase

The Germans conduct their Refit Phase first. The Refit Phase is as follows:

1. Supply Depots are placed and moved to eligible Areas on the map.
2. Units use supply points to Refit. After All units have finished refitting Impulse advance/retractions may be purchased with reserve Supply.

3. Isolated Units may have to make a Surrender die roll.


The Germans have five Depots that they can use. Also German Units in Zone I may automatically Refit without using a Supply Depot, as long as it is German controlled.
The Allied Player has five Supply Depots for XXX Corps and three for the Airborne Units, and an air Supply Marker.

The Air Supply Marker is worth five Supply Points. The German Supply Depots are worth five Supply Points in clear weather and six in cloudy weather. The Allied Supply Depots are always worth five Supply Points regardless of the weather.


The above is a simple and elegant way to portray how units recover from movement or battle etc. The Player is not forced to keep a log of each Unit's supply throughout the game. The flipping of the Unit to its Spent side and the Disruption Markers also make it easy to keep track of the abilities of each Unit. Map Areas that are heavily contested, and are small on the map, do lead to a bit of congestion, but it never reaches a problem point.


Another interesting and seldom seen ‘historical reality’ is that if the Allied Player uses Air Bombardment in a contested area, there is a chance that his own troops will be hit by some of the bombing.
 

 The Allied Player must deal with German Interdiction from FLAK Towers, FLAK Units, and Air Interdiction Markers when trying to Invade, Supply, or reinforce his Airborne units. Bad die rolls on the Airborne Landing Phase can possibly turn the game into a first turn nightmare for the Allied Player. Airborne Units can be landed Fresh (available for use), Spent (cannot do anything else), to even being disrupted. For the Allied Player, speed is of the essence to get and keep those bridges. For the Allied XXX Corps it is just as imperative to keep moving as quickly as possible to the next bridge. The Allied Player will understand why the name Hell's Highway was put on the roads leading to Arnhem. For the German Player it is naturally the reverse. Delay the Allies at every turn, and if in danger of losing a bridge destroy it if possible. The historical recipe of the battle cannot help but make a tense and eventful game for a player of either side. To make it more nerve wracking the designer added the 'Advantage Chit'. This chit starts in the Allied Player's possession and when it is used goes to the German Player, and so forth during the game. The Advantage Chit has various uses, including rerolling a die roll etc. In speaking with the designer he had this to say " The fact is the game sets up and plays quickly and yields consistently historical results, better than most other Market-Garden games." 

 One part of the rules is a little perplexing: knowing the history of World War II airborne attacks. The only way that an Airborne Unit that is landing in a Drop Area becomes Disrupted or Spent is if a German FLAK Unit, FLAK Tower, or Air Interdiction Marker is in or adjacent to the Drop Area. Going by what really happened during the war in air drops I think that you should use a house rule and have every Airborne Unit have to pass a die roll to see if it is Disrupted or Spent on landing. This would represent the actual chaos that ensued during the different airdrops in WWII.


 The addition of the scenario of the attack on Fortress Holland is a great plus for the buyer. This is one of the few Western Front battles of WWII that has not had too many games done on it. The scenario uses many of the same rules from the main game. There are some additions like a German Armored Train and some other interesting twists to the rules, so that it does not seem like the scenario was just cookie-cuttered in.


 The designer is correct in that the game sets up rather quickly. The play, except for new players, goes along at a good clip. As far as being historical, the events that happen during games are well within the historic might-have-beens of the battle. Thank you Multi-Man Publishing for letting me review this very good and very different approach to 'A Bridge Too Far'. The 'almosts' that happen in a game really portray the nature of the battle, without the player getting bogged down in details.


MMP:
www.multimanpublishing.com/

Monty's Gamble:
www.multimanpublishing.com/Products/tabid/58/ProductID/276/Default.aspx

Link to my review of Baptism by Fire by MMP:
https://www.awargamersneedfulthings.co.uk/2018/10/baptism-by-fire-by-multi-man-publishing.html

 
Robert


DUNE from GF9GAMES SAND, SPICE, STORMS - with a just dash of treachery. There's nothing to beat old recipes.  At long last, th...

DUNE DUNE

For your Wargamer, Toy soldier collector, MiniFig collector, military history nut. Reviews, interviews, Model Making, AARs and books!

from

SAND, SPICE, STORMS - with a just dash of treachery. There's nothing to beat old recipes.  At long last, the translation of Frank Herbert's epic sci-fi novel into board game form has achieved its resurrection or should that be its return from the Tleilaxu Tanks*. 
[*These are where your dead troops go and from where you can revive some in the course of the game.]

I first played the original Dune in 1980 when I ran a board game club in the school I taught at and one of the students brought back a copy from his holiday in the US.  I never achieved my own copy, though have toyed with the idea of buying Rex, a transmogrification of Dune into a Twilight Imperium setting.

However, thanks to Gale Force Nine, we can return to those glory days with a few additional optional extras.  Inevitably with the passage of time and the advances in production quality, the current game is state of the art standard.  Though if you look through the files on BGG you'll see many print and play [pnp] versions that match this professional treatment and show its source of inspiration.  

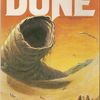
I have to say I hanker for the box art of the original that can be seen below.  There is just something more menacing about its gigantic sandworm, against which  the current art seems a little too clean and sanitised.  Still that's a very minor personal taste.

High Quality Scan of Original Box Front

I've no doubt that many will debate the art work that has been chosen for virtually all the components, perhaps none more than for the board itself.  Certainly there have been some exceptional and outstandingly colourful pnp versions running an amazing spectrum of tastes, but I love the more monochromatic effect here.


The essential simplicity is even more fundamental than in the original and makes identification of areas abundantly plain and simple.  Whether it will suit all tastes is unlikely, considering the imaginative pimping and blinging that has taken place in the past.  Ultimately, the same may be said of all the components and no doubt those who delight in creating 3D sandworms will want to supplement and refashion yet again.

So, here's a range of visuals starting with the lovely thick counters for the troops and individual heroes.


Next up are the battle wheels - with the inset position for potential placing of one of your named heroes.  Note the little additional touches, such as the marker for the Storm and the overlay for the Destroyed Shield Wall.  By and large, the direction of style has been to clarity and simplicity.


This can be seen again in the player shields that are presented in functional, bold outlines and colour fields.


Finally, you have six decks of cards, all maintaining the same clarity of purpose and use that characterises the whole product.  The two largest decks, the Treachery and Traitor Decks, signal a strong feature of Dune - this is a highly competitive game and definitely not for those who mainly like cooperation.  That said, there is one form of cooperation and that is Alliances, where you can link up with another player to try to secure a joint victory. But, be warned, there is every chance that such an Alliance may only be temporary.

All these excellent components are matched by the clearest of rule books that takes you, in succinct detail, step by step through each stage of the turn and if that were not enough you also have one of the best Quick Guides I've read.  Once familiar with the game, the latter should be all you need for future play.  Above all, it is really helpful for new players, both in sorting out what they need for the faction that they will be playing and for easy learning and reference prior to and during play.
  A glimpse of the excellent set of rules
A first look at the Sequence of Play gives the impression of a fairly detailed process with nine Phases.  However, this is very misleading, as all but three Phases take but a few moments to carry out, especially the final Mentat Phase which sounds wonderfully thoughtful.   The words "Declare a winner or take some time to evaluate their positions" -particularly those I've underlined - can only really apply to those afflicted with an extreme case of AP [Analysis Paralysis].  As Mentats are human computers in the novel, there is more than a touch of tongue-in-cheek at work in naming this Phase!  In reality, the Mentat Phase more or less means you check for a winner[s] and if not move on to the next turn.
Most of the game time is taken up by Phases 6 & 7 Movement and Combat.  Bidding can add a little to this, as does the making of Alliances, but the latter does not occur every turn.  
The game follows this sequence.
Storm Phase
Each turn begins with the movement of the Storm marker which destroys all players' troops in sand areas that the Storm marker passes over  along with any spice tokens in any territory passed over.   
Spice Blow and Nexus Phase
Card draw shows which region will have new spice tokens placed or the destruction of spice tokens, if the card reveals the dreaded monster sandworm, Shai-Hulud.  The latter card also heralds the Nexus action, which is the opportunity to break and form Alliances.
Choam Charity Phase
If you need this you're in dire straits, as you gain a little spice because you either have none or only one spice marker!
Bidding
This auction phase is to buy treachery cards that range from a variety of weapons including poison and defence protection to rare special cards and a series of worthless cards.  This is a real gamble, as the cards are auctioned unseen, so you might buy a totally worthless card or hit one of the rare ones!
Revival
This is when you gain back a small number [up to three] of your troops from the Tleilaxu Tanks and one Hero if all of your Heroes have been eliminated.
Shipment and Movement
Off-map forces may land and limited movement may take place on the planet
Combat
This kind of speaks for itself and brings into use your Battle Wheel and Heroes.  Though imitated in various forms in more recent games, such as Scythe, as far as I'm aware this was the first appearance of such a system.  It's also the Phase when your Treachery cards can be played, as well as Traitor cards.  The latter cards are very powerful, as they immediately win you the battle, nullify any losses you might otherwise have incurred and bring spice token rewards too. 
Spice Collection
Again a very straightforward  action, as each player collects  available spice tokens from territories they occupy
Mentat Phase
As already mentioned very simple. Check for a winner/s and, if no winner, move on to the next turn.
A typical extract from the extremely helpful Quick Guide
All in all, the rules are very straightforward and their explanation couldn't be clearer or better presented.  Much of the game is swift. Combat is always a high point and can be brutal and often brings drama to the action, particularly from the play of Treachery and Traitor cards.  Alliances are made and unmade.  Spice tokens are vitally important as the "money" of the game, but a solo victory ultimately lies in conquering three of the planet's strongholds [or four for an Alliance victory].

This new updated iteration of such a great game adds in a few Advanced elements both in rules and components, along with Strategy and Faction tips, a Question & Answer section, Optional Alliance rules to cope with different player numbers and for shortening or lengthening the game as well as a brief synopsis of the novel [If you haven't read Dune, I'd strongly avoid this, buy the book and get reading]. 

A close-up of two of the Strongholds crucial to victory
For me, all that I've mentioned mark Dune as a great game to play. The visuals, the systems and the player interaction all work to create an atmospheric rendering that does great justice to a classic S.F. novel's story.  Nowhere more so than in the element that I've saved to highlight here at the end: namely, the asymmetric player powers and advantages.  Again, to the best of my knowledge, this was another first for the original game of Dune.

Playing as one of up to six factions drawn from the novel leads you to adopt distinctly different styles of play suited to your strengths and weaknesses.  Inevitably some are easier to play than others, especially if you are new to the game - none more so than the Bene Gesserit faction, which is the faction most frequently left out when you do not have a full table of six players. 

Getting those six players together is the one difficulty and play with a full complement can be a lengthy undertaking, but one that I can wholeheartedly recommend.  Four and five players too make for an excellent experience and this new outing for an old favourite comes with a number of simple alliance options to create shorter or longer plays.  I love the description for the last choice of option which comes with the caution "a more exotic game" under Possible Side Effect!  

If Dune, the novel, and Dune, the game, are unfamiliar to you, I suggest you start right now to find out the value of a stillsuit, the deadly danger of a gom jabber and the awesome power and menace of Shai-Hulud.

Many thanks to GF9 for realising my dream of once more revelling in this game and to Asmodee UK for kindly supplying a review copy.


Durchbruch The Austro-German Attack at Caporetto 1917 by Acies Edizioni   It is the Fall of 1917. Austro-Hungary...

Durchbruch The Austro-German Attack at Caporetto - October 1917 by Acies Edizioni Durchbruch The Austro-German Attack at Caporetto - October 1917 by Acies Edizioni

For your Wargamer, Toy soldier collector, MiniFig collector, military history nut. Reviews, interviews, Model Making, AARs and books!


Durchbruch

The Austro-German Attack at Caporetto 1917

by

Acies Edizioni


  It is the Fall of 1917. Austro-Hungary is hard pressed because of the immense losses of manpower on the Eastern Front earlier in the war. The Austro-Hungarians need Italy knocked out of the war as quickly as they can be. Either that or their whole army might crack, and if they fall Germany is right after them. The Austro-Hungarians cannot do it alone. They have needed Germany's help as long ago as 1914.  There had already been eleven Battles of the Isonzo, and Italy and Austro-Hungary were bleeding each other dry. The new Austro-Hungarian Emperor Karl I knew it was only a matter of time before one or the other country broke through on the Isonzo Front. He appealed to the German Kaiser Wilhelm II. Of course, he didn't run Germany at the time; Hindenburg and Ludendorff did. Ludendorff turned down the idea, but was overridden by Hindenburg. A relatively small force of German divisions was added to the mix for the attack. The attack's success has been attributed, at times, to the German Stosstruppen and their tactics. What isn't well known is that both the Italians and Austro-Hungarians had their own shock troops. The Italian troops were called Arditi, and the Austro-Hungarians were called Sturmpatrouillen/Jagdkommandos. The Austro-German attack at Caporetto broke the Italian Front wide open. It was at Caporetto that Erwin Rommel won his Pour le Merite. So the battlefield is mountainous and the Austro-German force must break through in a very short timetable. Ludendorff wants those divisions back for his spring offensive. I have always been very intrigued by the Battle of Caporetto and the Italian front in World War I, and have read everything I could get my hands on about it. How does Acies Edizioni's game stack up?


This is what you get with the game:

Two 23" x 33" Maps
Two counters sheets ( 5/8" counters)
Each Hex is 1" Wide
Six Full Sized Glossy Colored Player Aids
 Morale Check
 Combat Table and Modifiers
 Barrage Communications and Stacking
 Terrain Effects Chart
 Italian Army Setup
 Austro-Hungarian and German XIV Army Setup
 Rulebook
Two Six-Sided Die

Every day is divided into two turns. The first day
has one more Preliminary Phase.
A hexagon on the map corresponds to about
1000 meters.
The unit counters represent infantry battalions/
regiments and minor units.


 The maps are spectacular. With the large hex size and the colors chosen they are very easy to read, and figure out what terrain is in each. The Player Aid sheets are likewise extremely large and very easy to understand. The counters are also very well done. They have a lot of information on each one, but are not cramped, and are easy to read. The Rulebook is in full color and is only twenty pages in length. Once again, the rulebook is up to the standards of the rest of the components. This is my first look at a wargame from Acies Edizioni and I am really impressed.


 The Rulebook seems small, but sometimes very good things come in small packages. 

The game comes with three scenarios:
October 24th Scenario (One Day Scenario)
October 25th Scenario (One Day Scenario)
Caporetto's Breakthrough Scenario (Campaign Scenario; It Lasts 10 Turns)
 Each scenario has the Austro-German Player adding up his Victory Points and comparing them to the Victory Conditions. He gains points for Victory Hexes and eliminated Italian Counter Steps, and loses them for each Counter Step he loses.


 Continuing with the Rulebook, the game has rules that deal with the following:

Making a Passage through No Man's Land and First Line Trenches
Bridge Destruction or Repair
Fog of War
Mountain units
Engineer units - These can make a Passage, Repair or Destroy Bridges
Machine Gun Companies
German Pioneer Units Gas Attacks
Assault Units and Rommel
First Turn German Bombardment
Dummy Markers used on both sides


 This is along with all of the usual stacking and Zone of Control rules etc.

 The game is based on the Chit Pull method. At the start of the game the Austro-German starts with four Chits (Corps), and the Italian starts with three. Once all of the Chits are pulled, then that is the end of one turn. This is the Sequence of Play:


1- Bridges - construction or demolition Segment
2- Command Segment
3- Artillery Segment
4- Movement Segment

5 - Assault Segment

There are many exceptions to the normal rules on the First Turn. Such as: 

All Austro-German artillery can fire in the Preliminary Phase.
Up to 20 Austro-German units can move and attack in the Preliminary Phase

The Austro-German player must pick one of three plans before the start of the Campaign Game. These are:
The Conrad von Hotzendorff Plan - Large
The Boroevich Plan - Limited
The Waffentreue Plan - This is the one that was chosen.


 So, how does it play? It plays extremely well, and in my eyes captures the history of the battle to a T. This does not mean that every game plays out the same with a guaranteed German victory. Far from it; the design allows either side to be able to pull out a victory. The chance for the German Player to try out the different plans also leads to an increase in playability and the longevity of the game on your table. Playing as the Germans, you should play 'hell bent for leather'. The German Player's advance and attack plan should be to ignore Italian strong points and go for infiltration first. The German Player must always be conscious that he loses a Victory Point for every step lost. Playing as the Italian Player you have to know when to cut and run. He must use every chance he gets to stay in front of the Austro-German Units and make them fight for any and every piece of ground he can. The German Player only gets a Victory Point for every ten Italian Player Steps lost. So, the Italian Player can afford to trade troops for time and space. The game comes with excellent components, and the designer has added all the rules that deal with everything that happened in this battle. My hat is off to Acies Edizioni. 


 There was some problems with the first Rulebook and Players Aids that had been sent out. In talking with the designer, what happened was that the printer was sent the first files and not the redone ones (none of us have ever done that :) ). So anyone who purchased the game was sent out the second edition rules ASAP. The 'living rules' are exactly the same as the printed second edition.

Acies Edizioni link:
https://www.edizioniacies.com/

Durchbruch link:
https://www.edizioniacies.com/para-bellum/durchbruch

Living Rules link:
https://drive.google.com/file/d/1bNrgR82KKg_D_GqQnVVFcL7vQcarKS_W/view


Robert


First Look at the Upcoming 'Fire and Rubble' the First Module for  Combat Mission Red Thunder  Th...

First Look at the Upcoming 'Fire and Rubble' the First Module for Combat Mission Red Thunder First Look at the Upcoming 'Fire and Rubble' the First Module for Combat Mission Red Thunder

For your Wargamer, Toy soldier collector, MiniFig collector, military history nut. Reviews, interviews, Model Making, AARs and books!


First Look at the Upcoming 'Fire and Rubble' the First Module for 

Combat Mission Red Thunder


 This is just a quick sneak peek at some screenshots of what Battlefront has been hard at work on. It is called 'Fire and Rubble', the first module for their Red Thunder game. Red Thunder is one of my favorite of the Combat Mission stable of games, and I am very happy to see that it is finally getting some love. So without further ado, here are the screens, and at the bottom will be some links for Battlefront games. 


 It is looking good, and please Battlefront keep your excellent games and modules coming!

Battlefront:
Combat Mission Red Thunder:

My review of the 'Rome To Victory' module for Fortress Italy:

My review of 'Shock Force 2':

Robert

 Interview with Scott H. Moore Designer of 'This War Without an Enemy' Released by Nuts! Publishing  Ple...

Interview with Scott H. Moore designer of This War Without an Enemy released by Nuts Publishing Interview with Scott H. Moore designer of This War Without an Enemy released by Nuts Publishing

For your Wargamer, Toy soldier collector, MiniFig collector, military history nut. Reviews, interviews, Model Making, AARs and books!


 Interview with Scott H. Moore

Designer of 'This War Without an Enemy'

Released by Nuts! Publishing


 Please give us some biographical information about yourself.

I was born in Sheffield but mainly grew up in the suburbs of Birmingham. My brother and I played games like Monopoly, Risk and Campaign when we were really young kids, but it was Christmas 1982 that really converted me into a gaming geek: we got our first computer – a ZX Spectrum complete with The Hobbit adventure game – plus the Warlock of Firetop Mountain gamebook. By the age of 11 or 12, I was wargaming the English Civil War with 25mm miniatures, and playing Games Workshop games such as Talisman and Warrior Knights. A few years later I started roleplaying with AD&D, MERP and Warhammer RPG. When we were 16, a few friends and I joined the English Civil War re-enactment society as pikemen in Colonel John Fox’s Regiment of Foote.
Not long after I had gone to university to study Physics I more or less gave up on gaming, except for the occasional roleplaying session back home in the holidays. After graduating, I spent a year in Spain, then I did a degree in Optical Electronics in Glasgow and Hamburg. When I finally entered the world of work, it was as a market analyst. I lived in London for a while, briefly in Prague, and then over a decade in Budapest. It was there, about 20 years ago, that I got back into gaming when I discovered both euro games (Catan, Carcassonne) and modern wargames (Hammer of the Scots). The boardgaming scene was just taking off in Budapest at that time, so I had plenty of opportunities to experience the renaissance of the 2000s led by designers such as Reiner Knizia and Wolfgang Kramer. In contrast, Hungarian wargamers were few and far between (they still are). I was lucky enough to find a few willing victims who I could explore light and midweight contemporary wargames with – we played a lot of block games, Command & Colors and CDGs such as Hannibal and Paths of Glory. I also got to know the only ‘serious’ wargamer living in Budapest at that time – Stéphane Acquaviva (designer of Hungarian Rhapsody). We played through the entirety of Great Battles of History, he introduced me to some classic Napoleonic Games and I could sometimes persuade him to try a CDG or a game from the Musket & Pike series. But the main focus of our hundreds of hours spent during Sunday gaming sessions were the campaign scenarios from the various volumes of MMP’s OCS series.
Several years ago, I returned to Birmingham having changed career to work as a translator. The gaming scene is very strong here – one of the world’s largest tabletop gaming conventions, the UK Games Expo, is held here once a year and has really helped to create a vibrant gaming ecosystem in the city. I attend a few different boardgames clubs every week, so I get to play a wide variety of games: euros, cooperative games, wargames, and even traditional RPGs. As part of the Birmingham Game Designers group, I organise an event every two months where boardgame, wargame and RPG designers can playtest their games with the gaming public. We also have more focused designer meetings four times a month. 


What was your first game design?

When I was about 12 years old, I created an Asterix board game based on Talisman, though I never finished the artwork and it I probably tested it no more than once or twice. When I became a serious hobby gamer 20 years ago, I also began designing games again. Although I’m usually inspired by history, my first completed prototype was a 2-player block wargame called The Long Winter based on a section in the Appendices of the Lord of the Rings (Appendix A, II, The House of Eorl). I was never going to be able to get a game on that topic published, but a couple of ideas I developed for The Long Winter did eventually find their way into This War Without an Enemy.

Why the English Civil War?

As I’ve alluded to already, I’ve been intensely interested in this period of history since I was a kid. The first English Civil War, in particular, is a fascinating narrative, full of colourful characters, closely-fought battles, important sieges and more than one reversal of fortune. I began designing a strategic game on the war many years ago, but the publication of Charles Vasey’s Unhappy King Charles in 2008 put paid to that, as it fulfilled most of what I wanted my design to do. However, a few years later Columbia Games listed the ECW as a topic they were considering publishing a game on. By offering to design it for them, I could combine my love of both block games and the historical period.
  
In what way is your design for This War Without an Enemy  different than others?

As my game was originally designed for Columbia, it very much followed in the mould of games like Crusader Rex and Richard III. However, when I moved to a different publisher – Nuts! Publishing – I wanted to differentiate it from those earlier block games, while at the same time I realised that I had the freedom to increase the complexity level slightly and add in more historical atmosphere. I think there are three main areas where This War Without an Enemy differs from most other block games:
The card decks: I decided early on in the design process to have a separate deck for each player. As a civil war, both sides in the ECW were very similar to each other in many ways, so I wanted to tease out the differences – and introduce more asymmetry to the game – with specific event cards. There are too few cards in total for the player decks to be further split into early, mid and late war decks, and so I introduced a mechanism for adding and retiring cards from each deck. The cards in most card-driven block games provide either points to spend or, more rarely, an event. In TWWE, most cards have both. This allowed me to balance the cards and avoid the possibility of a player having an inherently good or bad hand of cards. Each card either provides a lot of points (4) to spend on movement and/or recruiting; fewer points (2) but a strong event; or something in between (3 points and a weaker event).
Assaults and sieges: although the battles during the ECW are far better known than the sieges, it was the latter that were more important for the outcome of the war. Victory in TWWE is mainly determined by capturing cities, and so the rules around this needed to be well thought out. You can take a city through storming (assault), which is risky but can be quick, or through a siege (blockade), which is slow but sure. The mechanism for storming is similar to that for a battle, but artillery plays a more important role – if you breach the walls using artillery (or Mining via an event) then the city provides a much less significant defensive bonus. Sieges are resolved by rolling a die and consulting a table – this determines any attrition for the defender and eventual surrender. Ports can hold out longer than inland cities and can be reinforced by sea.
The Battle Mat and battle resolution: this has probably been the most popular part of the game. Although I retained the basic mechanism from other block games, I added more historical chrome and more player decision-making (in most block games, the only significant decision during battles is if and when to retreat blocks). The Battle Mat is essentially a player aid that makes battles easy to resolve despite the increased complexity. There are specific rules for artillery and cavalry blocks that replicate their role on the mid-17th century battlefield (yes, Prince Rupert’s cavalry can end up pursuing their opponents off the battle field!). When it comes to infantry blocks, a player must decide every round whether to fire at a distance with the muskets (which is less effective but happens early on in the round) or engage at close quarters with the pikes (more effective but take place at the end of the round). I believe this extra set of decision points makes battles them much more interesting for players.


Is there anything in the game that you would haved liked to be different because you had to compromise, or perhaps some part of the design that gave you fits?

As I have mentioned already, my move to Nuts! Publishing game me the freedom to change my game beyond the confines of the Columbia system. So, in the end, I had full control over the design of the game and did not have to make any compromises. My aim with TWWE was to create a game that is easy to learn, plays in no more than 3 or 4 hours, and yet contains a lot of history. I hope I have achieved this. 
I did not have difficulties with any particularly part of the design process. Basing my game on an existing system meant that it was fairly easy to develop an initial prototype. When I later chose to change the game, it was more of an evolution of an existing game that was working well. The trick was to add more chrome and historical atmosphere without compromising playability. Perhaps the most challenging part of the game to get right – and this is something that really gives it the flavour of the English Civil War – was the regional aspect. While the main field armies of the King and Parliament generally campaigned across the centre of the country, there were virtually autonomous regional theatres of war in the north and southwest of England. Unhappy King Charles simulates this in various ways, but I wanted a simpler approach for TWWE. Essentially, most blocks belong to one of five regions of England and Wales. Each block can only recruit (add strength) in its home region and may not leave, or remain outside of, its home region unless ‘chaperoned’ by a Leader block. 

Anything else you would want to emphasize or add to?

Something that I haven’t mentioned yet is the artwork and graphic design of This War Without an Enemy. This was a long process for both the publisher and I, but eventually we were very fortunate to find Nicolas Roblin and persuade him to do his very first board game commission. Working with Nicolas was a very collaborative experience, but the success of the final design was mainly due to his extensive research, passion and dedication – and, of course, his natural talent. He spent days in a library just to find the period illustrations for the cards. But it is the box cover illustration and the gorgeous map art that have attracted the most praise from people – they elevate the look of the game beyond anything I could have hoped for when I first started designing it all those years ago.

Thank you

Robert

Panzer Corps 2 is just over the horizon! The long awaited sequel to one of Slitherine's biggest titles comes out ...

Panzer Corps 2 - First Look Video and Open Beta for Field Marshal Pre-Orders Panzer Corps 2 - First Look Video and Open Beta for Field Marshal Pre-Orders

For your Wargamer, Toy soldier collector, MiniFig collector, military history nut. Reviews, interviews, Model Making, AARs and books!


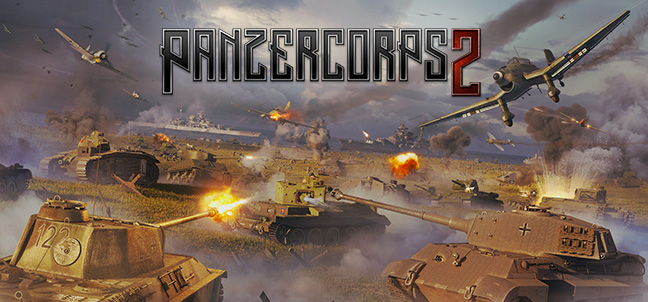
Panzer Corps 2 is just over the horizon! The long awaited sequel to one of Slitherine's biggest titles comes out March 19th, and you can see a bit of gameplay in my video below. If you want to play the game yourself, then you are in luck. Those who pre-order the Field Marshal edition (includes first two DLC and other goodies) will have access to a similar beta version from Feb. 18th to the 20th. So if you loved the first game, go ahead and hop in, this one looks to be a winner no doubt. If you're curious, check out my video and others. 


Please Note: I had some kind of unexpected issue with my recording, which resulted in it looking quite laggy when moving the camera around quickly. This is not reflective of the actual game, which runs perfectly smooth. I'll try to fix it and get a better version out when I can.


- Joe Beard
hpssims.com