TASK FORCE
CARRIER BATTLES IN THE PACIFIC
FROM
VUCA SIMULATIONS
Task Force has an exceptional pedigree. Designed by Ginichiro Suguki and originally published as a boxed game by Epoch Co in 1982, it re-appeared as an issue of Command Magazine Japan in 1996 and then returned once more in a boxed format for Japan Wargames Classic 1 in 2009. Now Vuca Simulations has brought out a stunningly up-gunned edition. The company has already established a reputation for quality and this latest game deserves to have deluxe appended to its title!
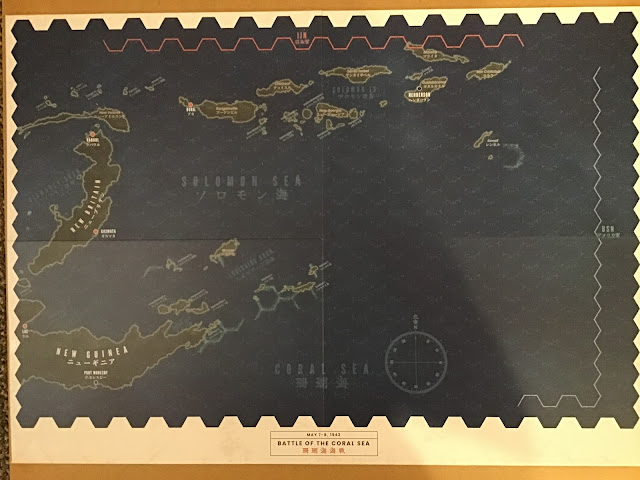
It arrived as a very weighty package indeed. Not surprising, as the contents are some of the most substantial imaginable. The description in the section Game Equipment Explanation is very misleading, especially the simple statement "Four map sheets." Admittedly, one is a small paper map for the Introductory Pearl Harbour Scenario, but the other three are double sided mounted mapboards. Two are 59cm x 42 cm and one is 40cm x 28cm. All are impressive, if perhaps a little dark.
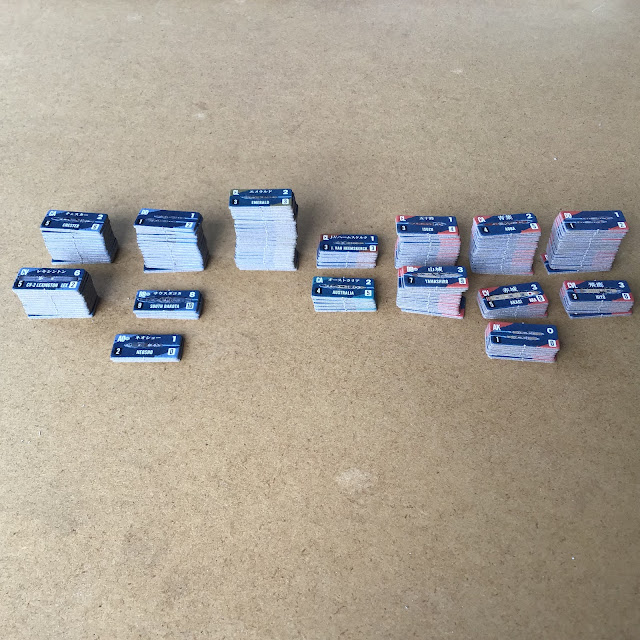
They reflect the same high quality of all the other components being perfectly die-cut with rounded corners. The naval units are standard double length style, with all having a dark blue background and the nationality differentiated by a coloured diagonal in the top left corner. Named ships are in both Japanese characters and English script. Aircraft are the typical smaller square counters, carrying the abbreviated name of either their carrier or land base - a very helpful detail.
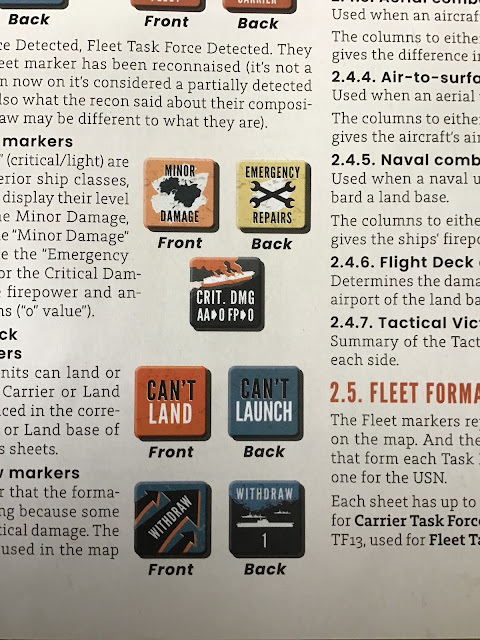
Rounding out the playing pieces are a wide range of markers, covering fleets [including dummies], naval unit damage, reconnaissance chits - always important in carrier warfare games - flight deck damage and ship withdrawal .
Last to be mentioned, but as always absolutely critical to any game are the Rules Booklet and Scenario Booklet. Both are attractive glossy, double columned products. The Rules Booklet I was very interested to see is only 20 pages even when counting the front and back cover. I was immediately interested to read in the Rules' introduction that you could approach them in two ways; either by reading the whole rulebook or learning with the help of tutorial scenarios. It is stressed that the latter is very much for beginners, but I thought I'd have a look at the approach using the learning tutorials, which involve the first four Scenarios. My expectations were based on my early years of learning to play the celebrated Squad Leader in which you progressed from section to section of the rules, with each section followed by a scenario that provided a fully fledged game..
Task Force takes a very different route. You are directed to the Scenario book and are told which numbered rules' cases to use in Scenario 1, play it and then go on to Scenario 2 where you're advised which rules you need to add on to those learnt in Scenario 1 and so on through the first four Scenarios. I would have been happy with this method, except for the fact that I'd count only the fourth and last of the tutorial Scenarios as giving anything that resembles a game, as each of the first three can be played in under ten minutes.
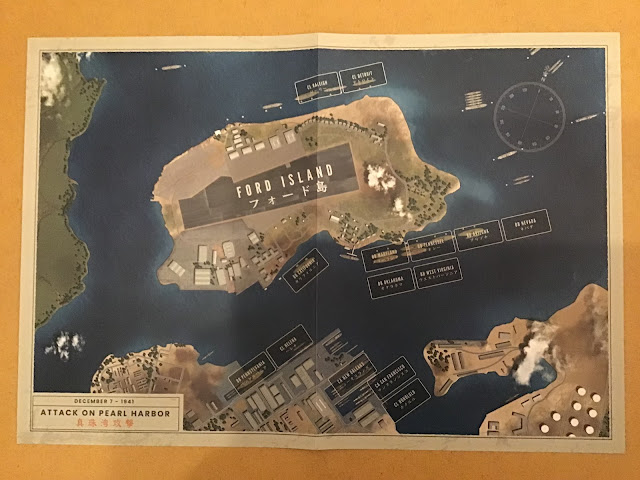
The first, Pearl Harbour, has its appeal, partly because of its subject and its lovely map, but it is purely a very simple, brief solitaire experience of Air to Surface combat with victory conditions that I can't imagine achieving without exceptional dice rolling. Still it does the intended job of introducing air to surface combat and application of the novel damage system which is a feature I really like. Scenarios 2 & 3 are very, very brief and I feel are essentially there because they were part, I assume, of the original game. They play their part for the absolute beginner and the more experienced gamer would probably have set out some counters in a similar way to practice parts of the rules. Still, I felt that having a whole double-sided board produced purely for these two Scenarios was unnecessary, as they could just as easily been played out on either side of the board for Scenario 4 and Scenario 6.
Apart from this one aspect, my view of the game is wholly positive. Not only are the rules clear and easy to assimilate, but they accomplish all that I would look for in focusing on a purely naval and air simulation of moderate complexity.
The first section, Game Equipment Explanation, presents all the necessary standard information about the types of units. For naval units the key numerical factors are anti-air, firepower and durability. The latter is for me one of the best concepts in the game and one that I'll shortly discuss in depth in the next section which includes combat and damage. It then outlines the different markers, the tables on the Player Aid Charts and Fleet and Aircraft Status Sheets.
Next, Standard Procedures, explores the differences to play of Night and Day turns, ZOCs, the use of Fleet Markers and Setup of Scenarios and, very significantly, Combat Hits and Damage, which I'll explore in some detail now. This is where the durability factor is crucial and it's important to note that only naval units have durability. The number of hits inflicted in combat is measured against a ship's durability factor to see what damage is taken. There are three levels of damage: Minor, Significant and Critical. As an example of how this works, take a ship with durability factor of 8. Any hits less than this durability factor of 8 would cause no damage at all. If exactly 8 hits are scored, then place a Minor Damage Marker on the ship. If a ship suffers no more hits before the Admin Phase of the current turn, the Marker is flipped to its Emergency Repairs side. However, if a ship takes exactly one more hit than its durability, the unit is flipped over which shows that it has Significant Damage. With our example ship of durability 8, 9 hits would cause the ship to be flipped over to its reverse side. The reverse side shows a smaller durability factor. Any new hits less than this durability factor will cause no damage, new hits exactly equal to its new durability factor would cause a Critical Damage marker to be placed and any further hits would sink the ship. To read this sounds much more complicated than it is when you have the ships in front of you and the necessary chart and damage markers. Hits against all aircraft and destroyers and transports are handled by conventional losses.
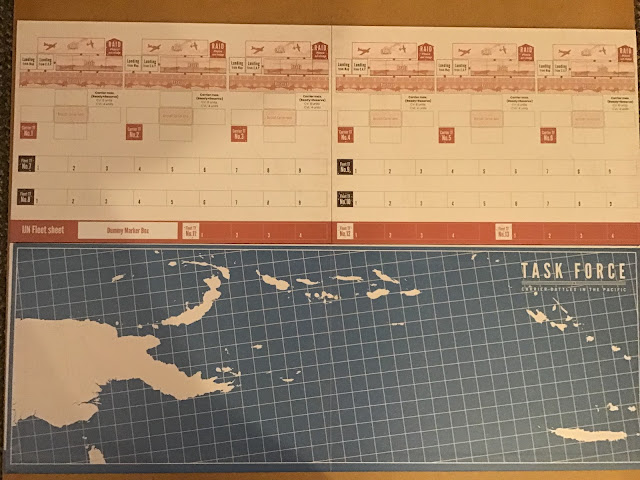
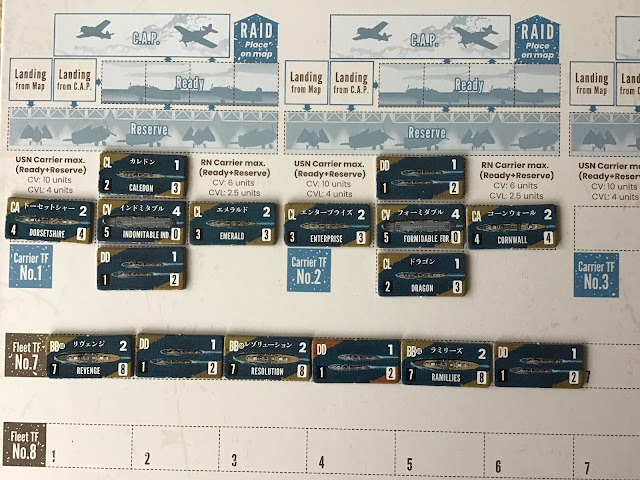
This section of the rules also handles how Fleets are formed, merged or rearranged and the use of dummy fleet markers. The latter are particularly important for this system, as for most of the game, the Fleet markers are all that will be placed directly on the map. Unlike some naval games, this is not a double-blind system where each player sets up all their ships on their own separate map that remains hidden behind a player screen. Instead each player has their own Fleet Display Sheet, on which all their units are placed. Surprisingly, keeping these displays hidden is an Optional rule, explained in the section on setting up a scenario, by the fact that the game is designed for beginners. For any players other than beginners, I would say that keeping your displays hidden is an absolute must for enjoyment and excitement.
The final part of Standard Procedures covers elements of SetUp which mainly relate to a variety of distinctions between the composition of Carrier and Fleet Task Forces and a few points about the Aircraft Status Sheet.
All this constitutes the first 10 pages of the Rule Book and the final 10 pages take you through the Sequence of Play, which has 5 Steps.
Naval Movement Phase
Mainly this covers the movement of your Fleet Markers, both real and Dummy ones. The only other markers that appear on the maps are Withdrawal markers that indicate individual or very small groups of ships that have been forced to withdraw because of the extent of their damage. The result is a very uncluttered map and plenty of uncertainty as to what each Fleet marker contains and whether it is a dummy or not. As a result, this Phase moves very swiftly, especially until the point at which fleets are within potential reconnaissance range. Any Dummy Fleet markers in the ZOC of an enemy Fleet marker are then removed from the map.
Naval Combat Phase
Any genuine opposing Fleet markers that are adjacent and in each other's ZOC are now turned up to reveal their Fleet number and combat takes place. If there are several fleets on each side adjacent in a single group, the Initiative player decides which fleet will participate in which battle and the order in which they will be carried out. During a night battle, it is very simple - all ships engage in fire; naval battles during the day are handled differently. With these day battles, a curious rule involving gun range determines which ships can fire. Normally only ship types with the longest range may fire, unless both sides agree that a ship type of a shorter range and all those of higher ranges may fire. I cannot see the realism in this rule, but it does make for some interesting choices at times. The Initiative player allocates all targets first and then fires; the non-initiative player then does the same. Normally, the results of all fire is applied simultaneously, unless a Scenario specifically rules otherwise or both players agree to incorporate the optional Surprise Attack rule in a custom-made scenario.
Aircraft Operations Phase
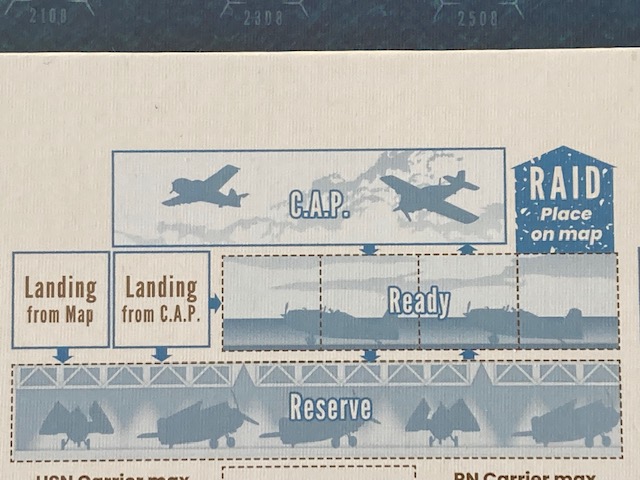
For me, this is the heart of any carrier game and where clarity of rules is at its most important. Task Force Carrier Battles succeeds admirably, especially in its use of Aircraft Status Displays, as shown below. This level of detail is an absolute delight for me, with planes on deck [the Ready boxes] or below deck in the hangar [Reserve boxes], the ability for allocation to Raids and CAP and finally boxes for the aircraft returning from Raids and CAP.
Reconnaissance Phase
Not surprisingly, reconnaissance is skipped during night turns, in addition you can't conduct searches on the final two turns of daytime either. I assume this might be explained by the risks of returning in dwindling daylight. However, it does mean that only six out of the 12 turns in a full day can be used for searches.
These searches do not involve the actual movement of your aircraft and are allocated slightly differently for the two sides. The Allies receive them on the basis of 2 Recon chits per CV and CVL and 1 or 2 Recon chits per land base depending on the Scenario, while the Japanese receive 1 chit per CVL, 1 chit per land base and 1 chit per CV up to and including Midway, after Midway this increases to 2 chits per CV. An explanatory note attributes this difference to the less diligent Japanese reconnaissance that took place until after the defeat at Midway. These little details either explained in design notes added alongside a rule or built directly into a rule are among some of the factors I value in any game and contribute neat touches of flavour to Task Force.
The resolution of your searches is carried out by your placing randomly drawn Recon chits from a bagful of them and your opponent reporting on the results on the unrevealed side. Again an excellent touch and, as you can only search within 8 hexes of your own ships, do make sure that you have more than one fleet marker within range or you've just given away your own position!
Administrative Phase
This is very swift to carry out. First of all, any ship that had an Emergency Repair marker on at the beginning of the turn and has not received any hits this turn removes the marker. Next any ship that has received a Minor Damage marker this turn flips it to the Emergency Repairs side.
Next, move the turn marker on one box and, if it's now the first Night turn of the day, return all Recon chits used during the current day to the draw bag or whatever container you're using.
To sum up the rules, they are clear, well set out and easy to understand and refreshingly short for the overall detail achieved. Turns flow swiftly and smoothly. Ship to ship engagements, if and when they occur, are very quick and easy to execute and the central focus of any carrier battle game, the raids on the opponent's fleets and bases are worked out with great satisfaction and enjoyment using the well designed fleet and carrier displays.
The Scenario booklet is equally well presented and contains a rich diversity of material. The first three Learning Scenarios have good brief historical outlines, with the Pearl Harbour one providing a detailed list of the full forces historically involved and even a run-through of an exemplified play through. The Main Scenarios are rated as Beginner, Intermediate or Advanced and once again provide succinct historical background, full set up instructions and any special rules.
Here is a full list of Scenarios followed by a few personal comments on some of the Main Scenarios.
Learning Scenarios
Scenario 1 Pearl Harbour
Scenario 2 Sinking of Prince of Wales and Repulse
Scenario 3 Battle of the Java Sea
Scenario 4 Carrier v Carrier [fictional]
-----------------------------
Main Scenarios
Scenario 5 Battle of the Coral Sea
Scenario 6 Battle of Midway
Scenario 7 Battle of the Eastern Solomons
Scenario 8 Combined Fleet v Pacific Fleet [fictional]
Scenario 9 Indian Ocean Raid [fictional]
Scenario 10 The Battles of Santa Cruz Islands and Second Naval Battle of Guadalcanal
Scenario 11 Solomon Islands [Custom Scenario] This last Scenario
Inevitably, Scenario 6 Midway, though classed as Beginner level, has a special appeal having gamed this in so many different ways over the years.
Scenario 10 The Battles of Santa Cruz Islands and Second Naval Battle of Guadalcanal.
I'd strongly recommend this, as it constitutes two battles with the results from the first strongly influencing the nature of the second battle - an element I wholly enjoy and it involves Guadalcanal, another battle zone I've played over in many other games.
Scenario 9 Indian Ocean Raid [fictional]
Though I much prefer historical scenarios in any game, this I found fascinating. Rather than calling it "fictional", this is a classic "what if scenario?" The historical raid might be called a damp squib, as prior warning allowed the commander to have diverted most of his ships away to another base. This scenario allows you to explore how the battle might have played out if those diverted ships had been there. It also means that as a Brit, I get a proper battle, even if I might lose it!
Scenario 11 Solomon Islands [Custom Scenario] This last Scenario is especially important as it helps to exemplify how to create your own custom scenario and was originally published in Command magazine Japan. Wholly enjoyable in its own right, it also serves as a lead in to the final section of the Scenario Booklet - Creating New Scenarios. Alternate orders of battle are provided drawn from a mixture of updated OOBs and differing source opinions on the battles. The developers have even included a number of additional units in the counter mix to facilitate this.
There's even a brief section on running a double-blind version with separate boards and a referee and, last but not least, there are two pages of Strategy and Tactics tips divided into Basic overall ideas and a few specific pointers for the main Scenarios.
I hope your stamina has got you this far, but Task Force Carrier Battles in the Pacific is packed with such a diversity of material to explore and is definitely a rich addition to Vuca Simulations well deserved reputation for quality. So, it's many, many thanks to them for providing this review copy and allowing me to take you on a journey through it.






0 comments :