second chance games

Search This Website of delight

Showing posts with label American Civil War. Show all posts

  The Maps of the Wilderness An Atlas of the Wilderness Campaign, Including all Cavalry Operations, May 2-6, 1864 by Bradley M. Gottfried  W...

The Maps of the Wilderness by Bradley M. Gottfried The Maps of the Wilderness by Bradley M. Gottfried

For your Wargamer, Toy soldier collector, MiniFig collector, military history nut. Reviews, interviews, Model Making, AARs and books!

American Civil War


 The Maps of the Wilderness


An Atlas of the Wilderness Campaign, Including all Cavalry Operations, May 2-6, 1864


by


Bradley M. Gottfried


 We have all read about how Napoleon and Marshal Berthier would crawl over maps during their campaigns. I think possibly that image in my mind started a lifelong love of maps. I love to look at all maps but especially campaign and battle maps. I believe it gives me, and others, a much-needed visual representation of the histories we are reading.


 These books by Bradley M. Gottfried completely switches the program from what we military history readers are used to. Instead of the prose being the main part of the book, in this case the maps are the real headliner. The descriptions are not inferior; in fact, far from it. It is just we are finally given exact and easy to read and follow maps of a campaign or battle. This is in comparison to many very well written military histories that have two or three maps that look like they were drawn by a second grader. This is actually the fifth in this series of books by the author. I can easily recommend all of them to the reader. They are:


The Maps of Gettysburg

The Maps of First Bull Run

The Maps of Antietam

The Maps of Bristoe Station and Mine Run Campaigns


 This book easily measures up to its elder brothers. The confusing and claustrophobic fighting of the Battle of the Wilderness is finally brought into the light of day. The books written about the battle are sometimes hard to follow because of the complete confusion on the part of the actual participants. They sometimes had no idea of where they were, let alone where the units on either side of them were at any given time. The painstakingly drawn maps clears up all of that confusion. 


 In conclusion, if you have any interest in the Battle of the Wilderness, or the American Civil War in general, this book is a must have for your library. While you are ordering it at Savas Beatie please take a look at the rest of the series.


 Robert

Book: The Maps of the Wilderness

Author: Bradley M. Gottfried

Publisher: Savas Beatie

  Conquering the Valley Cross Keys/Port Republic by Tiny Battle Publishing  The Shenandoah Valley 1862 campaign raged by the forces under Ma...

Conquering the Valley Cross Keys/Port Republic by Tiny Battle Publishing Conquering the Valley Cross Keys/Port Republic by Tiny Battle Publishing

For your Wargamer, Toy soldier collector, MiniFig collector, military history nut. Reviews, interviews, Model Making, AARs and books!

American Civil War


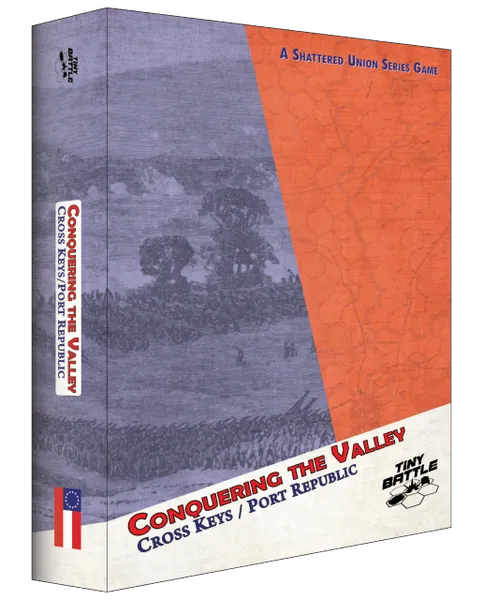
 Conquering the Valley Cross Keys/Port Republic


by


Tiny Battle Publishing


 The Shenandoah Valley 1862 campaign raged by the forces under Major General Thomas J. 'Stonewall' Jackson had an immense impact on the American Civil War. Union Major General McClellan was poised to attack the Confederate forces by an amphibious landing on the Virginia Peninsula southeast of Richmond. McClellan, aided by Pinkerton, believed that he was outnumbered by the Confederate forces by as much as two to one. Jackson's campaign was to keep the Valley in Confederate hands and also to panic President Lincoln in Washington to draw troops away from McClellan. Jackson did his job admirably while at the end being outnumbered almost three to one. McClellan slowed his glacial pace toward Richmond while also writing almost daily to his superiors in Washington that he was surrounded by millions of Confederate troops. The game represents the last two battles of the Valley Campaign before Jackson marched to join the Confederate forces at Richmond. The Battles of Cross Keys and Port Republic took place on June 8th and 9th of 1862.


 The game rules are one of the offshoots of Hermann Luttman's numerous designs for wargaming the Civil War (All hail King Hermann the first of his name). This is what Tiny Battle Publishing has to say about the game:


 "Following the release of The Hill of Death, Conquering the Valley is the second game in the Shattered Union series. Heavily influenced by 2022's Wargame of the Year, A Most Fearful Sacrifice, Herm Luttmann’s Shattered Union series is a new line of American Civil War wargames designed to be accessible to gamers of any experience level and playable in 3 hours.

Conquering the Valley covers the final two battles of Stonewall Jackson’s Valley Campaign of 1862. Jackson fights two Union armies, beats them both, and then heads off to Richmond for “The Seven Days”. 

Players can fight each battle separately or combine both as they historically were fought. The game also includes an interesting “What If” scenario; a Union cavalry force captured a key bridge but they failed to burn it and thereby cut Jackson off from his supply train. In the “What If” scenario, those Union troopers actually burn the bridge and force Jackson to fight Fremont’s army but Jackson has limited ammunition. In the end though, the historic game comes down to fighting it out for the Union guns at “The Coaling”. If Jackson can capture the Union artillery at Port Republic, he has won the campaign and can head towards Richmond!"


Illustration of the Battle of Cross Keys


  This is what comes with the game:


2 – Maps each 17" x 22"

189 – Counters 

39 – Playing Cards

Player Aid

1 – Series Rulebook

1 – Game Module Rulebook

5 – Six-Sided Dice (Red, White, Black, Blue and Gray)

A box to stuff it in

Designed by Claude Templeton Whalen 

Art by Jose R. Faura 

Number of Players: 2 (but solo friendly) 

Ages: 9 and up (potential choking hazard for anyone under 9 or hungry adults ) 

Playing Time: 2 hours 53 minutes (except if you play both battles back to back) 


 The battlefield maps are double-sided. The colors are somewhat muted, but you can clearly see the terrain and elevation. Their biggest claim to fame is that the hexes are 1" in size. The counters are well done with a picture of the troop type on each counter. The number on the bottom left is the unit's Strength Point value. The one on the bottom right is the unit's Cohesion Rating. Artillery units can be either Rifled (R), Smoothbore (S), or Mixed (M). The counters come in at 3/4" size. The game also has an 11"x 17" Players Aid that on one side has the CRT, Terrain, and other charts. The flipside has the Sequence of Play and rules etc. The game can pretty much be played by just looking at it without needing the Rulebooks. As I mentioned, the game materials are mostly in muted colors. However, I assume the art director decided to break free on the CRT and Terrain Chart side which is awash with color. It does not hinder the reading of it; on the contrary, it makes it easier to read and see what you are looking for. It just surprised me compared to the rest of the materials. The game, like most series games, comes with two Rulebooks. One is for the Series and the other for the Conquering the Valley game itself. The Series Rulebook is only 15 pages long. It is printed in double columns and the type is on the small size. It has only one example of play that is pictured; all of the rest are just written. However, there are a lot of them to help the player. This games Rulebook is only 11 pages in length and most of that is taken up by the scenario setups and individual rules. The game comes with four scenarios with the last one being a 'campaign' game of playing both battles. The 39 cards are used for unit activation, among other things. There are also Event Cards, Commander-In-Chief Cards, and Wild Cards The activation cards come with a nice ink drawing of some of the commanders. 


 The components measure up to the standard of the other Tiny Battle Publishing games I have played. About the only thing one could gripe about is the thinness of the counters. I do not remember the other games' counters and unfortunately, I have all of my games packed up for a move. It is possible the counters are the same thickness as in other games. They are certainly not thin enough to be detrimental to the longevity of the game.


Illustration of the Battle of Port Republic


  As mentioned, the game and its ruleset are an offshoot from the massive wargaming hit, 'A Most Fearful Sacrifice' from Hermann Luttmann. I for one, would look at buying a game of Tiddlywinks if Mr. Luttmann's name appeared on the rules. So, I was very familiar with his varied rule systems. I also reviewed the other game in the Shattered Union System: 'The Hill of Death', link below. There are only about three and a half pages of rules that pertain just to this game, and already knowing the system made it that much easier. This series is also supposed to be light on the rules and quick playing. The games that Tiny Battle Publishing puts forth are in direct contrast to its older brother Flying Pig Games. Yaah! magazine is the inhouse magazine for both of the companies' games. It comes with in-depth looks at the games and new scenarios or changes to existing scenarios. 

  The game comes as exactly advertised. Light on the rules and quick and easy to play. This comes without losing the historical flavor or play of the games. It does not make you think that these are cookie cutter rules where you could just put in a counter of panzers, and it would play the same. The cards used in the game are a refinement of the tried-and-true chit pull system of gaming. It allows the designer so much more latitude in what can be presented to the player for and against him. So, instead of just doing a cup pull to find out what units can move you can vary the number of units that can move etc., the designer can almost design a completely different battle for the player but still be in the realm of historical possibilities. 

 The Battle of Port Republic (Jackson Attacks scenario) is a hard one for the Confederates to get a win. First of all, it is only nine turns long. You have almost a two to one advantage in numbers playing the Confederates but that is because of reinforcements. At the beginning of the battle, it is about even. The South River ford causes the main problem for the Confederates because high rain has made the ford very hard to get troops through. So, as the Confederates you have a numerical advantage but because of the ford can you get your troops to where they are needed in time? Between the four scenarios I think it is my favorite because the cards, friction of war, make it so hard to make a plan and go with it. Although, because of the cards it really seems that each battle you play in the system is completely different than the last one. My second favorite scenario is Campbell Burns the Bridge. 

 There are a total of four scenarios. They are:

Ewell Does His Job - Historic Cross Keys

Jackson Attacks - Historic Port Republic

Campbell Burns the Bridge - Cross Keys What if

Two Days in June - Both Cross Keys and Port Republic


 Thank you, Tiny Battle Publishing, for letting me review another great game in your stable. With the rules and the small number of counters, this is a great game for anyone, but especially for gamers who do not have a dedicated gaming space. 

Robert

Tiny Battle Publishing:

Conquering the Valley:

My review of The Hill of Death:

The Hill of Death: Champion Hill by Tiny Battle Publishing - A Wargamers Needful Things

  Detour to Disaster General John Bell Hood's "Slight Demonstration" at Decatur and the Unravelling of the Tennessee Campaign ...

Detour to Disaster: General John Bell Hood's Slight Demonstration at Decatur and the Unravelling of the Tennessee Campaign by Noel Carpenter Detour to Disaster: General John Bell Hood's Slight Demonstration at Decatur and the Unravelling of the Tennessee Campaign by Noel Carpenter

For your Wargamer, Toy soldier collector, MiniFig collector, military history nut. Reviews, interviews, Model Making, AARs and books!

American Civil War


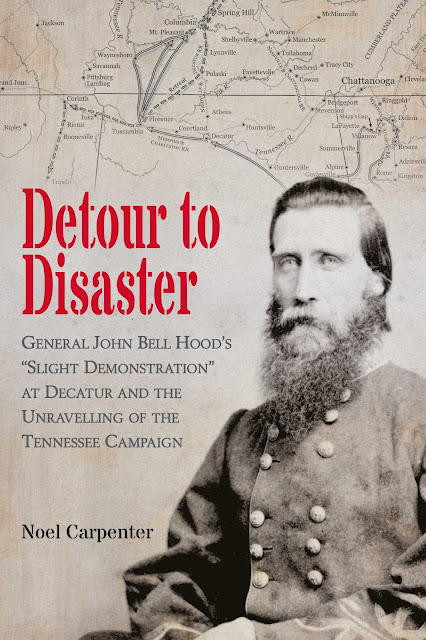
 Detour to Disaster


General John Bell Hood's "Slight Demonstration" at Decatur and the Unravelling of the Tennessee Campaign


by


Noel Carpenter


 This is a small book which is just over 160 pages in length. The book is also printed in large type, so it is not a hard read by any measure. The center of the book has fifteen pages of black and white photos of the people mentioned and towns of the area. The book is followed by three appendices. The first one gives and Order of Battle for the Army of Tennessee. The next is a list of ferries and fords across the Tennessee River between Chattanooga and Florence. The third is the evacuation order for the people living in and around Decatur Alabama.


 Lieutenant General John Bell Hood has lost Atlanta and a good portion of his troops trying to attack General William Tecumseh Sherman and stop him from taking the city. Hood now comes up with an audacious plan. He will do exactly what Sherman has decided on doing except in reverse. Sherman plans to cut his lines of communication and march from Georgia to the sea. Hood intends to cut his lines and head north trying to pull Sherman after him. The disparity between the forces makes Hood's campaign not only a desperate chance, but one that in hindsight is almost assuredly useless. The author tells the story of the beginning of Hood's campaign and Hood's 'Detour to Disaster'.  


 On page 146 the author uses some quotes from other historians about Hood's campaign plans. "An impossible dream" another wrote "Hood's activities after Sherman left Atlanta (to follow Hood) seemed to have been scripted in never-never land".


 However, a lot of other pundits believe that had Hood acted with more speed his campaign would have been successful. General Beauregard, in his report, said that the original plan "would have led to the defeat of Thomas ... if executed without undue delay and with vigor and skill". Which, as the author shows, was not done. Hood's four lost days at Decatur pretty much put paid to the entire campaign. In the Epilogue the writer explains what happened next in Hood's Tennessee Campaign.  Hood was given a last chance to destroy a large part of the Union force against him before the Battle of Franklin, but once again victory was turned into defeat. This would lead to the tragic and useless battles of Franklin and Nashville.


 This is a great book that shows off the truth of the expression "for the want of a nail". It also should be required reading for anyone trying to sift fact from fiction during Hood's days in army command. Unfortunately, we lost the author in 2000. In his retirement he dedicated twelve years to research and write this book, and it shows in this detailed account. Thank you, Savas Beatie, for allowing me to review this book. I do not know anywhere near enough about the Western Campaign in the Civil War. I am just starting to fill that gap and this book has done its job admirably.


Robert

Book: Detour to Disaster: General John Bell Hood's "Slight Demonstration" at Decatur and the Unravelling of the Tennessee Campaign

Author: Noel Carpenter

Publisher: Savas Beatie

Claude Whalen about him and his games and his newest offering 'Conquering the Valley' from Tiny Battle Publishing   Before we start ...

Claude Whalen about him and his games and his newest offering 'Conquering the Valley' Claude Whalen about him and his games and his newest offering 'Conquering the Valley'

For your Wargamer, Toy soldier collector, MiniFig collector, military history nut. Reviews, interviews, Model Making, AARs and books!

American Civil War


Claude Whalen about him and his games and his newest offering 'Conquering the Valley' from Tiny Battle Publishing


  Before we start a discussion on "Conquering the Valley", let me give you some of my gaming background.


I got my first wargames over fifty years ago: Tactics II, Gettysburg (1964) edition, Waterloo, Battle of the Bulge, Gettysburg (1977) and more Avalon Hill classics. Santa's workshop must have only made AH products because that is all that I ever got. Since I still have most of those games, I would say that Gettysburg (1977), Waterloo and Battle of the Bulge got the most play.


My main gaming interest leans towards the American Civil War for two reasons; I share January 19th as a birthday with Robert E. Lee (we had a print of Lee in our house) and I went to "Washington & Lee University" for my undergraduate work. Though it may seem like I'm from the South, my mother's family is from Pennsylvania and Massachusetts and my father's ancestors are from Illinois. Other than my time at Washington & Lee, I've never lived in the South and none of my ancestors served for the Confederacy.


As for the Napoleonic era, I would have to say that it is a rather distant second era of interest but I still have dabbled in those types of games. Though I have always had an interest in the Second World War, I find less and less time available for studying it so all my old Avalon Hill WWII games have been moved to the back of the game shelves.


I got started in game design/development/testing in late 2016 when I saw a GMT pre-order advertisement for "Longstreet Attacks". I signed up and noted that they mentioned a game called "Stonewall's Sword" that would be a good introduction to Hermann Luttmann's system. I went ahead, ordered the game and started to learn the "Blind Swords" system. I then got "Thunder in the Ozarks" and continued to comment about the games online (BGG & Consimworld). Roger Miller of Revolution Games mentioned that they were always looking for new designers so I asked if I could give it a try. We decided to start with "Kernstown" and that is how I first spoke with Rick Barber. While I was just starting with Kernstown, GMT released Hermann's "Longstreet Attacks" game and it ended up at Revolution Games. I managed to join with Fred Manzo and Steve Poitinger in play testing the game (which had initially caught my eye in the first place).


Longstreet Attacks Counters


Testing "Longstreet Attacks" lasted for eleven months, and it was a great introduction to game design and development. With guidance from Hermann Luttmann and Roger Miller (Revolution Games), we played, tweaked, replayed, tweaked again and then moved on to the next scenario. When we got to the final full battle scenario, we had to tweak a few more things and so we then went back and rechecked the smaller scenarios just to make sure that they still worked. It turned out to be quite an experience and I will always be thankful for being allowed to join the group.


Speaking of the group, I traveled to Gettysburg to meet with a few of the guys and that is how I actually met Rick Barber. Since I live outside of Pittsburgh, PA, I could drive over to the Harrisburg area, pick up Rick (he didn't drive) and take him down to Gettysburg. Wow what an experience that was; Rick was truly an artist and that first trip into his basement to see all of his maps was amazing. First of all, how he could do all of his great mapwork in a dark, cramped basement that looked more like a hermit's cave than an art studio was a mystery to me. Once his mother passed away, he moved everything up to a much larger, light and airy studio but that was probably only for 18 months before he passed away.
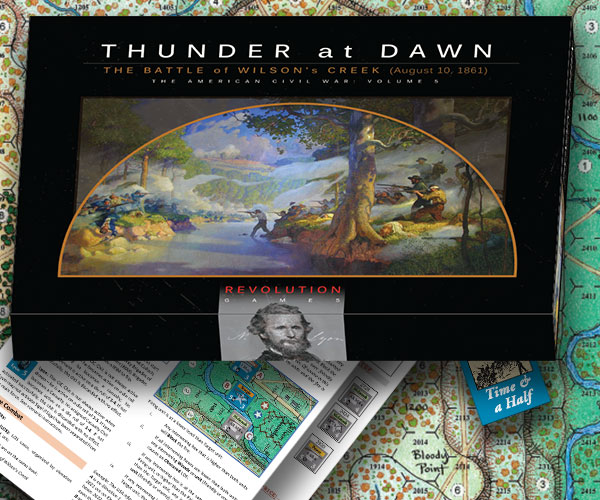


More importantly, walking the Gettysburg battlefield with Rick was truly an eye-opening experience. Instead of concentrating on monuments, statutes and cannons, Rick pointed out the lay of the land and some tips on how to read it. Right after the first controlled burn around Little Round Top and Hood's attack route, Rick and I visited the field with a last draft of the "Longstreet Attacks" map. Since the ground had just been burned two weeks before, we were able to walk and observe what Hood's men crossed as they headed for the Union forces. As I walked that ground with Rick's map in hand, I was truly amazed at how many details that Rick got exactly right. If Rick put a tree line on one side of a hex, it was there; if there was a large rock on the map, there was a large rock on the field too.


Once I started to look at the land like a cartographer, it was like I was back at Gettysburg for the first time. I still checked monuments and cannons but now I was looking at the line of sight and lay of the land issues. I changed my focus towards mapping issues and now I try to get to all the battlefields that I may use in a game. I get a much better feel for the fight because books and maps are great but little things lurk on the actual battlefield that are important for game design. Besides making for a better game, looking at a battlefield this way makes visits to familiar battlefields new again.


Using those lessons, I went to Kernstown in January of 2017 and then a number of times during the summer. I got to meet a nice group of people  (Kernstown Battlefield Association) who are working hard on preserving a smaller battlefield and doing a good job at it. I was able to apply Rick's "eye" to my observations and then report back to Rick on how his map matched the actual land. Since the core area to the west of the Valley Turnpike is still saved, Rick got that ground right. The ground to the east of the Valley Turnpike has been graded and developed so that had to be drawn from old maps; overall I like Rick's work on Kernstown.
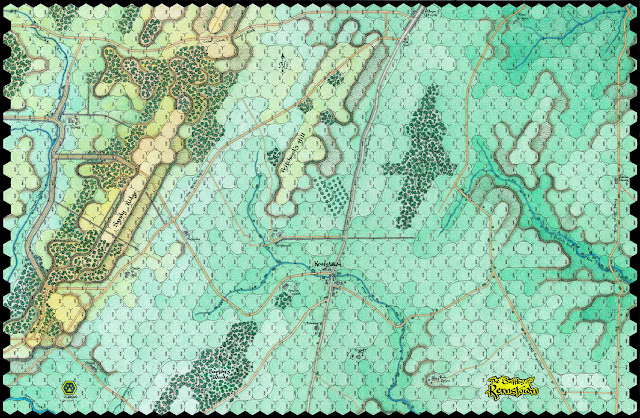

Kernstown Map


My next game was "Thunder at Dawn" (Wilson's Creek) and that ended up being the last map that Rick Barber worked on. He sent the final copy in to Revolution Games two weeks before he died. While that was going on, I worked with Hexasim on Quatre Bras and their combined game that included Ligny. In addition, I worked on "Fire on the Mountain" with John Poniske and Legion Games. Finally, I continued to work with Hermann Luttmann on "The Devil To Pay" with Tiny Battles and "A Most Fearful Sacrifice" with Flying Pig Games.


"A Most Fearful Sacrifice" was another 11-month monster project and it included Rick Barber's last map on Gettysburg. Though it took forever to complete, Rick hand drew and colored the 60" x 41" map and he really created a masterpiece. As for the process, Mark Walker was extremely generous in allowing us to do pretty much whatever we wanted. If we wanted different hats for the Iron Brigade, "sure". Add dog mascots to the appropriate counters, "why not". Tweak the uniforms for various units, "let's do it". The graphics for the game really deserved their CSR Award.


As for the switch from chits to cards, it was really very simple. We started out with chits but by the time that we realized that there were over 30 chits in the cup for day one alone, it was time to do something different. Hermann wanted to do cards and so we made the switch. As it worked out, it was one of the best changes that we made to the original "Blind Swords" system. After the numerous changes, we decided to change the game system name to something based on "BS". Since Dan Sickles' unusual move was something totally unexpected, we went with "Black Swan" for those utterly irrational events that just seem to crop up throughout history. As we kept testing the scenarios over the 11-month period, we kept raving over how much we liked the game. Though there was more than one comment that we "were preaching to the choir", the CSR Awards were a nice affirmation that we indeed created a great game.


Both Beautiful and Big!


After "A Most Fearful Sacrifice" was finished, Mark Walker asked Hermann if he wanted to do a simpler series of games for Tiny Battles Publishing and Hermann was kind enough to ask me to join in; hence the "Shattered Union" series was born. Trying to use some of the key parts of the "Black Swan" system, these games are supposed to be faster playing battles at a lower price point. Hence, they lack a mounted map board or extravagantly detailed counters but they should be fairly easy to understand if you are familiar with the "Black Swan" system. Hermann's "Champion Hill" was the first game and he also took Fredericksburg. I got "Conquering the Valley" and Gettysburg-July 4th. After some discussion, the Gettysburg-July 4th game became another scenario for the second printing of "A Most Fearful Sacrifice" and I decided to do Brawner Farm (2nd Manassas) on a demi company scale.


Using Rick Barber's cartography lessons from Gettysburg, I surveyed the ground at Brawner's Farm for two days. I spent two days walking the ground at Fredericksburg and bothering Frank O'Reilly with detailed questions about the ground there. He was extremely helpful and I passed my notes onto Hermann. Finally, Rick Barber gave me a name of one of his contacts who lived in Port Republic and so I traveled down there in August of 2017. Rick's associate was both a gamer and a very knowledgeable resident so I got a VERY detailed tour of the grounds. After his day tour, I spent the next day re-walking the ground and taking a few hundred pictures of the lay of the land. Since it took five years to finally get the game published, I am glad that I took those pictures to remind me of certain quirks on both battlefields.


Though Port Republic is the final battle of Jackson's Valley Campaign, Cross Keys is really more than just a prelude to the key battle. If the bridge over the North River is burned, Jackson's force is in serious trouble and even if they win, they probably cannot get to Richmond in time to help Lee during "The Seven Days". Union General Fremont was very aggressive in his pursuit of Jackson but once Jackson turns to fight, Fremont suddenly becomes very cautious. If he had been much more aggressive at Cross Keys and damaged Ewell's forces there (especially the "Louisiana Tigers"), Jackson may not have had enough fresh troops to defeat Tyler at Port Republic. With that being said, Cross Keys is more than an afterthought and is a battle worth fighting.


From my field survey at Cross Keys, there were a few things that stuck out. If you don't have a local guide, you probably would not find Trimble's ambush position for the 8th NY Infantry. It is just rolling farmland like many fields that you see driving through the Shenandoah Valley and if it wasn't for a small set of markers at the fence line Trimble occupied, you would never know that anything of any importance happened there. Another thing that stuck out was that Ewell's position above Mill Creek was VERY, VERY strong. Using Rick's "eye" training, it is very clear that Ewell's left flank is a much easier route to attack. The only problem with this route is that it is the furthest point from the North River bridge and even if you push Ewell back, he will just retreat towards that bridge anyway.


The key to the whole fight was the ridge that Ewell occupied behind Mill Creek. Here actually walking the ground and remembering Rick's guidance really paid off. Ewell's line was perched along a ridge that rose up from Mill Creek. The ridge is VERY steep and you needed to put your hand on the ground in order to balance yourself as you scrambled up the slope. It had to be nearly impossible to load and fire a rifle while making the climb. As it turned out, there was a small logging trail that started at the base of the ridge on Ewell's right front and it then rose up the slope and finally reached the top of the ridge on Ewell's left. Though the Rebel skirmishers could run up the slope in order to get back to the safety of their line, any Union troops couldn't have maintained a line of battle as they went up the slope two by two. They also would have exposed their left flank to any Rebel infantry on top of the slope.


Picture from Conquering the Valley


One final problem faced the Union at Mill Creek, as they approached the creek, the ground sloped down towards the water which made it even harder for them to fire at troops on the top of the ridge. After actually looking at the lay of the land, you understand why the Union troops only attempted a half-hearted frontal attack. Looking at a map never would have shown these problems to a game designer.


Moving onto the Port Republic battlefield, the first problem that both sides faced was the issues presented by the North River, South River and the South Fork of the Shenandoah. It had been a wet spring so all three rivers were running higher than normal. The North River and the South Fork of the Shenandoah were impassable without proper bridging and looking at the actual rivers, it was clear that they were substantial barriers. The bridge over the North River was the only reliable way to cross and it turned out to be a key to the battle. On the other hand, the South River was a river in name only. When I actually saw it, I thought that Antietam Creek was more of a barrier. Rain swollen at the time of the battle, it was more of a problem so Jackson had a bridge made from wagons and his troops crossed that way. Still, it was a "wagon-bridge" and it became a choke point for the Confederate troops, which caused them to trickle into the battle against Tyler's Union forces.


Though Jackson burned the bridge over the North River around 10:30am and thus prevented Fremont's troops from linking up with Tyler's force, things could have been much different. Turner Ashby was killed a few days before the battle and so the Confederate cavalry was in disarray at the time of the battle. Some Union cavalry were able to ride into Port Republic on a surprise raid, captured some of Jackson's staff and almost snagged Jackson himself. They also had a chance to destroy Jackson's ammunition supply. Though their orders were to NOT burn the bridge, the cavalry captured the North River bridge and positioned their one cannon at the south end of the bridge. All Rebel forces were on the north (Cross Keys) side of the bridge and were cut off from their ammunition. Faced with advancing Rebel infantry, the Union cavalry decided to burn the bridge. The Rebel infantry charged into the covered bridge and somehow the Union gun managed to MISS the Rebels as they came onto the north edge of the bridge. The Rebels chased the Union cavalry off, put out the fire and saved their ammunition train. The "what If" scenario came very close to being the actual Battle of Cross Keys.


The final two points about the Port Republic battlefield would not be noted unless you actually walked the field; maps wouldn't have shown these key points. The first point is that there is a ridge running down the middle of the cornfield. Since the North River makes a hard left-hand turn when it merges to become the South Fork of the Shenandoah River, this ridge was obviously an ancient river bank. When we drove down Lewiston Lane, the road cut through this ridge and it became clear that this ridge was a substantial ground feature (easily 15 to 20 feet deep where the Lane cut through it). Add on any crops growing on it at the time of the battle and it clearly would have blocked Line-of-Sight from one side of the valley to the other. Hence for the infantry on the floor of the valley, they couldn't see the entire field. Once you were up on the Union artillery platform on "The Coaling", the ridge DIDN'T conceal troops or limit the artillery Line of Sight. Though high ground is always important, this Line-of-Sight feature made "The Coaling" the dominant, key position of the battle. Possess it and you could control most of the battlefield.


Close-up from Conquering the Valley


The last point was the actual size of "The Coaling". Though the modern woods may have encroached on the site, it still is a remarkably small ledge. There is room for guns but not much else. Also, the Louisiana Tigers route of attack is tough terrain, heavily wooded and a sloped hillside. The only advantage that they would have had is that once they came out of the woods, they would be able to rapidly close on the Union guns. It is all very interesting ground and if I hadn't actually walked and climbed it, no map would have been able to show me what was actually there.


It is an interesting set of battles and I feel that the game gives you a good idea of what all three armies faced during those two days in June of 1862. Ewell had the easiest job, just hold the Union off. On the other hand, Jackson had to manage getting his troops over the North River Bridge and to safety while also getting enough troops up the valley to win the fight against Tyler's Union force. I found it fun and enjoyable to create this game and hopefully others will find it enjoyable to play. Now on to Brawner Farm!


CTW


Tiny Battle Publishing:

Tiny Battle Publishing

Conquering the Valley:

Conquering the Valley | Tiny Battle Publishing

  The Hill of Death: Champion Hill by Tiny Battle Publishing  I will be the first to admit that I knew very little about the campaign to tak...

The Hill of Death: Champion Hill by Tiny Battle Publishing The Hill of Death: Champion Hill by Tiny Battle Publishing

For your Wargamer, Toy soldier collector, MiniFig collector, military history nut. Reviews, interviews, Model Making, AARs and books!

American Civil War


 The Hill of Death: Champion Hill


by


Tiny Battle Publishing


 I will be the first to admit that I knew very little about the campaign to take Vicksburg and some other events in the Western Theater of the American Civil War. So, I did what every other red blooded grognard would do and I read up on it. For me, wargaming is as much about the playing of the game as it is in learning about the history of what is depicted.  Rather than me just spouting off some history that I just assimilated I will leave it to the master, Hermann Luttmann, to describe the history and the game.


"The Hill of Death is the first game in the new "Shattered Union" American Civil War series by Tiny Battle Publishing. The series is designed to be accessible and fast-playing, suitable for gamers of any experience level. It is based firmly within the core design philosophy of the Blind Swords and Black Swan systems, but will focus on more obscure or over-looked battles and campaigns, including some fictional "what if" battles that could have occurred during the war. The entire series is governed by one relatively simple set of standard Series Rules, which are altered in each game by a few Game Module specific rules.


The Hill of Death is the first Game Module in the Shattered Union series and covers the entire Battle of Champion Hill. This critical engagement was fought just outside of Vicksburg, Mississippi on May 16th ,1863, between the Union Army of the Tennessee (under Major General Ulysses S. Grant) and the Confederate Army of Vicksburg (under Lieutenant General John C. Pemberton). Grant successfully landed his Union army on the shores of the Mississippi River and quickly advanced inland towards the Mississippi state capital of Jackson. General Joseph E. Johnston’s Confederate force made only a token effort at defending the city and then Johnston instructed Pemberton to sally forth from the Vicksburg fortress and attack Grant’s line of supply. On the morning of May 16th, Pemberton’s Army of Vicksburg was in route to fulfilling that mission when it received new orders from Johnston to turn around and join him near the town of Clinton. Pemberton hesitated and as he contemplated his next move, Grant about-faced the Union army. Leaving most of Sherman’s Corps to hold Jackson, he began a determined advance against Vicksburg and Pemberton’s strung out and confused Rebel army. The Battle of Champion Hill was underway, and the fate of Vicksburg hung in the balance."


 This is what comes with the game:

1 – 17" x 22" Map

189 – Counters

45 – Cards

1 – Player Aid

1 – Series Rulebook

1 – Game Module Rulebook

5 – Six-Sided Dice (Red, White, Black, Blue and Gray)


 So, Mr. Luttmann has developed a third rule set of games for American Civil War Battles. This can only be a good thing for us grognards (Along with being a terrible thing for our wives and wallets. Come to think of it, someone should use wives and wallets somehow in a game or company title. Maybe even a gaming convention named 'Wallets sans Wives') 


 If you did not know, Tiny Battle Publishing is the little brother of 'Flying Pig Games'. To illustrate the difference just look at A Most Fearful Sacrifice and this game next to each other. Unlike David and Goliath you do not have to pick a side with these two. With Tiny Battles games you get the best of both worlds: great games with a very small footprint and quick play. You do not have to build on an addition to your house and buy a regulation pool table to set up your copy of A Most Fearful Sacrifice.


 The map is smaller than usual for most games at 17" x 22". However, this is to be expected from a company named Tiny Battles. It looks even smaller because the hexes are one inch wide. So, there is no trouble with cardboard clutter. The map is very well done and very easy on the eyes. It is one of those maps that you would like to copy and put on your wall. As you can see, it is easy to see what terrain each hex is made of. The addition of the names of the different families and their dwellings is a nice touch. It also helps to use the map to follow along with books about the battle. The counters are large at 3/4". They are extremely easy to read, and you can eschew your magnifying glass when playing. The colors are the standard blue and butternut for the Union and Confederate units. The game comes with one large 11" x 17" double sided Player Aid. It is in full color and made from hard stock and laminated. It really reminds me of a restaurant menu in size, color, and the type size. One side has all of the tables needed for the game. The other side has the Sequence of Play etc. on it. Like most games in a series there are two different Rulebooks: one for the series and another for rules that will only apply to the game itself. The Series Rulebook is fifteen pages long. It is made of your normal rulebook paper and is in full color. The type is a bit small but still readable. There is an index included on the first page. The game Rulebook is only eleven pages long with the last page of the Rulebook being another copy of the tables used in the game. The rules take up only five and a half pages. After the rules come the setup and Victory Conditions for the two scenarios. This is followed by a write up about the Optional Units that both sides can add to the game. The game comes with forty-five cards. These are the normal game size cards, but they do seem to be a little sturdier than most. There are Event Cards and Formation Activation Cards. The Formation Activation Cards come with a black and white picture of the units' General or CIC. The components as a whole are as good as you would see on more of the 'larger' games in our hobby.


 This is the Sequence of Play:


1. Game Turn Marker Phase

2. Command Decision Phase

3. Held Formation/CIC Activation Card Phase

4. Activation Phase

  a. Draw Activation Card Step
  
  b. Immediate Event and Wild Card Step

  c. Formation Activation/CIC Card Step

  d. Fire Combat Step

  e. Movement Step

  f. Close Combat Step

  g. Regroup Step

  h. End Activation Step

5. End Phase

  a. Held Event Card Step

  b. Rest and Victory Point Step


 So, what we have here is a new subset of Mr. Luttmann's rules that are a bit streamlined for smaller battles. For those of us who wanted to have the battles of the American Civil War that did not make the 'A' list- Antietam, Chickamauga etc. this is a bit of a Godsend. Champion Hill probably influenced the ending of the Civil War as much or more than any of the much larger battles. 


 How does the game play? Fast and furious, as the designer intended. The footprint of the game and play time are both on the small side. The game is listed as taking two hours to play. From my experience that seems just about right. Of course, it helps if you have played some of his other designs. Naturally, two newbies to the systems are going to take longer on at least their first playthrough.  The game includes rules and counters of the Confederate Army Supply Wagons. As the Confederate player it behooves you to keep them safe. The rules also include some Optional Units for both sides that could have been present at the battle. I would say to get a least a game or two under your belt until you dabble with these 'what ifs'. The game system, like Mr. Luttmann's others, replaces a chit pull or die roll with cards for unit activation etc. So, he has been able to add many different actions that the player would not have if he just pulled a chit that activated x units. It adds a whole new layer to the 'friction' of board wargames.


 One thing about the Tiny Battle games is that if you are so inclined you can buy a PDF of the game and print everything out yourself at a substantial saving. My very few efforts at this have been underwhelming, to say the least. However, I have seen some people who have done it perfectly. Thank you, Tiny Battle Publishing, for allowing me to review another great game from Mr. Luttmann. It plays quickly but is still pretty deep. It also plays well within the bounds of historical accuracy.

Robert

Tiny Battle Publishing:

The Hill of Death: Champion Hill:

A review of The Devil's to pay: The first day of Gettysburg:

A review of Cruel Morning Shiloh 1862:


  A Most Fearful Sacrifice 2nd Edition by Flying Pig Games  The big guy is back in the ring. Flying Pig Games has a Kickstarter for A Most F...

A Most Fearful Sacrifice 2nd Edition by Flying Pig Games A Most Fearful Sacrifice 2nd Edition by Flying Pig Games

For your Wargamer, Toy soldier collector, MiniFig collector, military history nut. Reviews, interviews, Model Making, AARs and books!

American Civil War


 A Most Fearful Sacrifice 2nd Edition


by


Flying Pig Games


 The big guy is back in the ring. Flying Pig Games has a Kickstarter for A Most Fearful Sacrifice 2nd Edition coming out on October 26th. If you remember, this has a gorgeous map that is FIFTEEN SQUARE FEET in size. The unit counters are also very large at 13/16". Below will have the Designer Notes from Hermann Luttmann. I will also throw in some pics. Without further ado:


 "GAME CREDITS

Game Design: Hermann Luttmann

Publisher: Mark H. Walker

Game Developers and Testers: Claude Whalen, Stephen Poitinger, 

Zeke Conover and Fred Manzo

Map Art: Rick Barber

Game Counters and Aids Art: Jose Faura

Rules Layout: Guillaume Ries


DESIGNER’S NOTES

Thank you so much for purchasing and playing A Most Fearful Sacrifice! It has been quite a long, grueling process to get this project tested and finished … but it was indeed a labor of love. I have to first thank the individuals you see listed as the Game Developers and Testers. This group of gentlemen is the most dedicated, talented, and valuable team of gamers with which I have ever worked. They have been tireless in their efforts to test every aspect of this design and their contributions and observations have made this a much better game than I could have created on my own. So, my utmost thanks to all of them! I also want to thank Mark Walker and Flying Pig Games. They are a terrific company for which to design, and Mark is a wonderful guy who has also become a good friend over the years. 


I know many of you are saying … “Why another Gettysburg game?”. Well, honestly … why not? This is the iconic American Civil War battle and when taken in its entirety, it is a fascinating study in command, strategy, and tactics. It also tells some of the most heroic - and most tragic - stories to emerge from the annals of military history. The conduct of the battle and the myriad possibilities of how it could have evolved are fascinating topics to explore in a wargame. Overall, the consequences of the Battle of Gettysburg and its reverberating effect on the conduct of the remainder of the American Civil War cannot be understated and thus it has drawn warranted attention in the gaming world. 


Ultimately, the decision to do the entire battle was an easy one to make. We felt that we had a good core system with The Devil’s To Pay, which is essentially an upscaling of the Blind Swords system. But I did not want to do just an expansion to that game (which covers only the first day of the battle) for a number of reasons. Such an expansion’s footprint would have to be quite large in order to cover both the second and third days of the battle. In addition, the extra rules required to handle a multi-day battle would essentially have made the expansion larger than the original game. No – we needed one epic design to handle all three days and that’s what we set out to do. 


The system used for A Most Fearful Sacrifice is basically the same as used in previous games in the Blind Swords family, but because of the grander scope of the battle I needed to re-design the activation system, or the game would take way too long to play. Thus, was born the idea of converting from chit-pull to card-draw mechanics. Not only is it microseconds faster to draw a card than pull a chit, but more importantly, actual game information can be included on a card, and this results in a huge time saver – no more hunting for a rule or event effect on a chart or in the rulebook. Also, by switching to activating units by Corps, this cuts down severely on the number of cards that need to be drawn. Instead, an extra layer of player decision making was incorporated into the concept of the player needing to set up each Corp’s “Division Priority”. This certainly adds an additional element of command and speeds up gameplay at the same time. Other mechanics were also re-designed and tweaked to maintain just as much “crunchy” detail as before but with less effort. All in all, we feel that Black Swan is the ultimate ACW grand-tactical game system, and we hope you agree. 


Finally, we’ve designed thirteen scenarios of varying scopes so that players can explore every portion of the Battle of Gettysburg in detail. There are small and medium scenarios covering just snippets of the battle’s narrative (and these obviously require shorter swaths of playing time) or you can experience all three days in a “grand battle” extravaganza so players can explore all the strategic options for both sides. However, you choose to experience this game, we hope that you ultimately enjoy it. Once again, thank you for your kind support and good gaming!" 

Hermann


Flying Pig Games:

Flying Pig Games

A Most Fearful Sacrifice:

A Most Fearful Sacrifice 2nd Edition/Reprint | Flying Pig Games

Kickstarter for the 2nd Edition:

A Most Fearful Sacrifice -Second Edition by Mark H. Walker — Kickstarter


 Mac and Lee by Hollandspiele  The 1862 Peninsula Campaign was at the very beginning a bold stroke to move around the Confederate Army in No...

Mac and Lee by Hollandspiele Mac and Lee by Hollandspiele

For your Wargamer, Toy soldier collector, MiniFig collector, military history nut. Reviews, interviews, Model Making, AARs and books!

American Civil War


 Mac and Lee


by


Hollandspiele


 The 1862 Peninsula Campaign was at the very beginning a bold stroke to move around the Confederate Army in Northen Virginia. In actuality, it turned out much like the Anzio invasion. A whale had been beached, and that was about it. Little Mac (George McClellan), could not, for the life of him, understand the reality of the situation. The Pinkerton Agency told him that he was outnumbered two to one and he either believed them outright or used it as an excuse for his own doubts and fears. Whatever it was, his attack on Richmond progressed slower than a sloth descending a tree to do its business. Joseph E. Johnston had his own fears and doubts to deal with. He let Little Mac saunter ever so slowly to the very gates of Richmond. Had it actually come to a siege Little Mac's artillery would have pounded Richmond to dust. If, that is, he let them actually open fire. His nightmares of massive Confederate forces clouded his campaign from start to finish. Once Johnston was wounded, when he finally attacked at the Battle of Seven Pines, Robert E. Lee was summoned to take command of the Confederate Army. From this moment on Little Mac believed to his core that he had to be vastly outnumbered for the Confederates to attack him. He went into an almost mental breakdown and left his forces to mostly deal with the Confederates on their own. Lee was presented several times with opportunities to deal the Union forces a crushing blow. Instead, his forces rarely did anything correctly from a military point of view. He either could not get his subordinates to do anything, or they decided to attack the Union forces where they were the strongest. Porter Alexander believed that during this period, now called the Seven Days Battles, was the only time that the South could have won independence. Is it actually possible to put such a strange campaign into a game? Let us find out if Hollandspiele and the designer John Theissen have actually succeeded in doing so.


 This is what comes with the game:


22" x 34" mapsheet

184 counters

8-page series rulebook

12-page module rulebook

2 display sheets

1 double-sided player aid

28 special event cards

1 six-sided die


 The box and its contents are standard Hollandspiele fare. The map needs some coercion to lay flat. A piece of plexiglass or a few books on top for a bit fixes the issue. The map is reminiscent of a spruced-up map from SPI or AH. It is meant to be a wargame map and not a wall decoration. In this it serves its purpose admirably. The terrain is easy to discern and there are no ambiguities. About one third of the map is taken up by charts and tables. These are in large print and have enough separation so that all the information is easily discernable. The counters are a little dark in color, but their information is large enough to be read without squinting. The number of actual units on the board is very small, which is a hallmark of Hollandspiele's American Civil War Operational Series. They are Corps sized for the Union and Division for the South (Not until after this campaign were Corps introduced to the Confederate Armies). The Series Rulebook is eight pages long. It does have some color thrown in for aesthetics. The print is nice and large. The Module Rulebook is actually ten pages long. First is an excellent five page write up about the campaign by Doug Miller. Then there are four pages of Module rules for Mac and Lee. This follows the same format as the Series Rulebook. There are three Player Aids. These are standard size and in full color. The first one has the Terrain Chart on one side with multiple tables on the reverse side. The other two Player Aids are Strength tracks for both sides in the two scenarios that come with the game. Next up are the Special Events Cards. These are the standard game size and are nicely done. The only problem with the cards is that they contain so much information that the type is rather small. Again, the above components are the standard fare for Hollandspiele. There is nothing wrong with this. They just veer toward meaty games in play instead of artwork for the components. 


 The Sequence of Play is:

A. First Player

  1. Reinforcement

  2. Movement

  3. Combat

  4. Recovery

B. Second player same as above.


 The scale of the game is:

Time: One day per turn.

Hex size: 4.9 miles per hex

Men: About 3000 men per Strength Point.


 A game can be incredibly plain Jane in the components and still be on your table for months at a time. Conversely, some games belong in the Louvre but are never brought out to play. So, now we will go into the game itself.


 As I mentioned, this is an incredibly hard campaign to design a game around. Little Mac should have been able to swamp the Confederates and been in Richmond in no time flat. There have been many theories put forward to explain his actions, or more correctly non-actions, during the campaign. So, the designer has to take into account that the Union Army was operating with a large ball and chain attached, mainly its commander. Then on the Confederate side you have Johnston who seemed just as reticent to engage the Union troops (This was shown throughout the war). The designer chose to simulate this with a Caution & Uncertainty Roll. Each side's Caution Level is kept track of, and this simulates the oddness of the first part of this campaign. Both sides are like old Walruses who are stuck in the mud glaring at each other. At times this will be a bit maddening for the player, just as it was for Abraham Lincoln and Jefferson Davis. Once Robert E. Lee shows up, the campaign usually turns abruptly into constant battles. This again shows how much the designer worked to make the game historically accurate. As Little Mac you cannot just ignore his foibles and and use your army to say, maybe fight the enemy. As Johnston, you can retreat only so far before you are heading toward the Appalachians. I love games where the designer puts you into the shoes of the commanders but also gives you the opportunities and restraints that those commanders had to deal with. This includes seeing hordes of butternut soldiers where there are none. The game also comes with 'Dummy Counters' for the Confederate Player to use to confuse Little Mac that much more. 


 The Victory Conditions for each scenario are based mostly on the control of Richmond (again historically based). The Union Player receives ten points if they occupy Richmond at any time and another ten points if they control it at the end of the game. If the Union Player never scores these points the Confederate Player receives twenty points at the end of the game. You can also get Victory Points for disrupting and eliminating the other side's forces as long as any of your units are not disrupted or eliminated in the combat. Each side must also take a Rest Turn during each quarter-month segment. This is not enforced during the first turn or during July. 


 Thank you very much Hollandspiele for allowing me to review this game. I am a deeply read student of the campaign and I am very impressed on how Mr. Theissen has been able to give us almost a simulation of it. Hollandspiele has just released an expansion to 'The Grass Crown: Battles of the Roman Republic'. It is called 'The Grass Crown II' and it includes eight new scenarios. The link to my review of The Grass Crown will be below. They have also released 'Horse and Musket V Age of Napoleon'.


Robert

Hollandspiele:

Hollandspiele

Mac and Lee:

Mac and Lee – Hollandspiele

The Grass Crown review:

The Grass Crown by Hollandspiele - A Wargamers Needful Things


hpssims.com